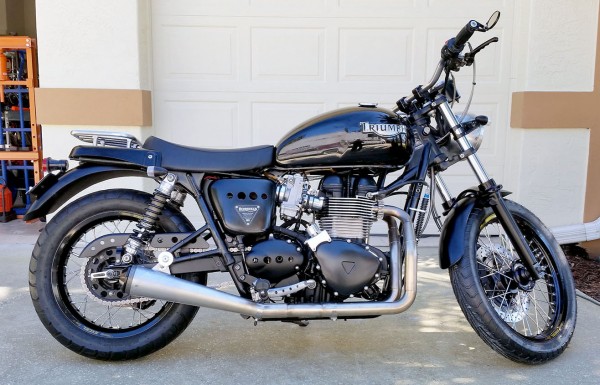
Taking the Triumph Bonneville 865cc Engine to an 1100cc Beast!
With the help of Bill Gately of Bonneville Performance!I had over 63,000 miles on my 2008 Bonneville 865cc engine and it needed a valve job. So, instead of doing that only, I decided to send the entire engine to Bill Gately of Bonneville Performance, for a complete engine overhaul and upgrade modification! My final engine will have the same spec’s as the BP 1100cc crate engine, including:
- New bearings
- New oil pump
- Billet cylinders with Nikasil lining
- BP performance head porting with BP valve train
- BP Cams
- Crankshaft dynamically balanced
- All paper and MLS gaskets
The modified engine, along with the twin Mikuni HSR42 carbs and the BP 2 into 1 Exhaust system should produce approximately 94 HP and 76 ft. lbs. of torque. Bill also had a number of the engine covers powder-coated satin black for me.
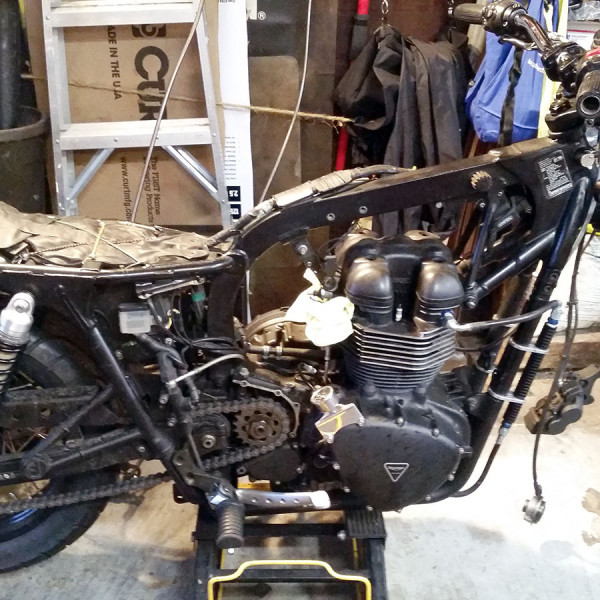
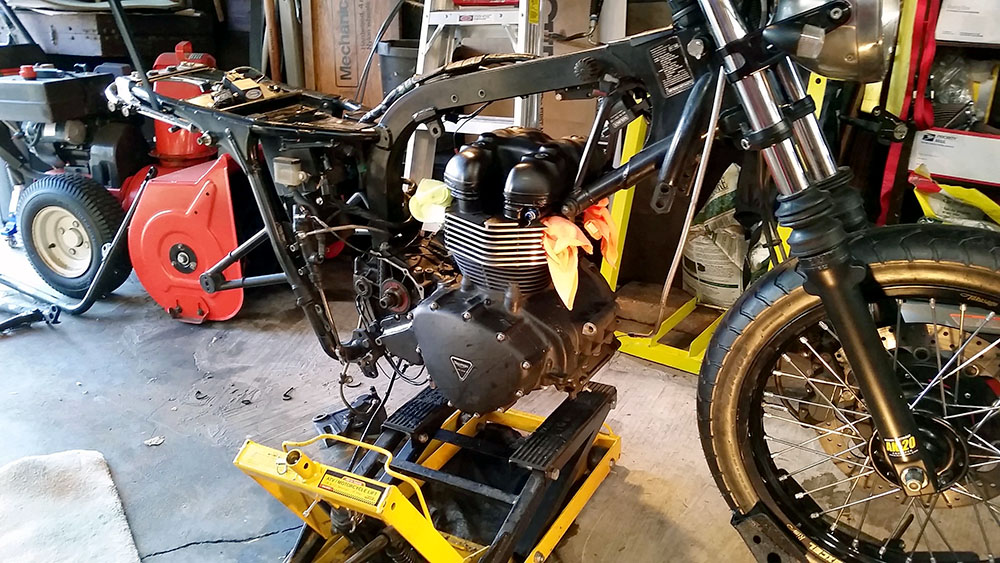
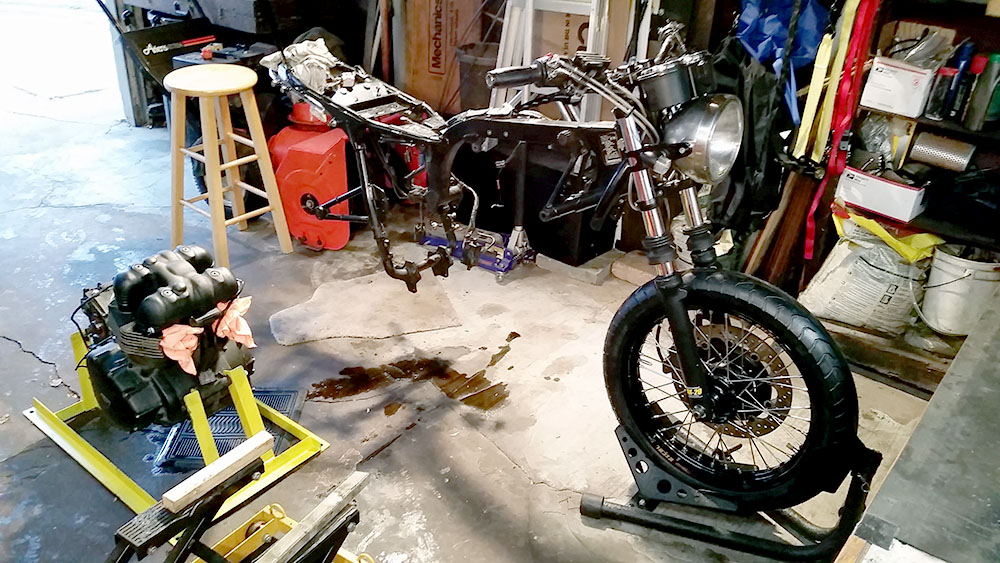
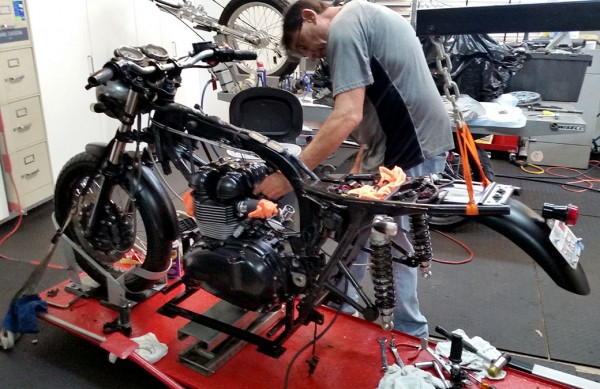
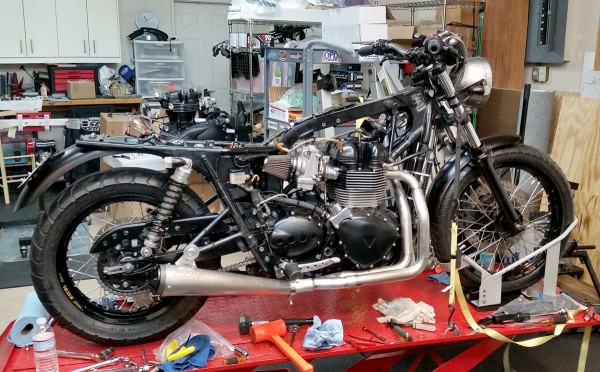
Step 1 – Remove stock 865cc engine from 2008 Bonneville frame
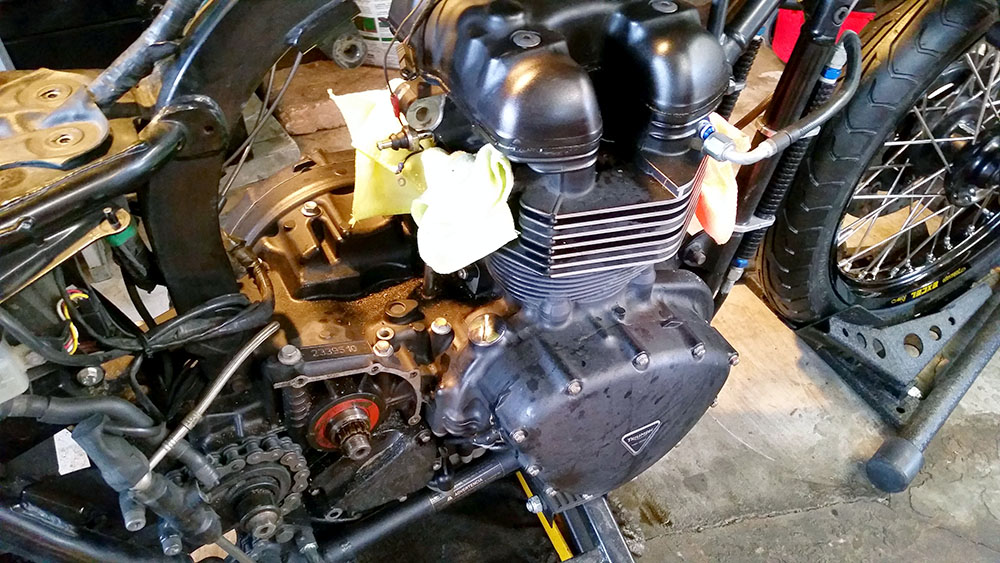
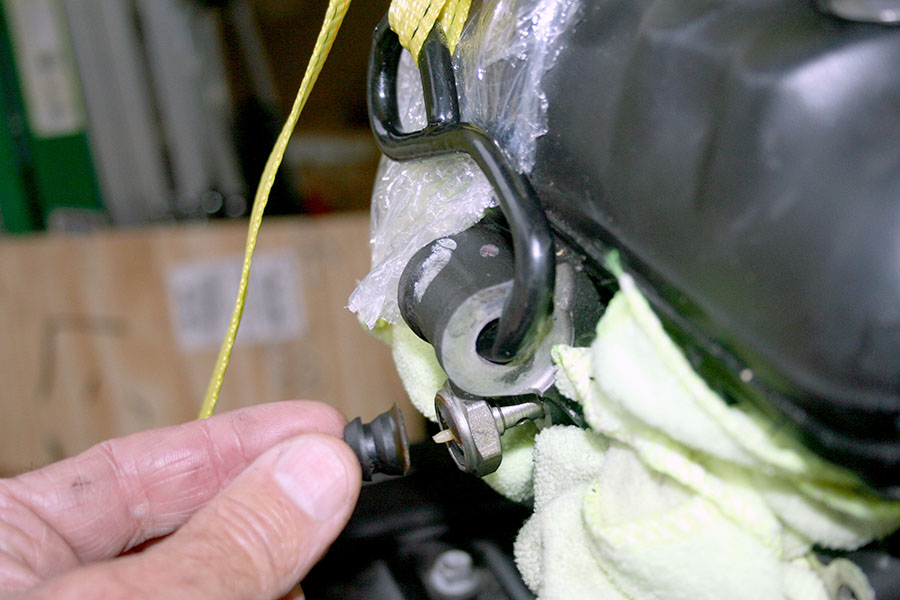
This is easier said than done. You basically have to take the motorcycle apart! I followed the steps in my Haynes manual to remove all the parts that connect to the engine including exhaust system, oil cooler, carbs, electrical system wires and components, and subframe members.
Beginning the process.
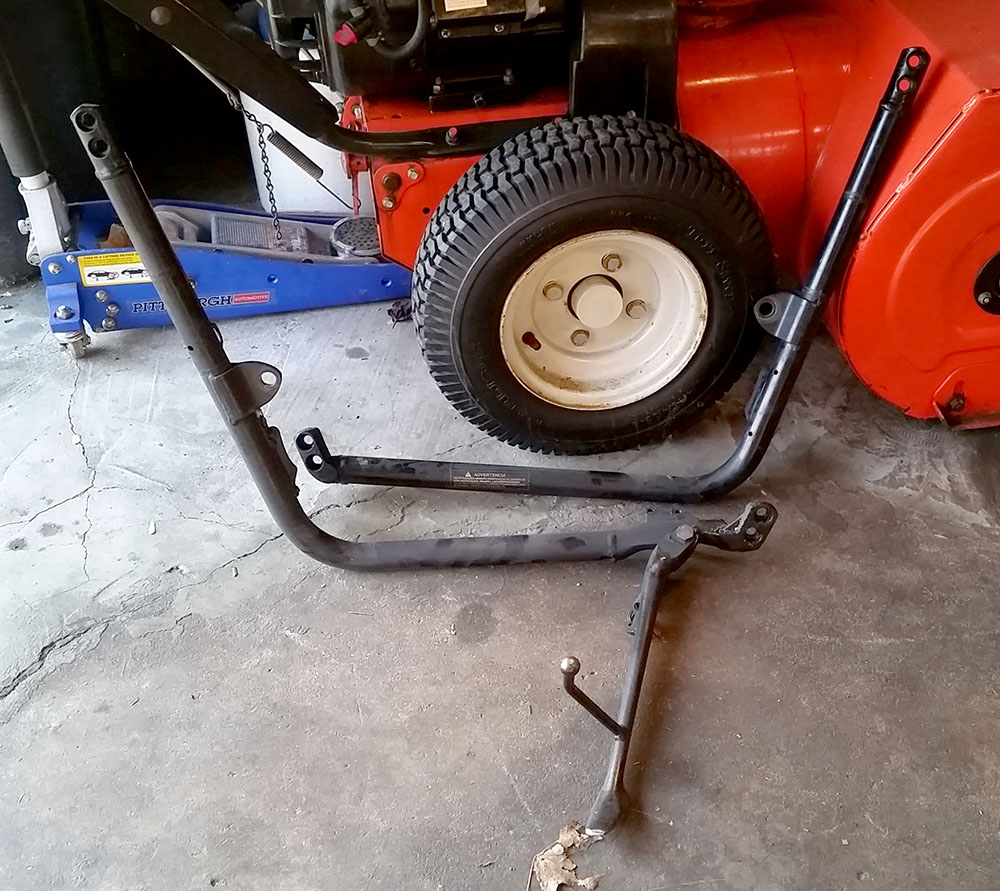
Sub-frame basket bars… these are heavy!
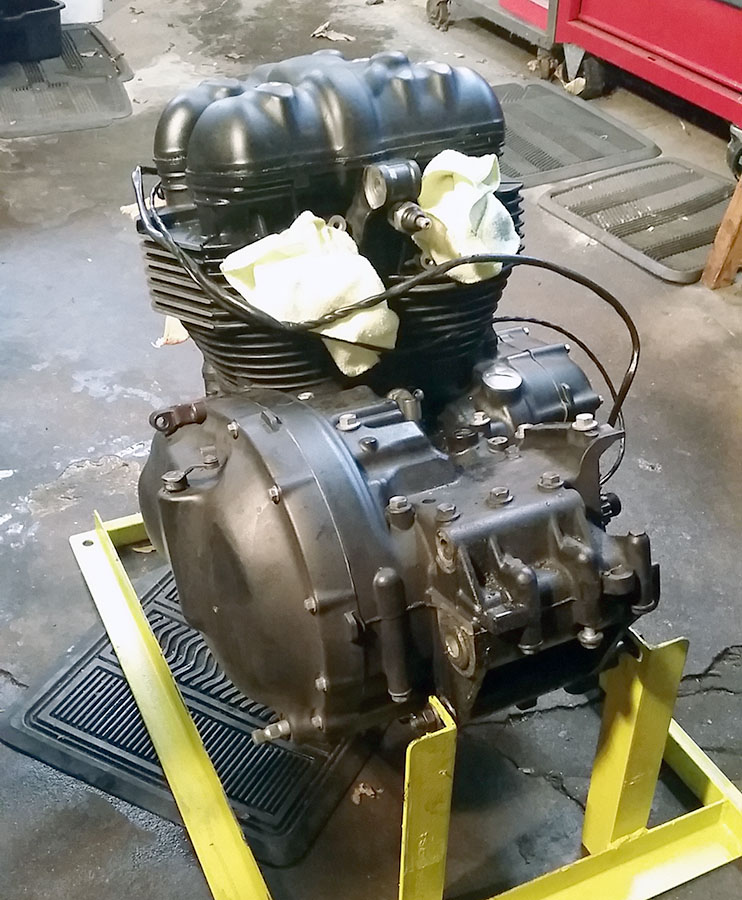
I’ve protected the intake and exhaust port holes with clean rags.
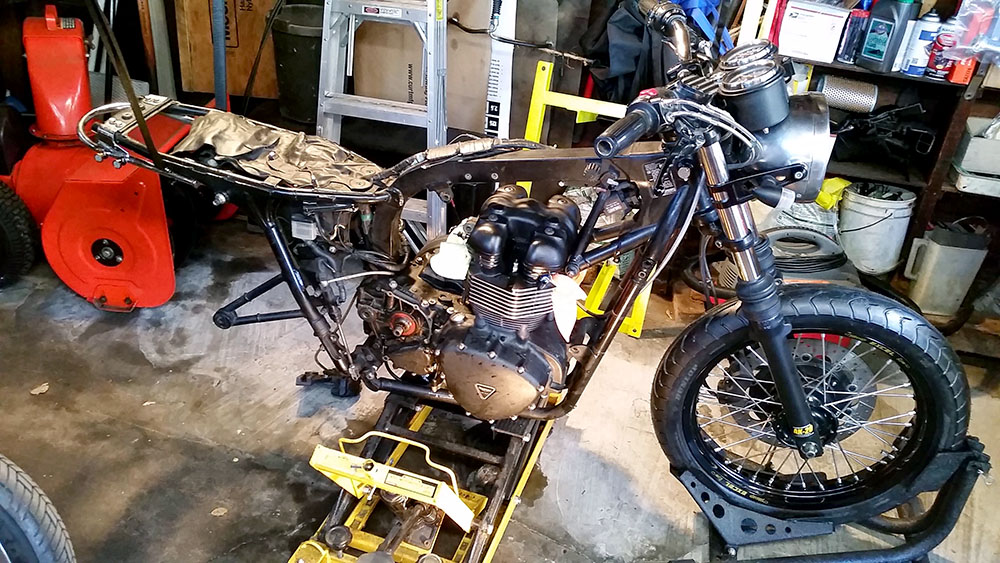
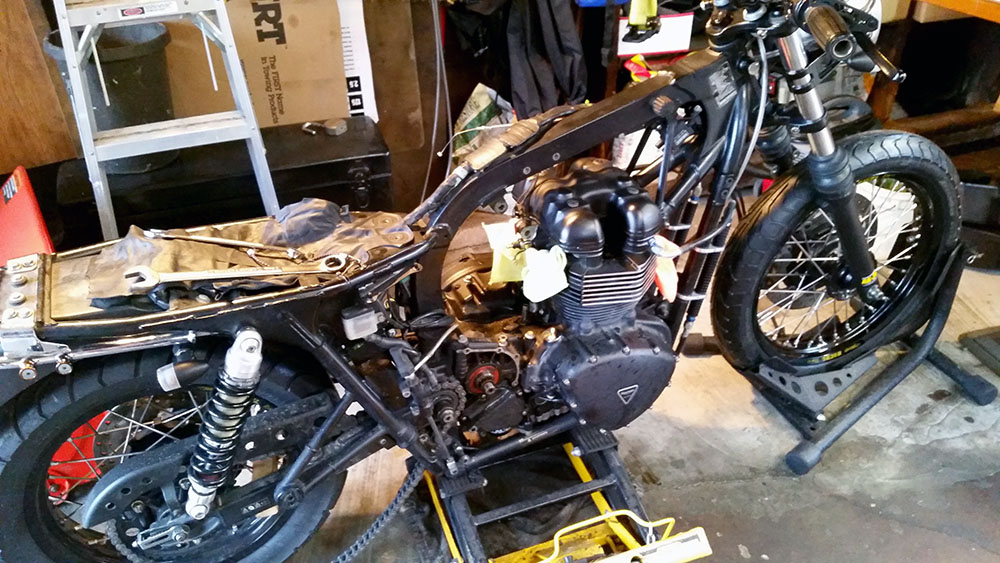
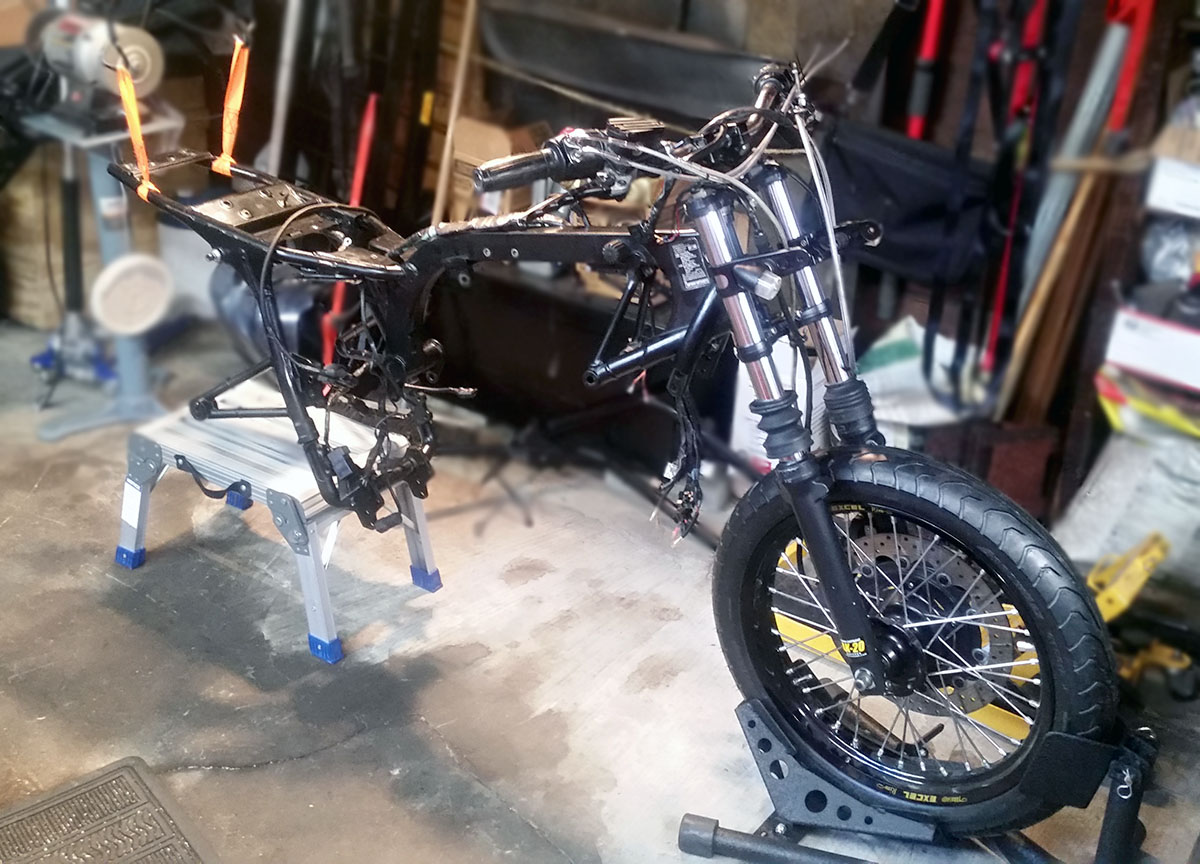
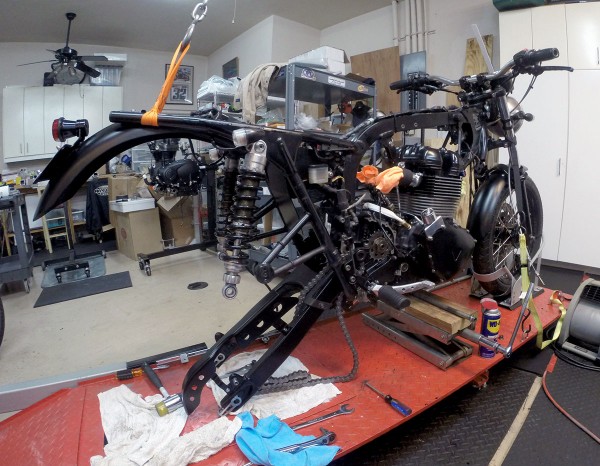
I supported the rear of the bike from a garage joists with 2 adjustable tie-down straps. With the front tire in a floor carrier, the frame is stable and suspended.
With the frame suspended I removed the rear fender, wheel and swing arm. I then removed the 2 sub-frame basket bars.
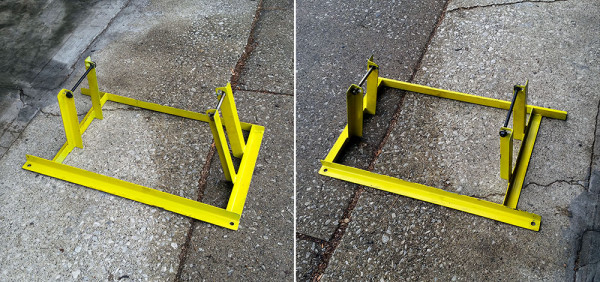
STEP 2 – Prepare engine for shipping in a crate
Bill Gately suggested that I contact Johnny Scheff at Motoworks Chicago to see if he had an extra Triumph engine shipping frame. These are angle iron frames that Triumph uses to ship its engines to dealers. As it turned out, Johnny did and was kind enough to let me borrow it.
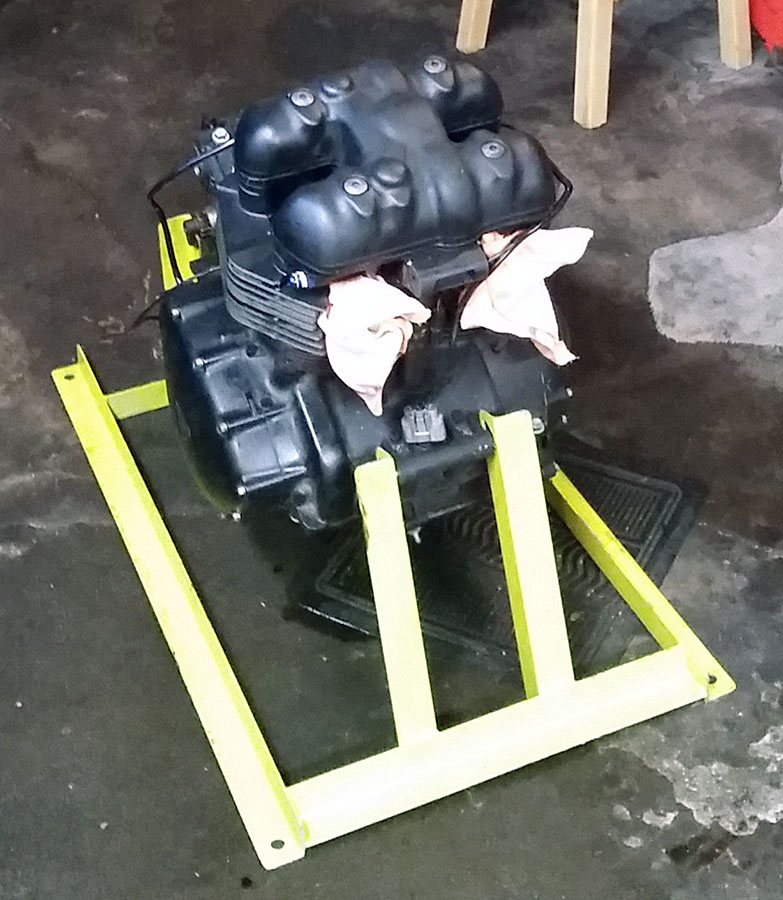
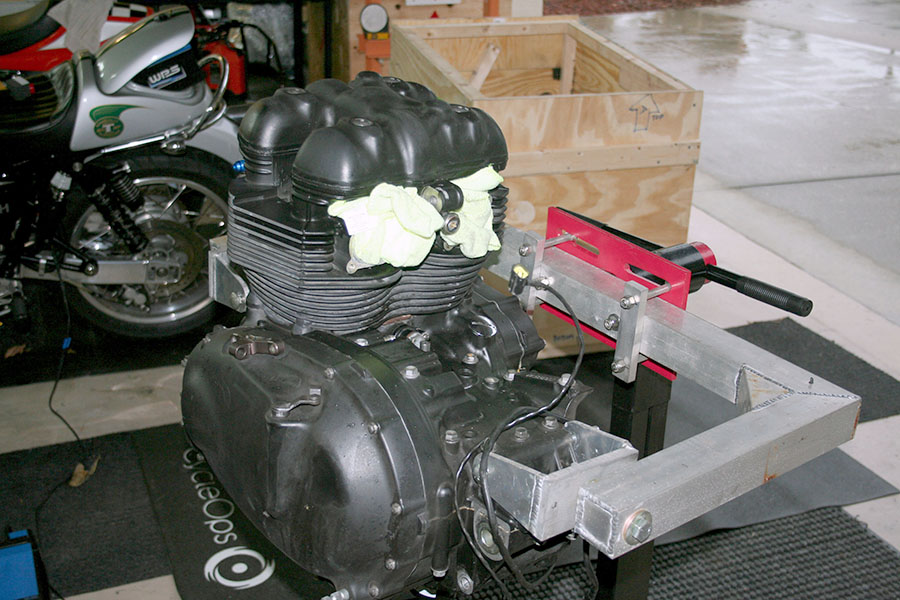
Saturday, January 3, 2014 Update – Engine removal and mounting to shipping frame
We had a little trouble with getting the engine to drop from the frame, but once I removed a couple more brace pieces around the lower exhaust mounts, things freed up and we were able to slide the engine down free of the frame and then sideways on the floor jack. Then we were able to pick up the engine (it weighs about 165 lbs) and mount it on the bright yellow Triumph engine shipping frame.
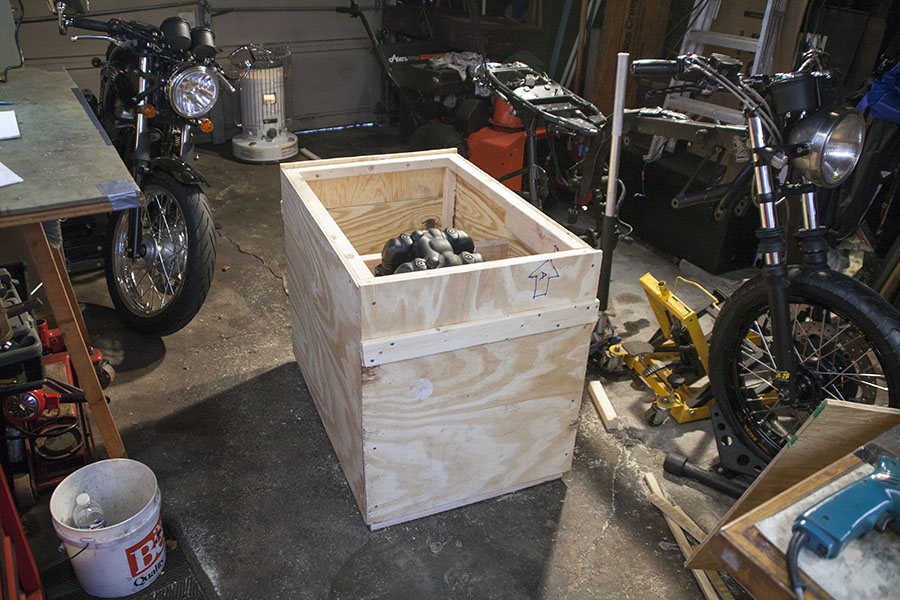
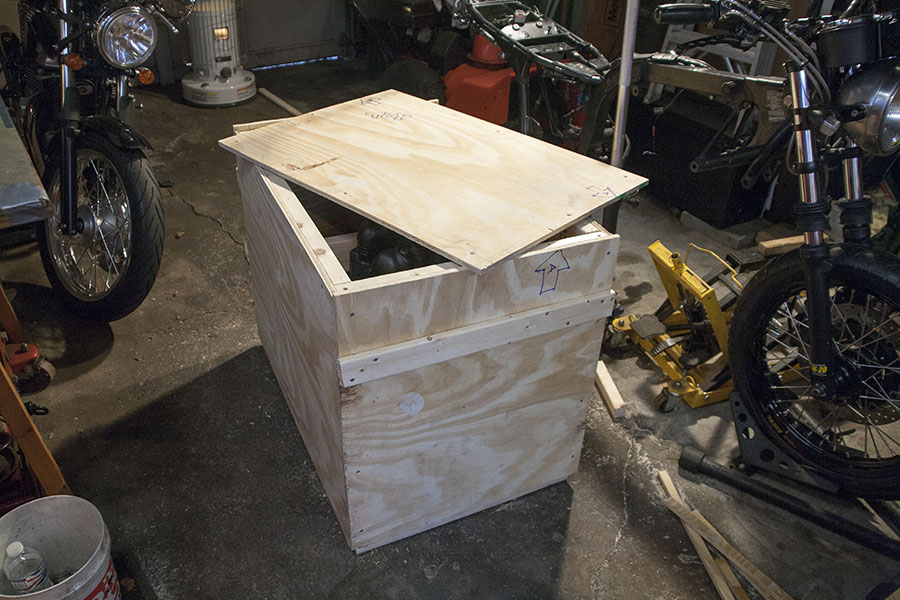
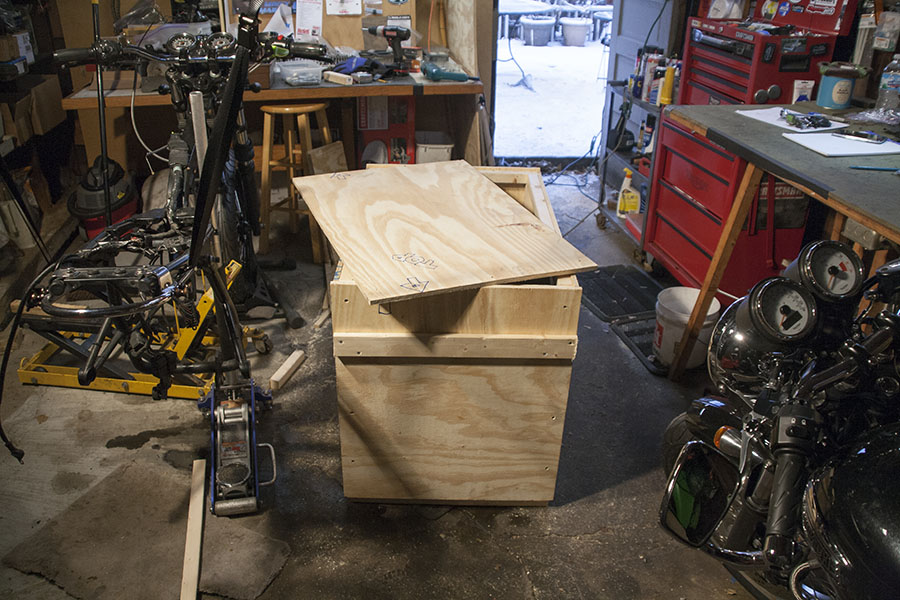
January 4, 2014 Update – Building the Shipping Crate
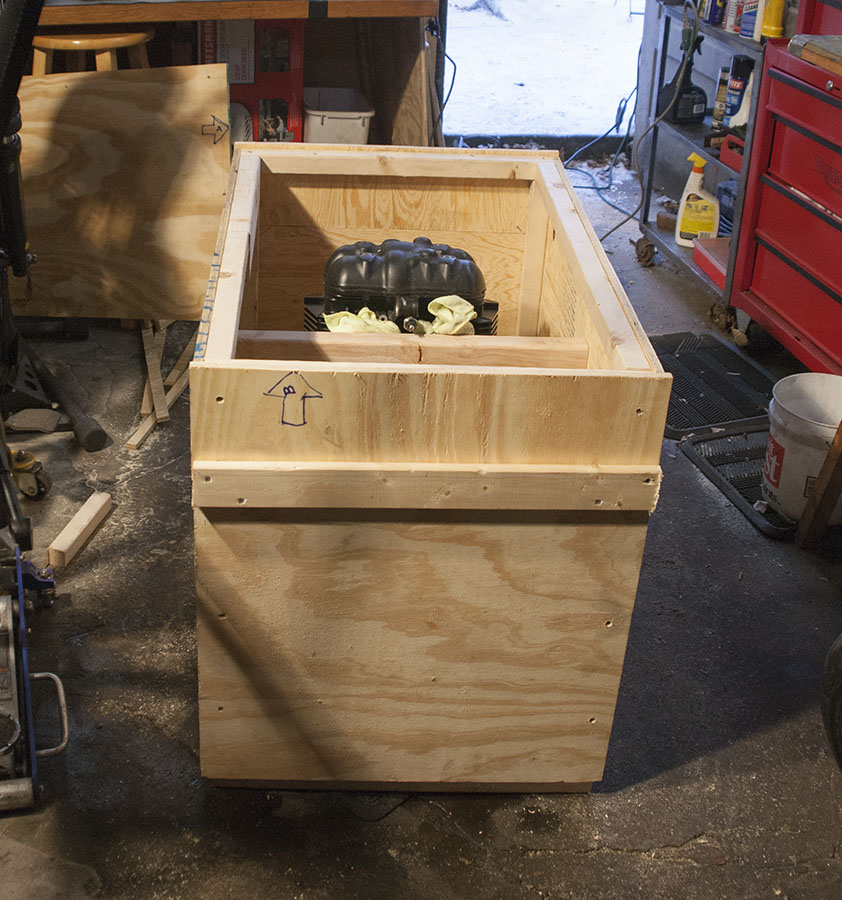
Here are a series of photos of the process of building the shipping crate around the 865cc engine on a shipping stand. I purchased 2 sheets of 1/2″ x 4′ x 8′ plywood, (4) 2x2x8 ft., (1) 2x4x8, (1) 1x3x8 and (1) 1x4x8 plus misc screws, etc. for about $75 at Home Depot.
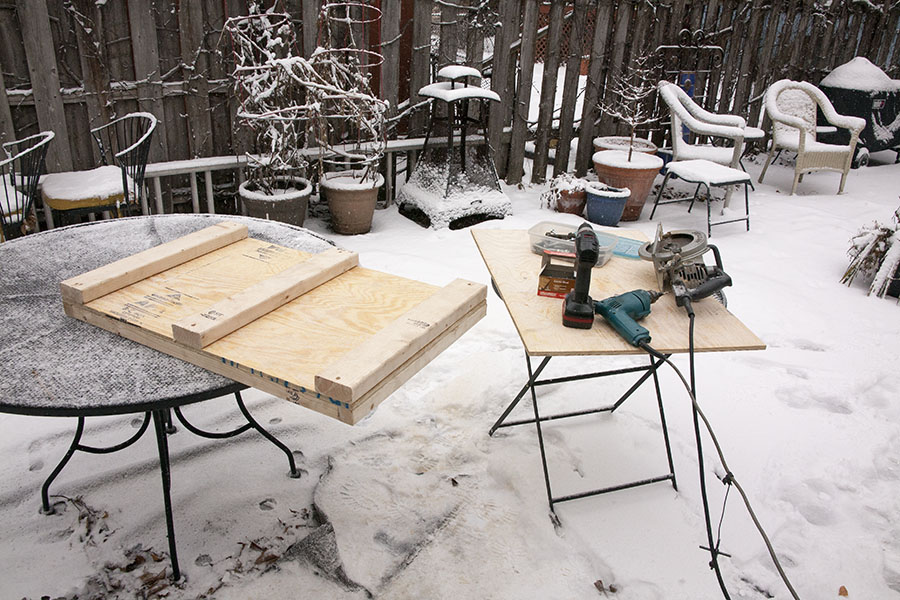
I started with the base, slightly larger than the angle iron frame.
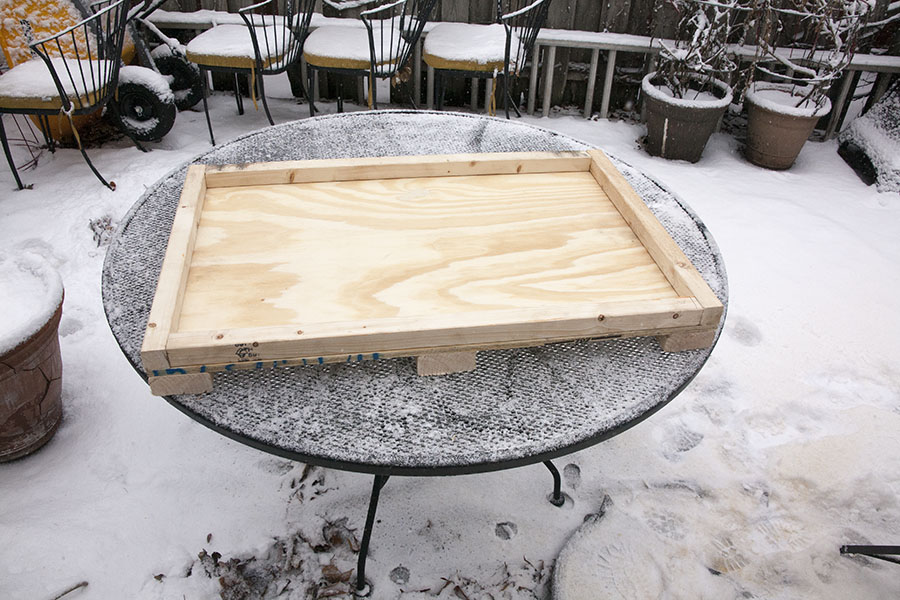
Completed base made of 1/2″ plywood with a 2×2 base frame and 2×4 base slats.
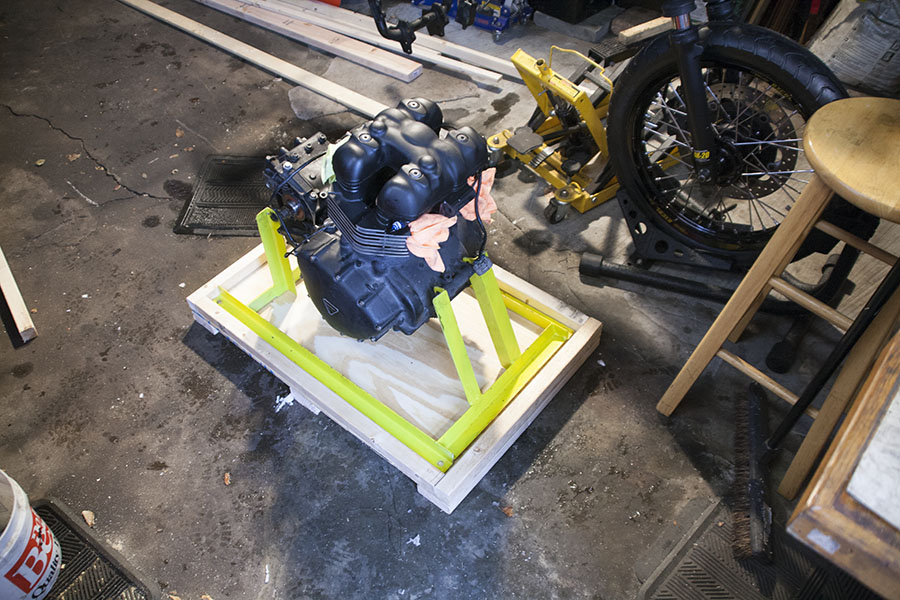
The engine frame fits inside the 2×2 frame just right.
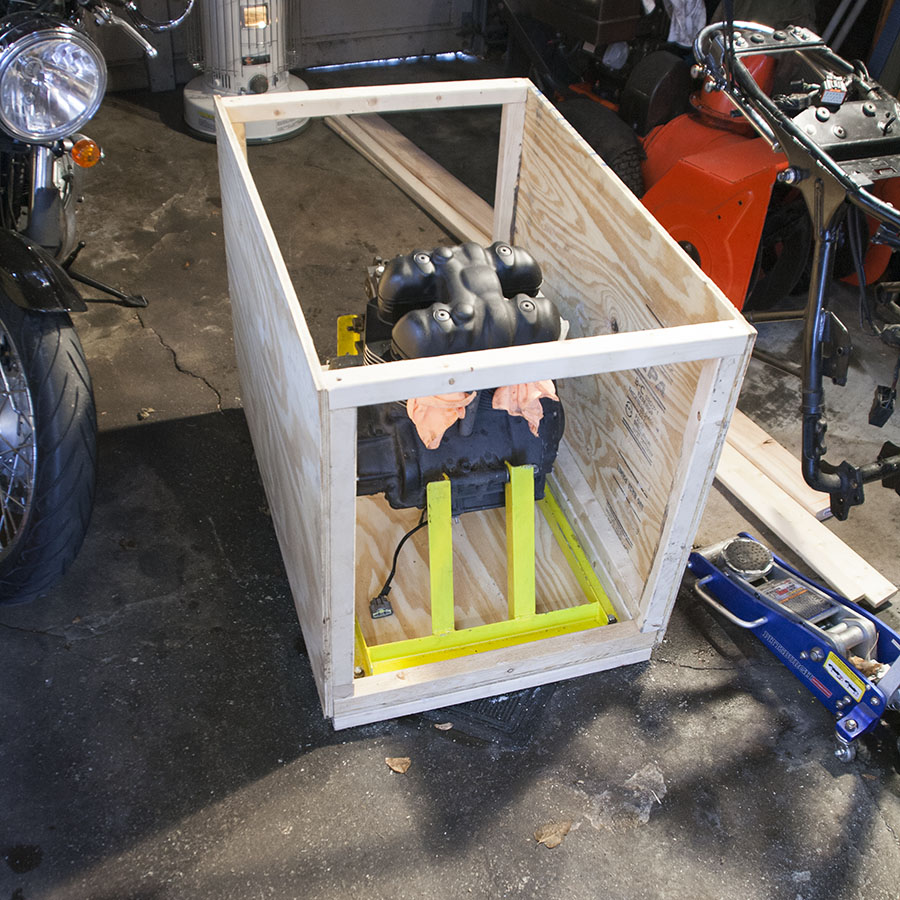
Side panels and 2×2 frame connected.
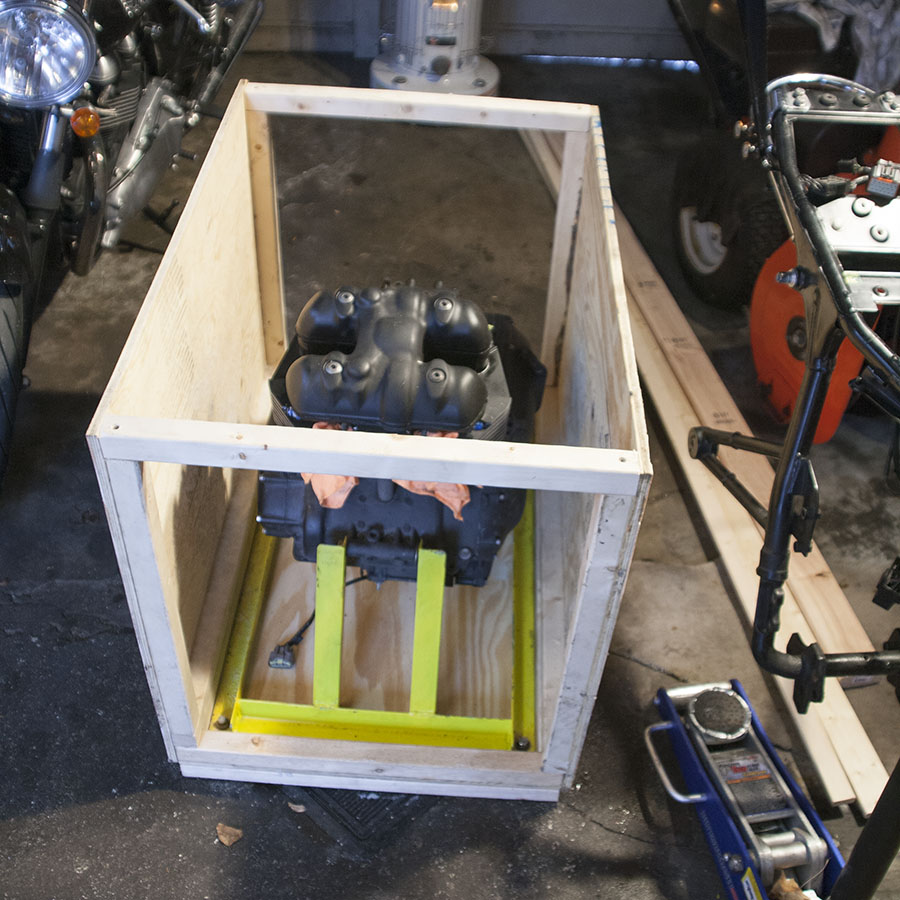
Next, I added the rest of the framing and the end panels. I also put a 2×4 brace across the interior for extra support and engine protection.
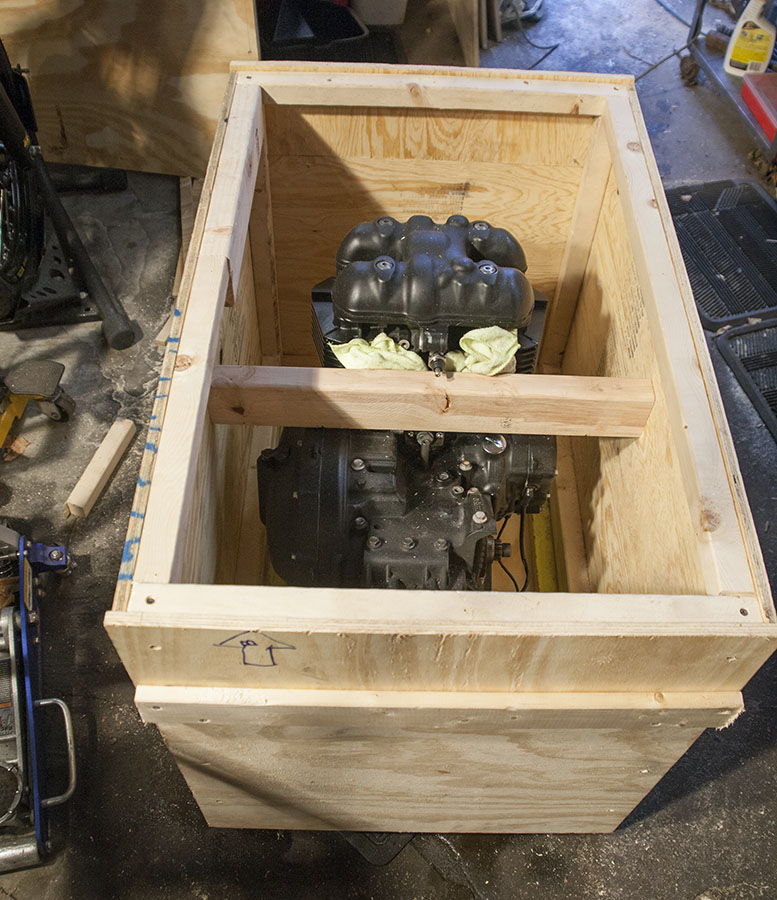
Another view of the interior of the shipping crate with interior brace and exterior handle added.
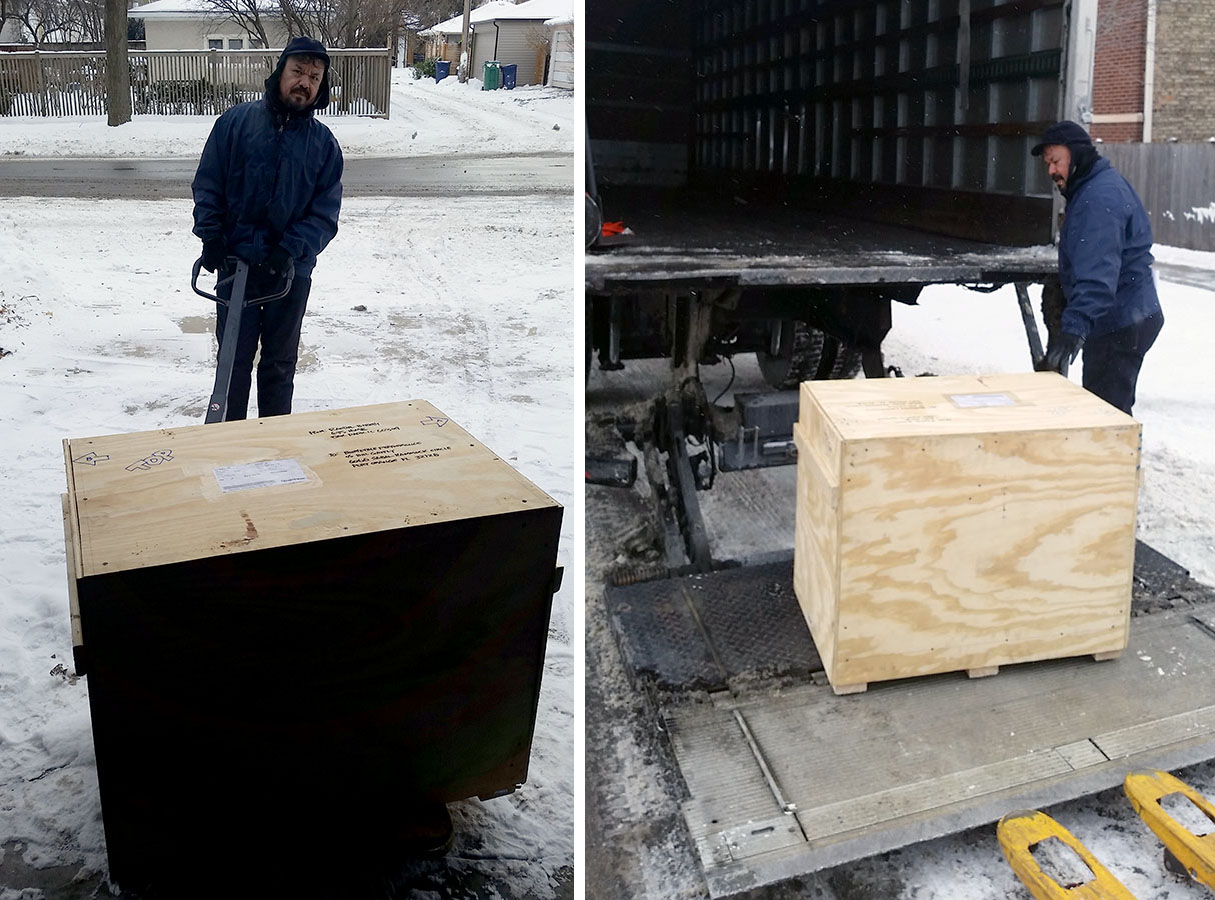
January 9, 2015 – Engine Picked Up
I was able to secure a decent freight shipping rate through freightcenter.com with Pilot Freight as the carrier. I also insured the shipment through freightguard.com. I took care of everything online, and the truck and driver showed up as promised today.

Step 3 – Engine Rebuild Process
January 15, 2015 – Arrival at Bonneville Performance
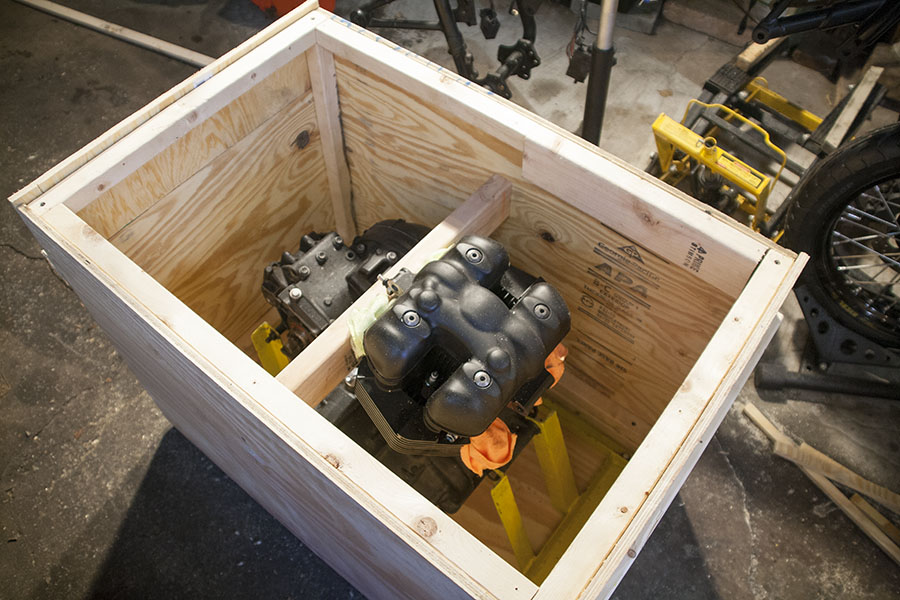
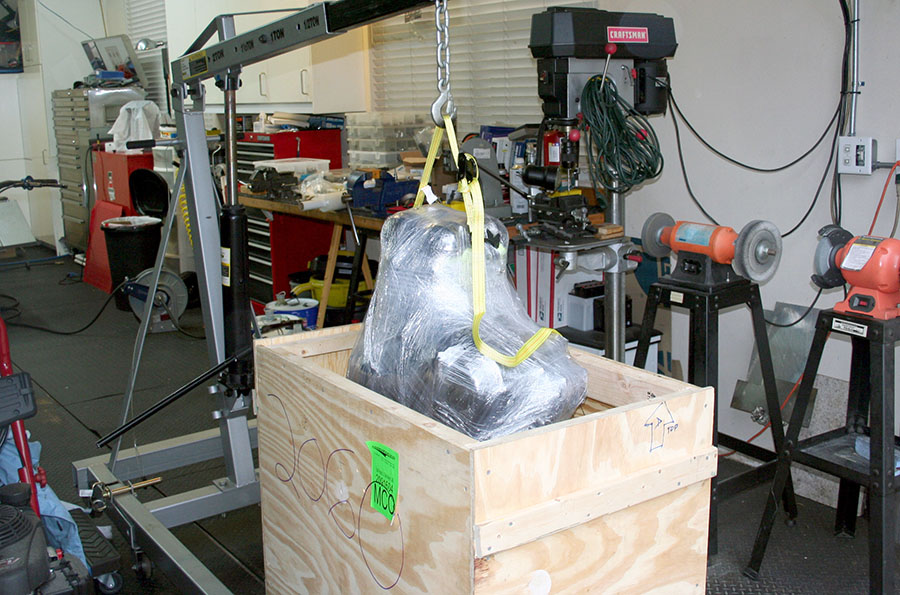
I am pleased to share that my 865cc engine crate arrived safely at Bonneville Performance via Pilot Freight on Thursday, January 15, 2015. The crate was in good shape with no signs of stress or damage. Bill Gately, owner of Bonneville Performance was able to disassemble the crate, lift the engine off the skid and get it setup in his shop for tear down. Thanks for the photos, Bill!
I have been told by Bill that he will tear the engine down and then:
- Crank to House of Balance in Baltimore, MD
- Upper crankcase to Daytona Auto Machine shop in Daytona Beach for boring
- Cams to WEB Cam racing cams in Riverside, CA
- Billet Cylinders to Daytona Auto Machine shop for boring and sleeves insertion – then to Millennium Technologies for Nikasil in Plymouth, WI
- Cylinder head and manifolds to be ported and then to Daytona Auto Machine shop for the valve job
- Everything else to be cleaned and inspected
There is a 3-week wait on the crank and cams before they are returned to Bonneville Performance which puts the reassembly starting around the week of February 9, 2015. I am assuming I won’t see the engine back until some time in March.
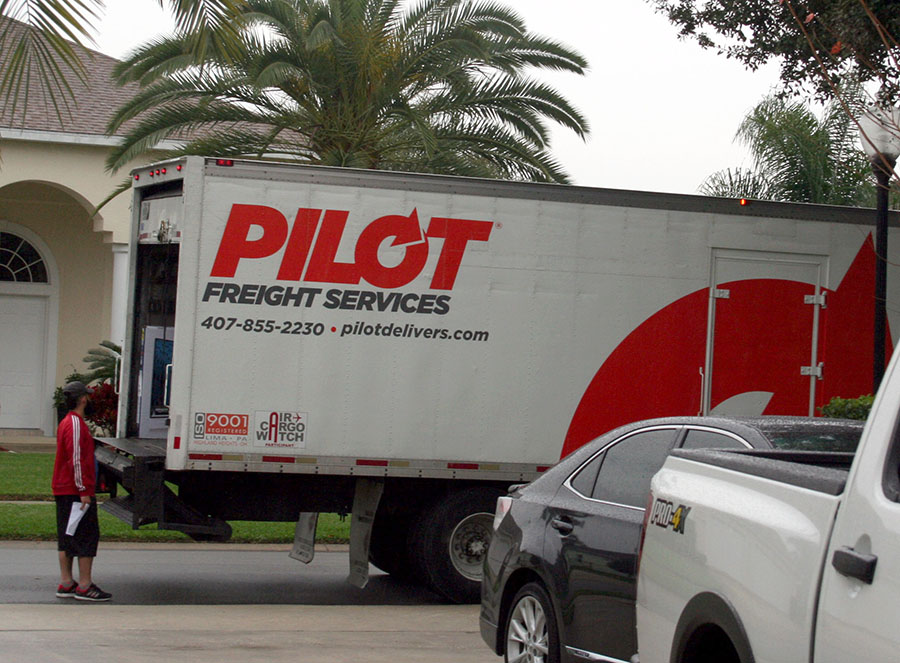
My 865cc Bonneville Engine arrives safely at Bonneville Performance in Florida, via Pilot Freight Services.
Update February 17, 2015
I spoke to Bill yesterday and learned that my engine parts are in the process of coming back to him from the various shops.
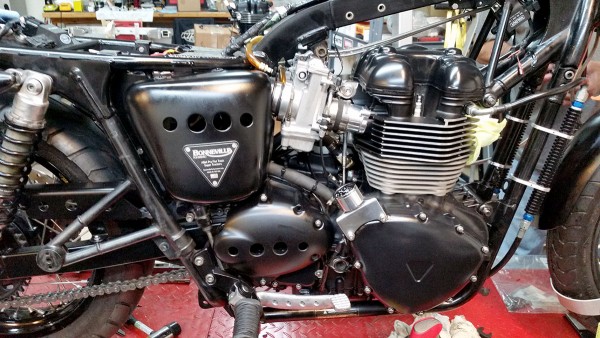
My engine should be looking like this fairly soon except it will have satin black powder-coating instead of glossy.
April 4, 2015 Update
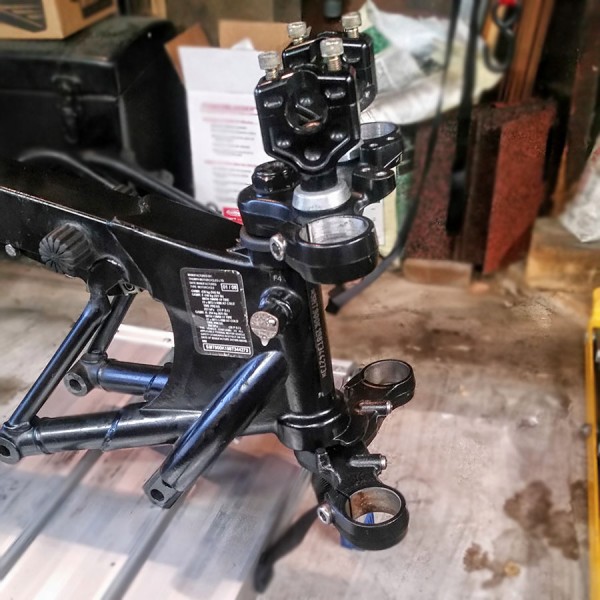
The long winter is over and work is picking up in Randy’s Garage. Today I disassembled the front of the 08 Bonnie including the front head triple trees and bearings, and worked on cleaning the frame.
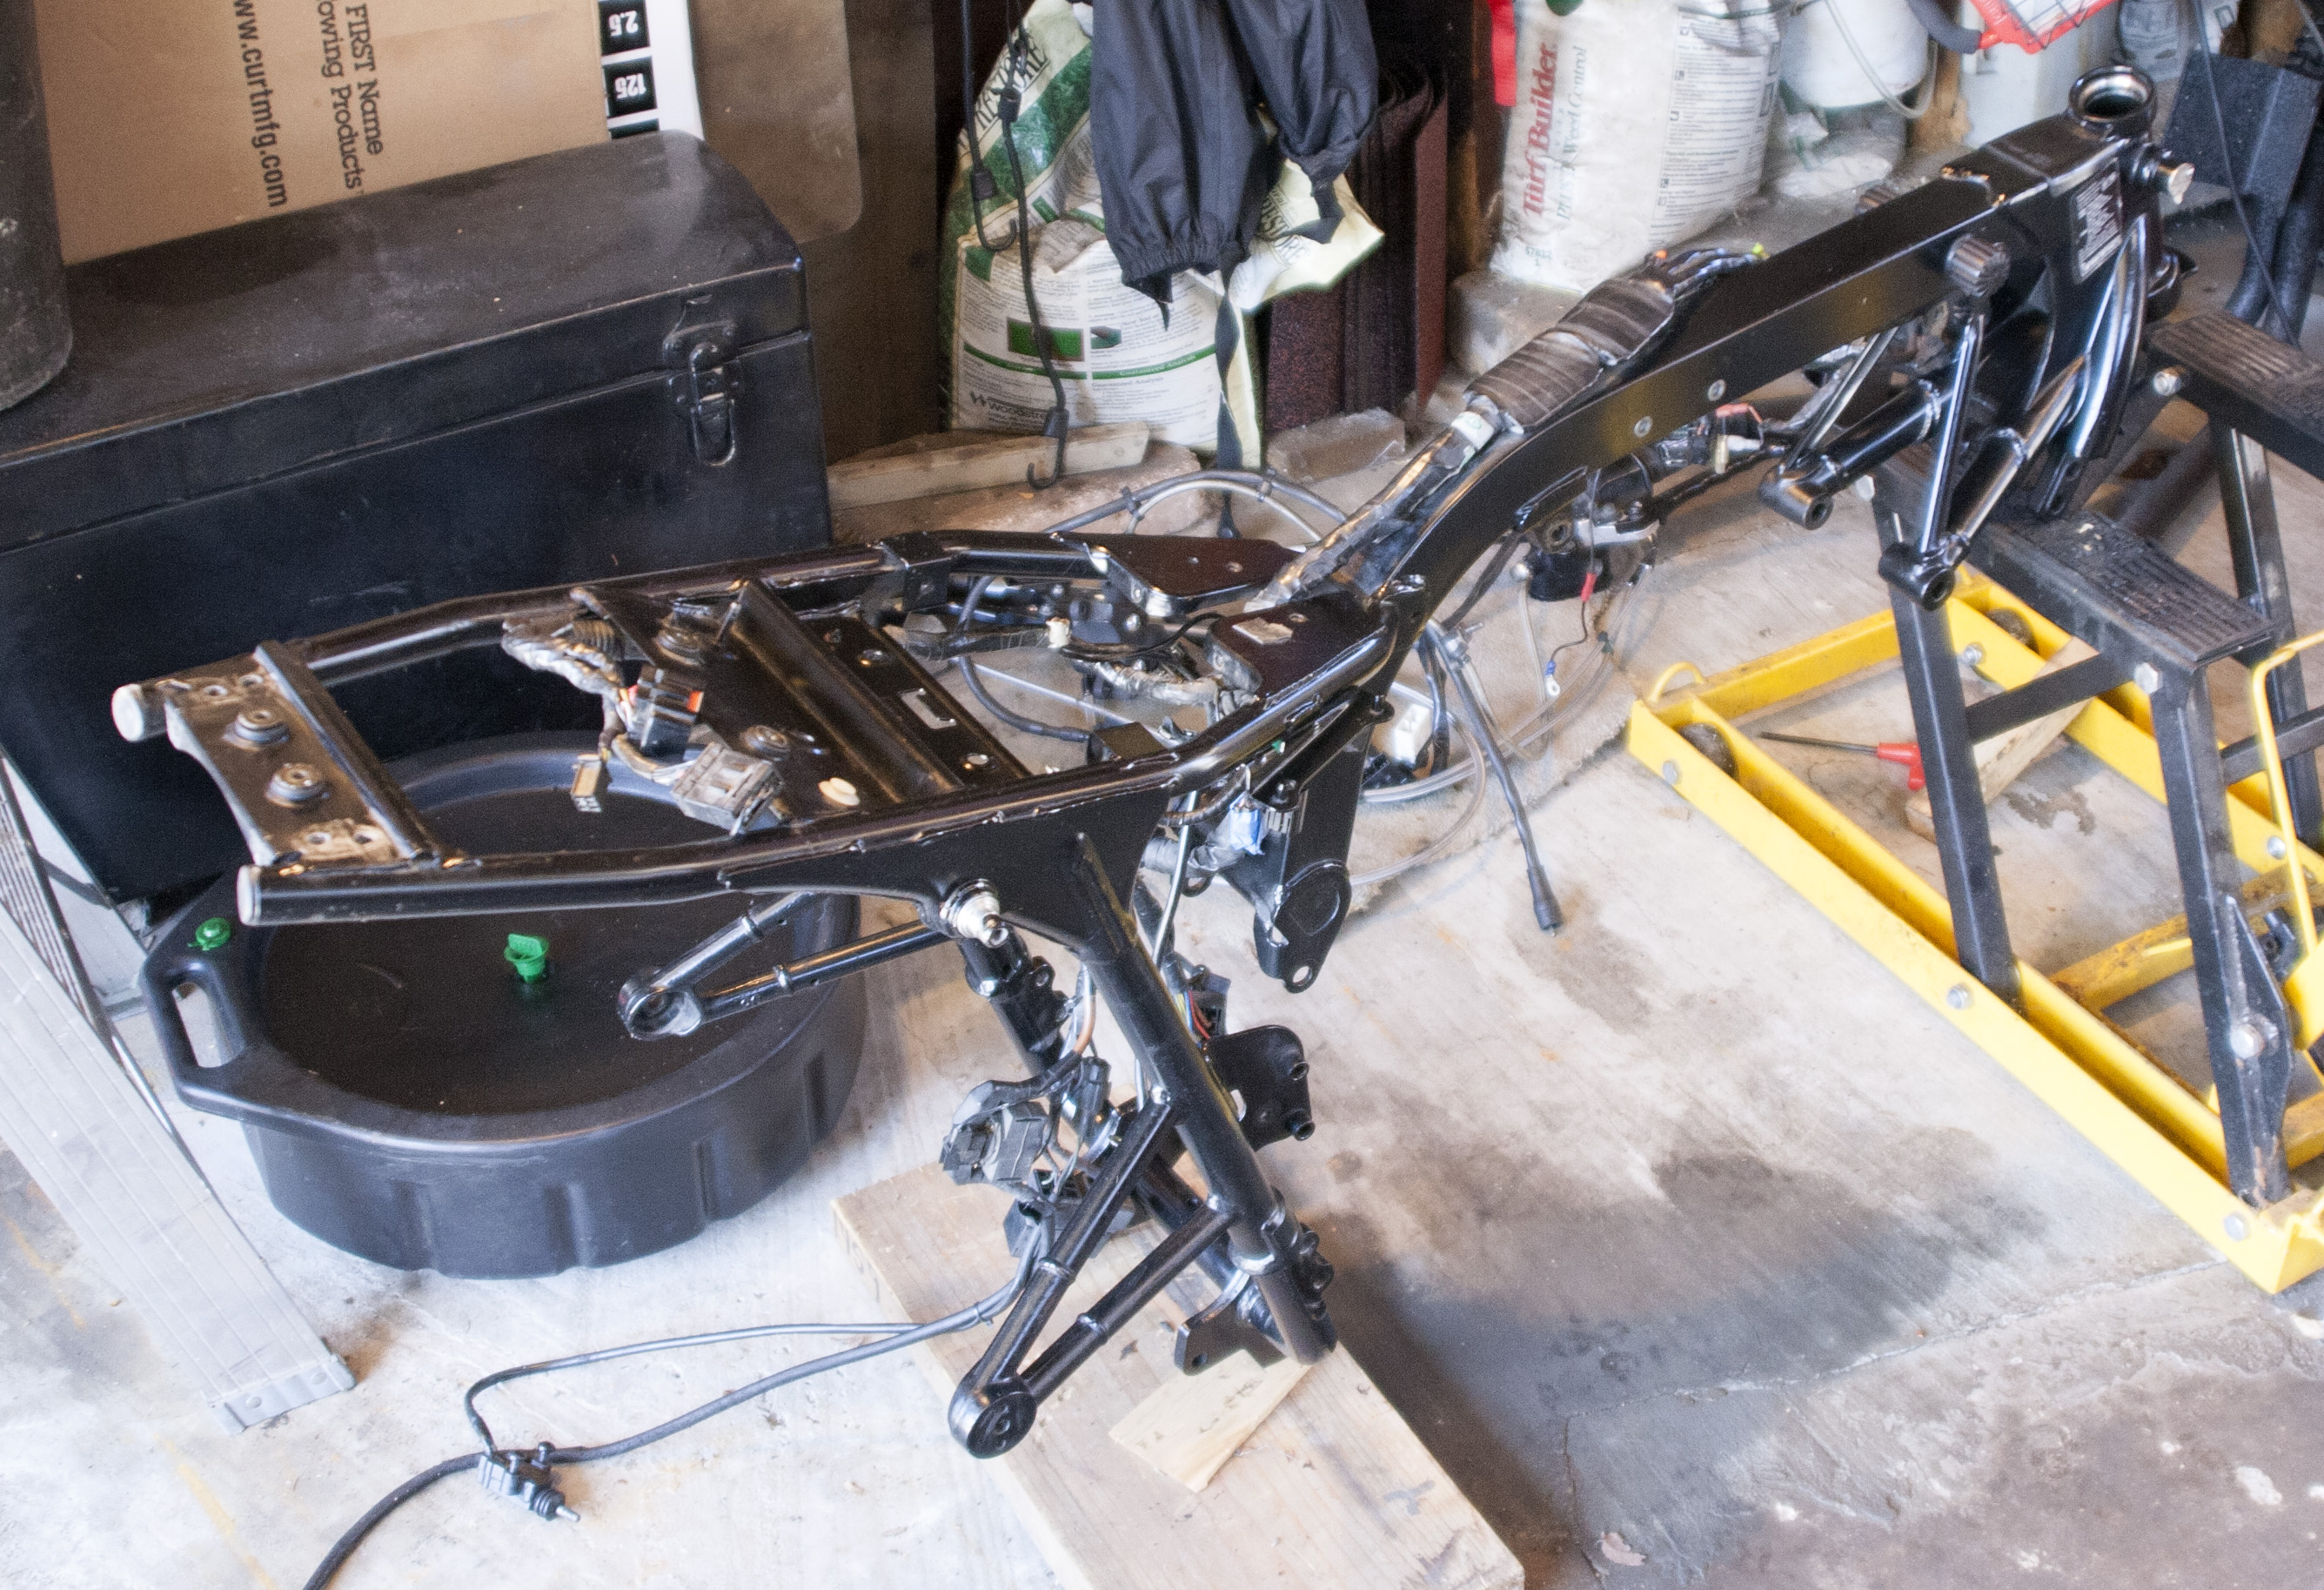
The frame is fairly clean and free of parts.
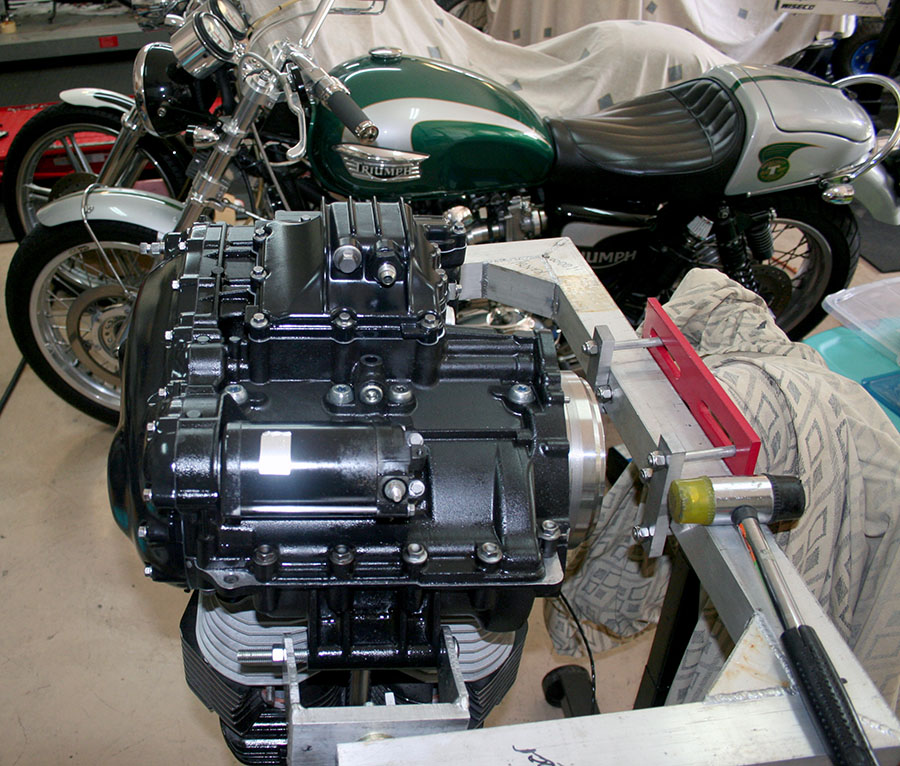
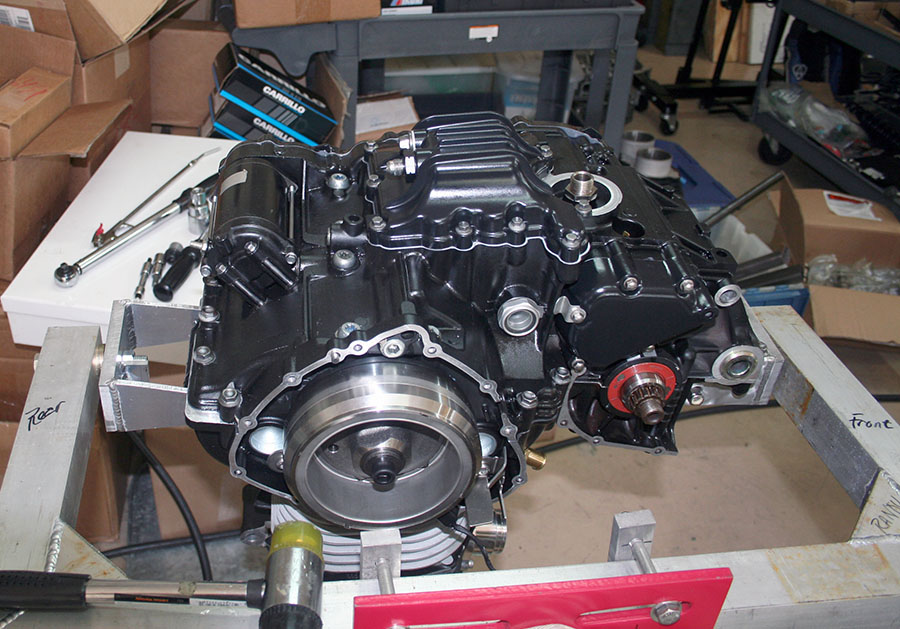
April 28, 2015 Update – Engine Crankcase Reassembly
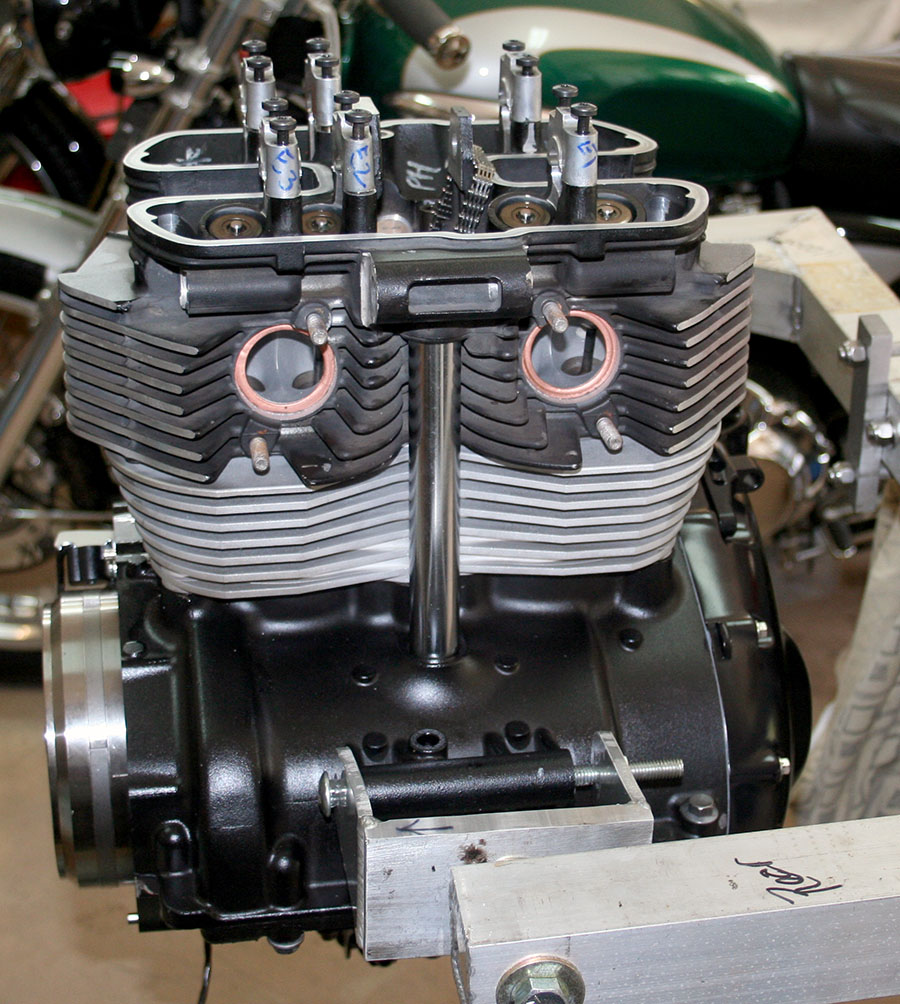
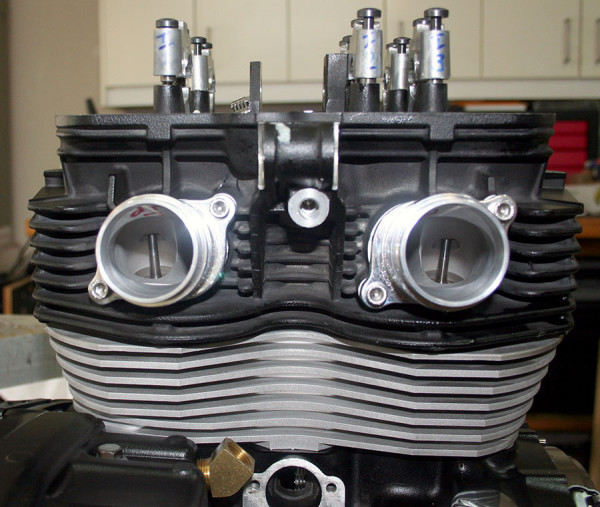
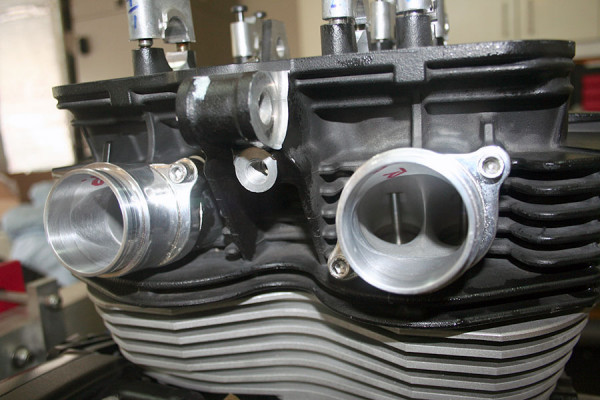
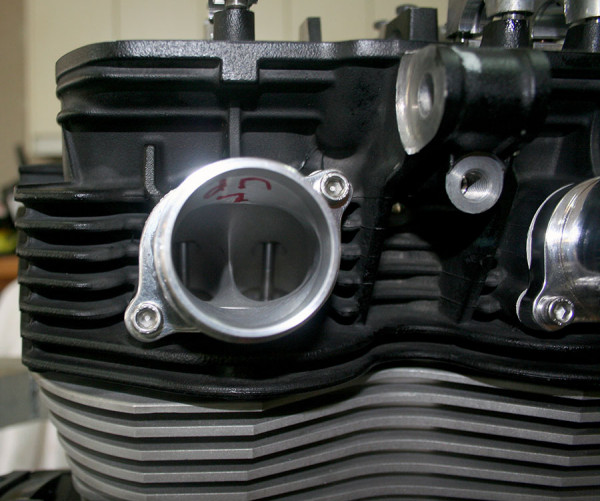
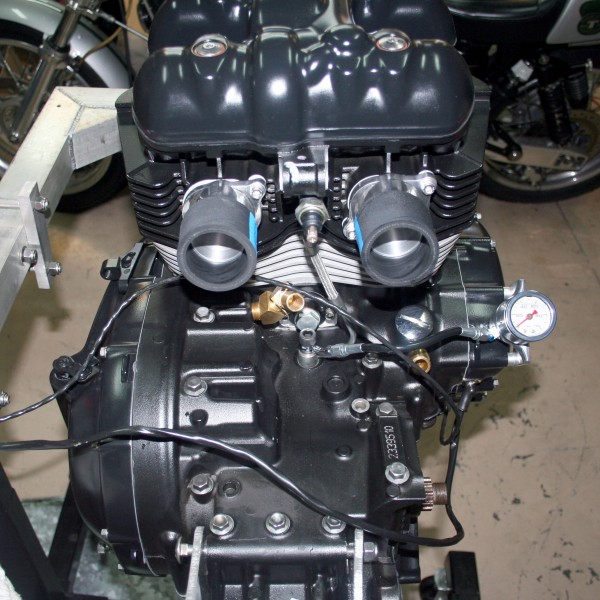
I heard today that my 1100cc crate engine rebuild is moving along nicely. Here are photos of the parts back from various machine shops and parts vendors ready for reassembly.
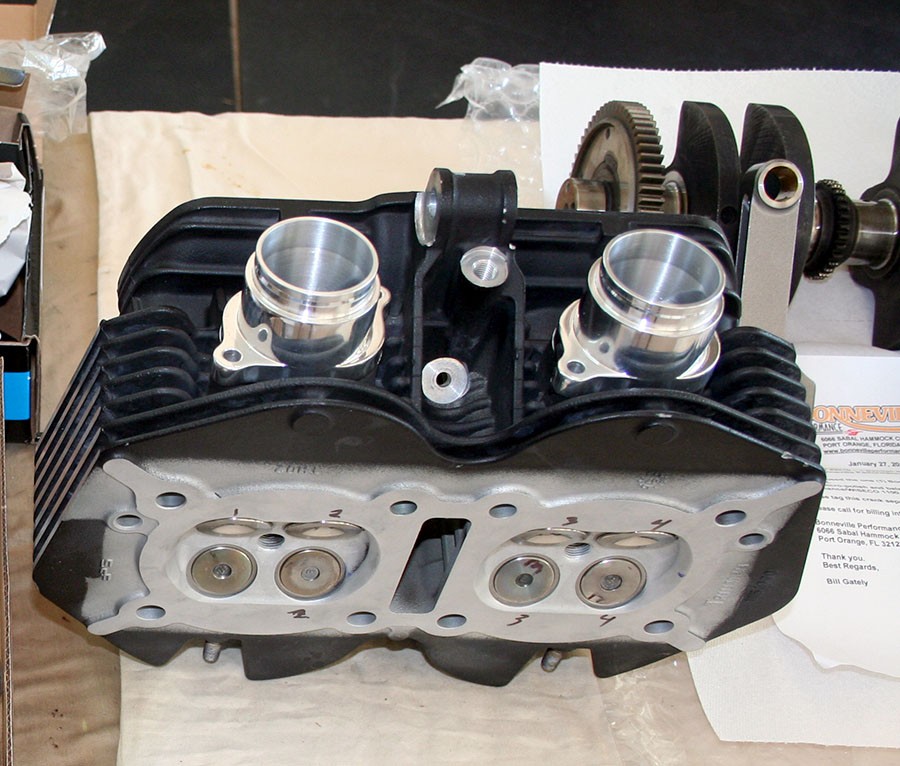
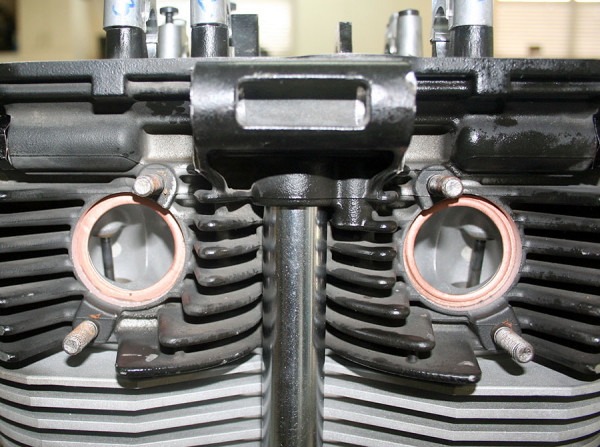
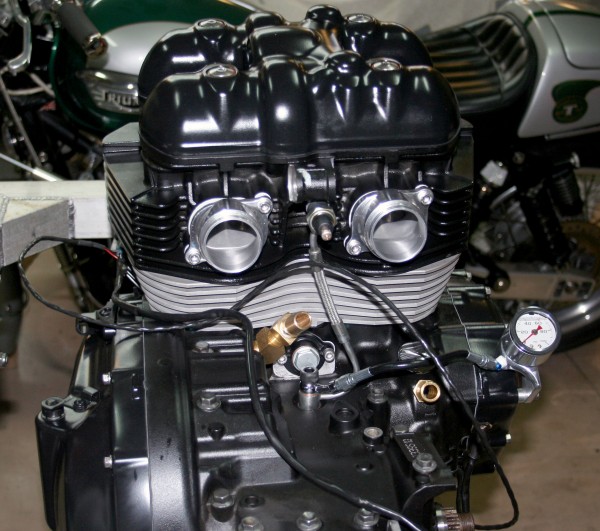
Closeup view of head showing valves and intake manifolds.
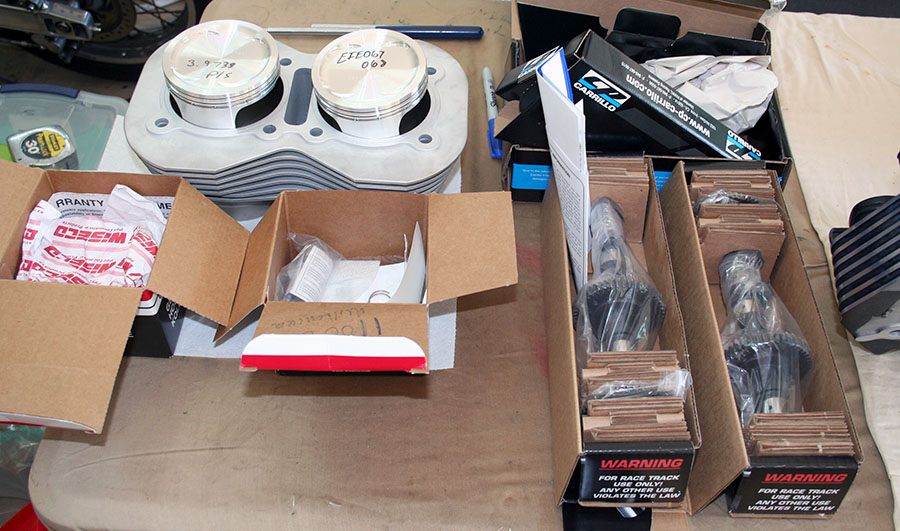
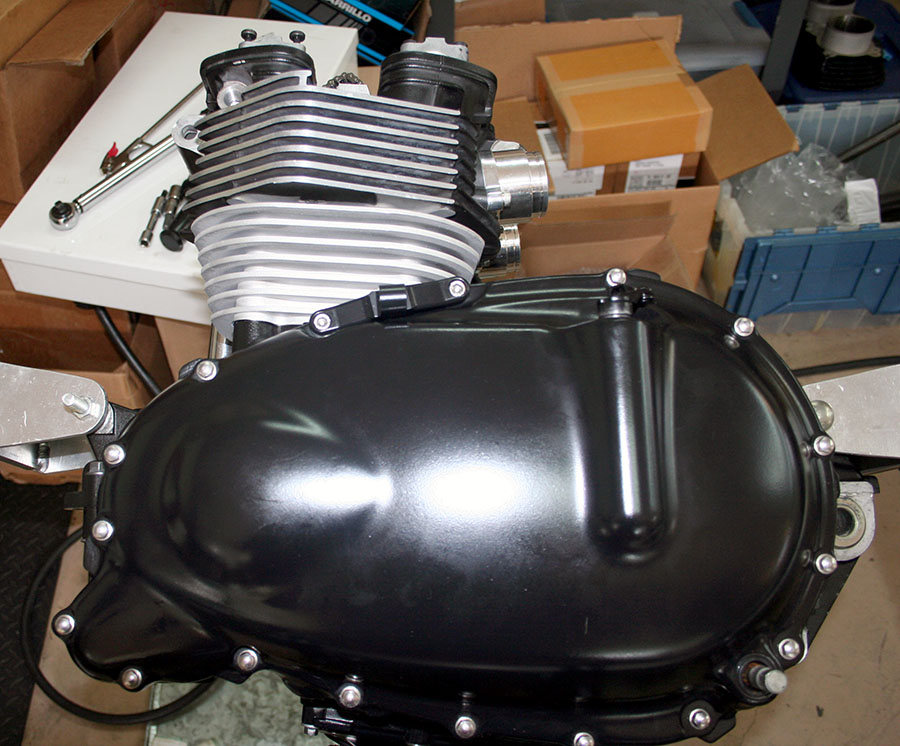
Cylinders with pistons, plus various parts for the rebuild, including the two BP Mile camshafts in boxes.
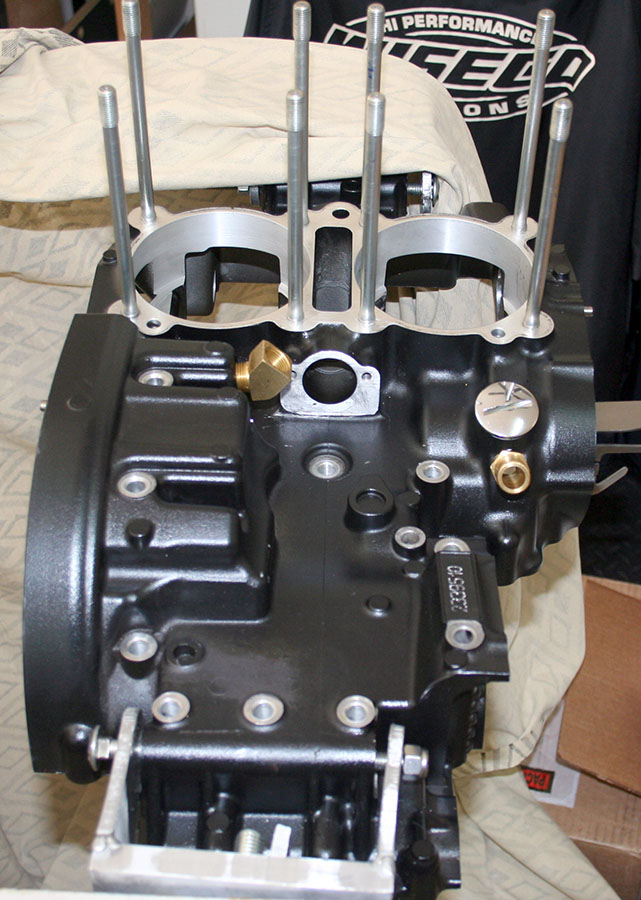
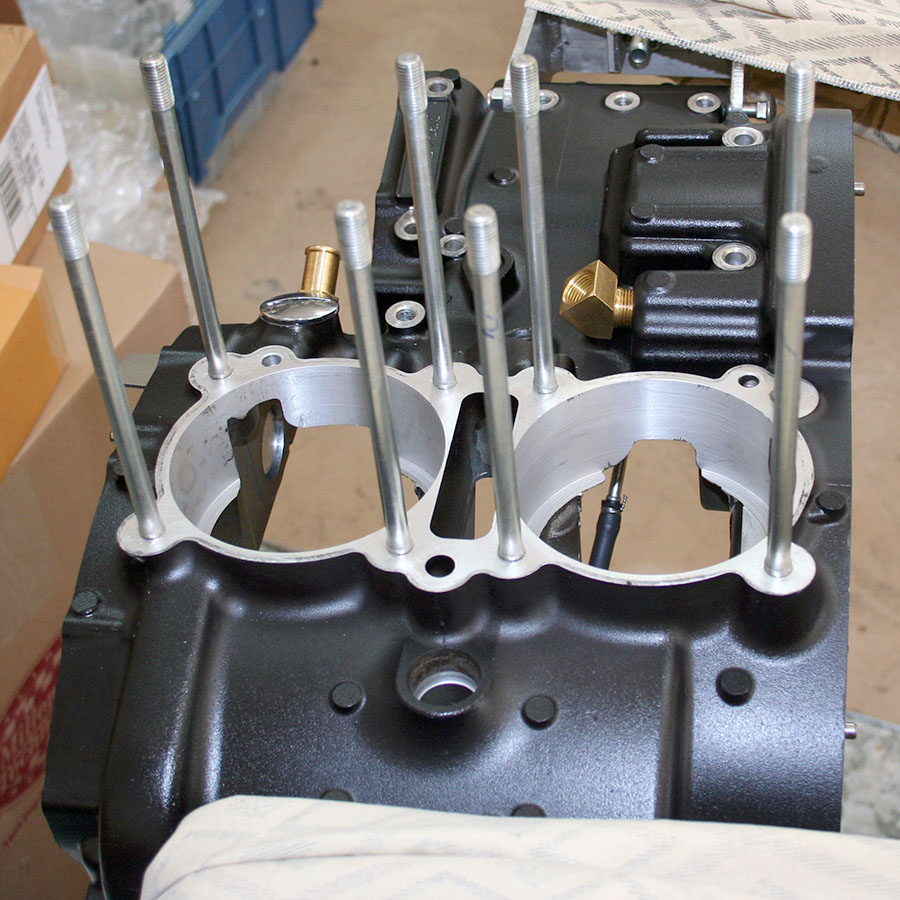
Front view of upper crankcase. The cylinders and head bolt on the 8 vertical studs.
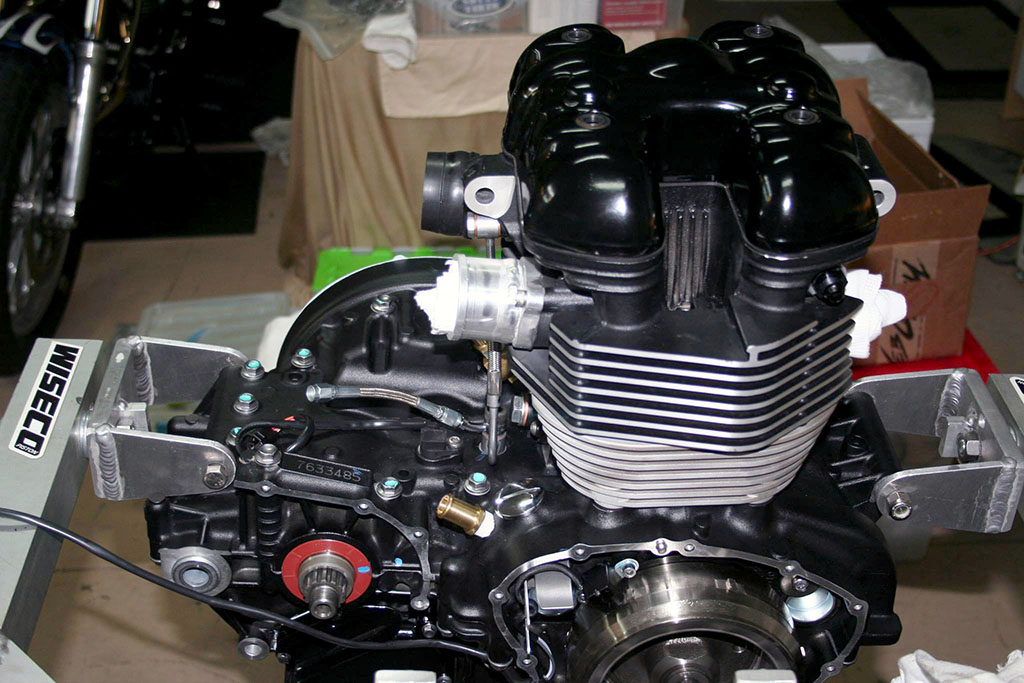
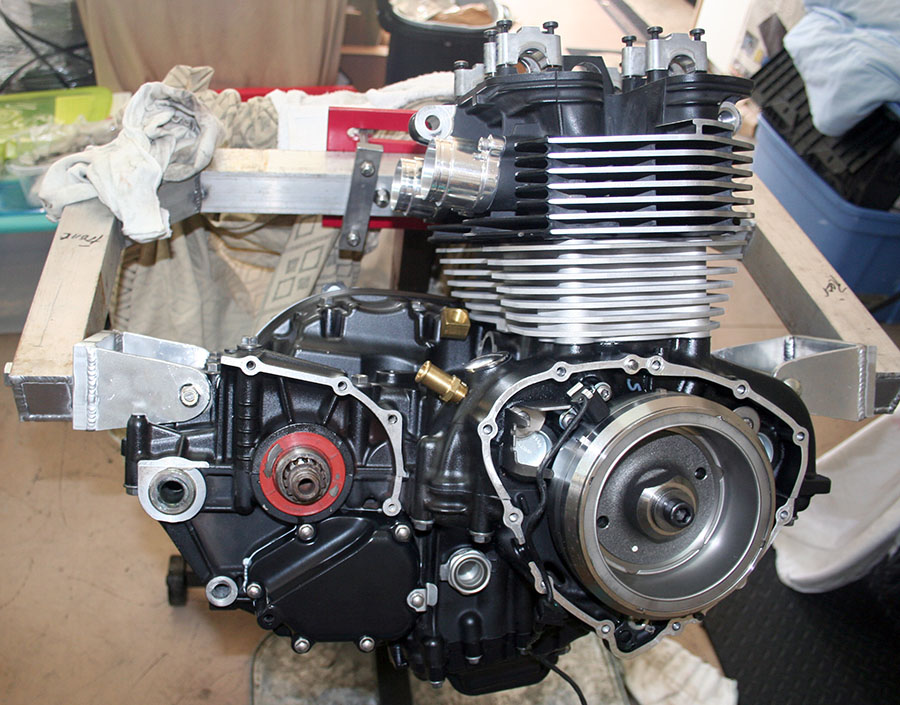
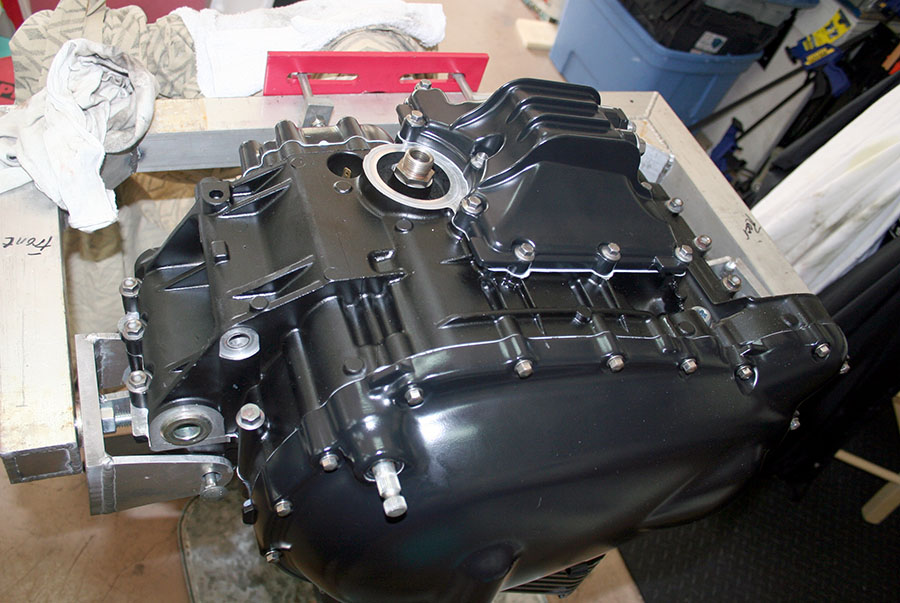
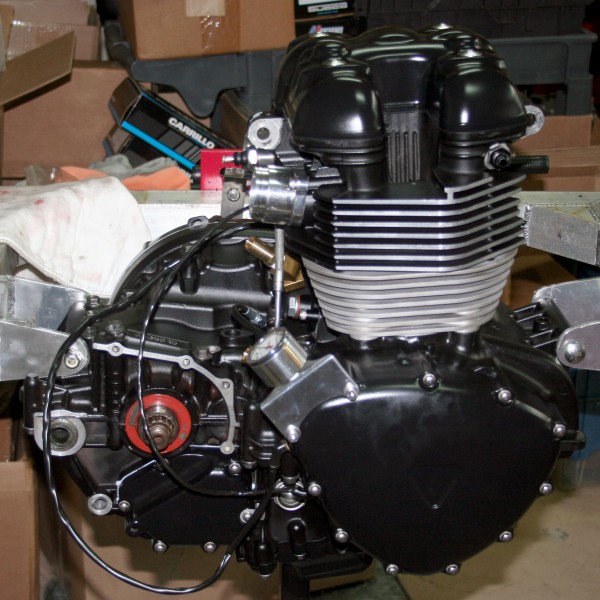
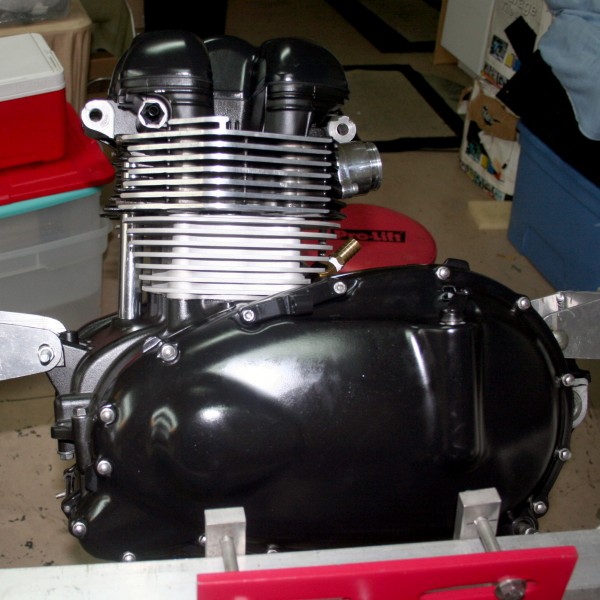
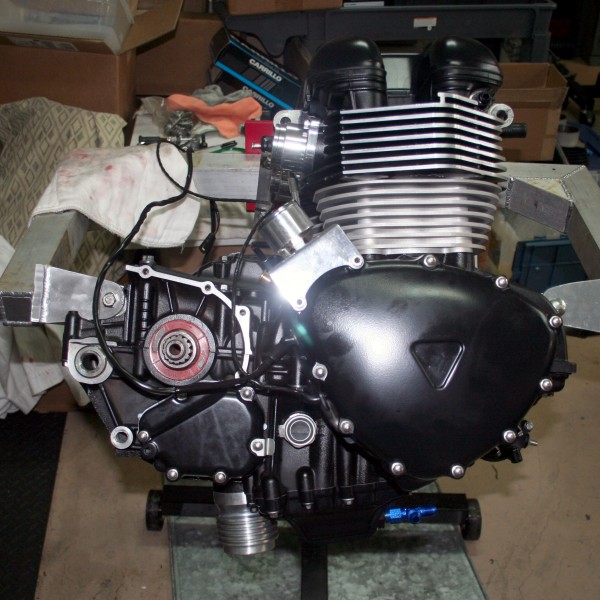
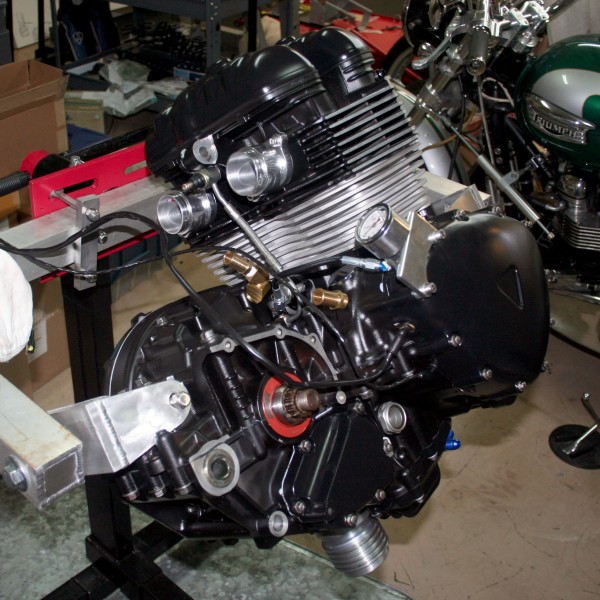
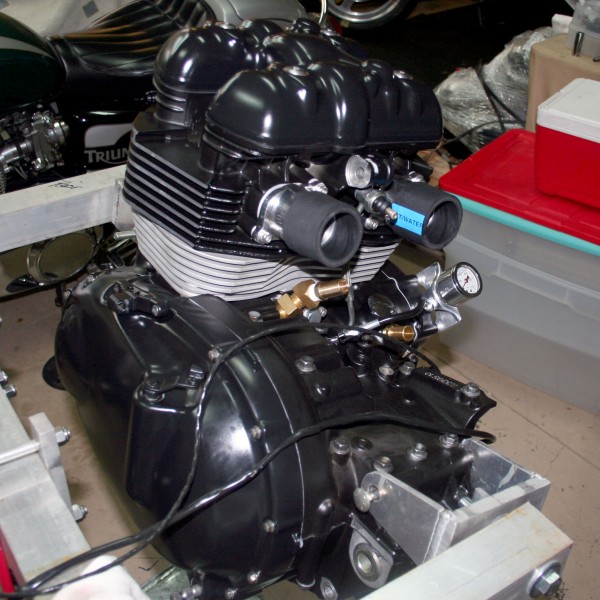
May 2, 2015 Update – Engine Reassembly, Cylinders, Head, Cams and Covers
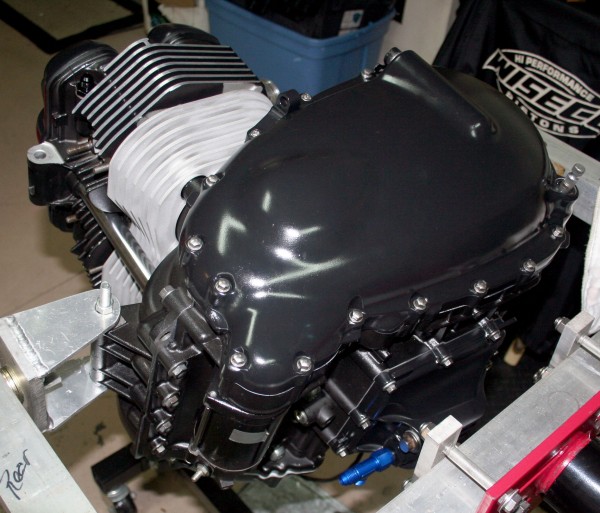
Bill sent these photos to me today, to let me know that all he has left to do is set the valve clearances, cam timing, and button up the timing cover and cam cover – then into the crate for the Monday, May 4, 2015 pickup!
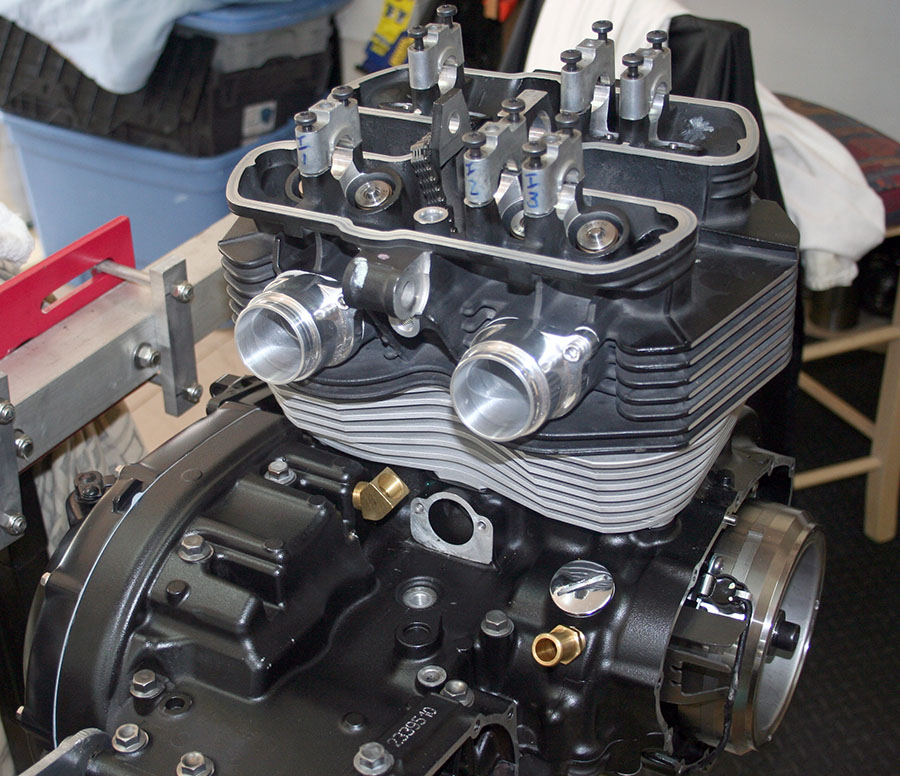
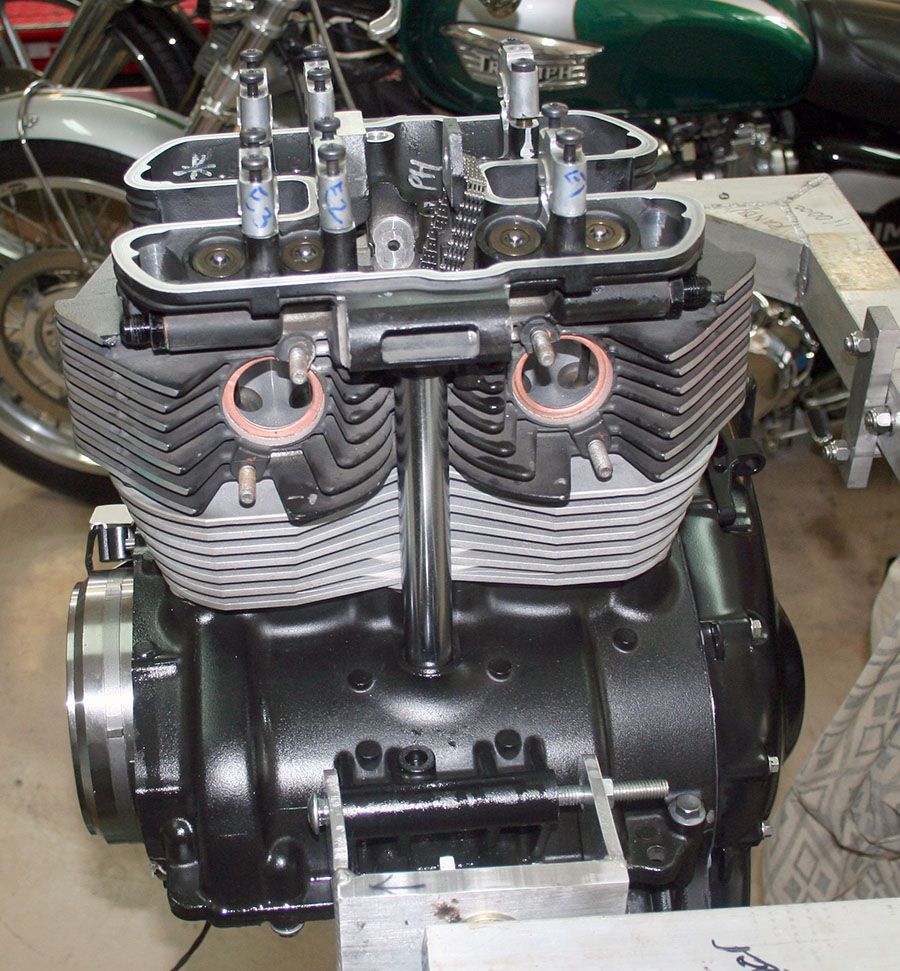
Front view of the engine with cams and cover yet to be installed.
May 12, 2015
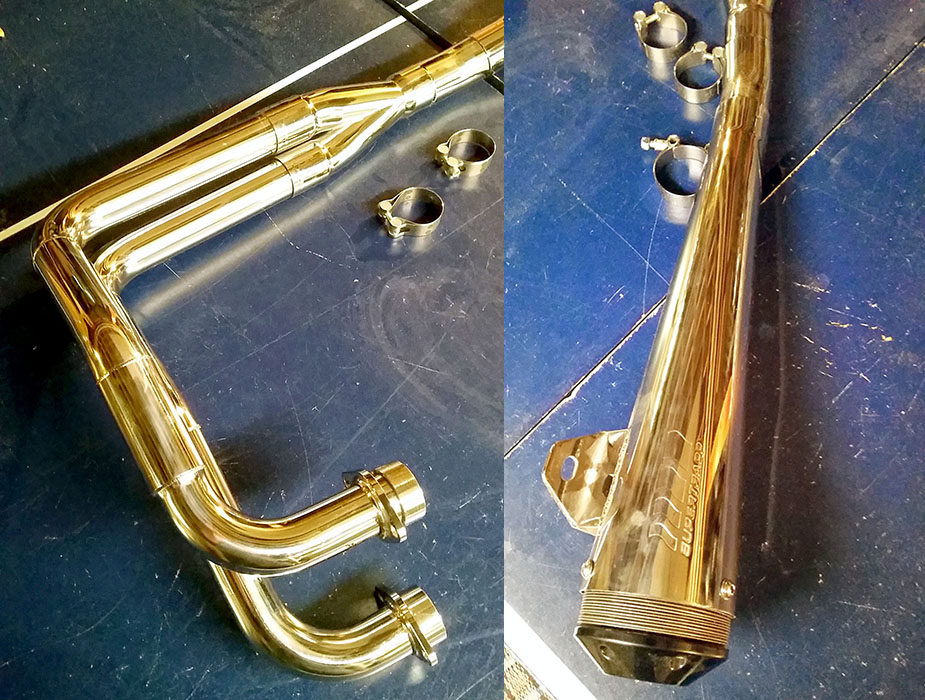
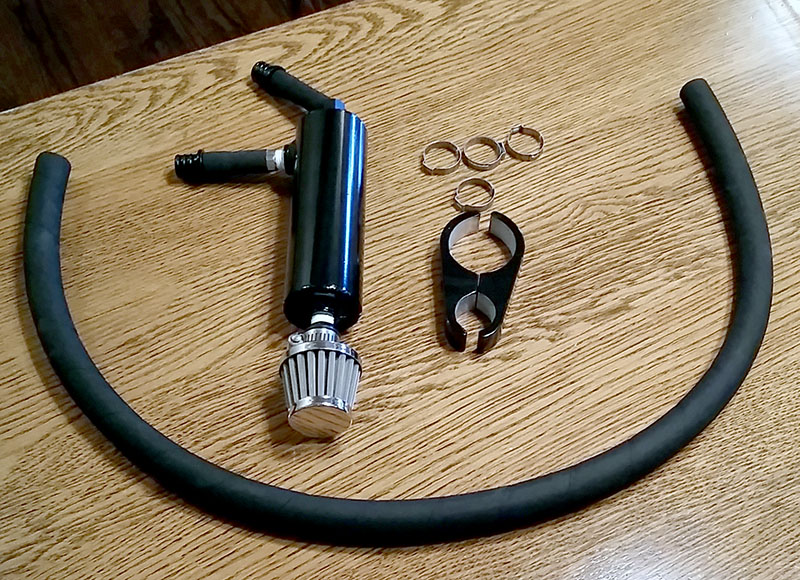
Always good to arrive home from work and be greeted by boxes of performance parts from Bonneville Performance! I received my Bonneville Performance Stainless Steel 2 into 1 Exhaust System that I will be using with my rebuilt Bonneville Performance 1100cc Triumph Twin engine. Also arrived was the Bonneville Performance Crankcase Oil Breather Canister Kit for the same engine.
As soon as some correct size valve shims arrive, Bill will finish up my final engine adjustments and ship it to me!
May 2015 Update
I am happy to report that my engine rebuild has been completed by Bill Gately at Bonneville Performance! Now, the planning begins for how we will put it all back together!
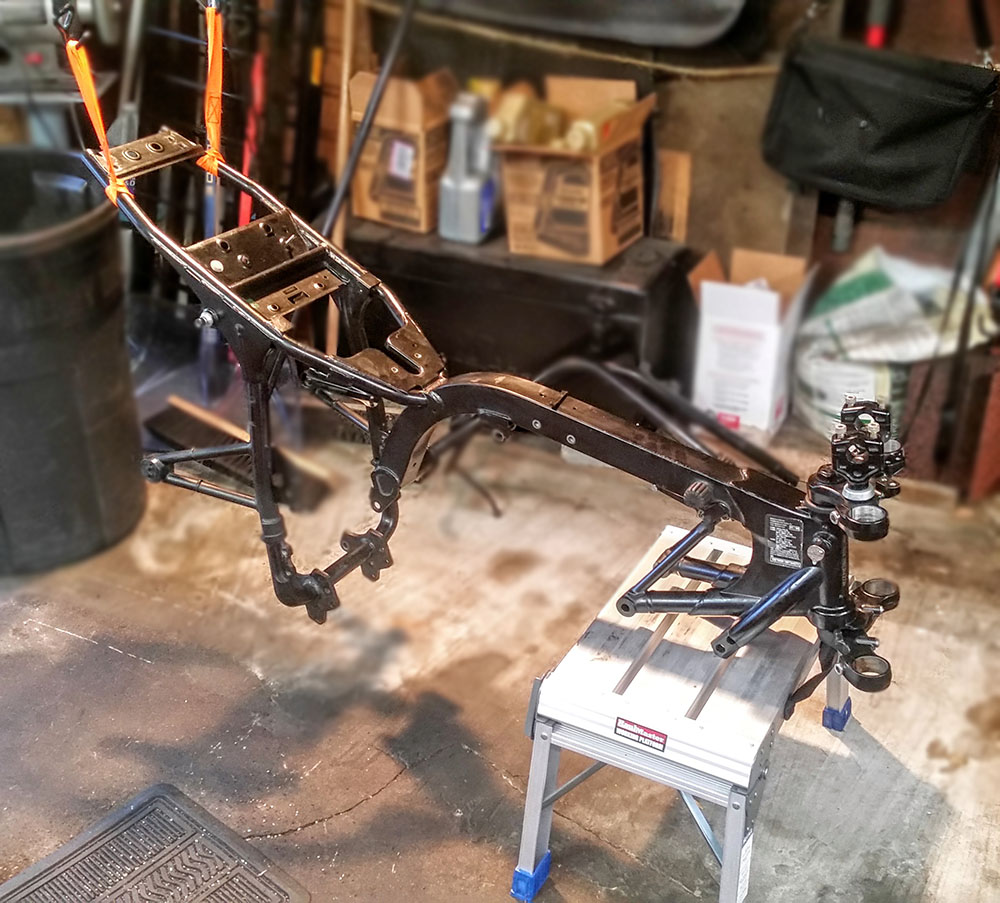
December 2015 Update
The 2008 Bonneville frame is going back together in preparation for a road trip down to Bonneville Performance in January 2016 to be reunited with the new 1100cc engine! The task today was to install new All Balls Steering Stem Bearing Kit 22-1020 in the head and then install the upper and lower yoke assembly. The new replacement bearings are roller bearings that replace the less desirable and less reliable ball bearings installed at the factory. I followed the instructions in the Haynes manual to remove the old bearings, and press in the new sleeves and bearings without the use of a machine press.
January 1, 2016 Update
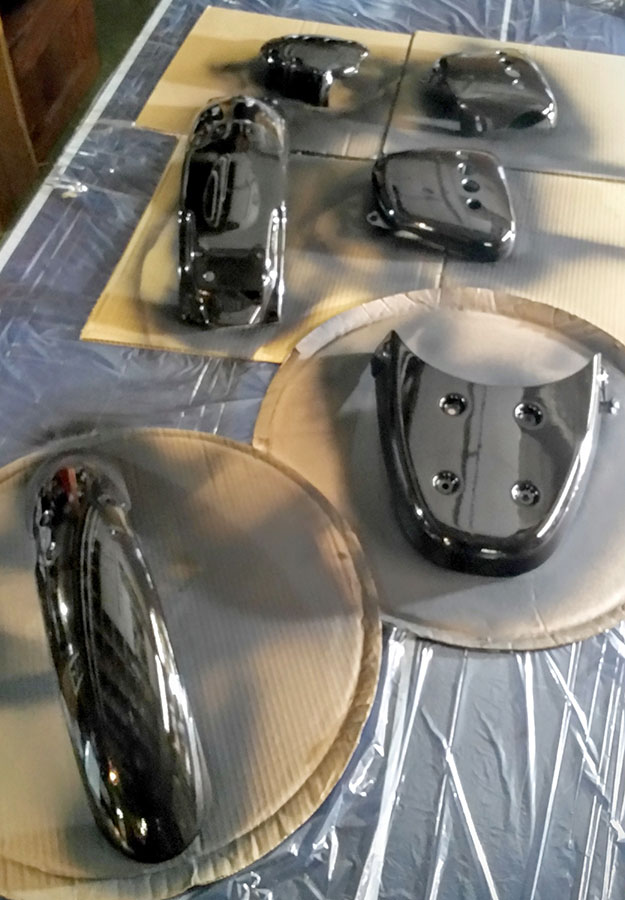
In preparation for my trip to Bonneville Performance later this month, I am using my holiday weekend to get more of the frame and parts ready for the trip and final reassembly. This morning I trimmed 3/4″ off the sides of the rear fender, and 1/4″ off the sides of the front fender. While the Bonnie is apart, I plan to shoot some new coats of Eastwood Rat Rod Satin Black Paint (Item #21857ZP) on these parts: fenders, chain guard, side covers, front sprocket cover, and seat cover. I am considering also shooting the swing arm and the gas tank (not pictured) but leaving the frame in the original factory black.

First coat of Eastwood epoxy primer
Week of January 25-29, 2016
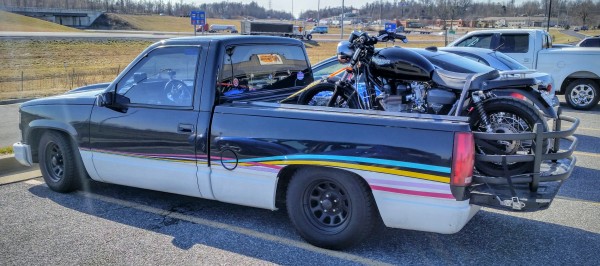
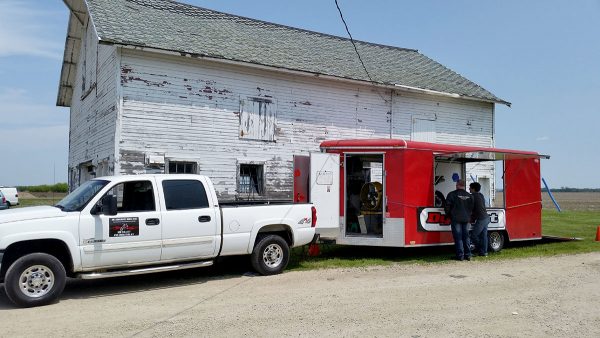
I loaded up my 2008 Bonneville in my 1993 Chevy pickup and headed down south to Bonneville Performance to install and dial in the 1100cc rebuilt engine.
After arriving at Bonneville Performance, we unloaded the bike, put it on a work stand in the shop, and began the process of installing the engine into the frame.


January 29, 2016 – First ride with the 1100cc engine!
Having completed the assembly of the 1100cc Bonneville Performance twin back into my 2008 Bonneville frame, heat cycling the engine and doing the final oil change to synthetic Castrol racing oil, I was able to take the bike out for its first spin. I took it for few laps around the streets near Bonneville Performance. A short GoPro video clip is below.
All I can say is… Wow! Amazing! Incredible! How else can I describe the increase in performance? The most noticeable change is the instant response to the throttle and the torque! I am sure a wheelie would be no problem… and that fact that is a bit scary!
February 1, 2016 Update
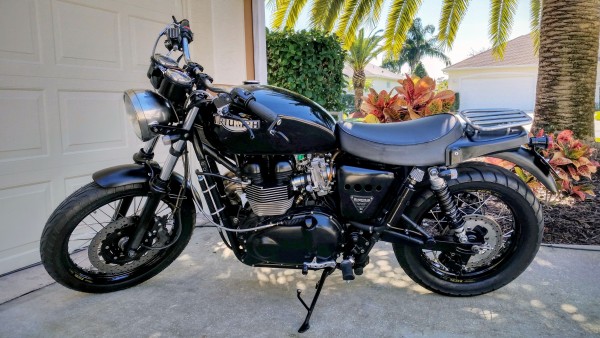
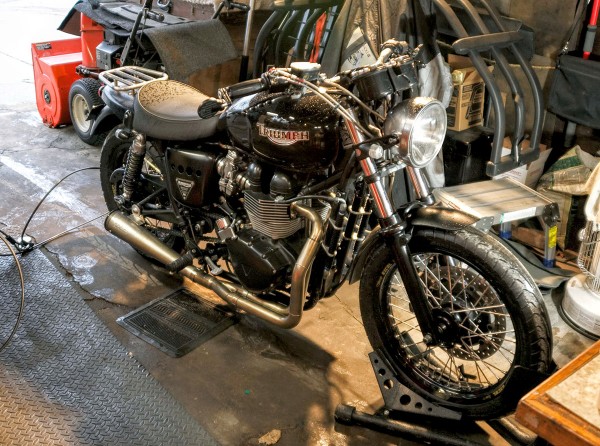
A little over a year since I began the project, I arrived back home with a fully functional 2008 Bonneville with a high-performance 1100cc engine. A couple of friends helped me unload the bike at home, and it is now safe and sound in my garage.
It still being winter in Chicago, I have a number of smaller projects, modifications and improvements to make to the bike to get it ready to ride in the Spring, including:
- Install Sato Racing rearsets
- Install 520 chain and sprocket conversion
- Final paint color sanding and buffing, including gas tank
- New custom badges
- Replace and improve fuel lines – Tygon
- Install shorter K&N air filter pods
- New handlebar grips
- New front gaiters
- Sort out front brake master cylinder mushiness
- Sort out rear shock performance issues
- Consider changing rear wheel from 17″ to 18″ dia. to improve handling and suspension performance
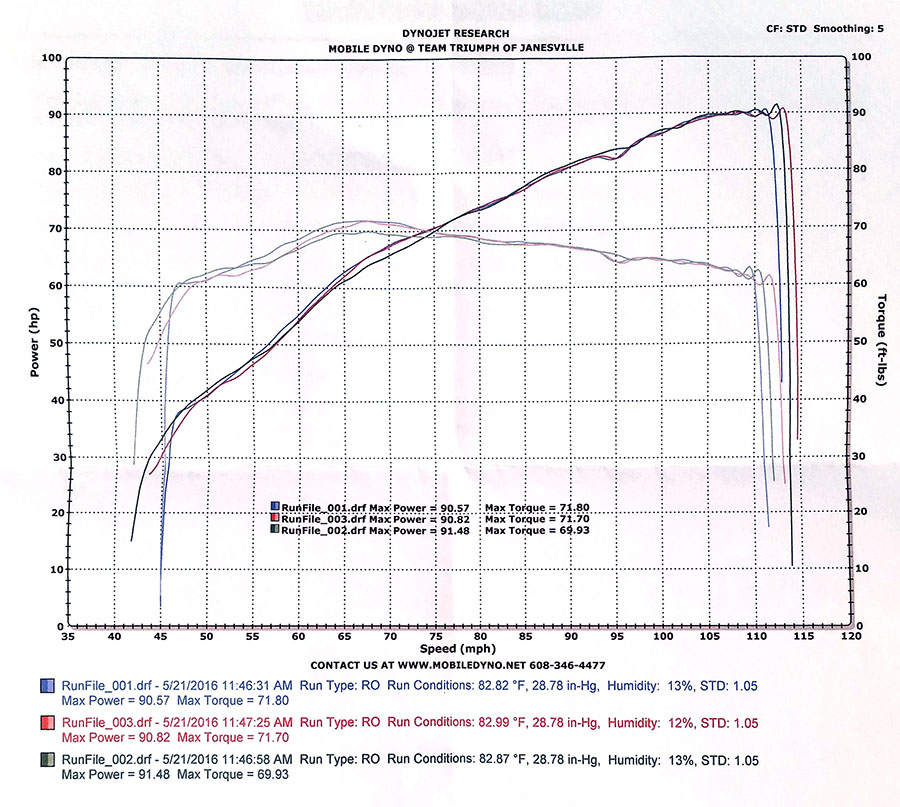
May 22, 2016 Update – Dyno Results
I have been able to complete the items on the list above except for the last one, which I will wait another year to do. I am also happy to report that I had a chance to put the Bonneville on a Dyno and had some great results, as shown below.
The outcome is basically 92 HP and 72 ft. lbs. of torque with a power curve that just keeps building, at least all the way to 115 MPH! This matches my riding experience where I have not yet experienced the bike flattening out… at all, at any speed, in any gear. It is truly amazing to ride!
Additional Work Done Since 2016
In the months and years since I completed this project with Bonneville Performance, I have made some additional changes and upgrades.
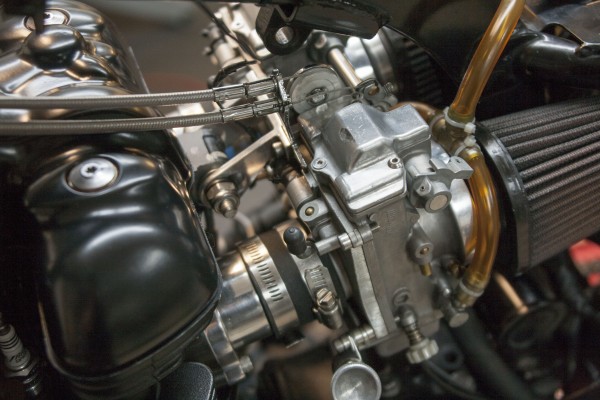
After more discussion with Bill Gately regarding the initial dyno results I got, he recommended that I go with the Mikuni HSR45’s for additional intake capacity. These carbs are 3mm larger in diameter than the HSR42’s, but otherwise have the same housing and connections. I went ahead and made that swap and have definitely noticed an improvement in power.
In 2019, Bill told me that he had entered into an agreement with Triumph Twin Power (in the UK) to make a custom CDI unit for his engines. I purchased the Fire Starter with the custom map for the BP 1100cc engine (https://www.triumphtwinpower.com/fire-starter-performance-igniter-unit.php). Wow! What a fantastic improvement that made!
I also upgraded the headlight to an LED unit so I can see better at dusk or at night, or during rain. It really makes a huge difference! This is the unit I purchased: Liteway Headlight. It fit right inside my stock headlamp bucket in place of the original and plugged right into my three-prong connector.
I have also purchased additional diffuser discs for the Supertrapp muffler to tune the exhaust a bit more.

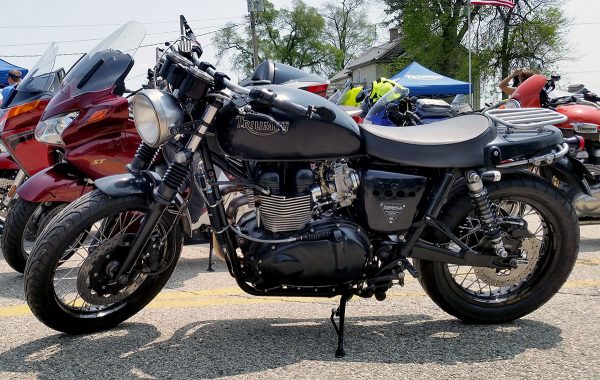
A recent photo that was taken on a ride in March 2020, here in Southwestern Wisconsin.
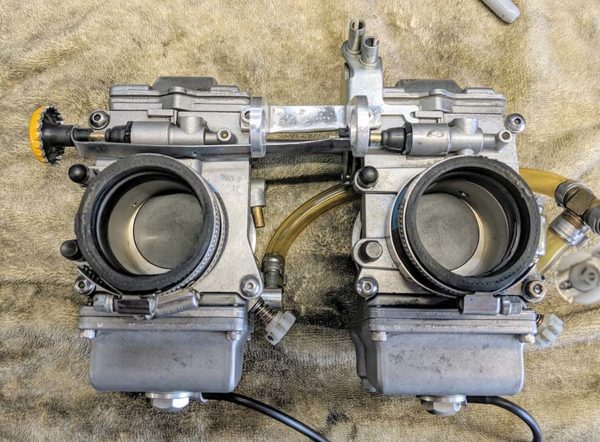
Upgraded Mikuni HSR45’s – with custom choke arrangement I fabricated.

Triumph Twin Power custom CDI for the BP 1100cc engine.
that is BIG job. Let me know if you want help putting it back in.
Doug… I certainly will! Thanks!
Awesome! Now, I want to swapped a 1200 EFI into my 2013 Triumph Scrambler.
I can’t wait for the reassembly and end result!
NICE!! I would love to see a video of it running when it’s done. …. I’m curious as to what the entire cost will be?
Wow! The whole transformation to an 1100 sounds incredible. I’d be interested in seeing a video of the bike running and a report on performance. You may not say, but a ballpark on cost would be appreciated.
Dan,
I will be updating this blog post as I get more details and photos of the process.
Once I get the bike back together and running, I also plan to have it dyno’d to get the actual performance spec’s.
Thanks for your interest.
Randy
Hi Randy. Any updates on your motor?
Eugene,
No, not yet. I expect I’ll be receiving it sometime in April.
Randy
Holy cow! This is one serious project. The weather is warming up. I hope you get it back soon. Rudy
Rudy,
Thanks for your comment. Yah, it is a serious project – my most serious to date! I heard from Bonneville Performance last week that they were putting the engine back together after finally having all the parts and outsourced machine work done. One thing that extended my project was that my cam shafts were not recoverable… so they had to order new ones, then modify them into the BP Mile cam. One other thing I decided to do is order the BP 2 into 1 stainless steel exhaust to add a few more HP!
I’m looking forward to getting it all back soon so I can put the 08 Bonnie back together! Spring is here and I hope to have it done by Memorial Day or soon thereafter!
Randy
Watching and waiting with much interest here in Australia!
I wanna see you cat walking that beast!!
Do you mind telling us what you spent all in?
Jayson,
You can get an idea by visiting the Bonneville Performance website and looking at the crate engine prices. I already had purchased the Mikuni Carb kit, and I also purchased the 2 into 1 exhaust and the crankcase oil breather. I had also previously purchased the oil cooler kit and the oil pressure gauge kit.
I am looking forward to putting this beast back together!
Randy
Randy, VERY cool! Love it, I went thru the same thing when I rebuild my 77′ Lotus Esprit S1.
Dwight
Hi Randy, I have just purchased a brand new Triumph Bonneville Newchurch. At delivery I had a rev counter, added a centre stand and a couple of other bits added. On the first ride out from Alberta Canada down into Montana I found the bike very buzzy and constantly looked for the non existent 6th gear. I would be very interested to hear about your new engines characteristics ie RPM at 85 mph because as my bike is now it’s not much use for longer rides.
Regards
Ian
You can also swap out the front sprocket to a 19 tooth. That’ll give you lower revs a high speeds. A little slow out of the hole but with the 1100 you won’t even notice it.
Ian,
That’s a beautiful Triumph Bonneville model that I like! Good for you! I also found the stock Triumph gearing to be too low for long road trips. That is why I have tried other sprocket combinations to solve the issue. The simplest and lowest cost first step is to try using a 19-tooth socket on the front as Jayson already noted. You can do it with hand tools as long as you have a 1/2″ breaker bar and can get a 36mm socket for the nut that holds the front sprocket on.
The other thing you can do is to experiment with smaller rear sprockets as well, either in combination with the 19-tooth front, or back to the 18-tooth front. On my Bonneville I often use a 19 front and a 42 or 41 rear for long trips. On my Thruxton I have settled with the 18-tooth front and a 42 rear.
You can use the same chain length for all of these options and simply adjust the rear wheel for proper chain tension.
Hope this helps. Here’s another post on this topic: http://triumphbonneville.org/rebel-gears-rear-sprocket/
Randy
Have you install the motor in your bike?
Have you managed to get any further. Do you have a video of it running. Fantastic idea!
Any news?
Sorry for the delay on this project everyone. Between a number of months struggling with some back issues (which are now resolved) and summer riding and racing schedule, I have not been able to make any progress on this. However, I am planning to complete it over this coming winter and have it ready to go in the spring of 2016! I’ll be updating and adding to the post as I make progress! Thanks for your interest!
I want to do this to my Thruxton. Can’t wait to hear how your Bonnie performs. Hurry up????
Kevin, now you can buy a brand new Thruxton 1200 R. About $14,500. Twice the torque and a ton of hp. Comes with Ohlins, Brembos, ABS, three ride settings. Check it out.
Jayson,
You make a good point, although I don’t think they’ve released the final pricing yet… do you know for sure that will be the price? Also, another big difference will be air-cooled vs. liquid-cooled. The new bikes will be much more sophisticated and dependant on technology to maintain and sustain. I think the older air-cooled models will remain much easier to modify and more affordable to own and sustain over time. Also, the 1200R may be the only new Bonneville model that will out-perform the Bonneville Performance 1100 or 1200 modified engines. The Bonneville Performance 1100cc at 90HP and 76 ft. lbs. of torque at the rear wheel, and the 1200cc at 104HP and 91 ft. lbs. of torque at the rear wheel will still be pretty tough to beat.
Bill Gately and I inspected the new Bonneville T120 this past week at Triumph headquarters and Bill has some pretty cool ideas on how he will use the new engines for flat track racing. It will be interesting to see how much more performance he will squeeze out of these new engines! Good things ahead!
Randy
That’s what my local dealer is taking deposits on. It’s a dilemma. I have been wanting to bore mine out as well. It would be fun to do but other than the liquid cooled part, everything else is about the same for me. Right now I can’t afford either option so it really doesn’t matter. ha!
Looking forward to seeing your finished bike!!
Kevin,
Thanks for your comment. I am also getting anxious to get this done! The current plan is to drive my 2008 Bonnie down to Bonneville Performance in Florida in January, spend a week with Bill Gately and Jake Shoemaker putting it all together and running in the new engine and shaking everything out. Then I will be entering it in the Dania Beach Motorcycle Show along with a number of other Bonneville Performance custom Street Trackers and race bikes before heading back to Chicago with it in my Chevy Pickup truck!
Randy
Kevin, I couldn’t happier with the performance results. I own my dream bike! I am sure you will too if you go ahead with this for your Thruxton.
Two things:
Cost?
How come the paint does not match???
Carl,
Thanks for your questions. First, you can get an idea of the cost range on the Bonneville Performance website under “high performance crate engines” (http://bonnevilleperformance.com/product/high-performance-crate-engines/) and then by using the contact form or a phone call to get a written quote from Bill Gately for your specific application. Second, my 2008 Bonneville 865 had some surface damage to the left side cover that I requested Bill to have powder coated. There is no way to perfectly match the factory finish, but if your cover is in good shape, you can leave it as is.
Hope that helps…
Randy
How’s the progress coming!? Very awesome you detailed this so much. Anxious to see completed pics and hear your review after a first ride.
Andy,
Good timing! I just added photos and descriptions to the bike coming back together the last 2 days! More to come soon!
Thanks for your interest!
Randy
Wow! Impressive. Looks likes you may have more horsepower and torque than the 2016 Thruxton R?!
Congrats! Very fine Bonnie!! Got to see those Bonneville Performance Flat Track bikes in person. Unreal stuff!
Curious if your still using your Pro Com ignitor unit with the big bore motor??!
Mine unit is done and looking at ordering that particular ProCom unit.
Danny,
Thanks… yes I am using the Procom ECU/CDI unit with the 1100cc engine. I did buy a new one because I thought the old one wasn’t working properly, but I may have been mistaken. I also have a stock OEM unit ready as backup. I am using the #3 PIN setting which is the recommended setting for my Bonneville year/model, then I’m using the #10 map for “aggressively modified machines”. Seems to be working well right now. Once I get the carbs dialed in more, I may play around with programming a custom map for this bike.
Best of luck to you!
Randy
Awesome results, bravo! Does anyone know if the price on the price on the http://bonnevilleperformance.com/ website includes the core charge, or if you supply your own engine is it cheaper?
I believe the choices are to either buy a crate engine directly from BP, and send them yours as a core exchange, or ship them yours and have them do the same work on it as a crate engine. You can contact Bill Gately directly and ask about any other options and pricing: [email protected]
How does the vibration rate given that the balance shaft has been removed plus the increased capacity would theoretically increase any vibration.
Does it vibrate more or less?? Does it vibrate as much as a Meridan twin?
Danny, even though the factory counter balance system was removed, the crankshaft was then balanced. The factory doesn’t do this for cost reasons… but racing experts do it all the time. So, vibration is not an extra issue as everything is even better balanced and to tighter specifications than from the factory.
Hi Randal, why did you choose the 1100cc over the 1200 option?
Marc, In discussion with Bill Gately, owner of Bonneville Performance, he recommended the 1100cc option because of the kind of riding I do. I take longer distance rides in addition to short regional trips. The 1100cc option is a change in the cylinder bore, where the 1200 option is a change in both bore and stroke. The performance difference is very minimal. I recommend that anyone considering this kind of upgrade should talk directly with Bill Gately before making a final decision. His experience and depth of knowledge is second to none. I would do what he recommends.
Hi Randy,
I hope it settles in to be a nice bike and that you can use it for many more years and get it up to 100,000 miles. The rear carrier is neat.
Peter,
Thanks. I have put some serious miles (approx. 10K) on this Bonneville since the engine upgrade and I am very pleased with its all-around performance. I have every intention of keeping it for a long time and to put many, many more thousands of miles in it! The rear carrier is what Triumph calls the “Solo Seat” and comes with that carrier built into its structure. The seat, carrier, and seat pan all come off as one unit. Very handy indeed!
Randy
How comfortable would you say your solo seat with carrier is, Randy?
I need a much more comfortable long distance perch than my Norman Hyde. I would appreciate a bit of you subjective review.
Thanks,
Richard,
I’ve never had problems with any of the Triumph Bonneville OEM seats. They’ve always seemed to be acceptably comfortable for me. The Solo seat feels very much like the stock, long seat to me. The newer liquid-cooled Bonneville seats I find to be even a bit more comfortable.
Randy
For longer trips that ‘solo’ seat looks like it would be very handy for lashing a dry bag on the back.
Thanks Randy, safe riding.
Richard.
Richard, yes, it does come in handy for that purpose! – Randy
Cool … a lot of work. I chose to take my bike to Carpenter Racing in Cross Keys NJ. They did the heads and cams (I wouldn’t let them do the pistons because I know everything) and it dynoed around 88-89…… $3500. With the pistons I’d be looking at 90 hp. Great people 2013 speedmaster
Can you just ship them your whole bike for them to remove engine and reinstall it for you to pick up?
Ed, thanks for the comments. I certainly understand your excitement! Going from 865-900cc to 1100-1200cc really changes the game for a Bonneville! Bill Gately of Bonneville Performance is usually quite accommodating to his customers. You should contact him directly and ask him questions about your specific bike and circumstances. You won’t regret it. There is a functioning contact form on his website. – Randy