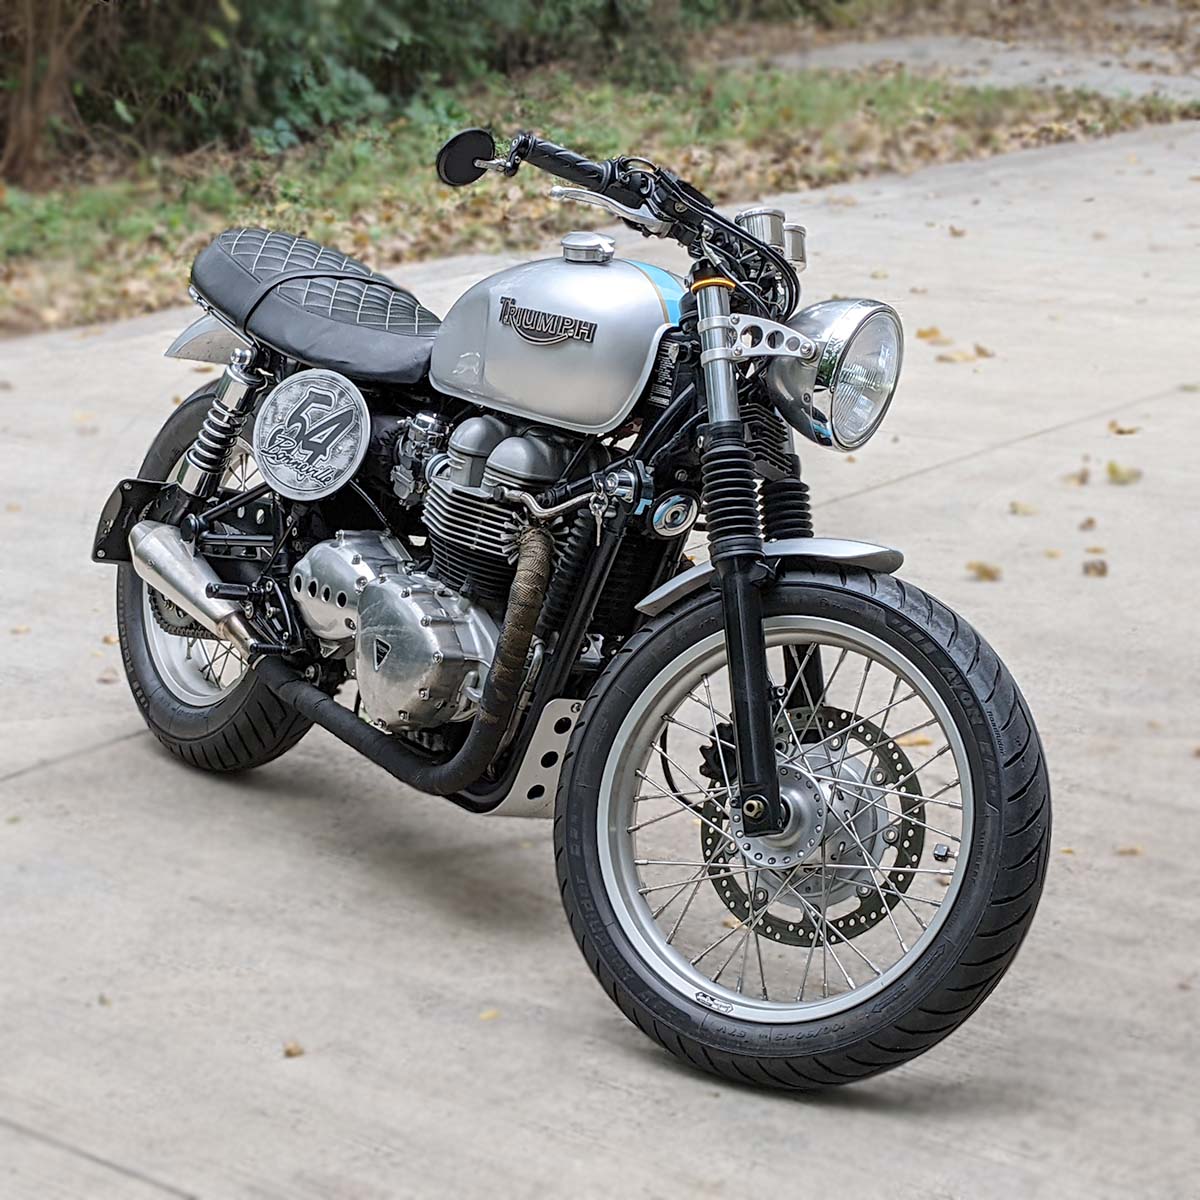
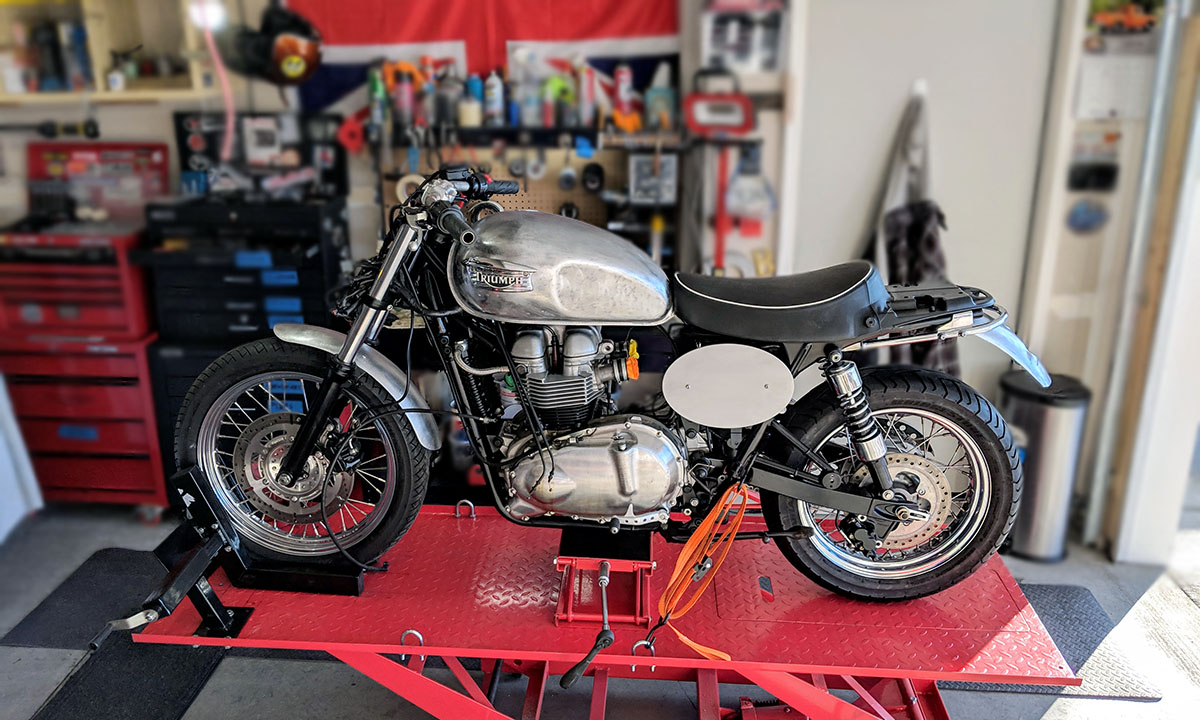
Custom 2004 Triumph Bonneville Cafe Racer - SOLD
790cc - Project Bike 3 - 6800 Miles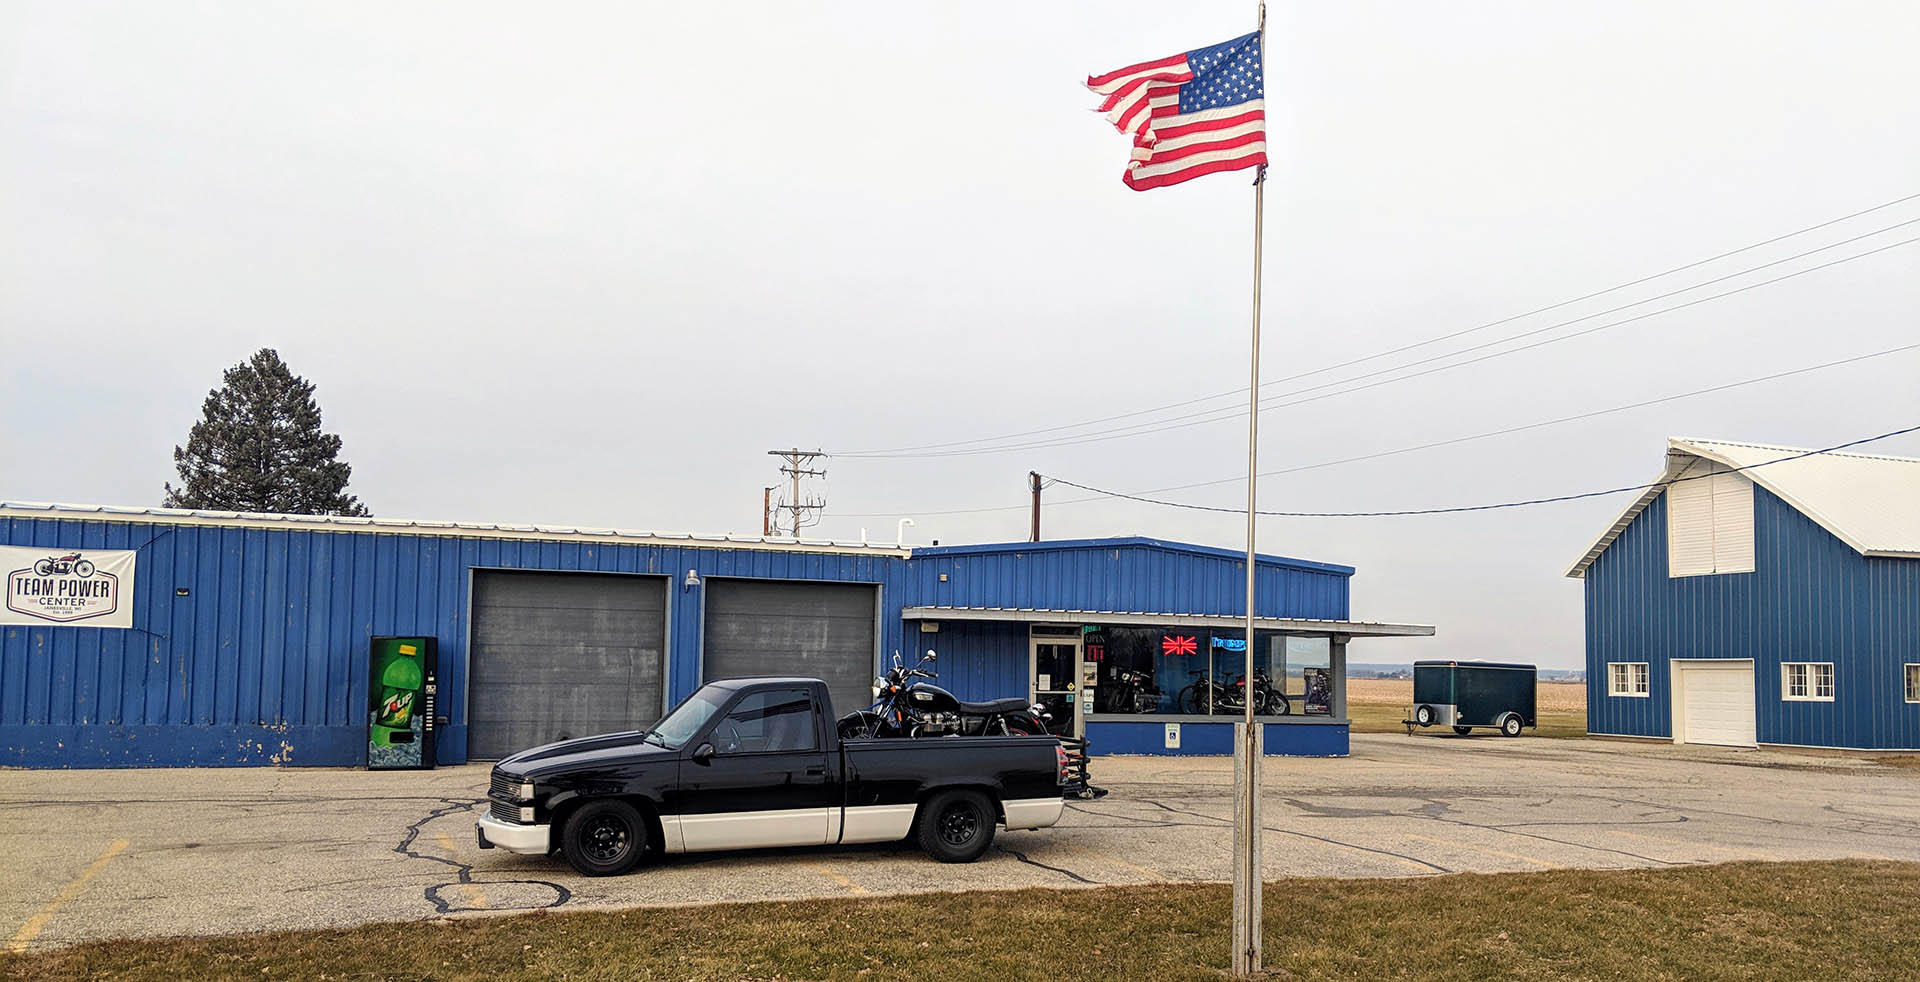
Team Power Center – Janesville, WI – One of the Best Triumph Motorcycle Dealers in the USA!
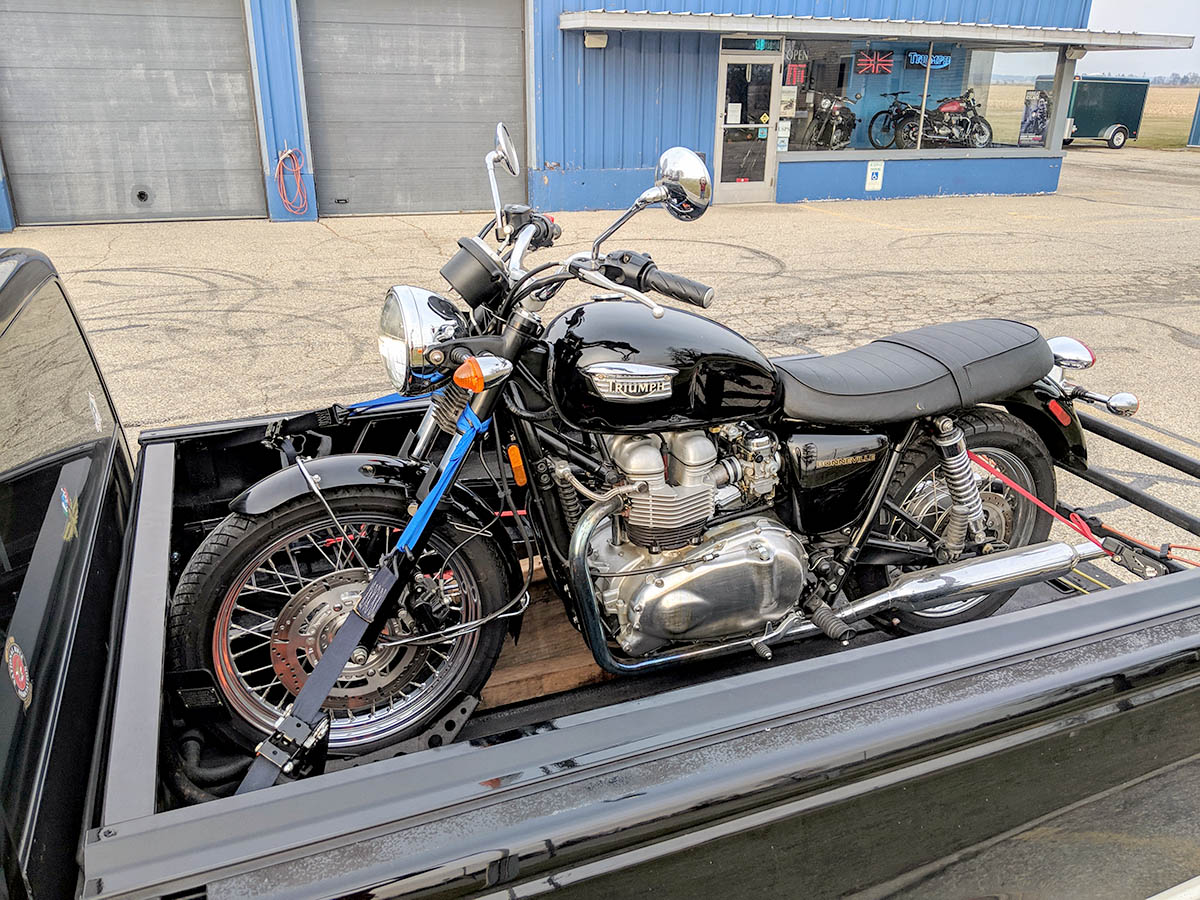
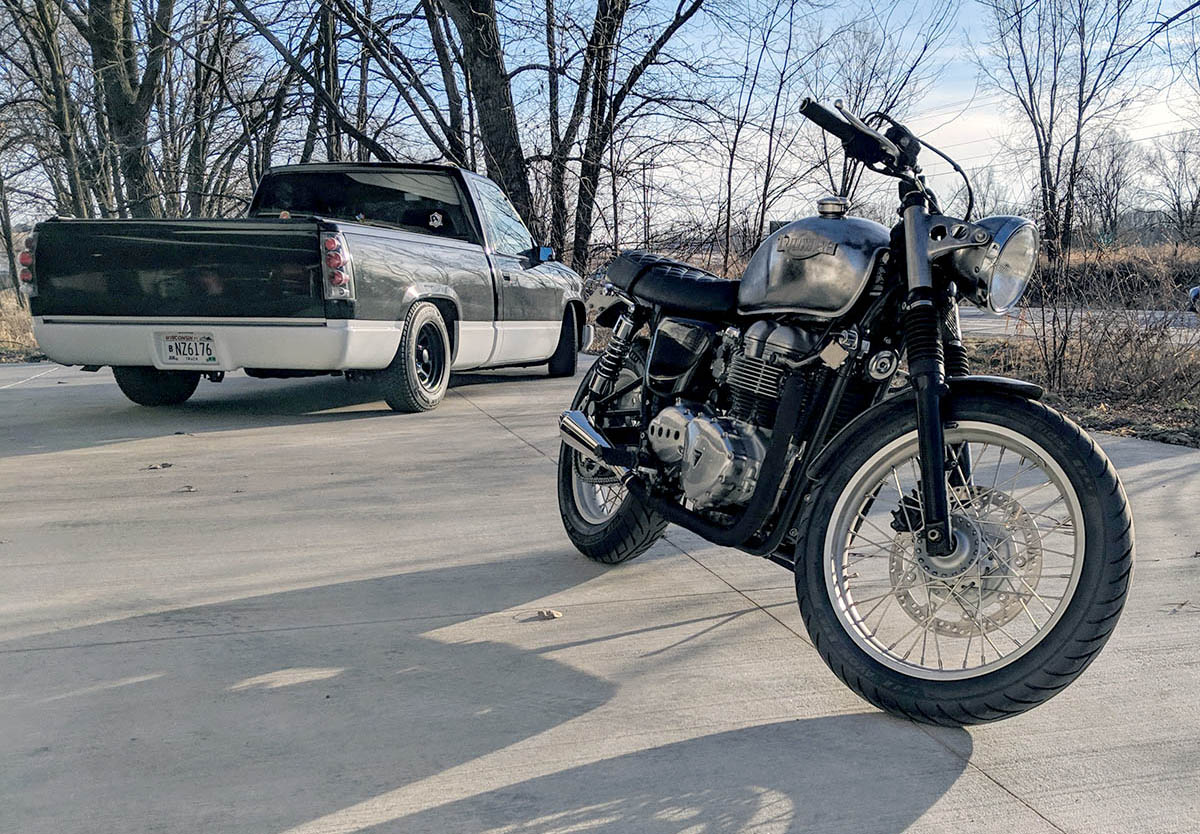
2004 Bonneville purchased and loaded up in the 93 Chevy Pickup.
DECEMBER 26, 2018
Based on previous conversations, inspection, and a handshake, I drove down to Team Power Center in Janesville, WI to meet owners, Todd & Darcy Ligman to purchase a 2004 Triumph Bonneville.
This bike had been purchased at auction some years earlier with 4,776 miles on it and was intended to become Darcy’s bike. However, since that never happened, Todd offered to sell it to me at a fair price. It had a number of issues:
- Bent front fender
- Missing right tank badge
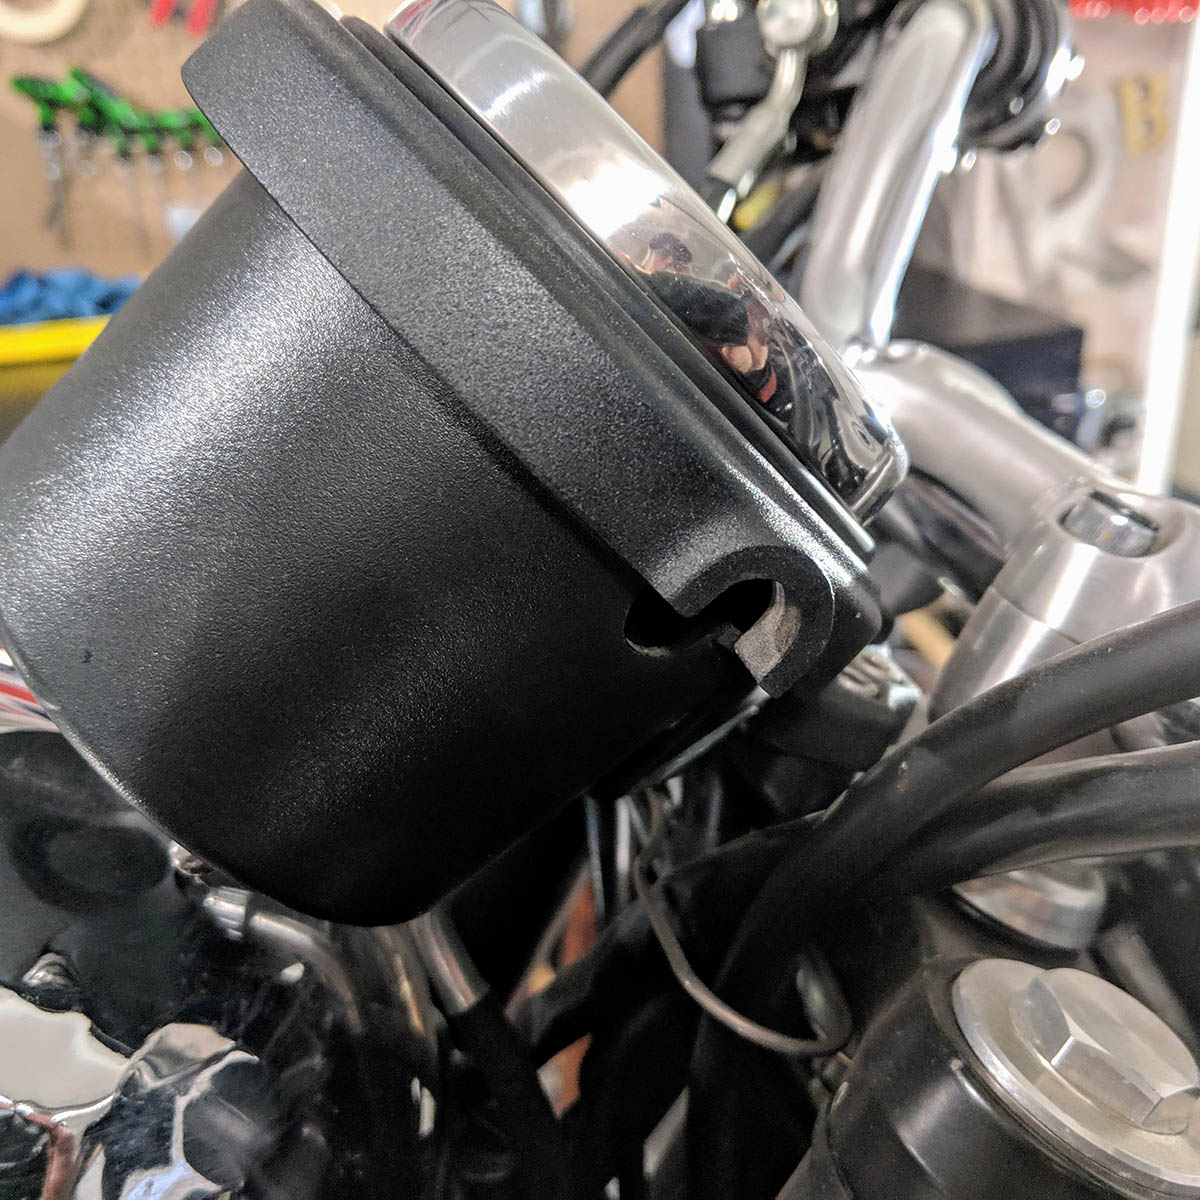
- Dented headlight bucket
- Missing fork lock key
- Missing odometer adjustment peg – later learned the speedo did not work
- Tear in the seat vinyl
- Missing crankcase breather filter
Other than these few items, the bike looks pretty good and runs well.
In addition:
- The Air injection system (AIS) had been removed
- A new petcock was installed
- New rear brake pads were installed
- New Nology coil and spark plug wires were installed
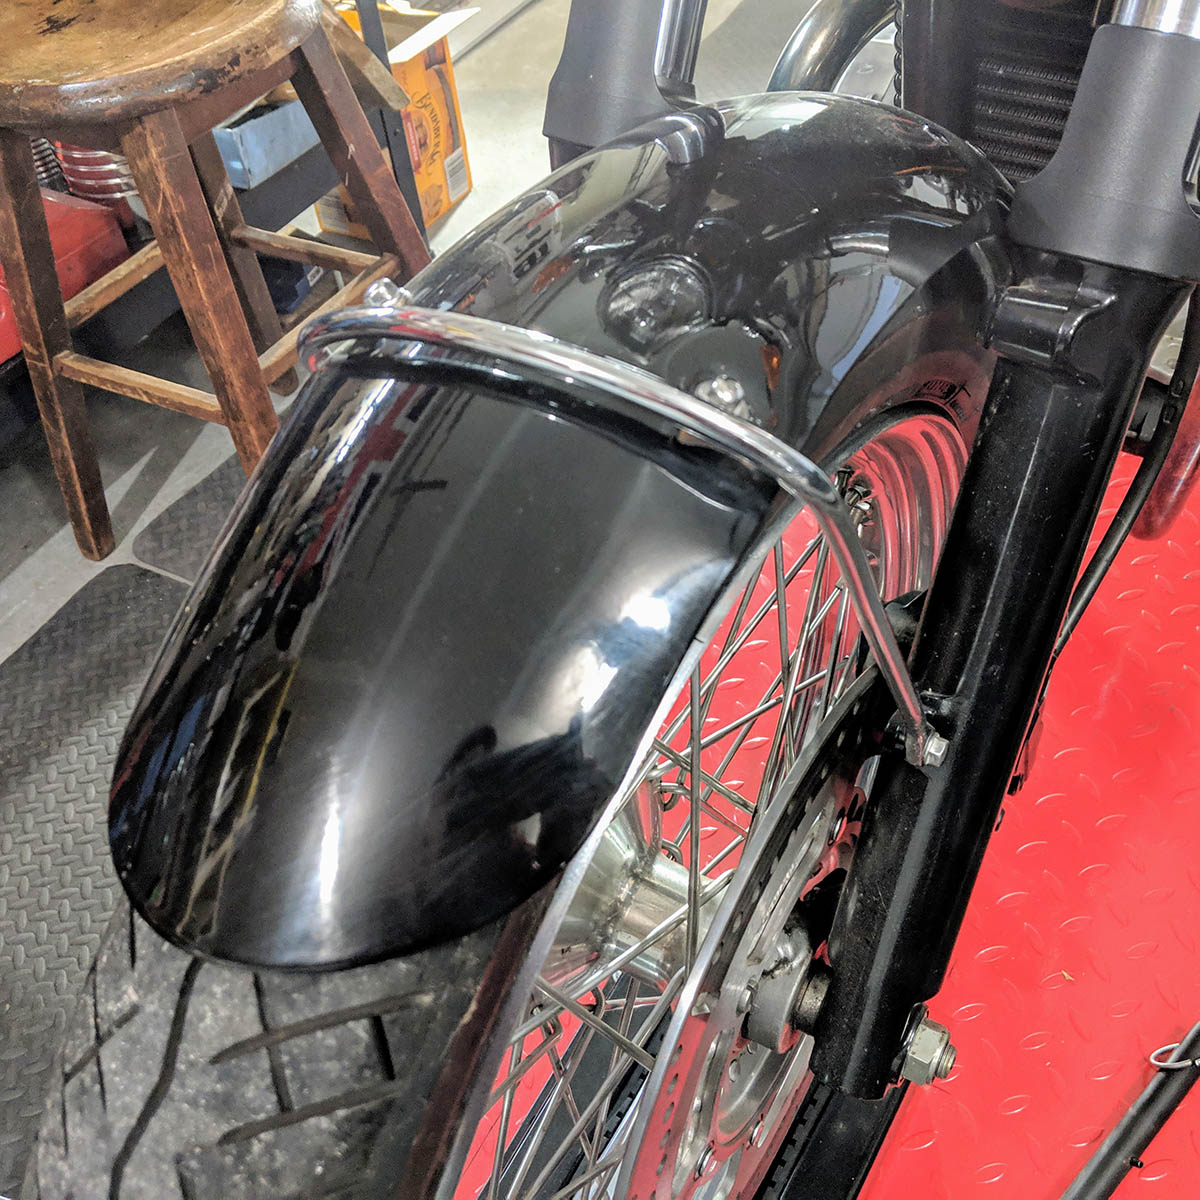
Damaged front fender
Missing right tank badge

Dented headlight bucket
Odometer reset peg missing
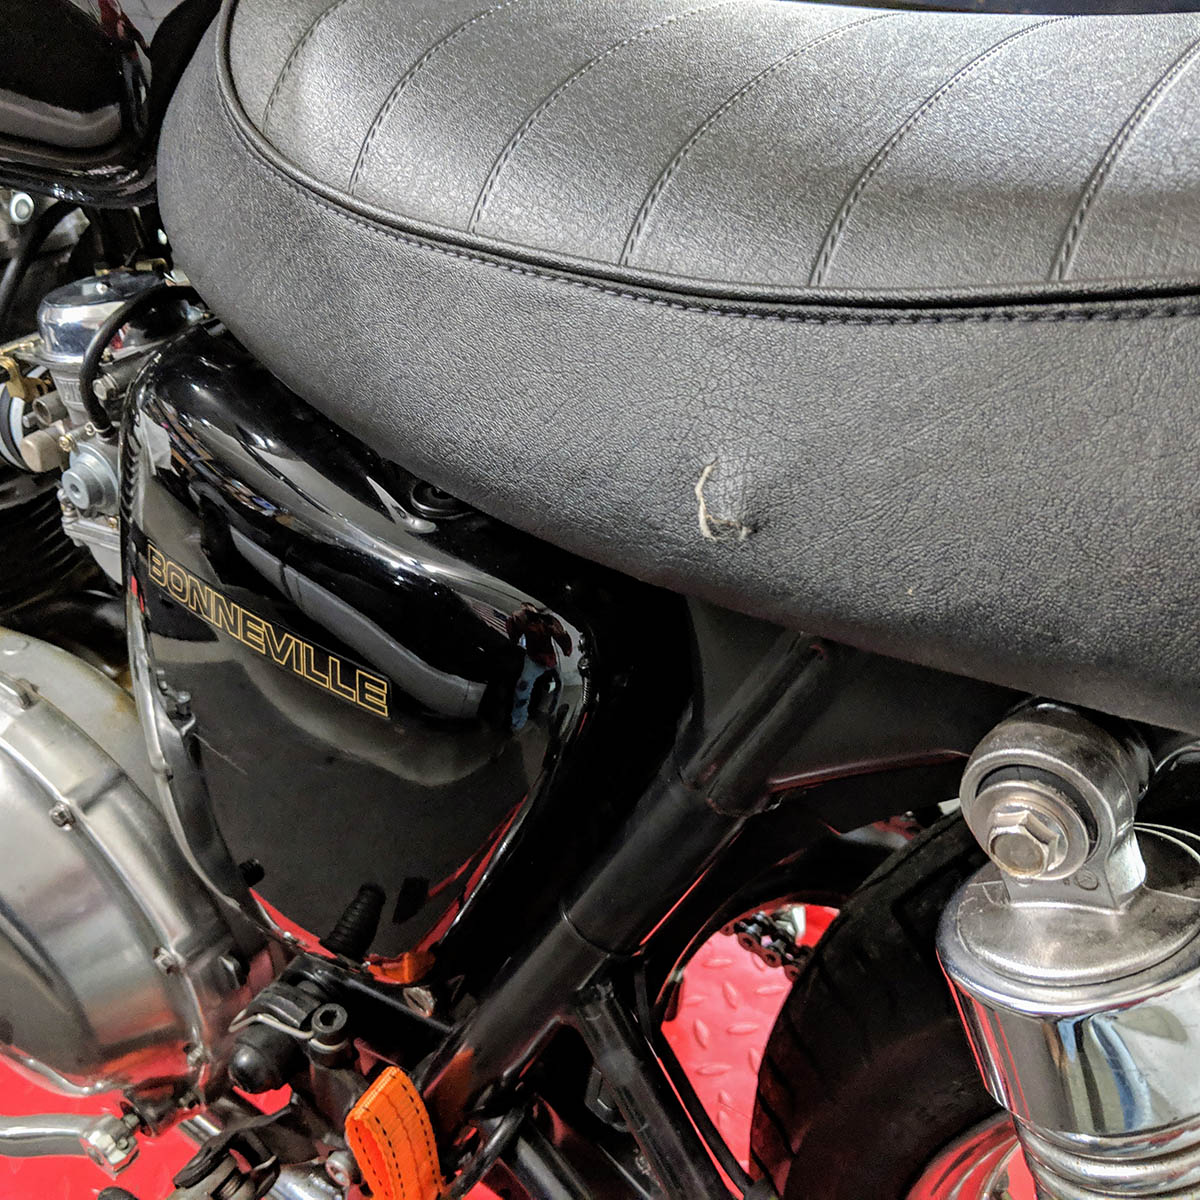
Seat tear
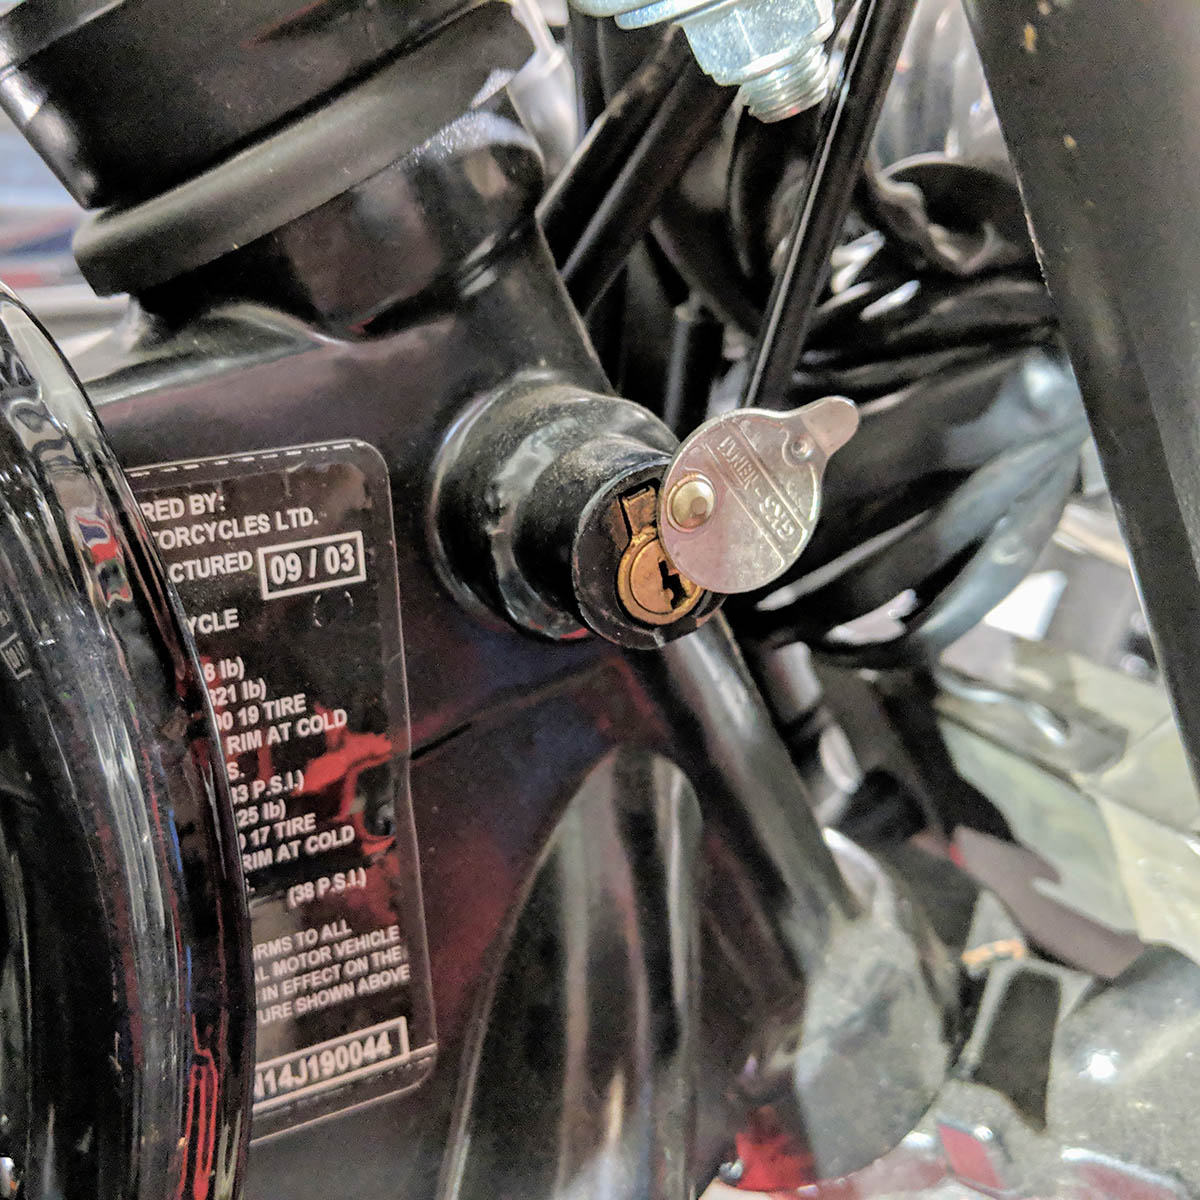
Missing fork lock key
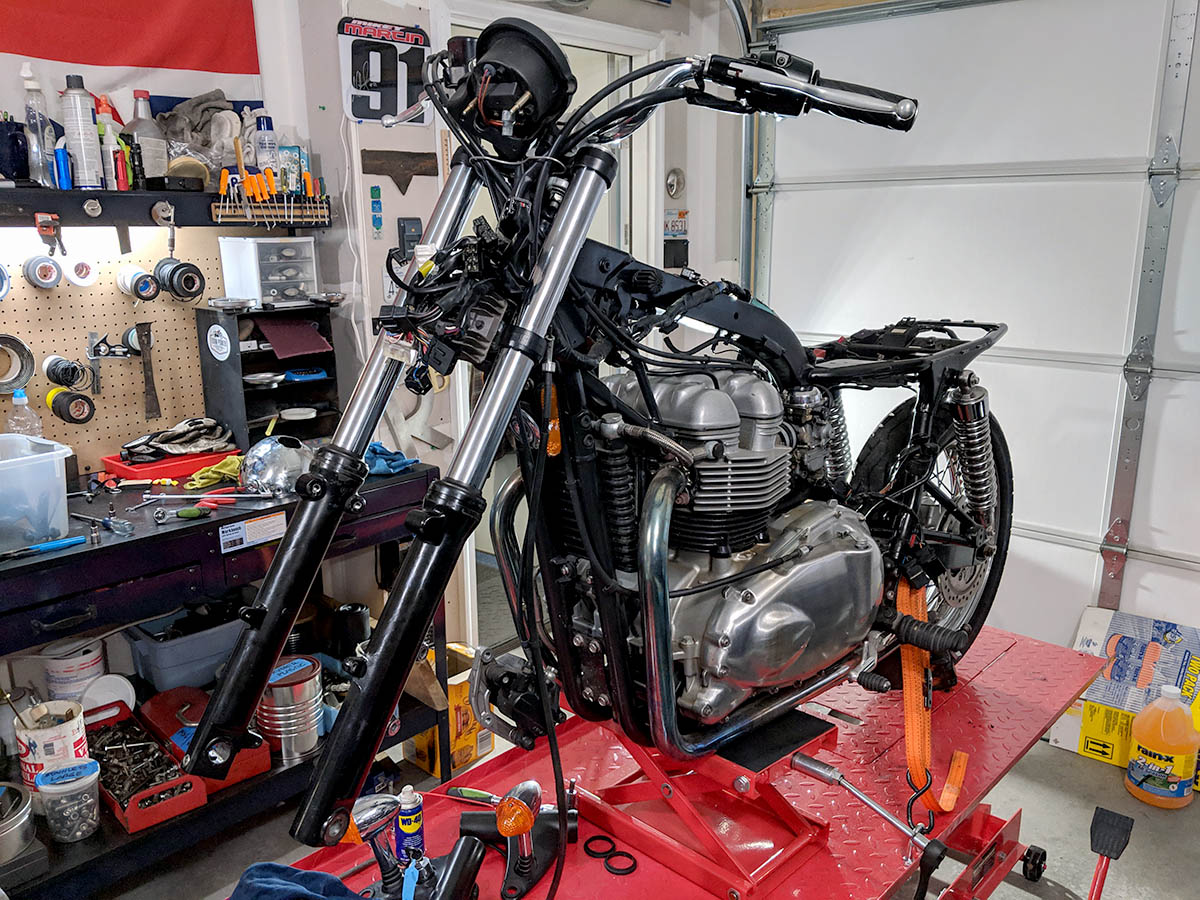
2004 Bonneville during deconstruction
DECEMBER 27, 2018 – DECONSTRUCTION
What a difference a few hours can make!
- Battery and Airbox removed
- Headlight bucket and ears removed
- Fenders, seat, and side covers removed
- New and replacement parts list being developed
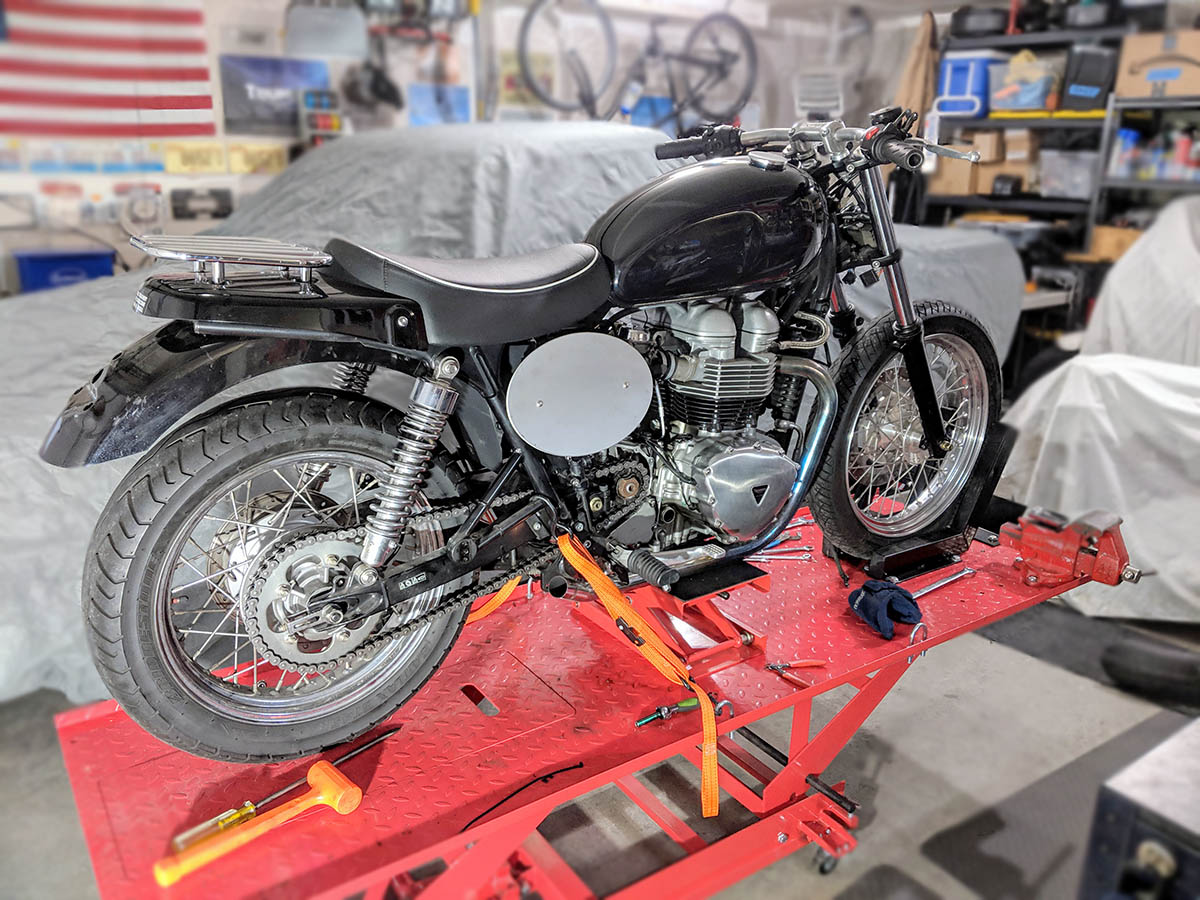
Starting to mockup the 2004 Bonneville cafe racer ideas.
DECEMBER 27, 2018 – MOCKUP
After deconstruction, I started playing around with some ideas for the direction of this cafe racer. So far the ideas include:
- Airbox Removal Kit
- K&N Pod filters
- Bobbed fenders
- Number side plates
- Single seat or custom shortened seat
- New headlight bucket
- Drag bars
- Bullet style turn signals
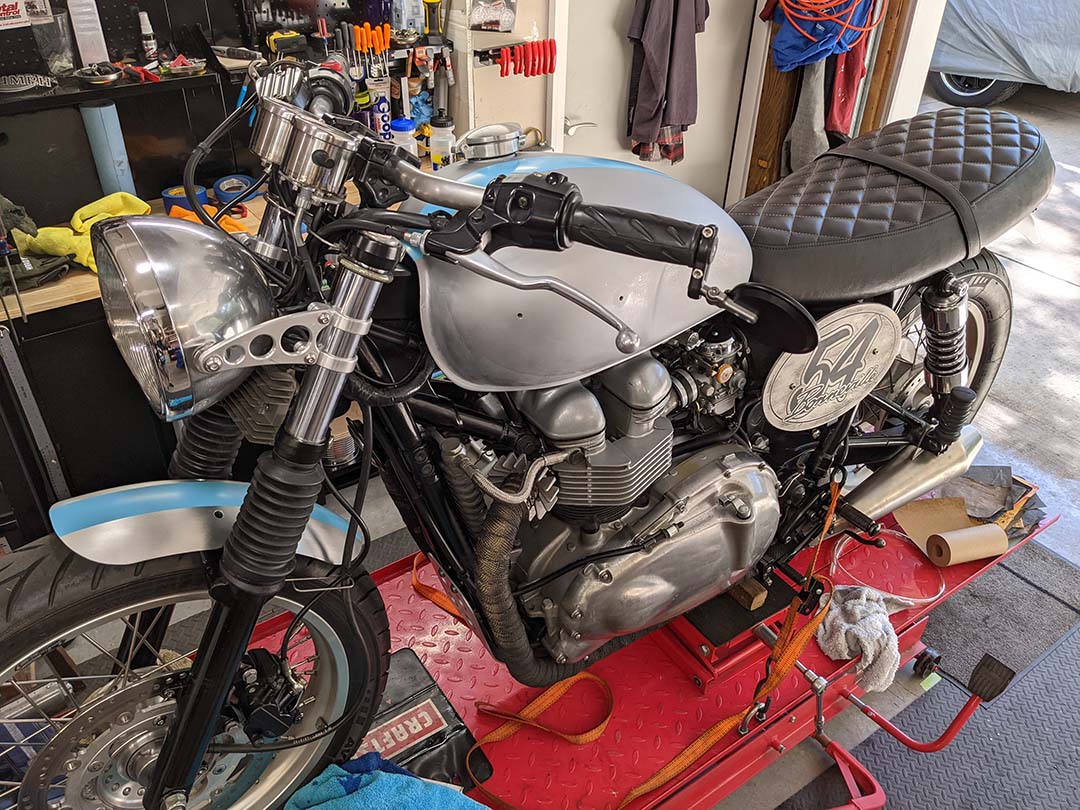
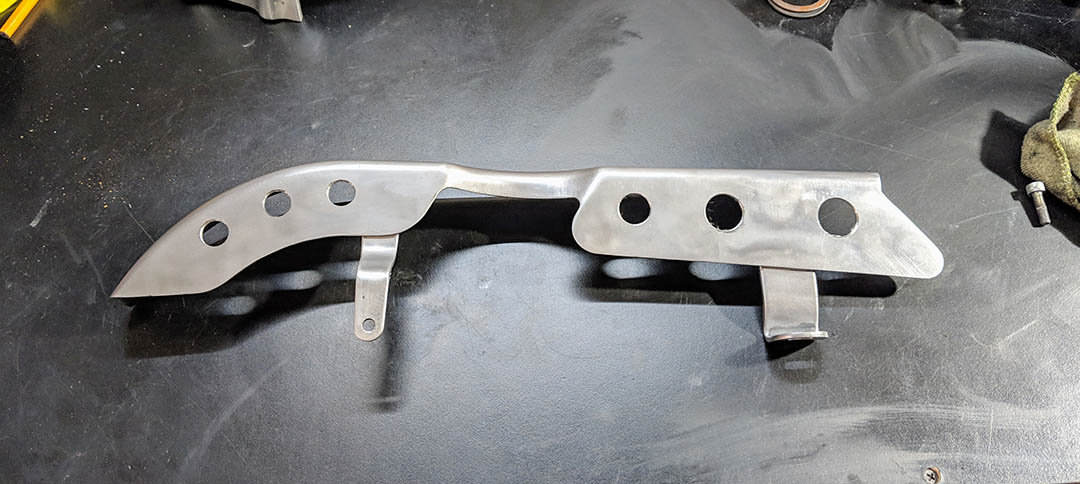
- Bonneville Brackets custom instrument panel and “Sharky” headlight ears
- Drilled shift lever, rear brake lever, front sprocket cover and chainguard
- Sun alloy rims and Avon Roadrider tires
- Custom taillight
- Rejet carbs
- Predator exhausts
- Wrapped headers
DECEMBER 28, 2018
Further planning, mockups, and ordering of parts continued today. Orders were placed with:
- British Customs
- New Bonneville
- Dime City Cycles
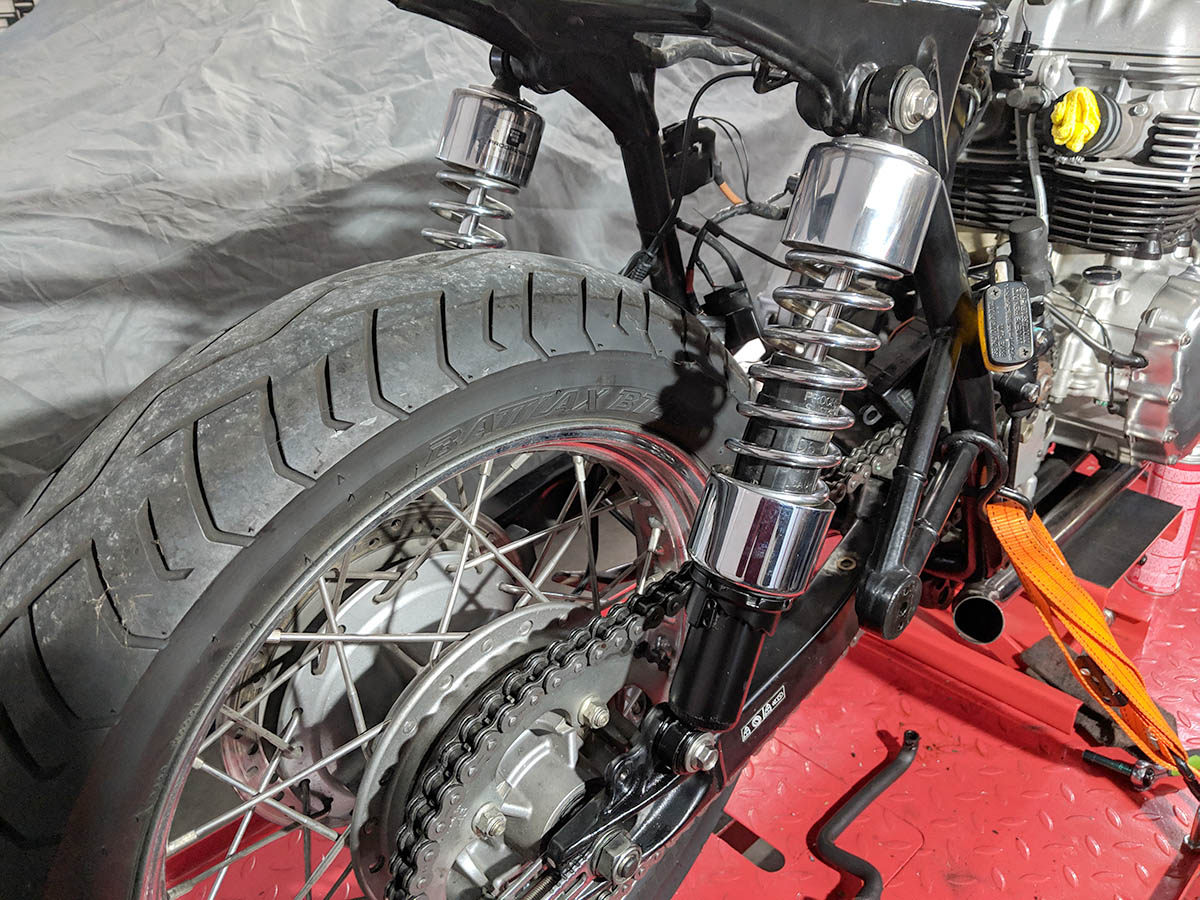
Progressive Suspension rear shocks
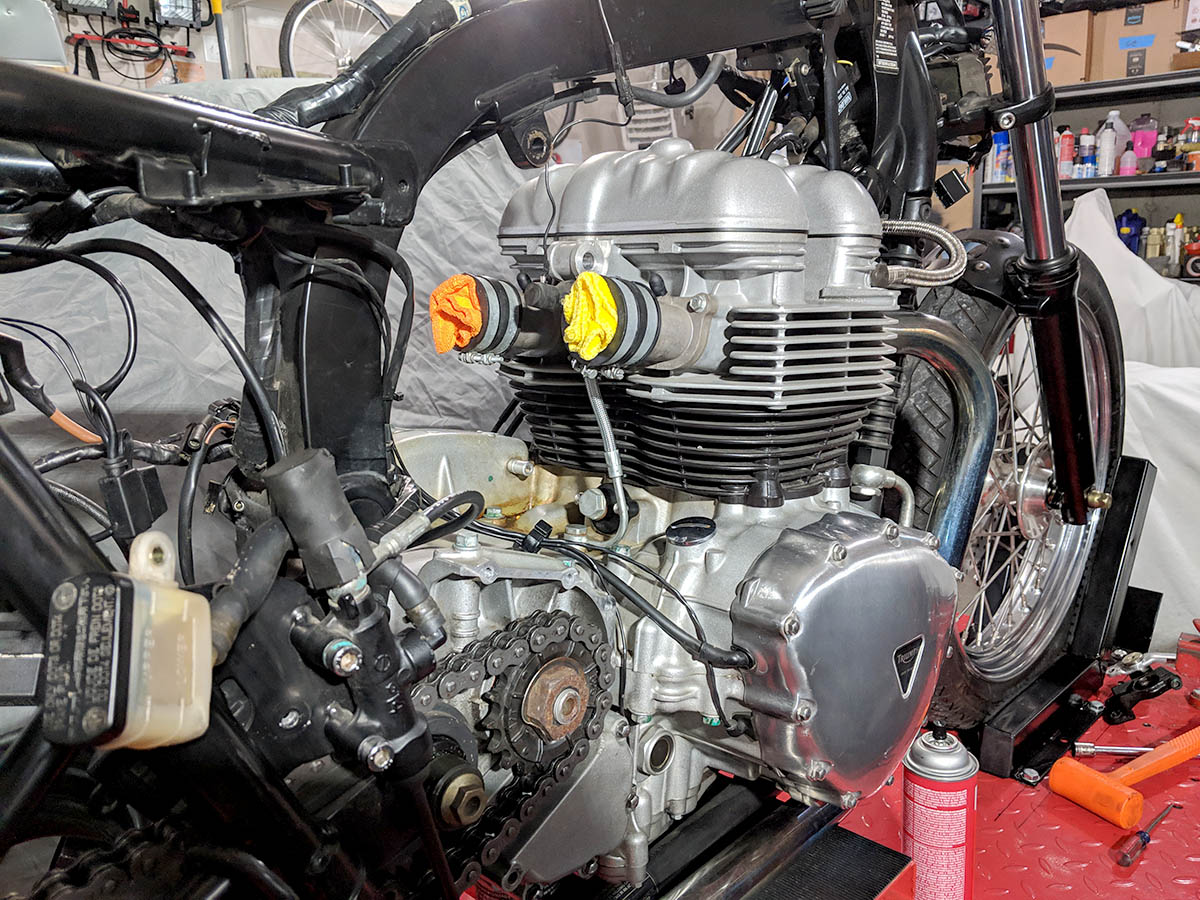
Engine undergoing cleaning. Carbs removed for rejetting.
DECEMBER 31, 2018
On the last day of 2018, I spent time cleaning and planning. Tasks included:
- Removal of the headers
- Strip paint from chain guard and drill 6 holes
- Drill holes on right brake lever
- Drill holes in the shift lever
- Drill holes in the front sprocket cover
- Rejet the Keihin CVK carb main jets (#140), and order new pilot jets #42)

Airbox removed and new aluminum battery box installed.

Drilled items.
Paint stripped and drilled chain guard
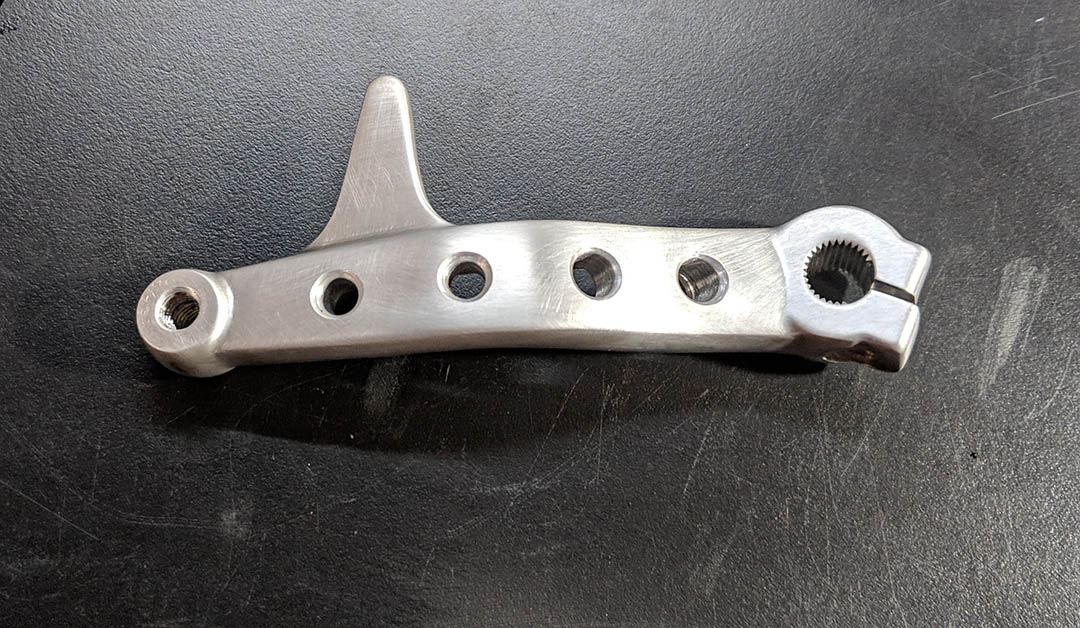
Drilled shift lever
JANUARY 2, 2019
Today I accomplished the following tasks:
- The first ordered part arrived from the UK, the Triumph Dresser Rail part #A9738012 and I installed it.
- Marked and cut (bobbed) a Triumph factory rear metal fender (the shorter version)
- Marked and cut (bobbed) the damaged front fender that came on this Bonneville

Tail section without Triumph Dresser Rail #A9738012

Tail section with Triumph Dresser Rail #A9738012
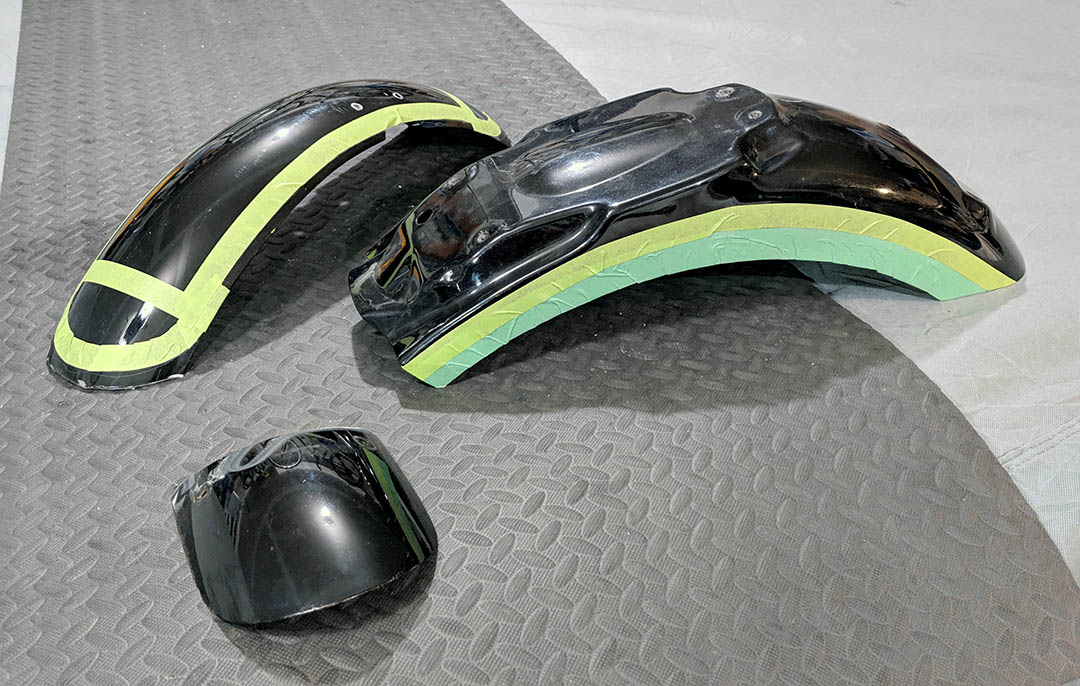
Front and rear metal fenders marked for cutting (bobbed).

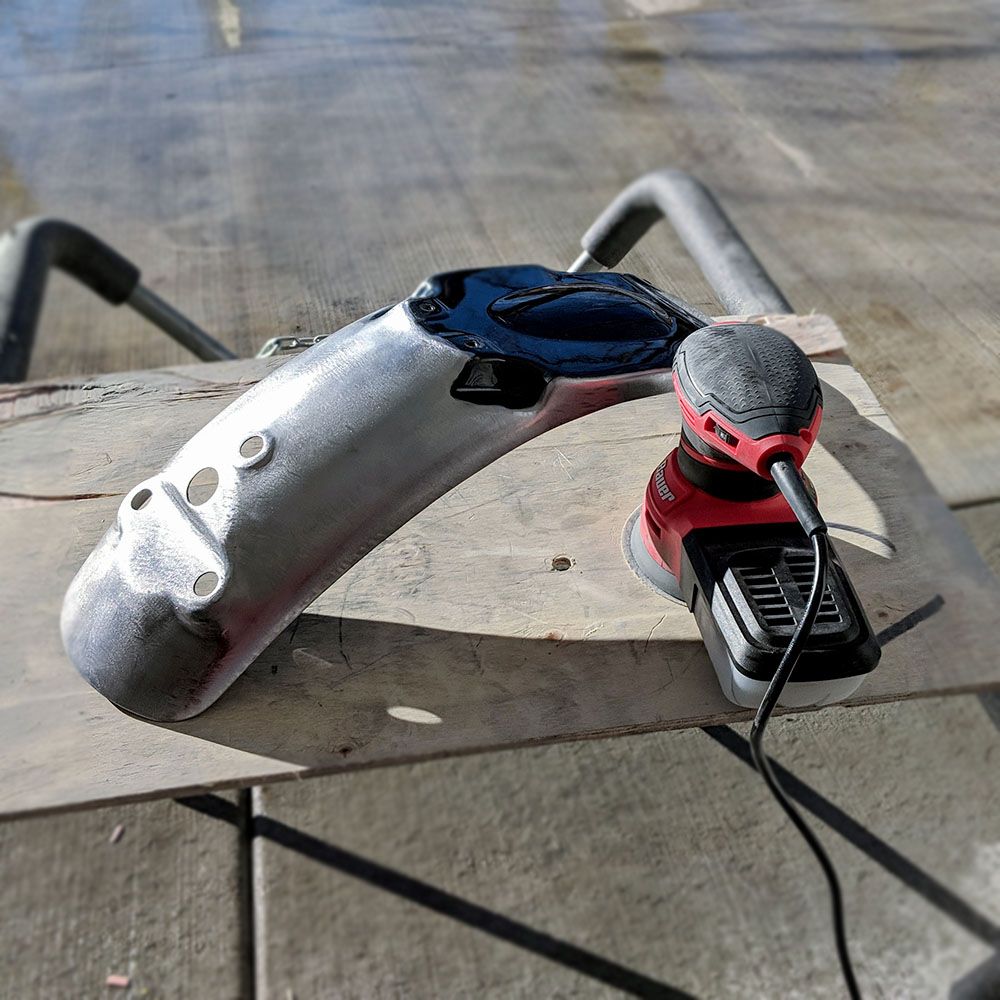
Front fender bobbed and ground to bare metal
Rear fender bobbed and ground to bare metal

Front and rear fenders bobbed and ground to bare metal
JANUARY 3, 2019
More progress was made today.
- Continued sanding and grinding on the front and rear fenders and the gas tank
- Mockups of possible directions for the cafe racer
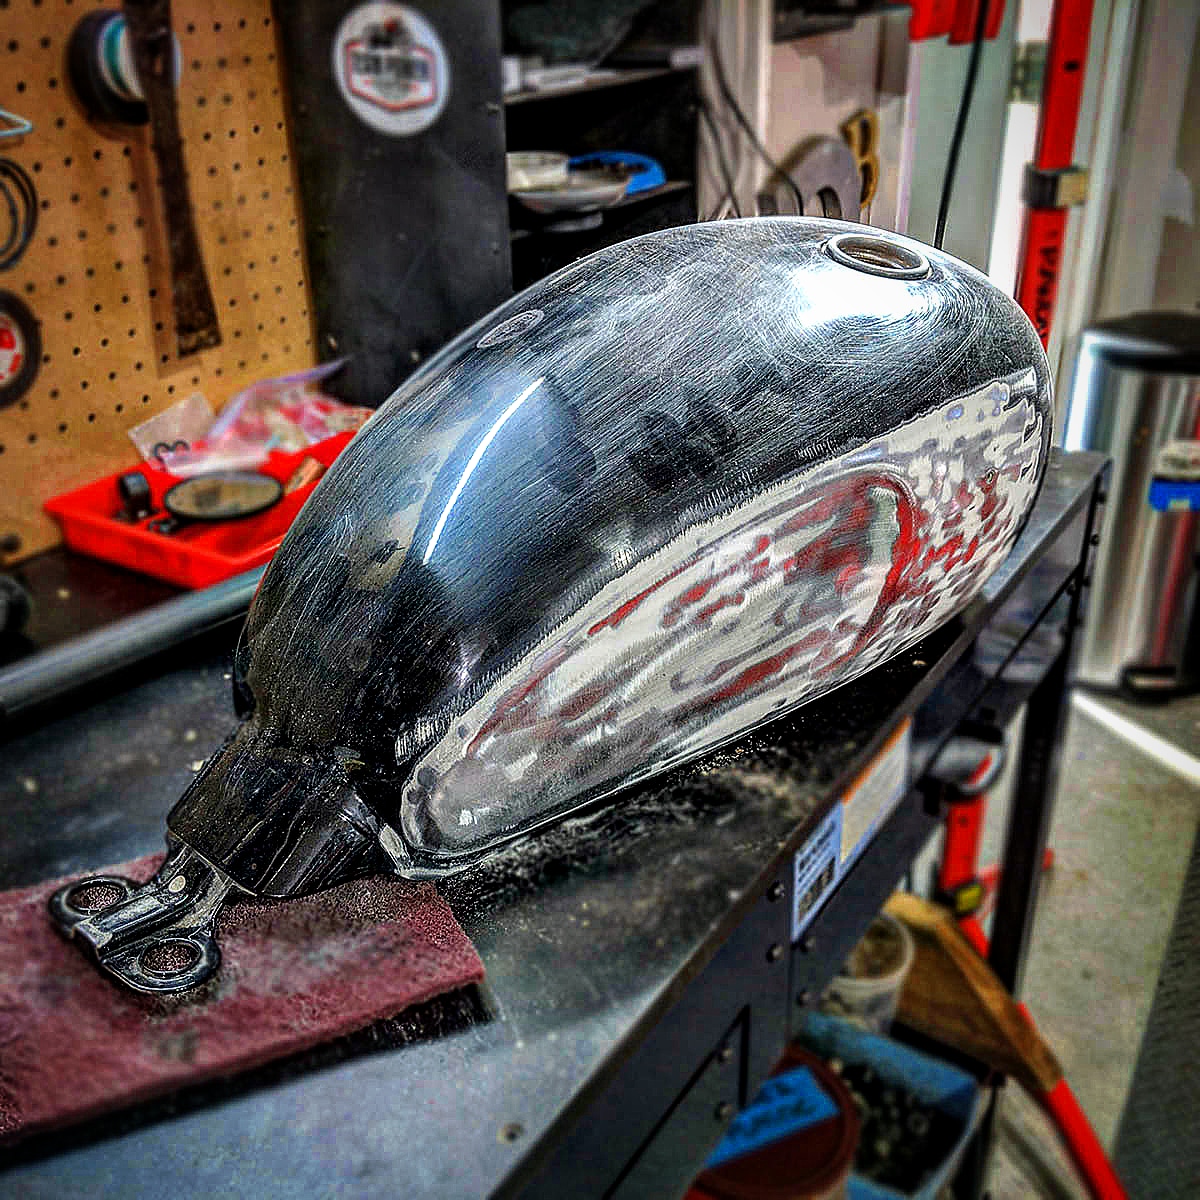
Gas tank in the process of going to bare metal
All black paint gone!

Remembered that I had a “Sixty Eight” tank cover and decided to mock it up… interesting.
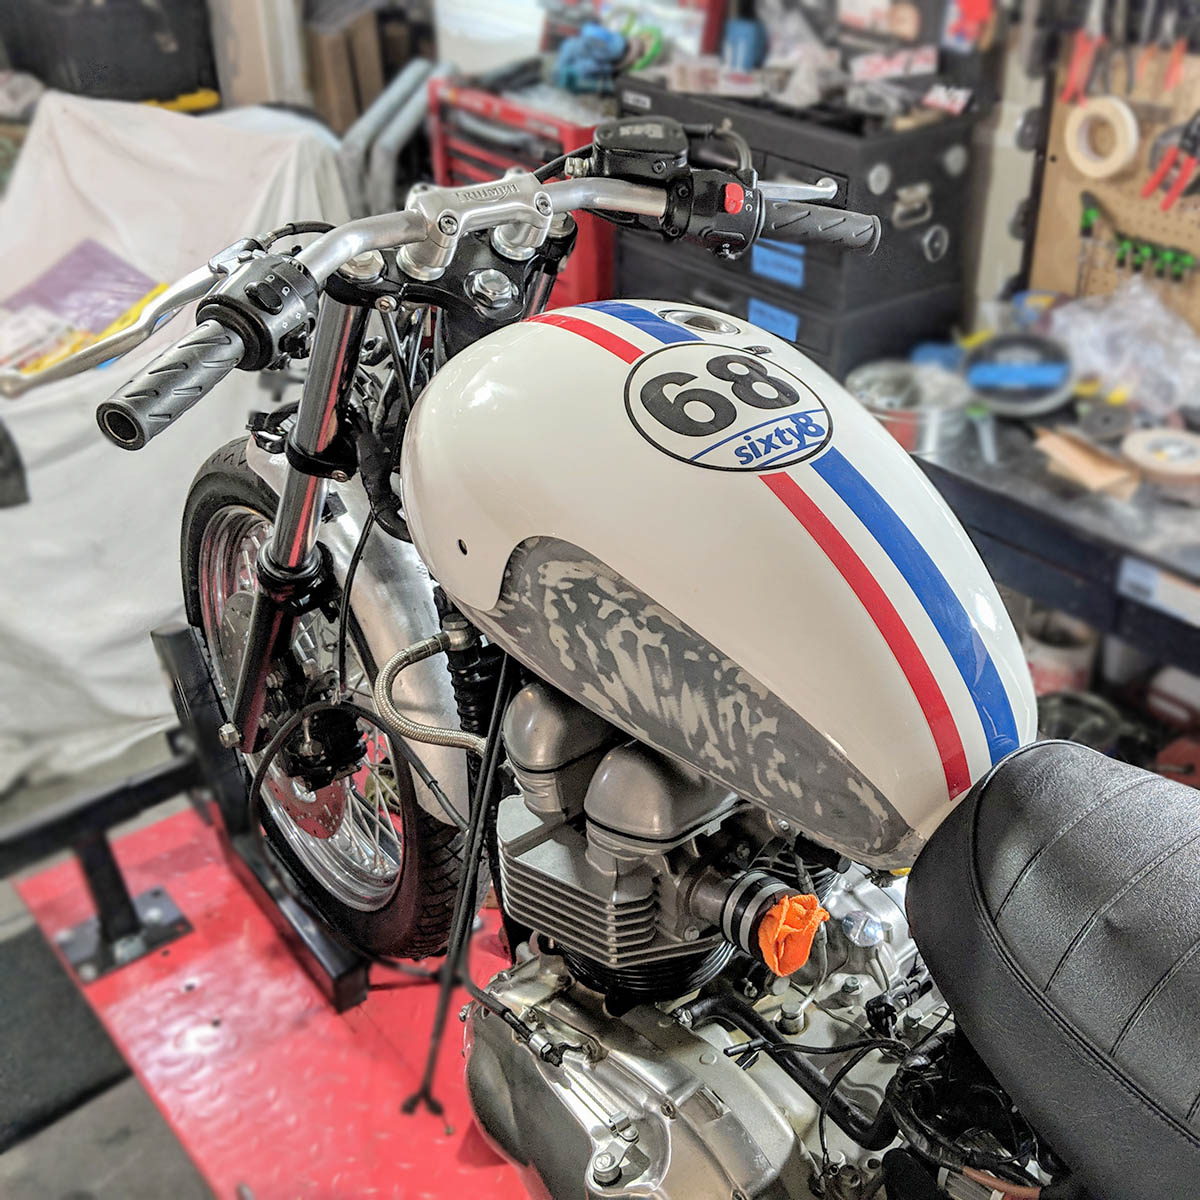
“Sixty Eight” tank cover on bare metal tank.
JANUARY 4, 2019
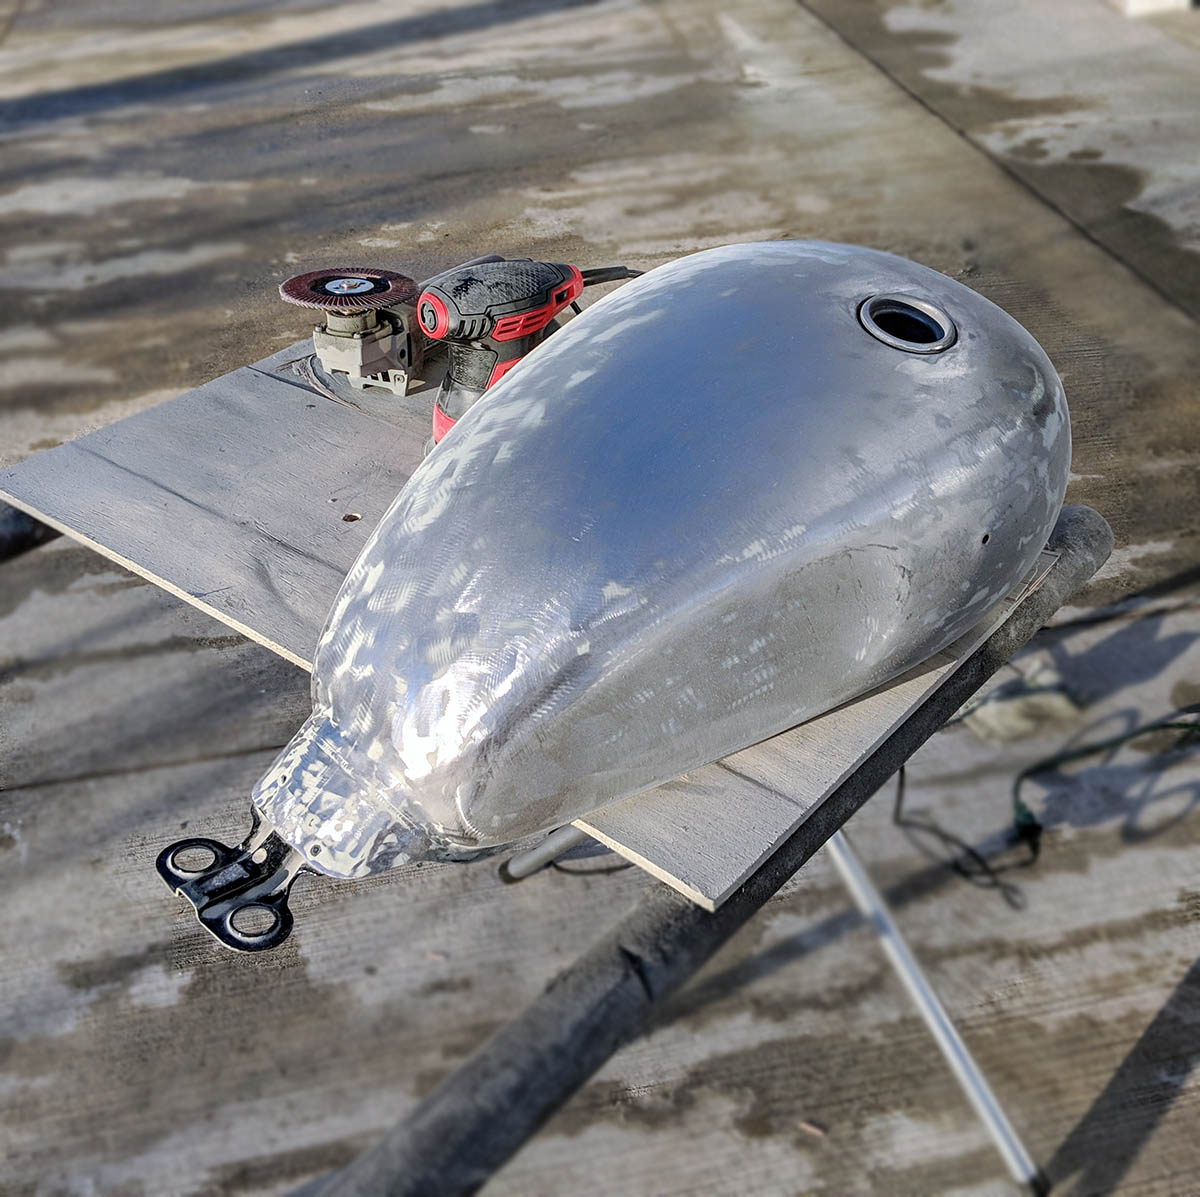
Today got up near 40 degrees in the Madison, WI area and was sunny. So, I opened the garage and worked part of the day in and outside of my garage, refining the finish on the bare metal pieces of the project bike. The general process I’ve arrived at is as follows:
- Use a 4.5″ angle grinder with an 80 grit flap disc to remove most of the paint and primer/filler
- Step that up to a 120 grit for finer paint/filler removal and smoothing
- Use a 6″ wire wheel on a post mounted bench grinder to remove additional paint and filler in crevices and seams
- Use a 5″ orbital sander with 150 grit paper to smooth out and refine the metal finish
- Step this up to 220 grit for finer smoothing
- (There may be additional steps I will take when I get ready to coat the bare raw metal with 2-stage urethane clear coat.)

Front fender finer sanding
Rear fender in sanding process
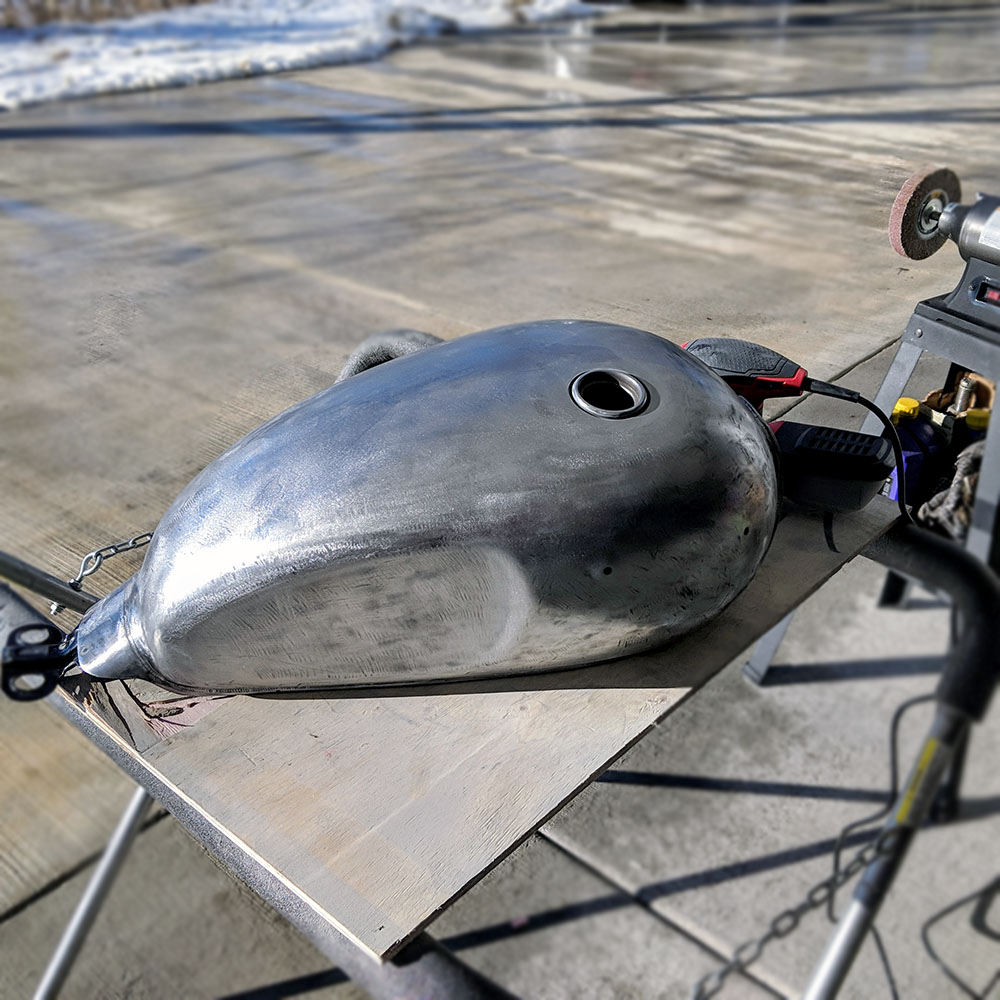
Gas tank sanding
Left side view
Left side – higher view
JANUARY 5, 2019
Another warm day in the Madison, WI area, so again I opened the garage and worked on the bare metal pieces of the project bike.
- I used a 400 then 600 grit sanding wheel in my angle grinder, to get an even smoother and shinier finish.
- I also used 600 grit sandpaper on my orbital sander to get at more difficult sections.
Additionally, I went through the parts delivery from Dime City Cycles and did the following:
Discovered that the taillight, front turn signal clamps, and billet footpegs will not work on this bike project – so those will need to be returned.
I did however, successfully wrap the headers with the DEI Titanium Black pipe wrap for a pretty nice look.
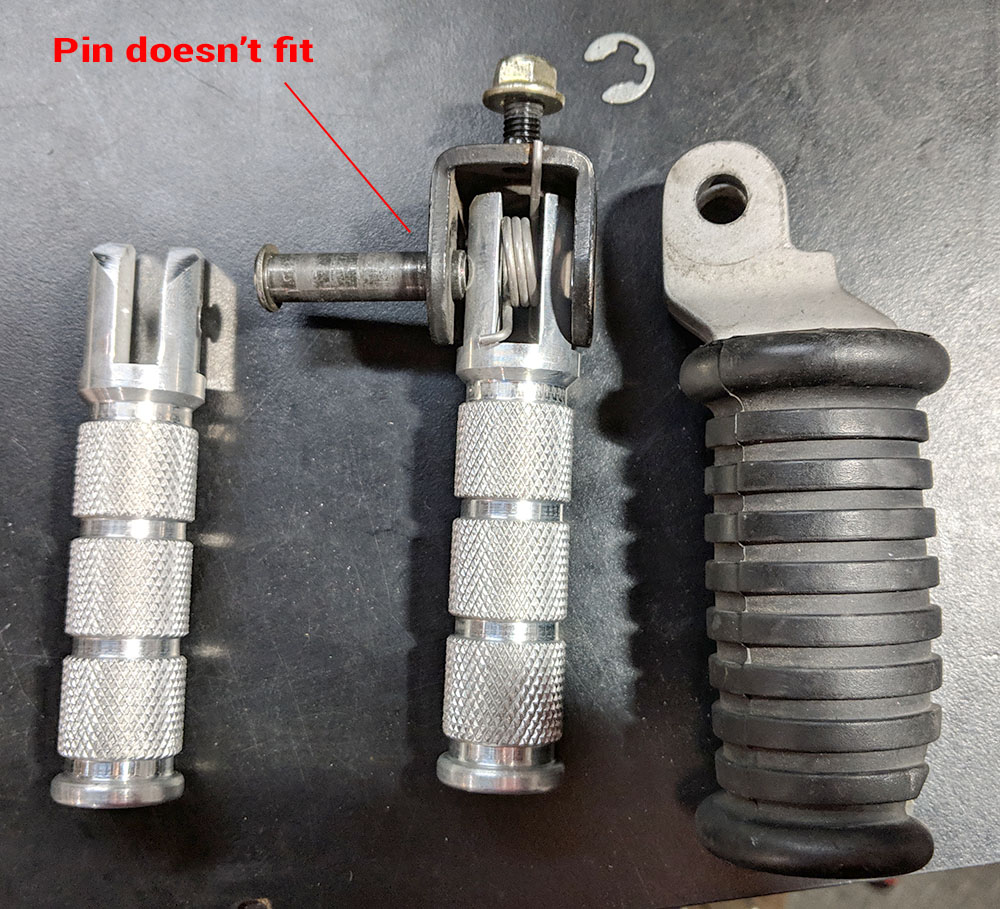
The DCC Billet Foot Pegs do not fit as advertised.
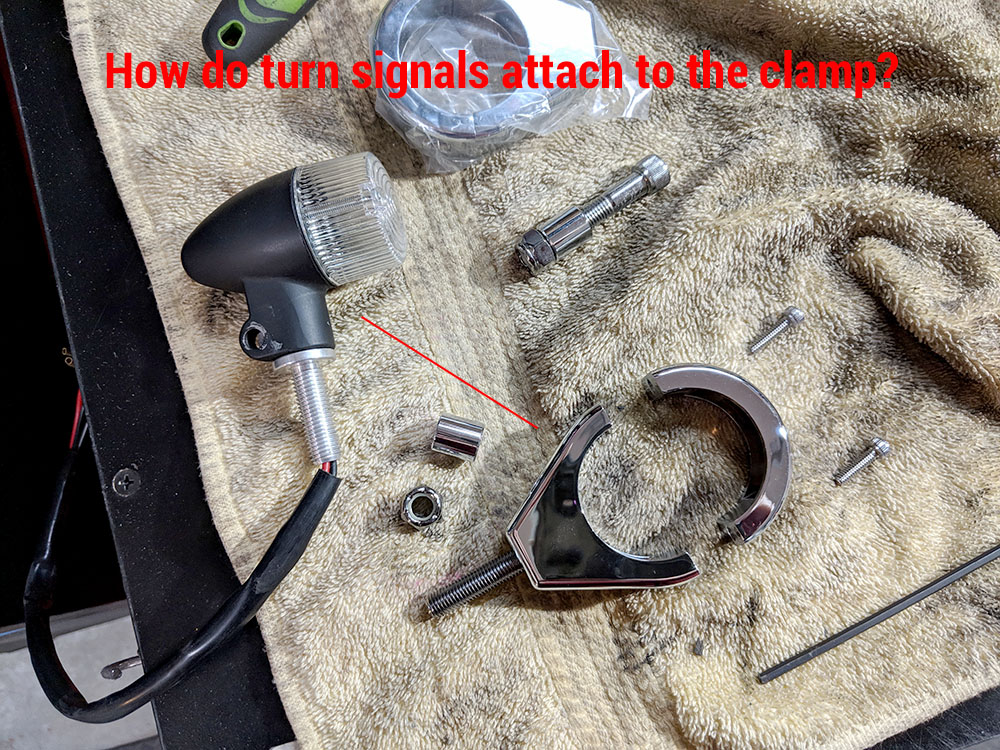
The front turn signal brackets do not appear to work with my turn signals!
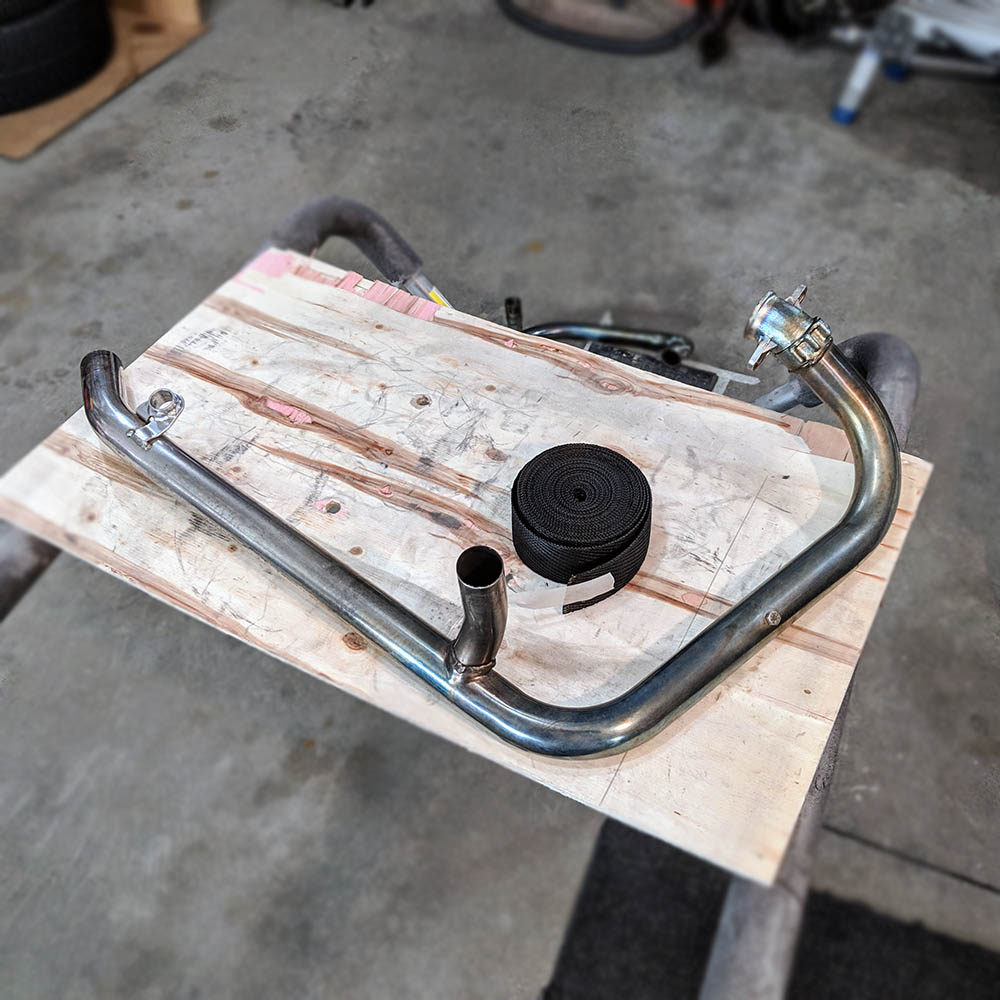
Ready to start header wrap with DEI Titanium Black
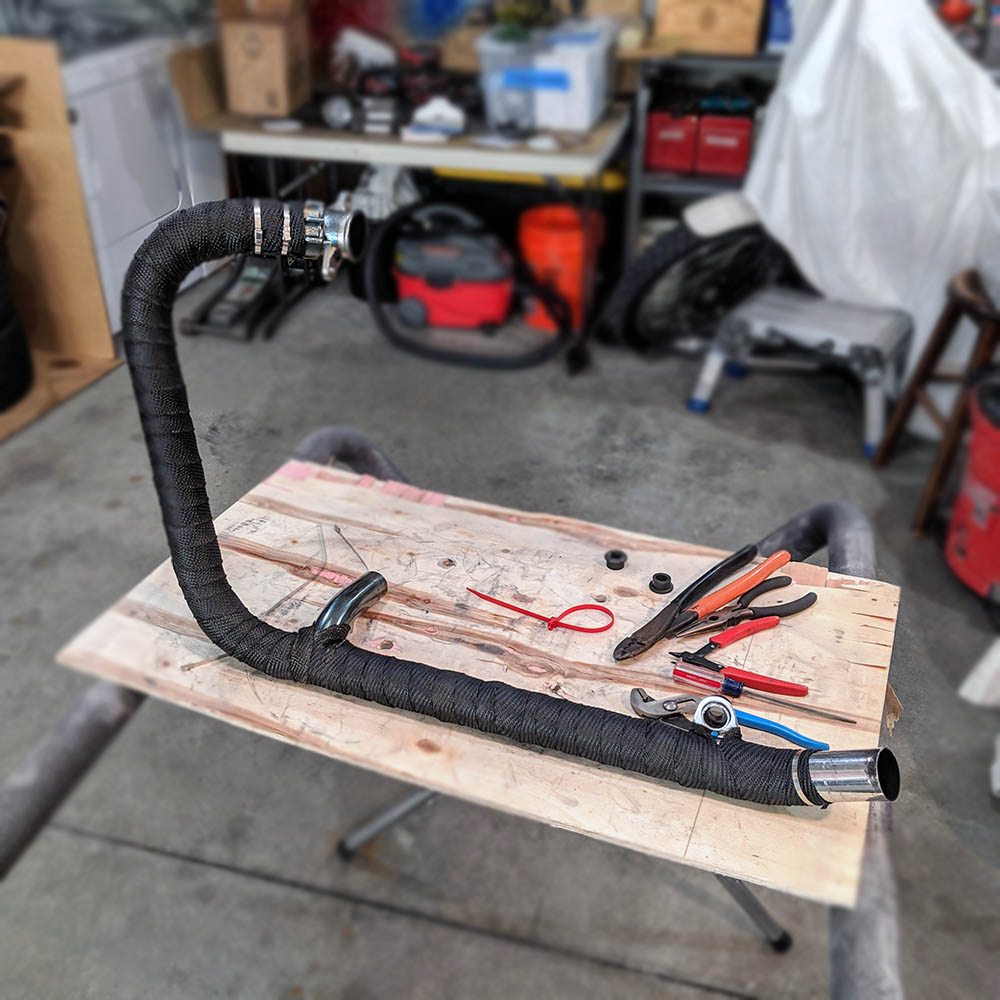
One header wrap completed
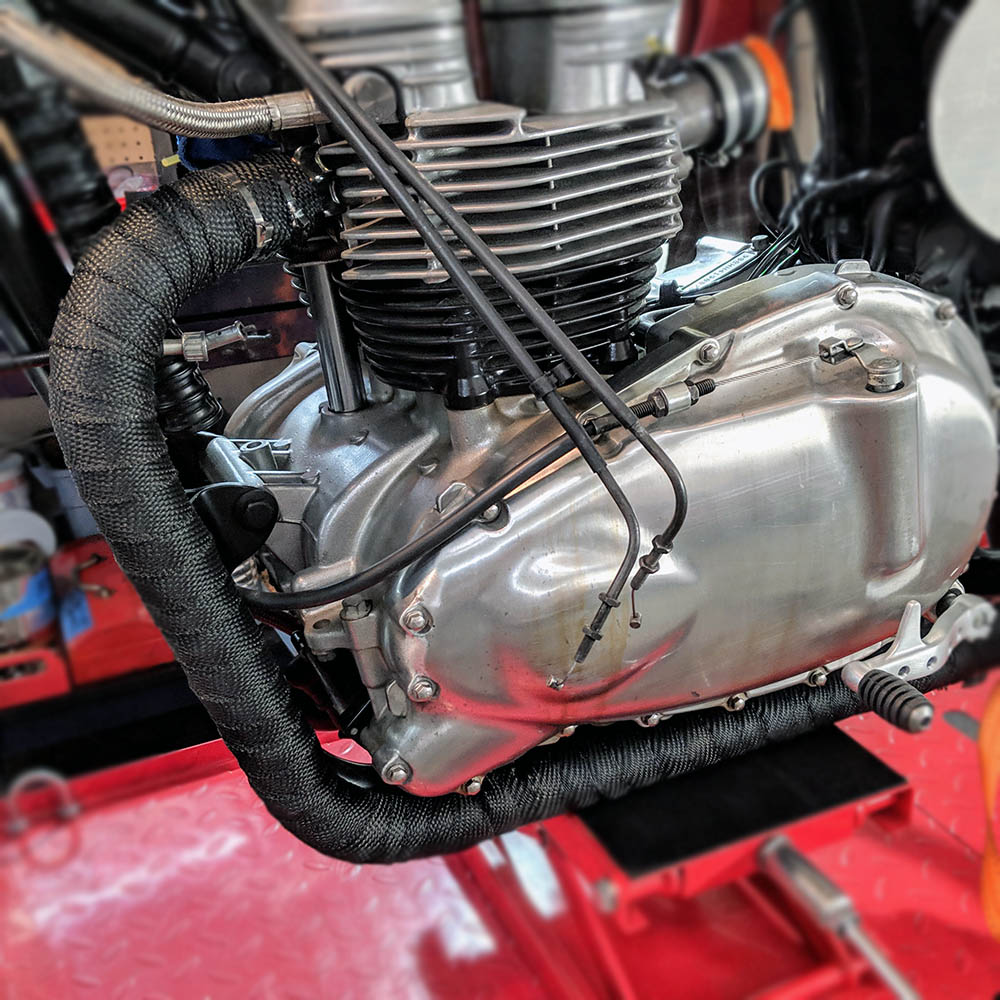
Completed header wrap mounted on bike – looks good!
JANUARY 7, 2019
Today I managed a number of tasks:
- Opened my first order of parts from NewBonneville!
- Explored options for getting a headstock lock key, and another ignition key from Team Power Center
- Installed 2 Baldwyn luggage spools on the dresser rail
- Installed billet Joker Machine handlebar risers/clamps
- Mocked up the new Motone bobbed front fender (brushed aluminum) for a look (waiting on the matching rear fender to be delivered as it is back ordered)
- Installed the Motone ignition relocation bracket on the right side, front of frame
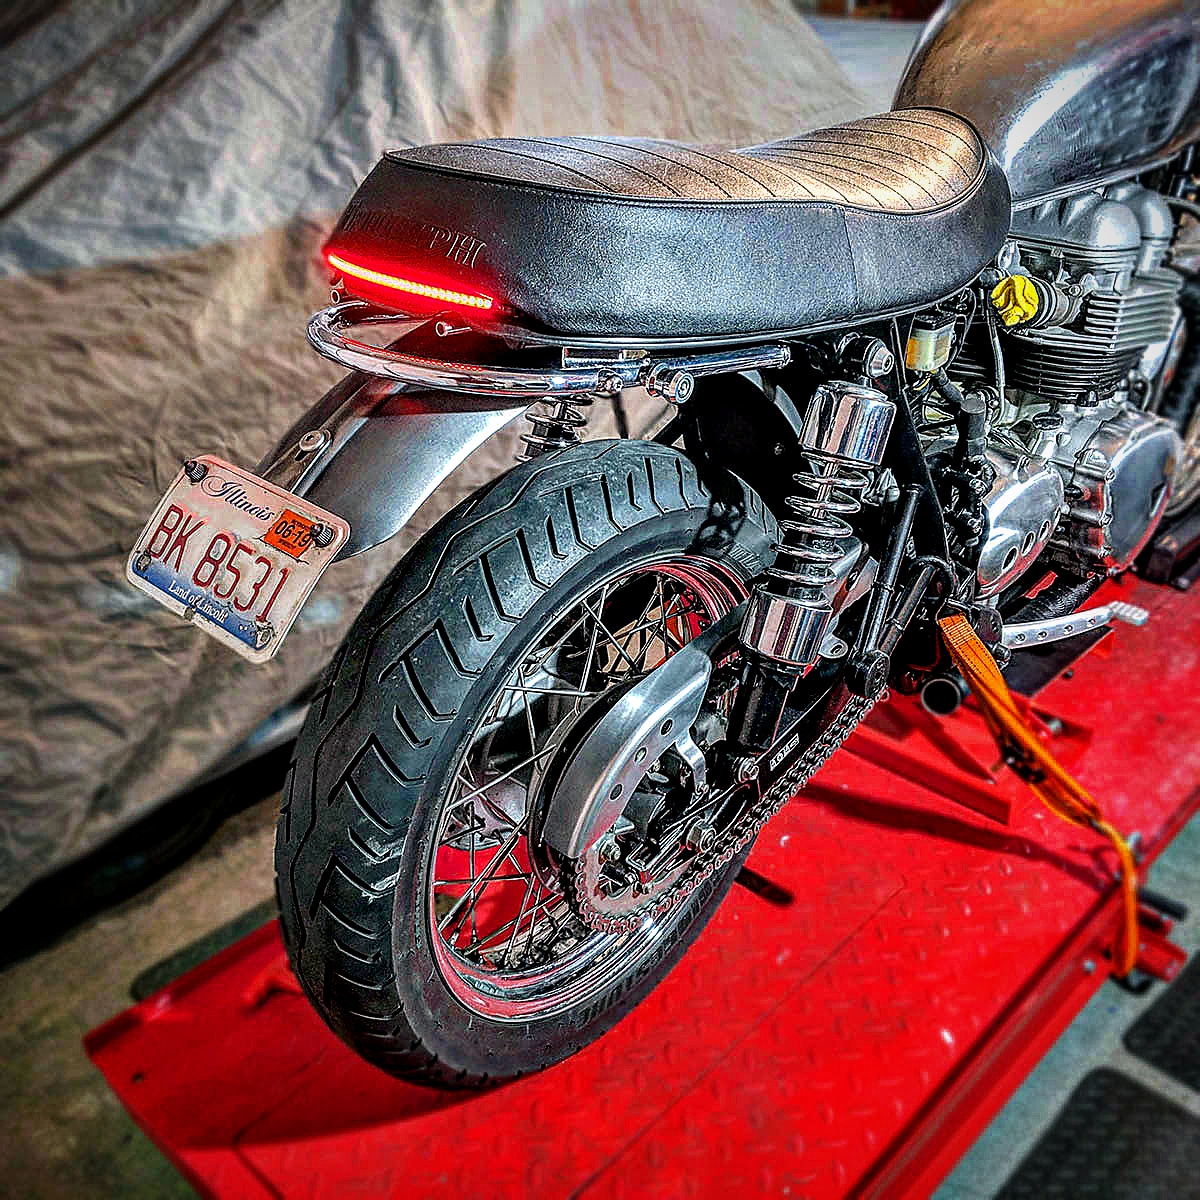
- Installed the DCC 8″ Flexible Slimline LED Integrated Tail Light / Indicators on the back of the Triumph seat pan and temporarily wired them up for a mockup test.
- Modified a $20 swap meet metal fender to use as the rear fender on this build, and fabricated a license plate holder/frame
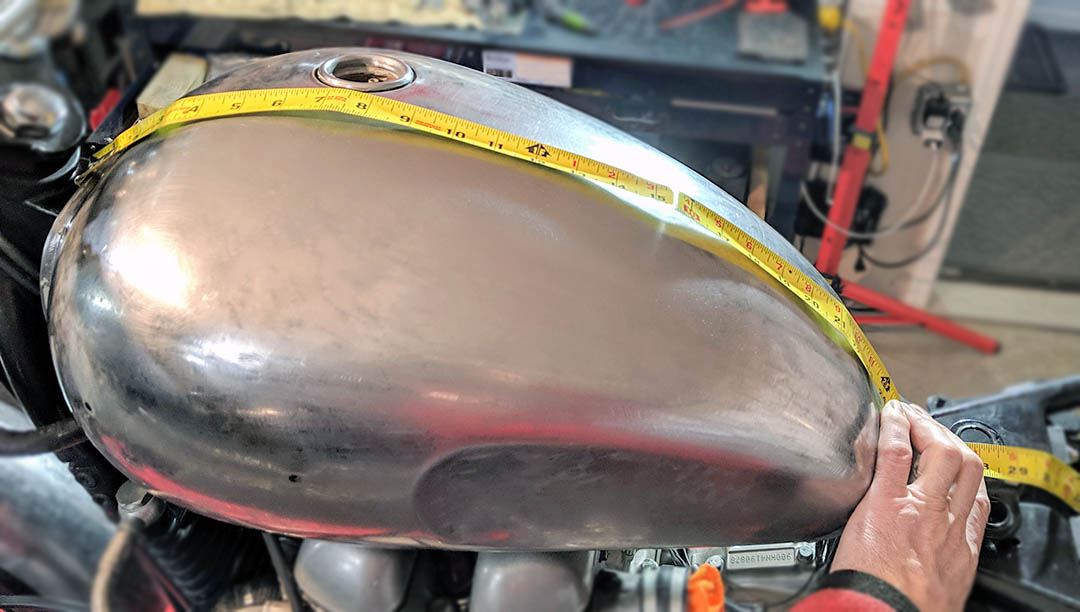
Measuring the gas tank for potential stainless steel strap
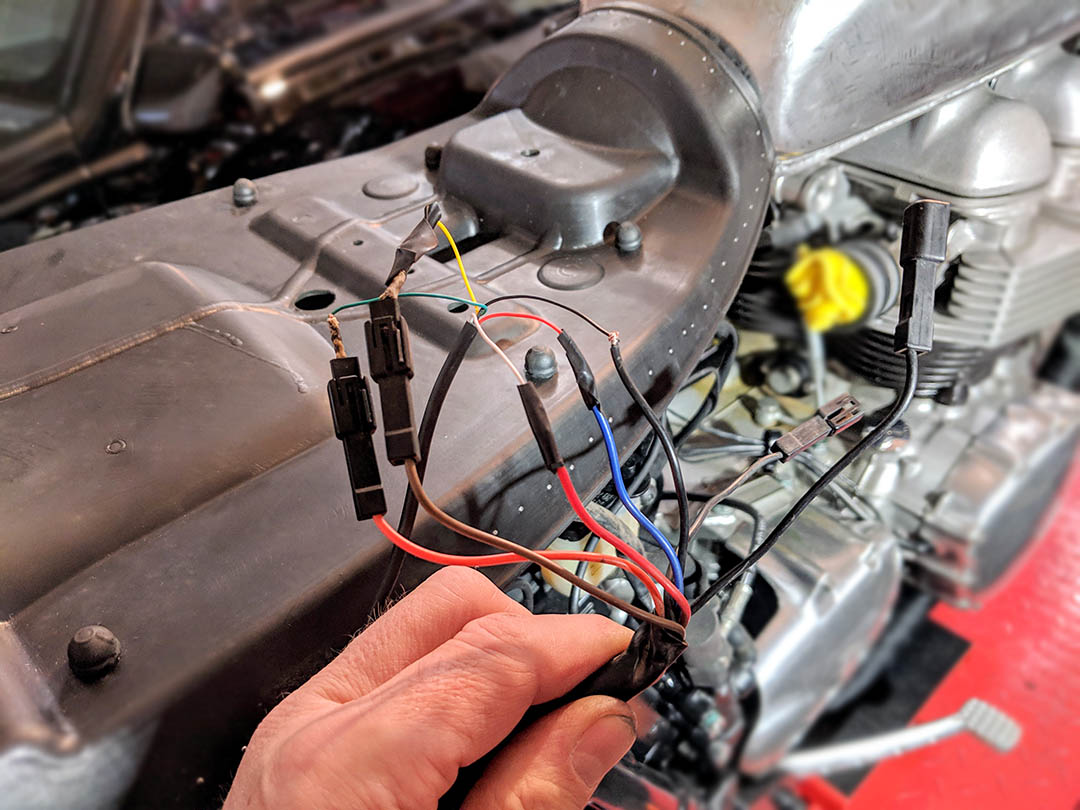
Wiring up the LED taillight/indicator strip

LED taillight test
Baldwyn luggage spool attached to dress rail
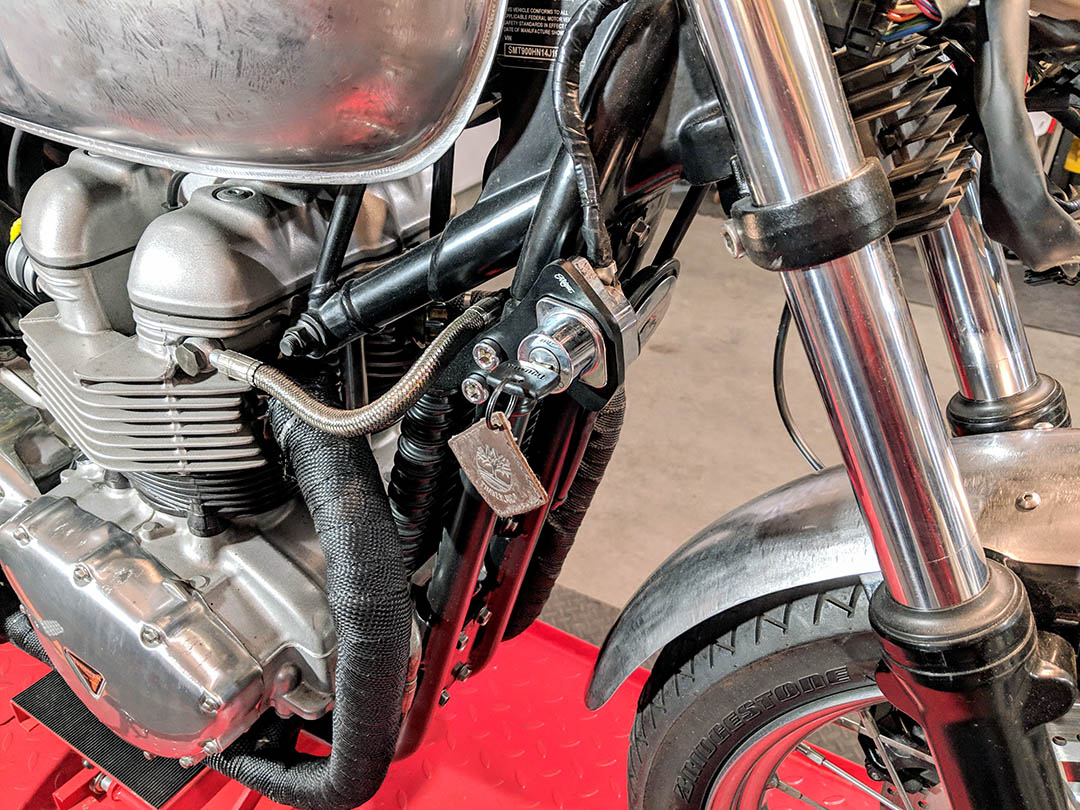
Motone Ignition Relocation Bracket

Joker Machine billet anodized handlebar risers
JANUARY 8, 2019
I worked on the following tasks:
- My first British Customs order arrived
- Installed the BC Shorty Predator mufflers
- Installed the BC Mule Swing Arm Bushings
- Test fitted (visual only) the BC pleated seat cover
- Fabricated a right rear side, chain guard mounted, license plate holder bracket
- Test fit a Triumph Heritage tank badge (left) for visual decision
- Ordered a replacement headstock lock and keys from Team Power Center
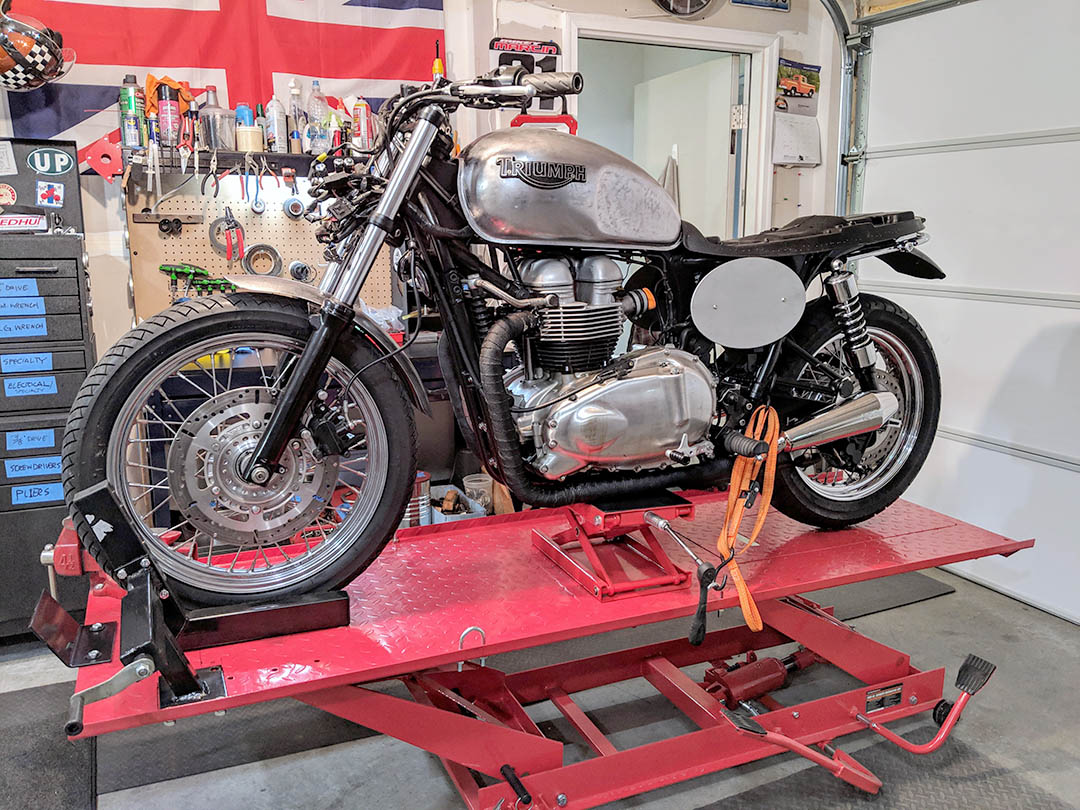
Overall view of tasks completed today.
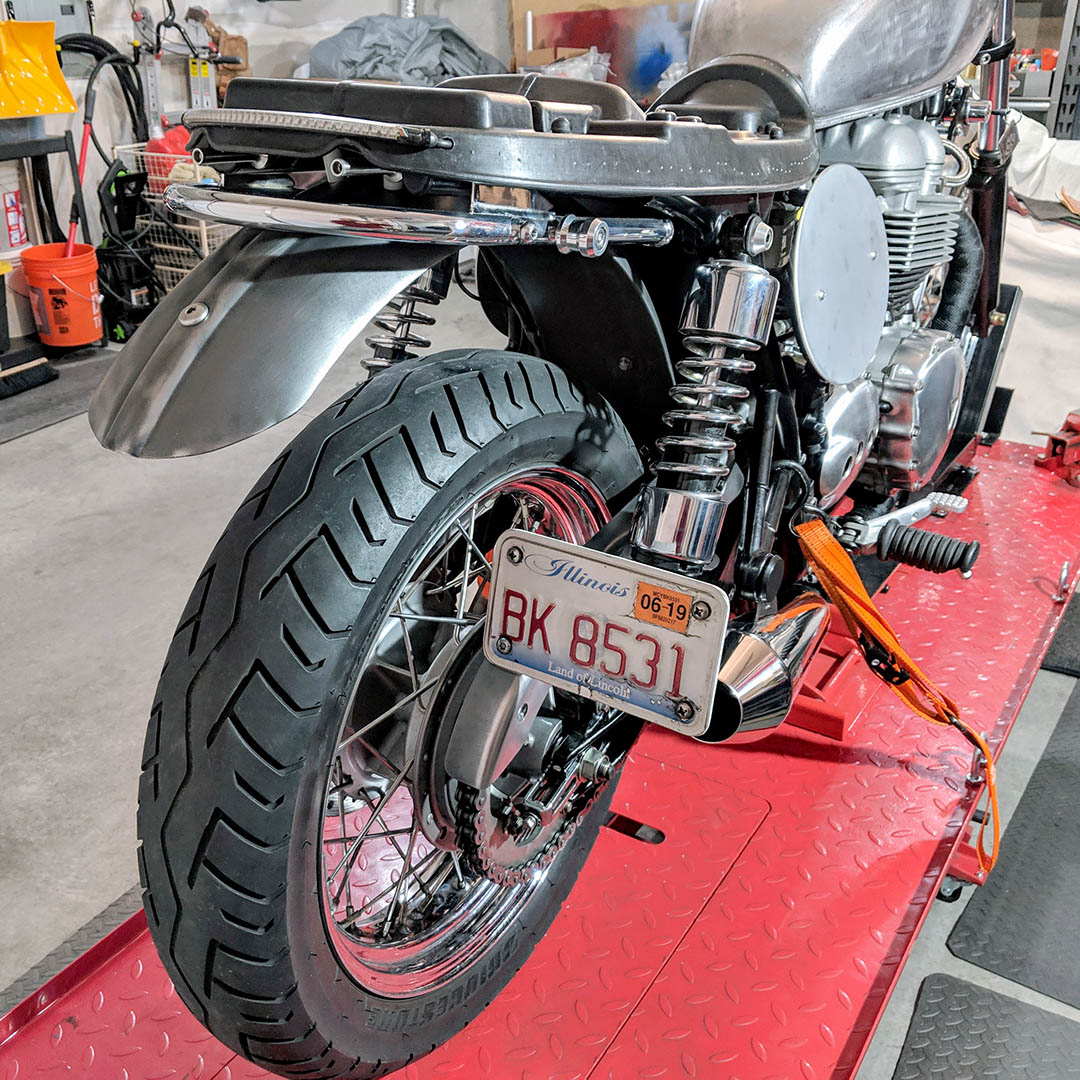
Right side rear view of items completed today.

Right side BC Shorty exhaust
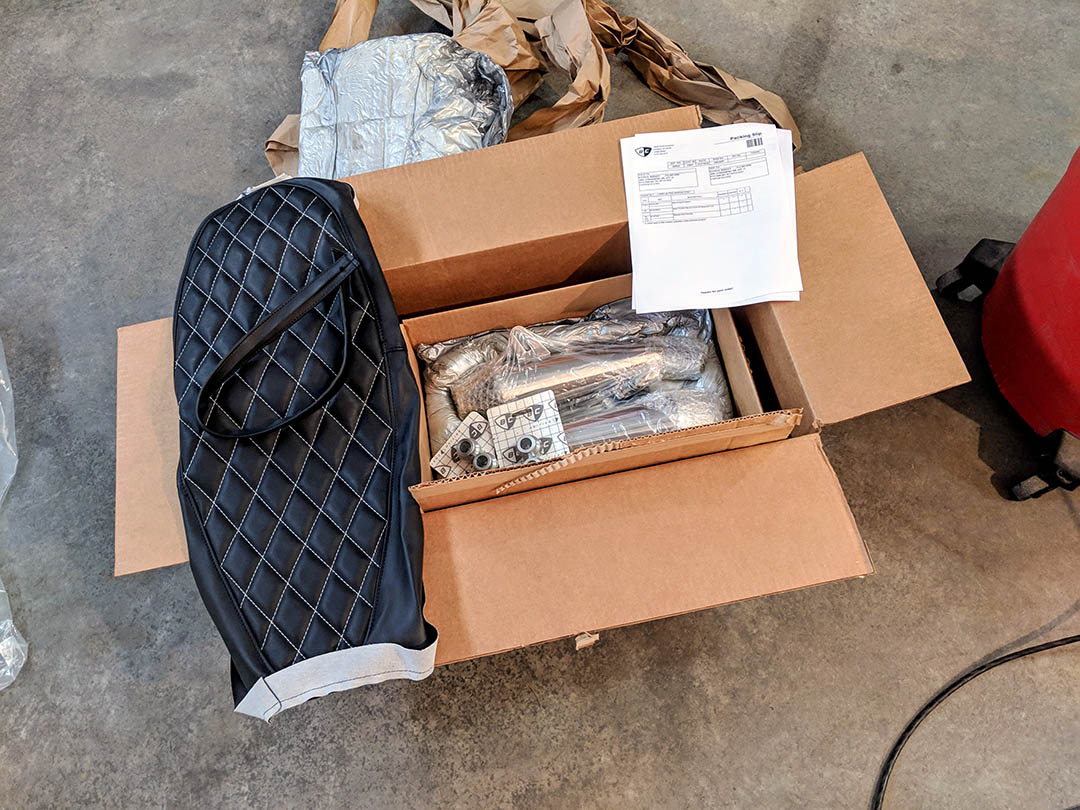
First British Customs parts delivery
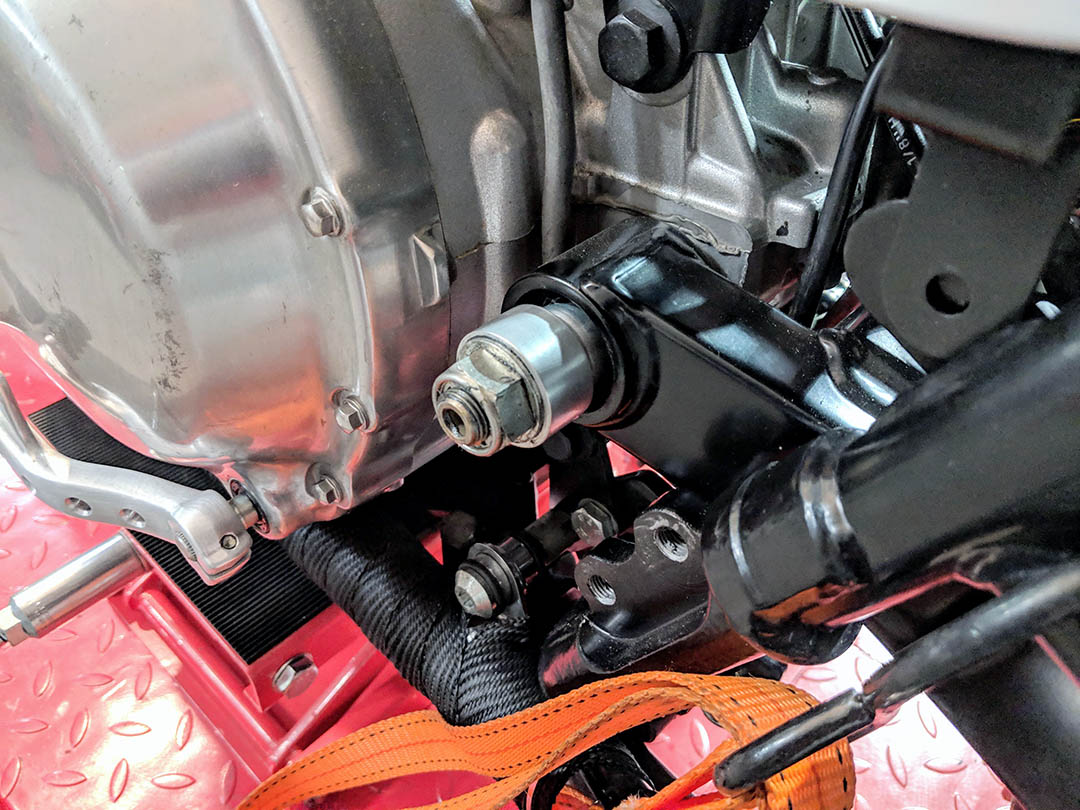
Mule swing arm bushing – left side
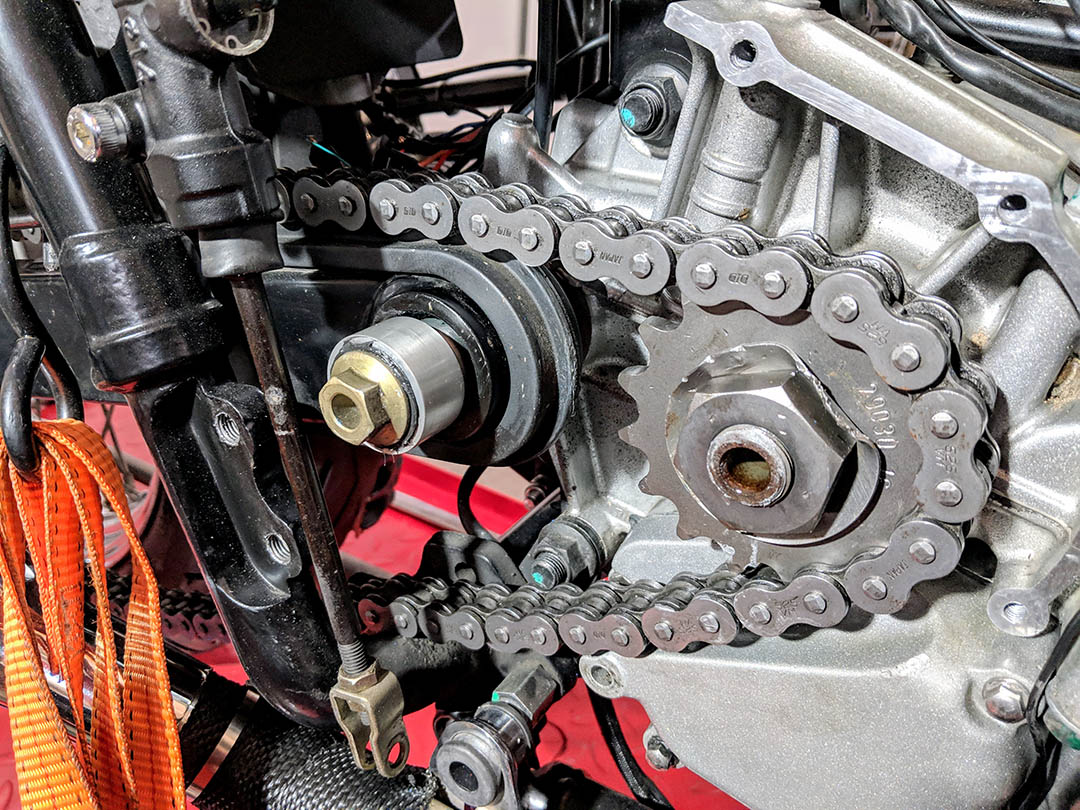
Right side BC Mule swing arm bushing, plus new 16 tooth front sprocket

Fabricated license plate bracket
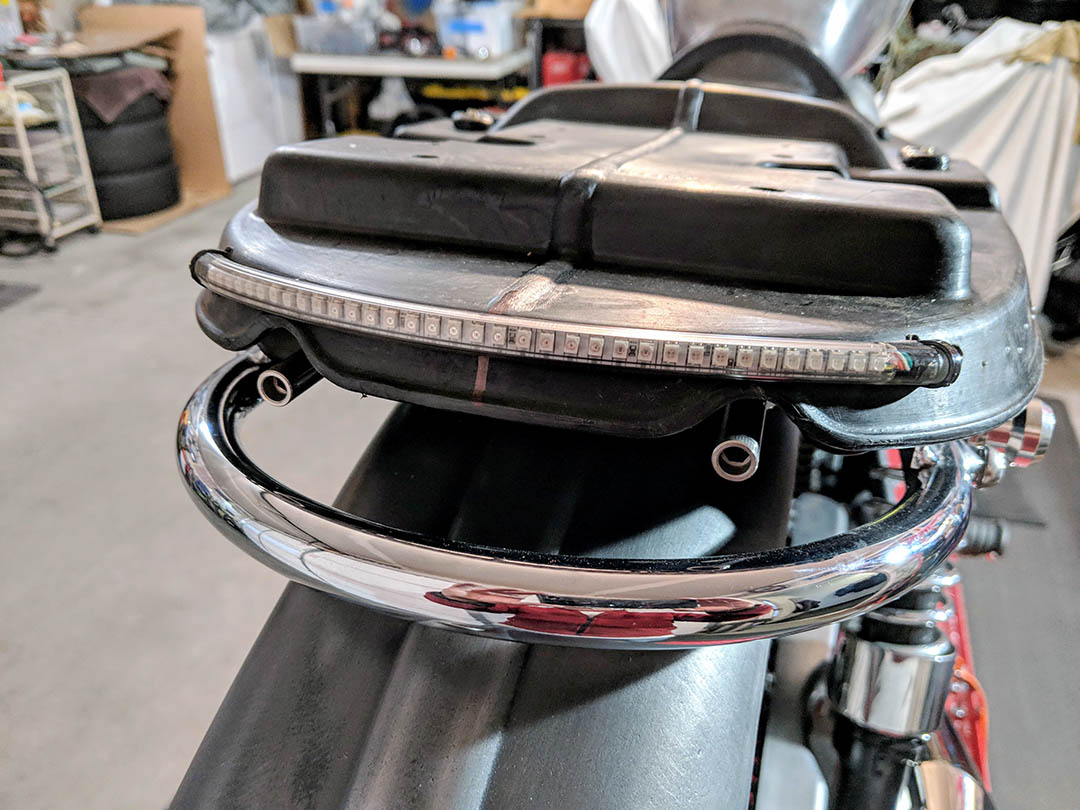
Closeup of LED taillight/indicators assembly (off) mounted to OEM Triumph plastic seat pan

Closeup of LED taillight/indicators (on), plus new stainless steel extended seat bolts
JANUARY 9-24, 2019
My rate of task completions have slowed as I am waiting on parts, or we got some very cold winter weather, and frankly, there are fewer things to do. But there has been some progress.
- I purchased several items from Denverdave on the https://newbonnevillleriders.com online forum. I installed the brushed aluminum skid plate and a wire-brushed chrome dresser rail.
- I reupholstered the stock seat with a diamond stitch pattern skin purchased from British Customs.
- I ordered a replacement headstock lock and key from Team Power Center, in Janesville, WI.
- Finished final wiring of the rear LED taillight and turn signals, with BikeMaster resistors.
- Mocked up the Monza Gas Cap that I ordered from NewBonneville.com – looks great!
- Modified the Triumph Heritage tank badges to look older, and stand out better against the raw metal tank.
- Fabricated a better license plate bracket for the rear fender.
- Fabricated an extra extension on the right side number plate bracket to allow for easier removal.
- Installed the 1.9″ Dime City Cycles tachometer and wired it up to be sure it works
- Installed “Outercovers” pre-filters over the K&N Pod filters
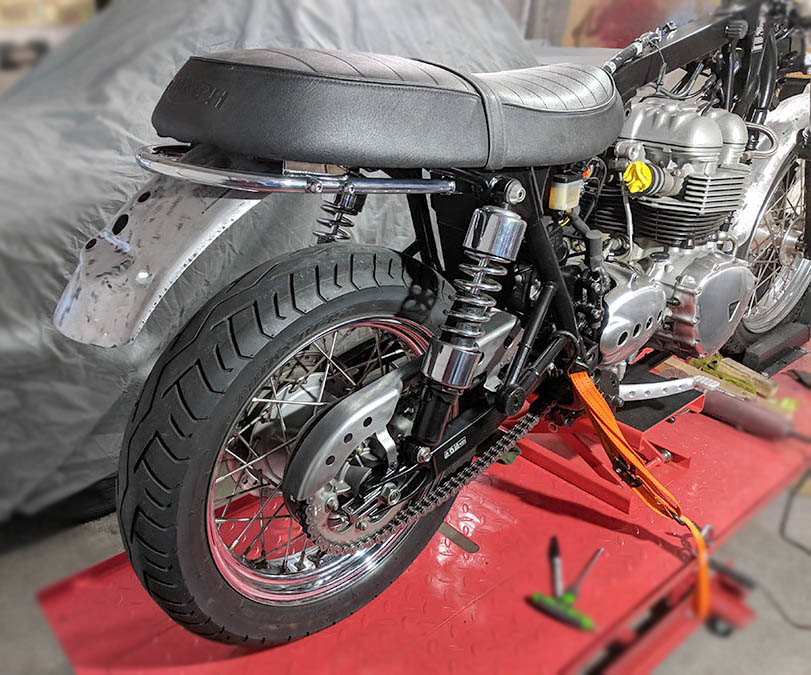
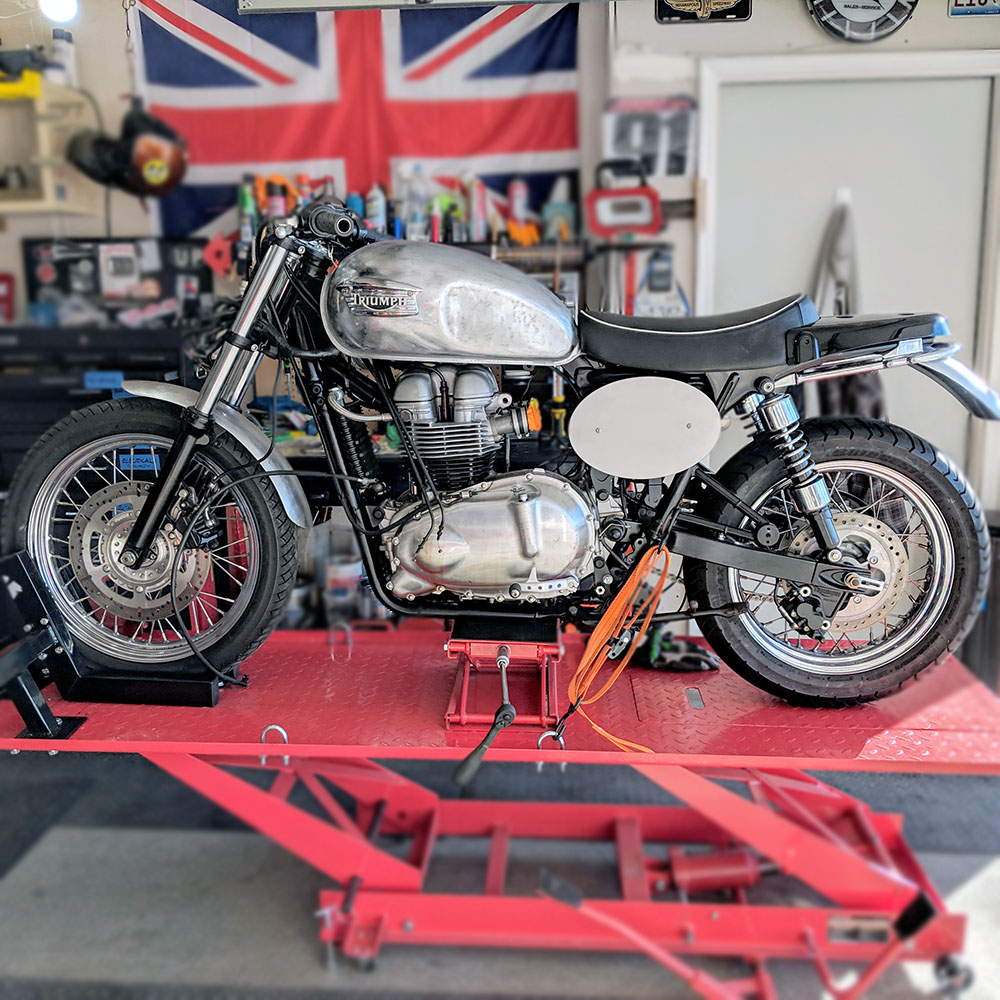
- You may notice that the Bonneville now sports Sun alloy wheels and Avon Roadrider tyres. These I had on hand for another project and decided to put them on this bike. This change reduces the weight of the bike quite a bit and makes handling much more responsive.
I’m waiting on new Sharky headlight brackets and custom instrument cluster bracket from Bonneville Brackets that will allow me to finalize the front of the bike.
Clear coating and finishing the raw metal parts will need to wait until we have warmer weather.
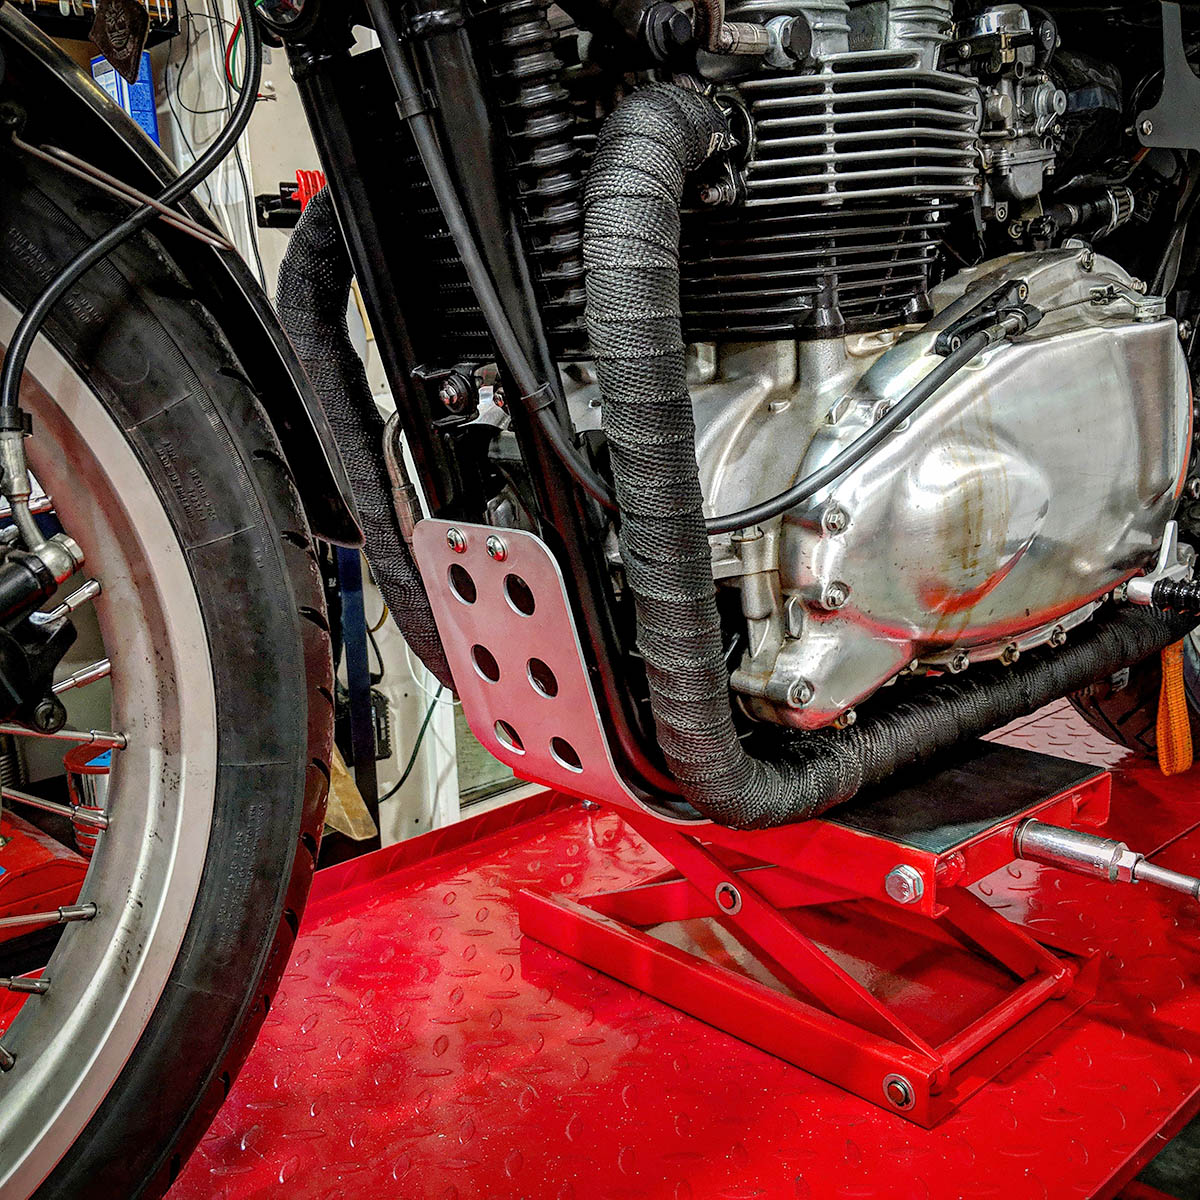
Triumph brushed aluminum skid plate installed
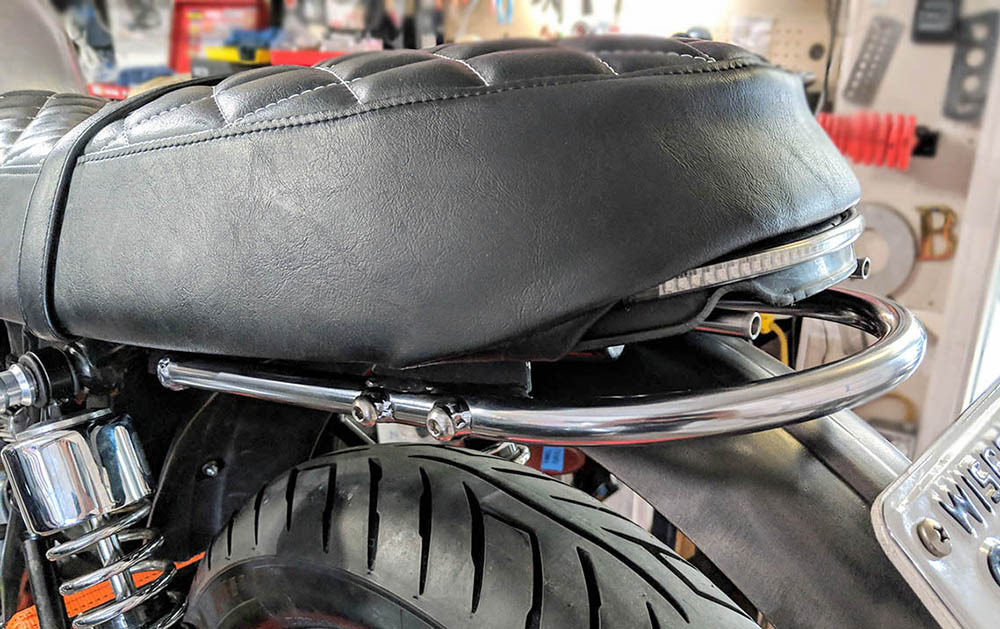
Triumph dress rail installed after I wire-brushed it.

The British Customs diamond stitch seat skin looks great!
First start of the engine after re-jetting carbs and new exhausts.

I mocked up the Monza Gas Cap from NewBonneville.com
I modified the look of the Triumph Heritage Tank Badges to look older and to stand out better on the raw steel gas tank.
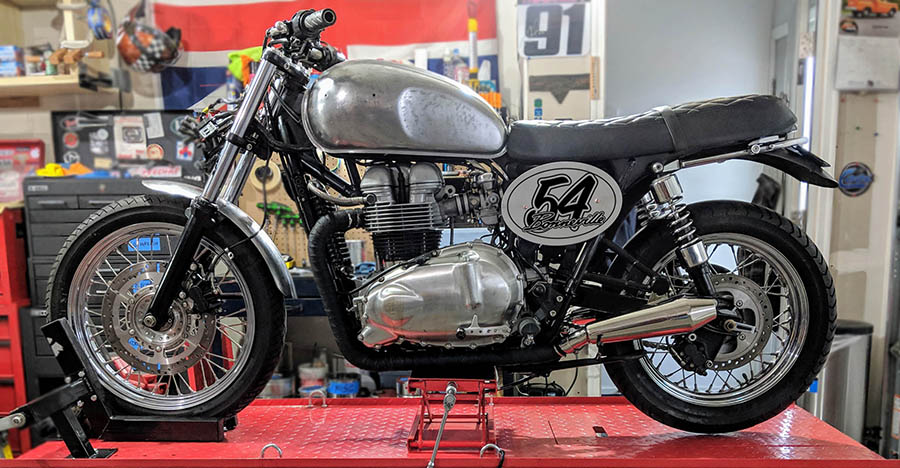
I’ve finalized the design for the number plates and sent them off to my friends at YourBagTag.com for laser engraving.
After getting the carbs re-jetted and back together, I was able to take the bike for its first short test ride.
MARCH 14-16, 2019
The last few days have been closer to Spring e-weather here in Madison, Wisconsin. This has allowed me to get out on this project bike and fine tune the carbs, and tweak other things like the mirrors. etc.
After some test rides, I’ve ended with the carbs set up with: 42 pilot jets, 145 main jets, and 2 shims on the stock needles. This allows the bike to pull strong all along the RPM curve.
The list of things to complete is getting very short. They include:
- Install Ikon progressive front fork springs
- Matt clear finish the gas tank, fenders and chain guard
- Replace the speedometer after discovering the odometer adjustment handle on the OEM speedo is broken
- Install the side number plates as soon as they arrive
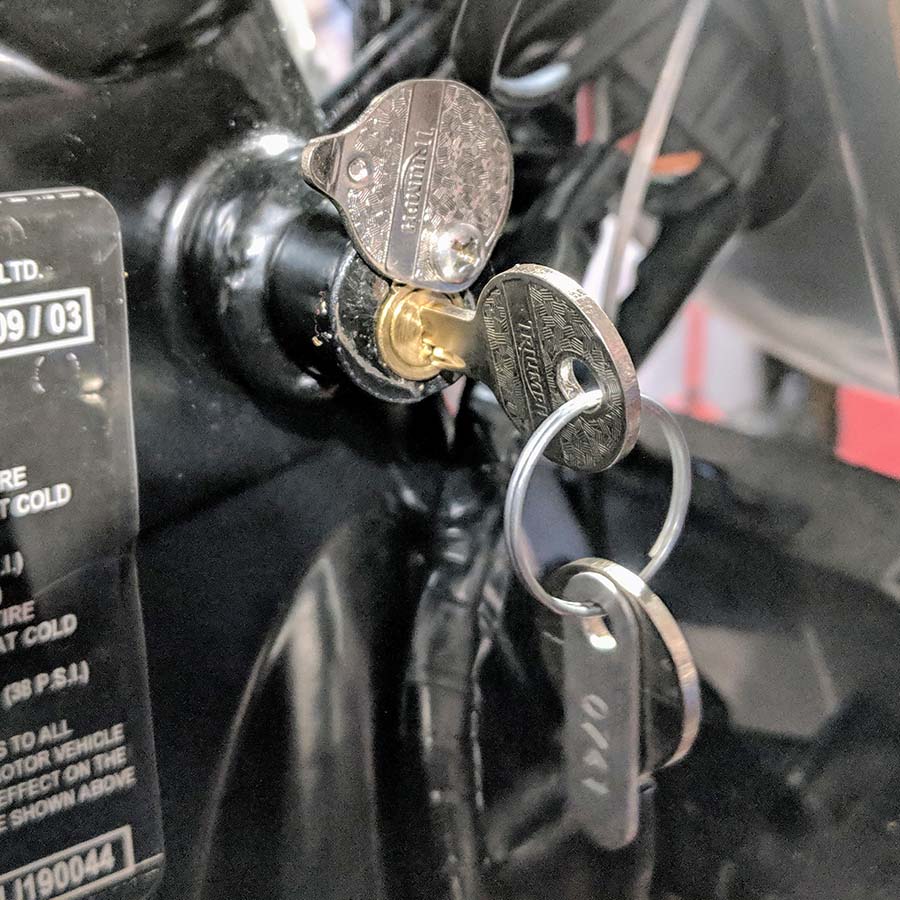
A new fork lock had to be installed as the previous key had been lost.

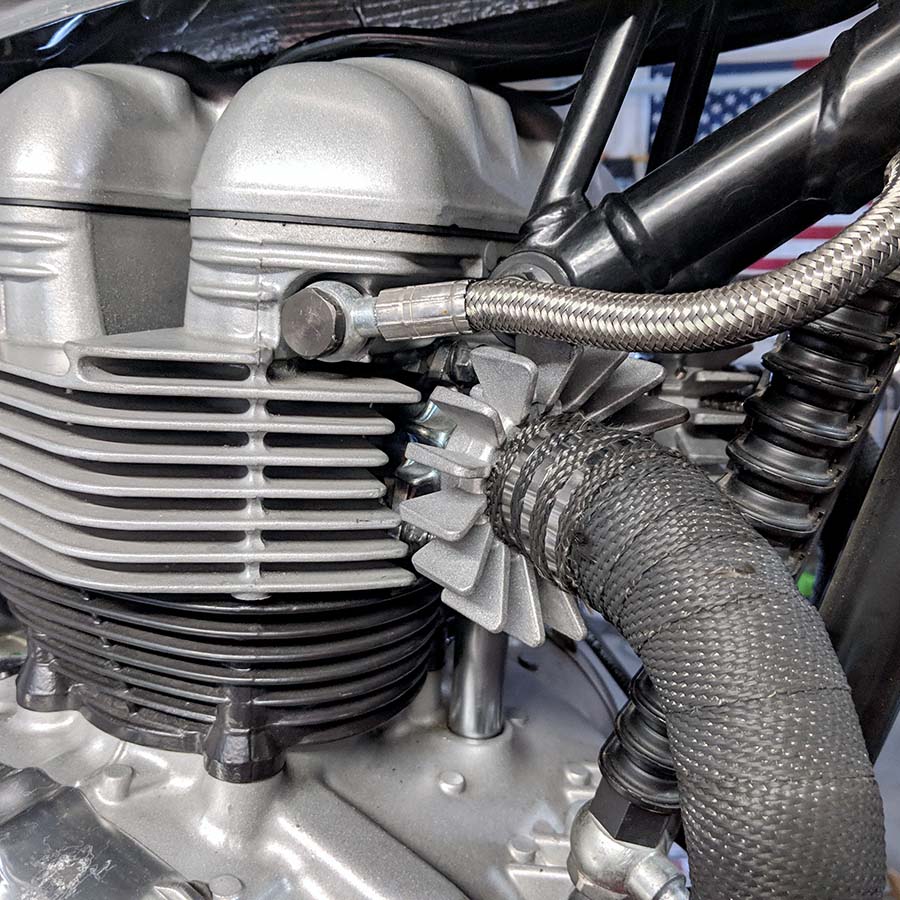
I installed a set of Motone exhaust fins to give it a more classic 60’s Bonneville look.
MARCH 20, 2019
The side number plates arrived today from my friend Steve Wilson at YourBagTag.com – They were laser etched out of the aluminum plates I sent to him using my custom design layout provided as a PDF file. Steve and Rebecca provide all kinds of creative labels, tags and other custom, hand-made items for a wide variety of uses. Check them out! Great job Steve – I love them!
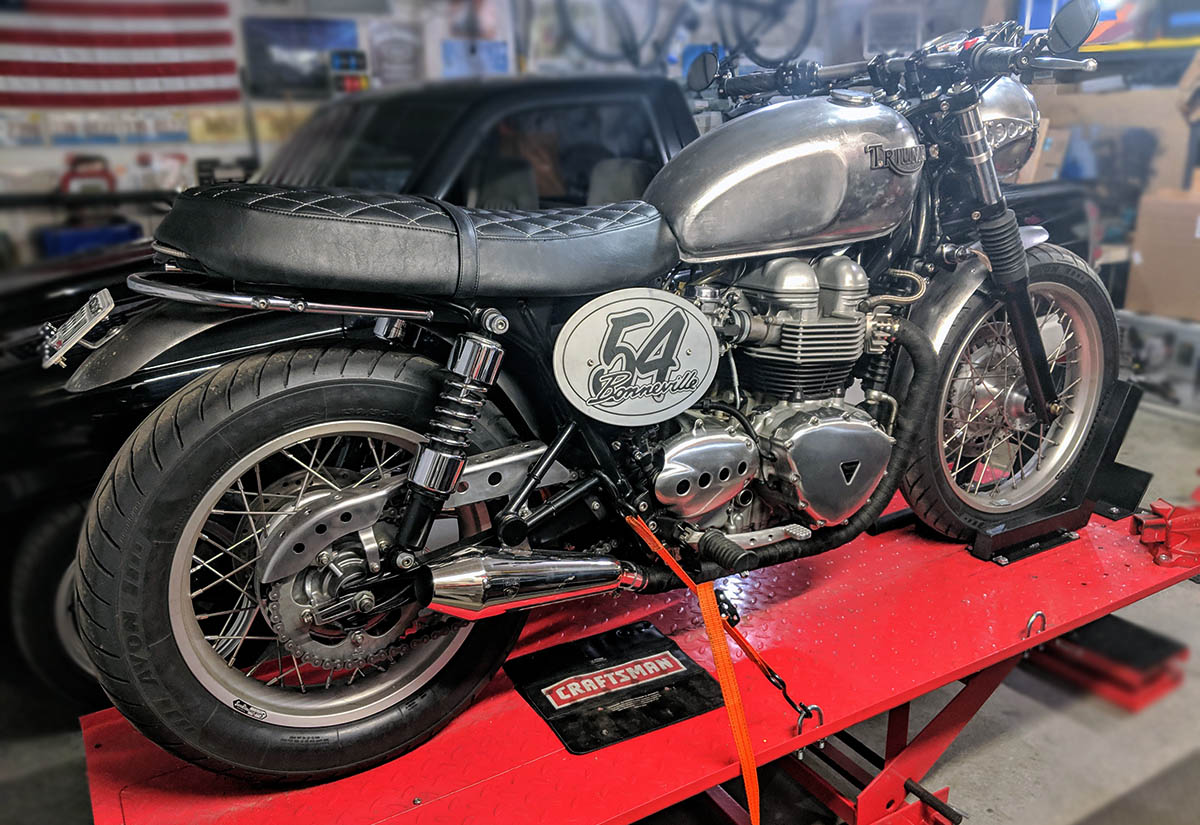
MAY 2019
I have been able to complete several more items on the cafe racer this month including:
- Install Ikon progressive front fork springs
- Matt clear finish the gas tank, fenders, chain guard, and number plates.
- Replace the speedometer and tach with matching 2.5″ models after discovering the odometer adjustment handle on the OEM speedo was broken
- Install the side number plates
- Install my signature “Newcastle Brown Ale” bottle cap as the choke pull cover
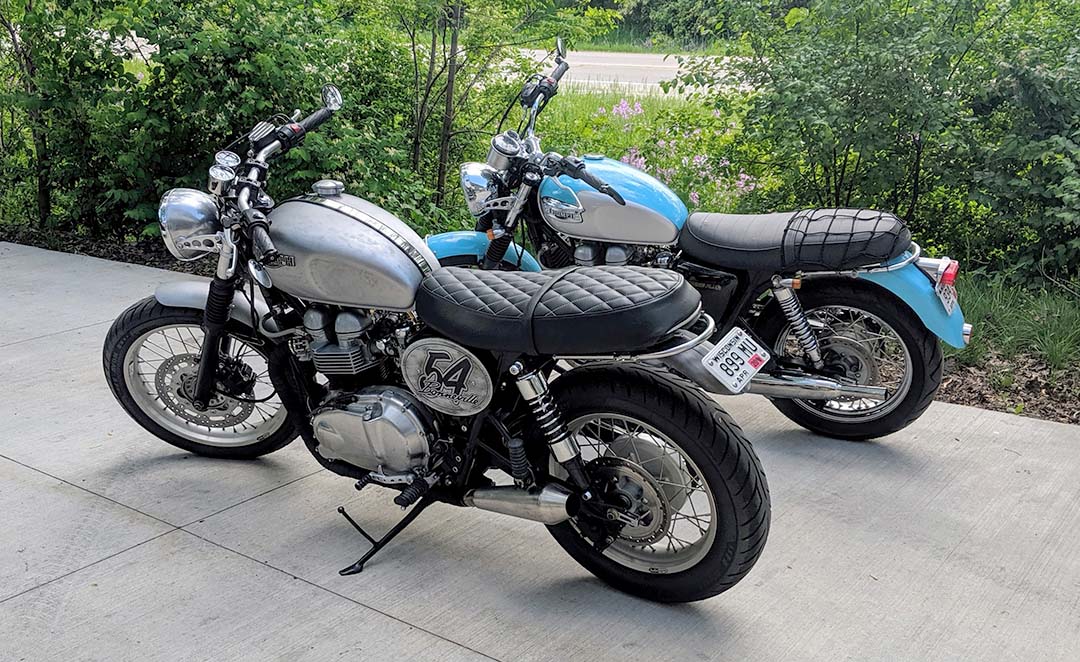
I rode this bike to the Team Power Center Open House on Saturday, May 18, 2019 so that Todd & Darcy Ligman could see the finished product, after they sold me the bike last December.
JUNE 2021
The pandemic is over, I’m fully vaccinated and finally, things are opening back up! In the past few days I’ve been able to accomplish some changes to this Project Bike #3 to get it ready to sell.
- Earlier this spring I prepped the gas tank with primer, body skim coats of filler and final sanding primer. I then shot the base coats of warm metallic silver (a 2002 Bonneville color) and coats of clear.
- Then I color sanded the clear, did a buff with a Meguier’s fine final cut, then a final buff with synthetic sealer.
- I added the tank badges, petcock, and Monza-style gas cap, mounted it on the bike, hooked up the fuel line, filled it with gas, and fired her up!
- I’ve replaced the former raw steel fenders with raw aluminum Motone fenders.
- I’ve installed black Sato Racing Rearsets
- Installed the freshly painted black chain guard
- Replaced stock blinker relay with a CF13-GL02 LED Flasher Relay that gets rid of the rapid flashing
- Moved the rear license plate mount from the fender to the lower right side using a 20mm axle mounting bracket from Dime City Cycles.

SEPTEMBER 2021
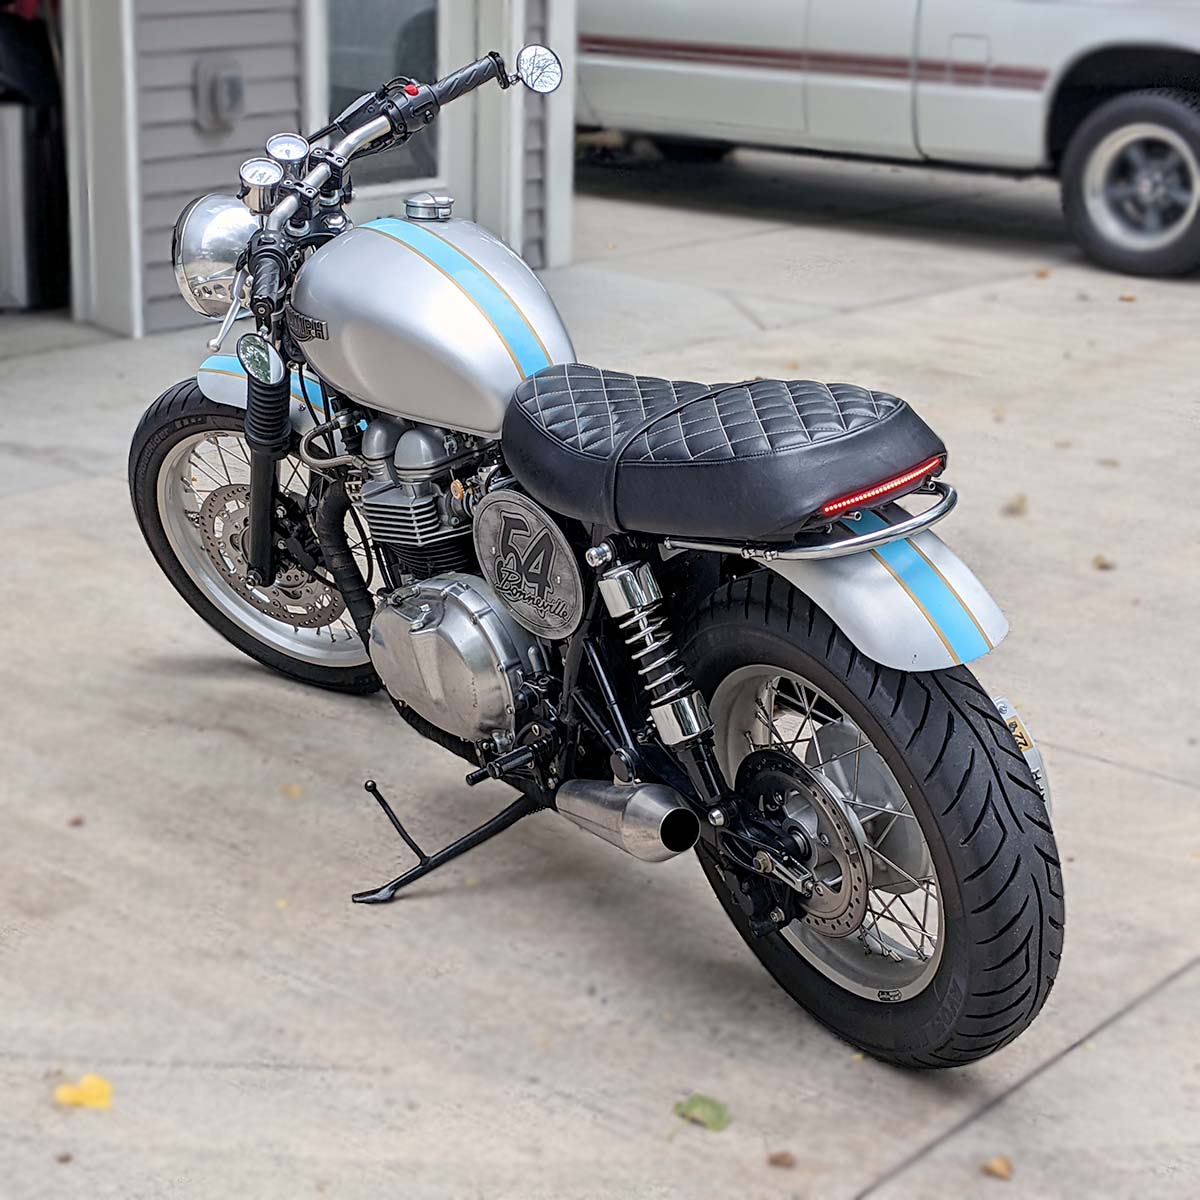
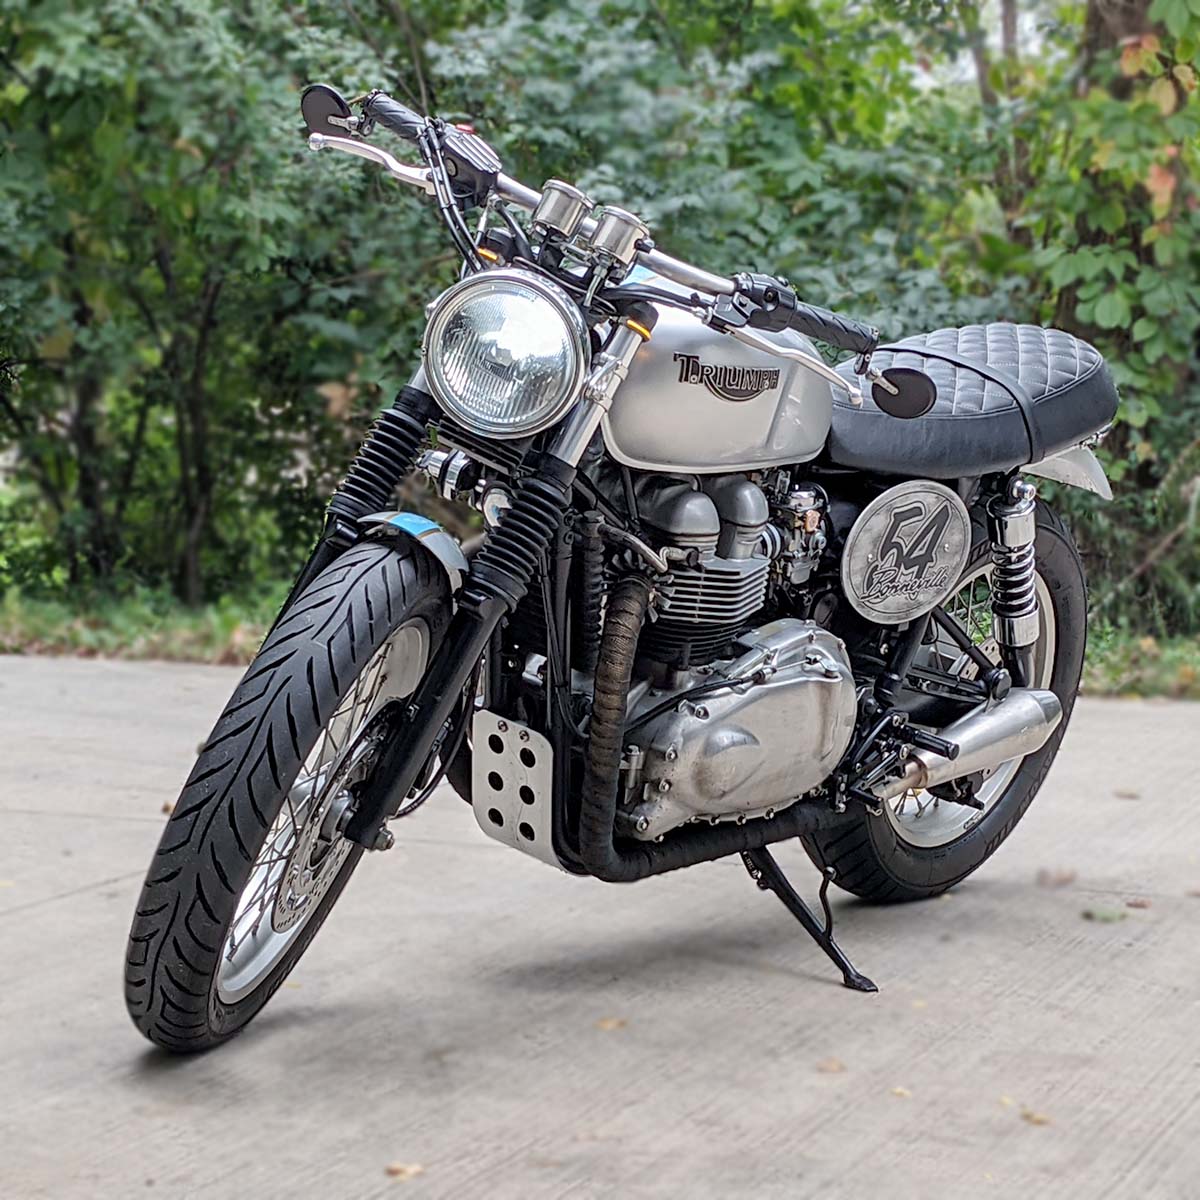
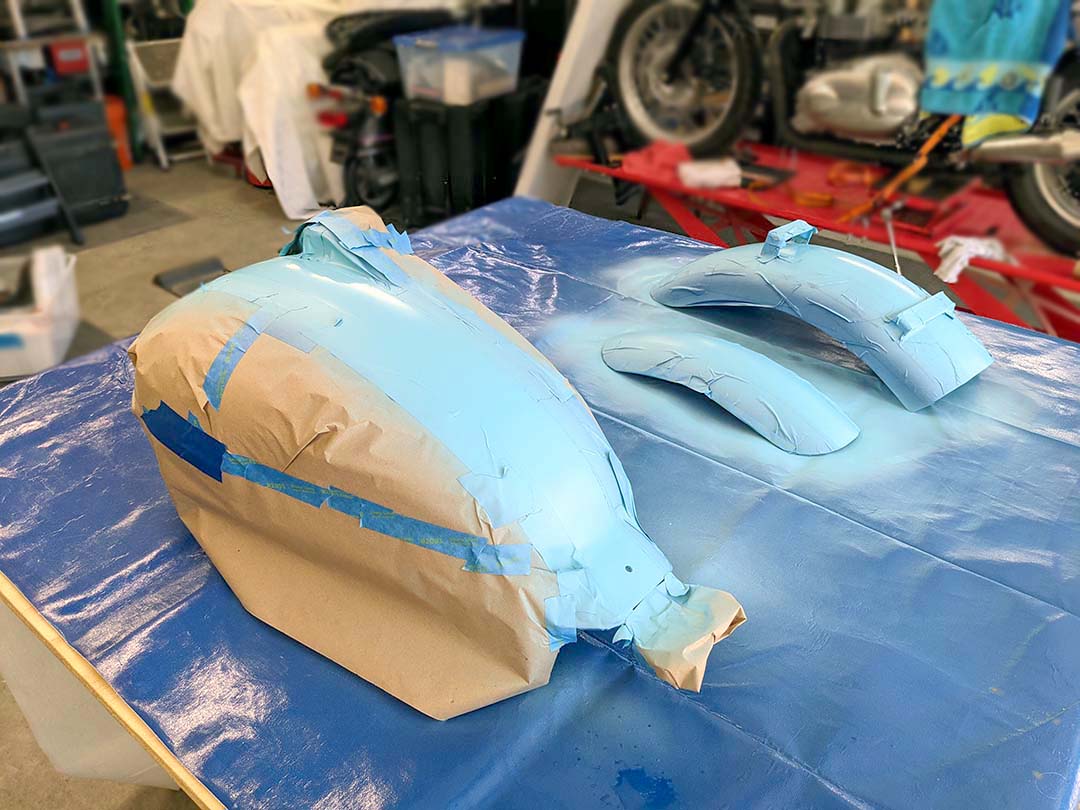
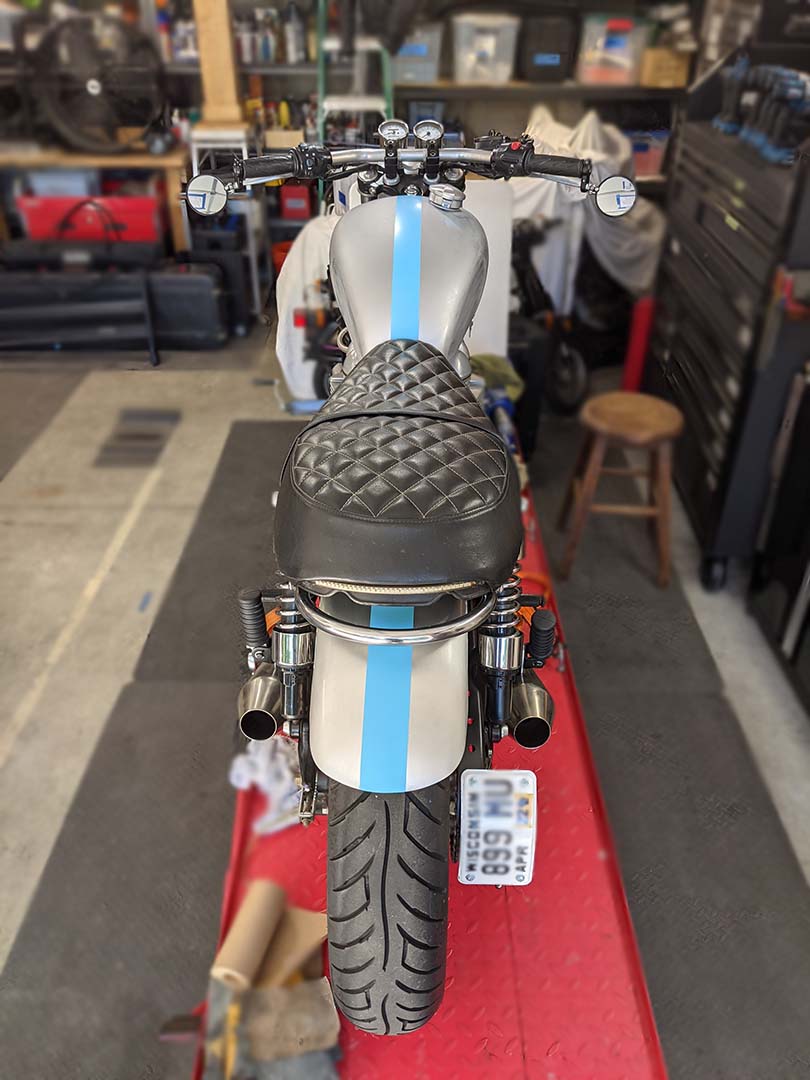
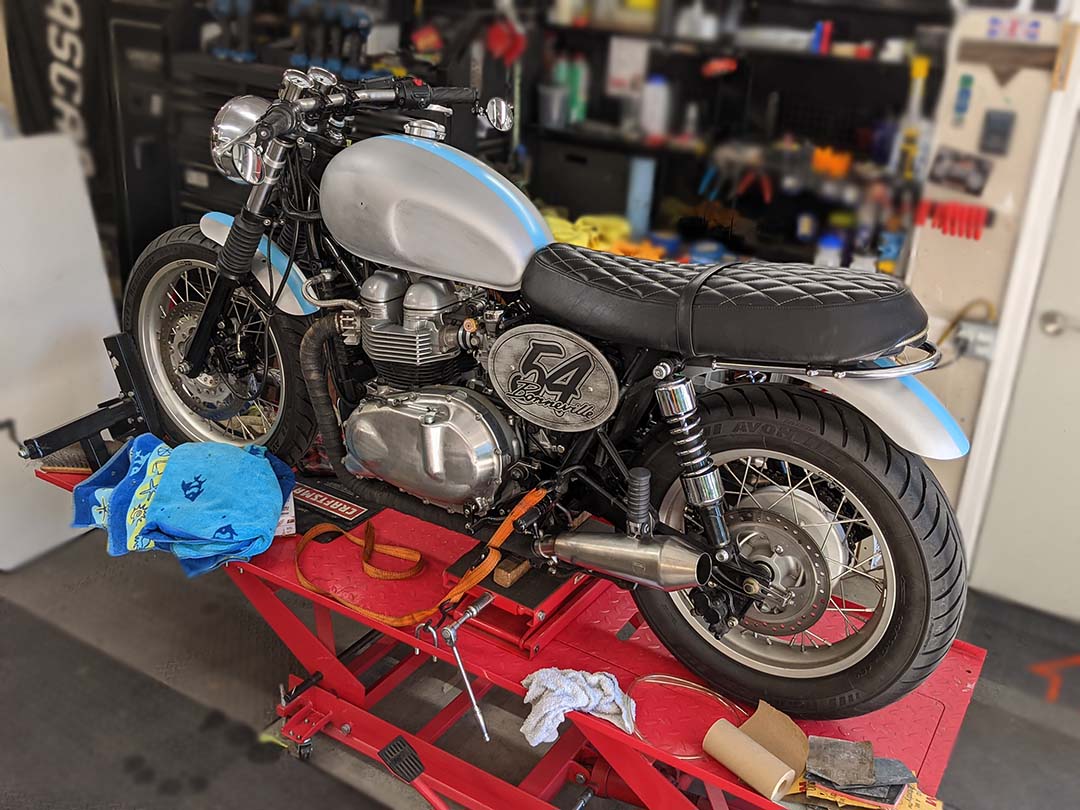
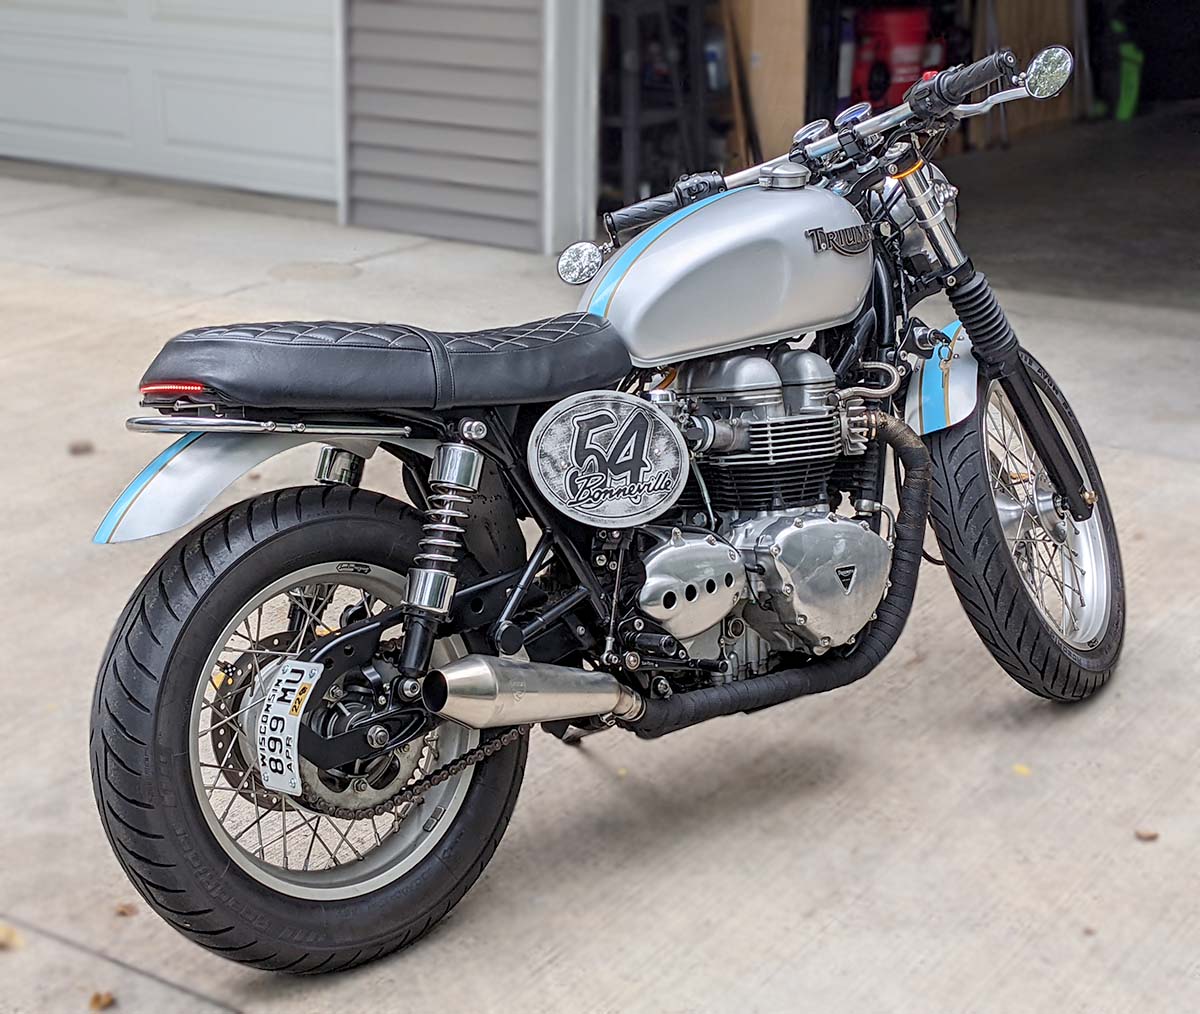
I had a serious buyer for this bike in late August 2021, that unfortunately fell through. So, I decided to use some time on my hands to up the ante on this bike by adding some custom stripes. You may know that I did something similar on the 2002 Bonneville Project bike which had a sky blue base color, with silver and gold stripes. In this case, the base color is silver, so I am adding Sky Blue and Gold stripes.
Here are some progress photos.