Project: Adding a Tachometer to an EFI Triumph Bonneville (2013)
By guest contributor: Lee Hoffner
Introduction
So, I ride a 2013 EFI Bonneville (shown below — today was also my first day using my new ATV jack, from Harbor Freight Tools: LOVE IT! Even if you don’t need to jack the bike, it’s really nice to get your work up out of back pain territory). For 2013, Triumph eliminated the SE model from the line. So, unless you buy a T-100, you don’t have an option to get a tachometer on your Bonnie. I want one, so: Enter aftermarket parts!
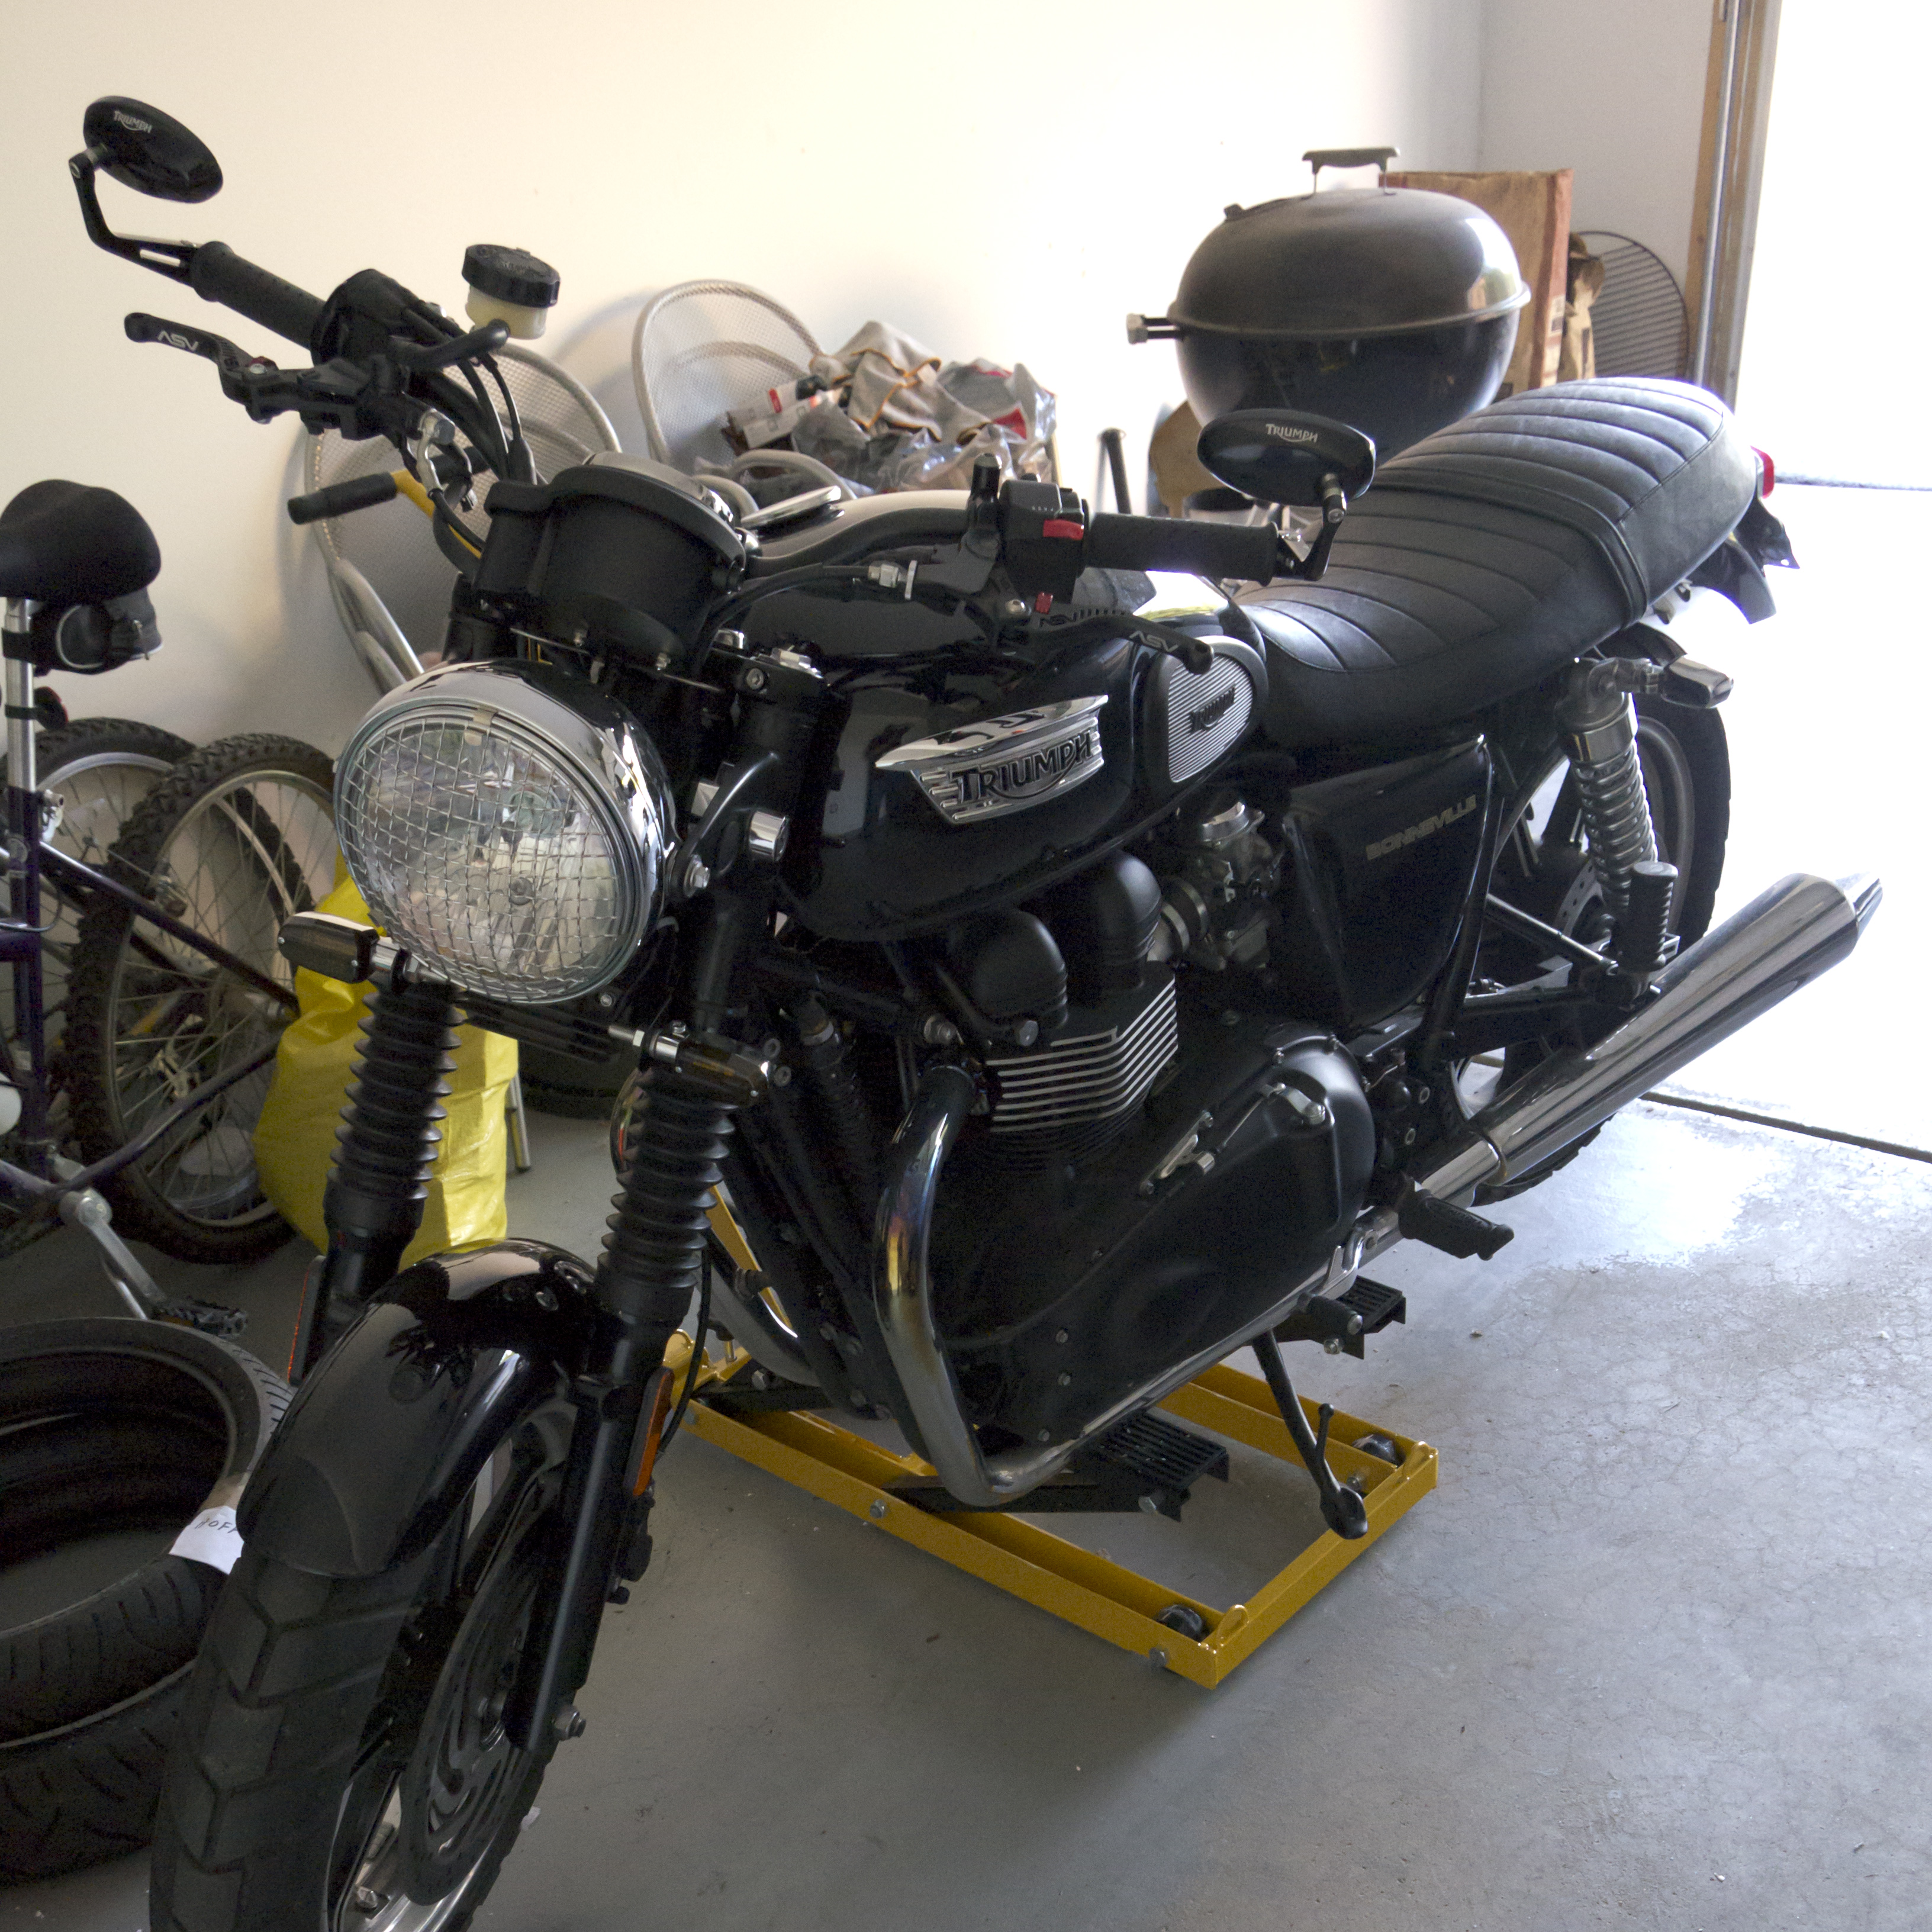
Black Beauty: my ’13 EFI Bonneville

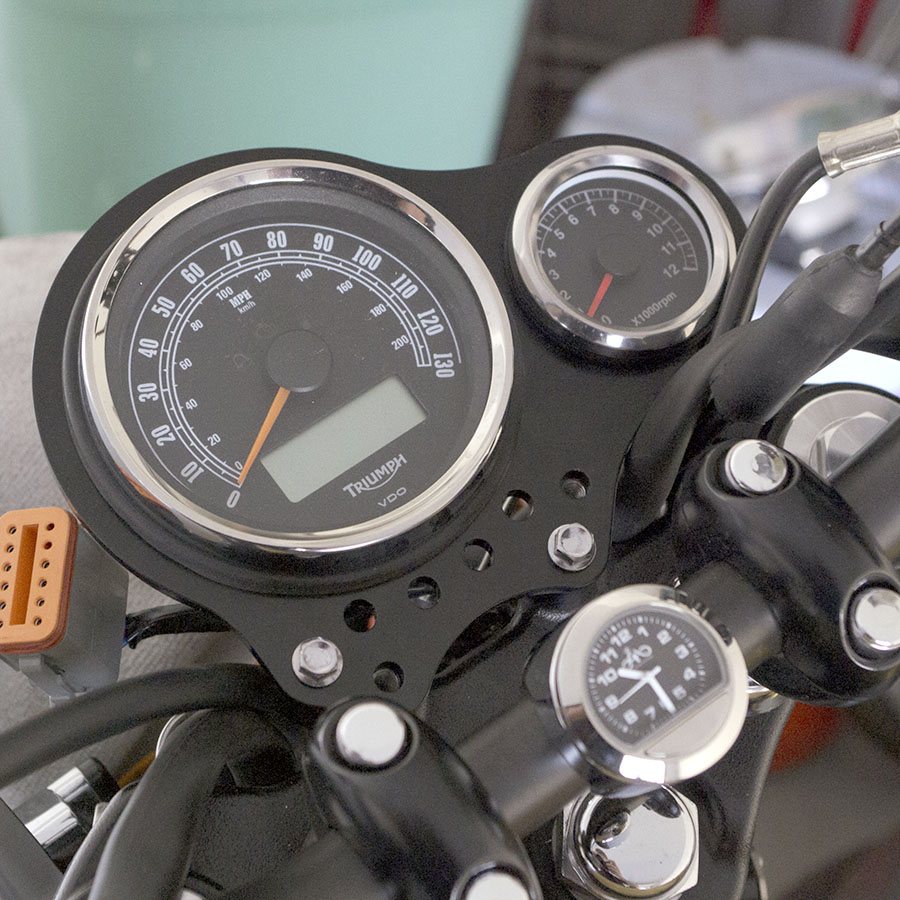
’13 EFI Bonneville stock instrument panel (no tach). (Note: the bars are not stock. They are Dime City Super Moto 7/8″ Satin Black bars. The clock is from clocks4bikes.com)
I had seen that Dime City Cycles had added a new piece of cool kit to their line: their new “Low Pro Speedo and Tach Gauge Cluster“, made for the Bonneville, to go with their existing electronic tachometer. So, I ordered these items and they arrived yesterday.
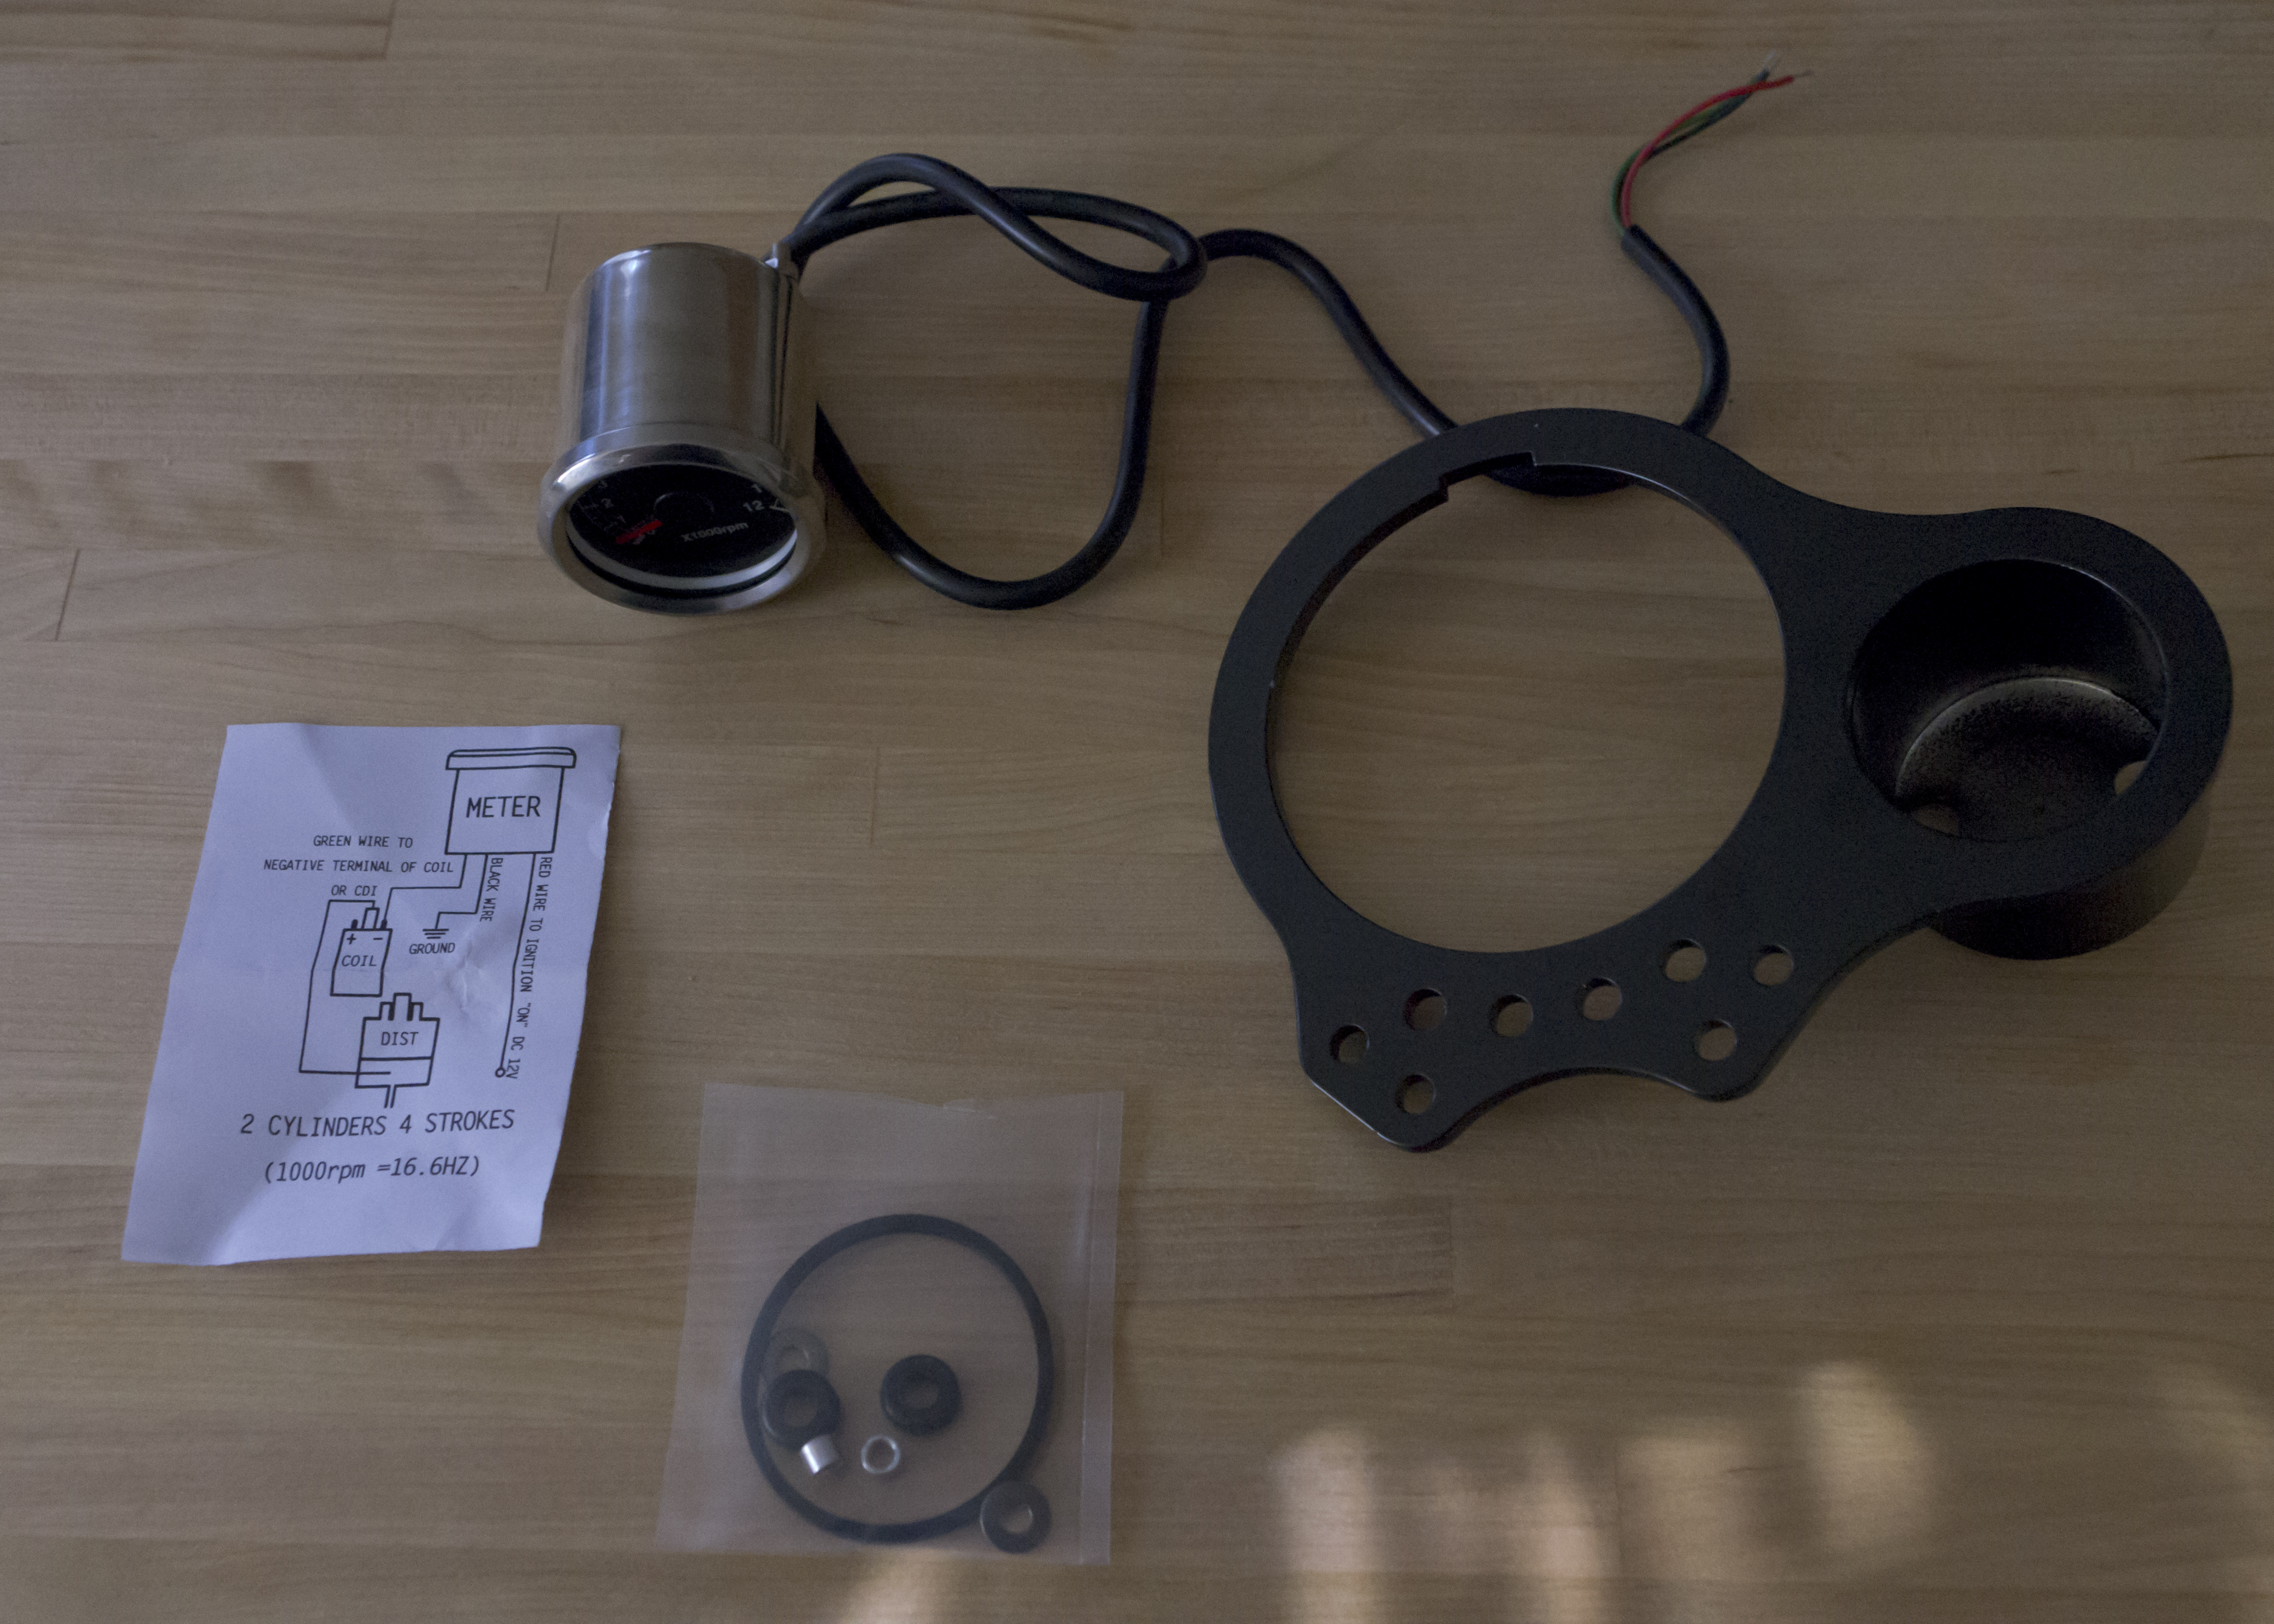
DCC Speedo and Tach Cluster, and 1.9″ Electronic Tach (plus fitting parts and verbose instructions…)
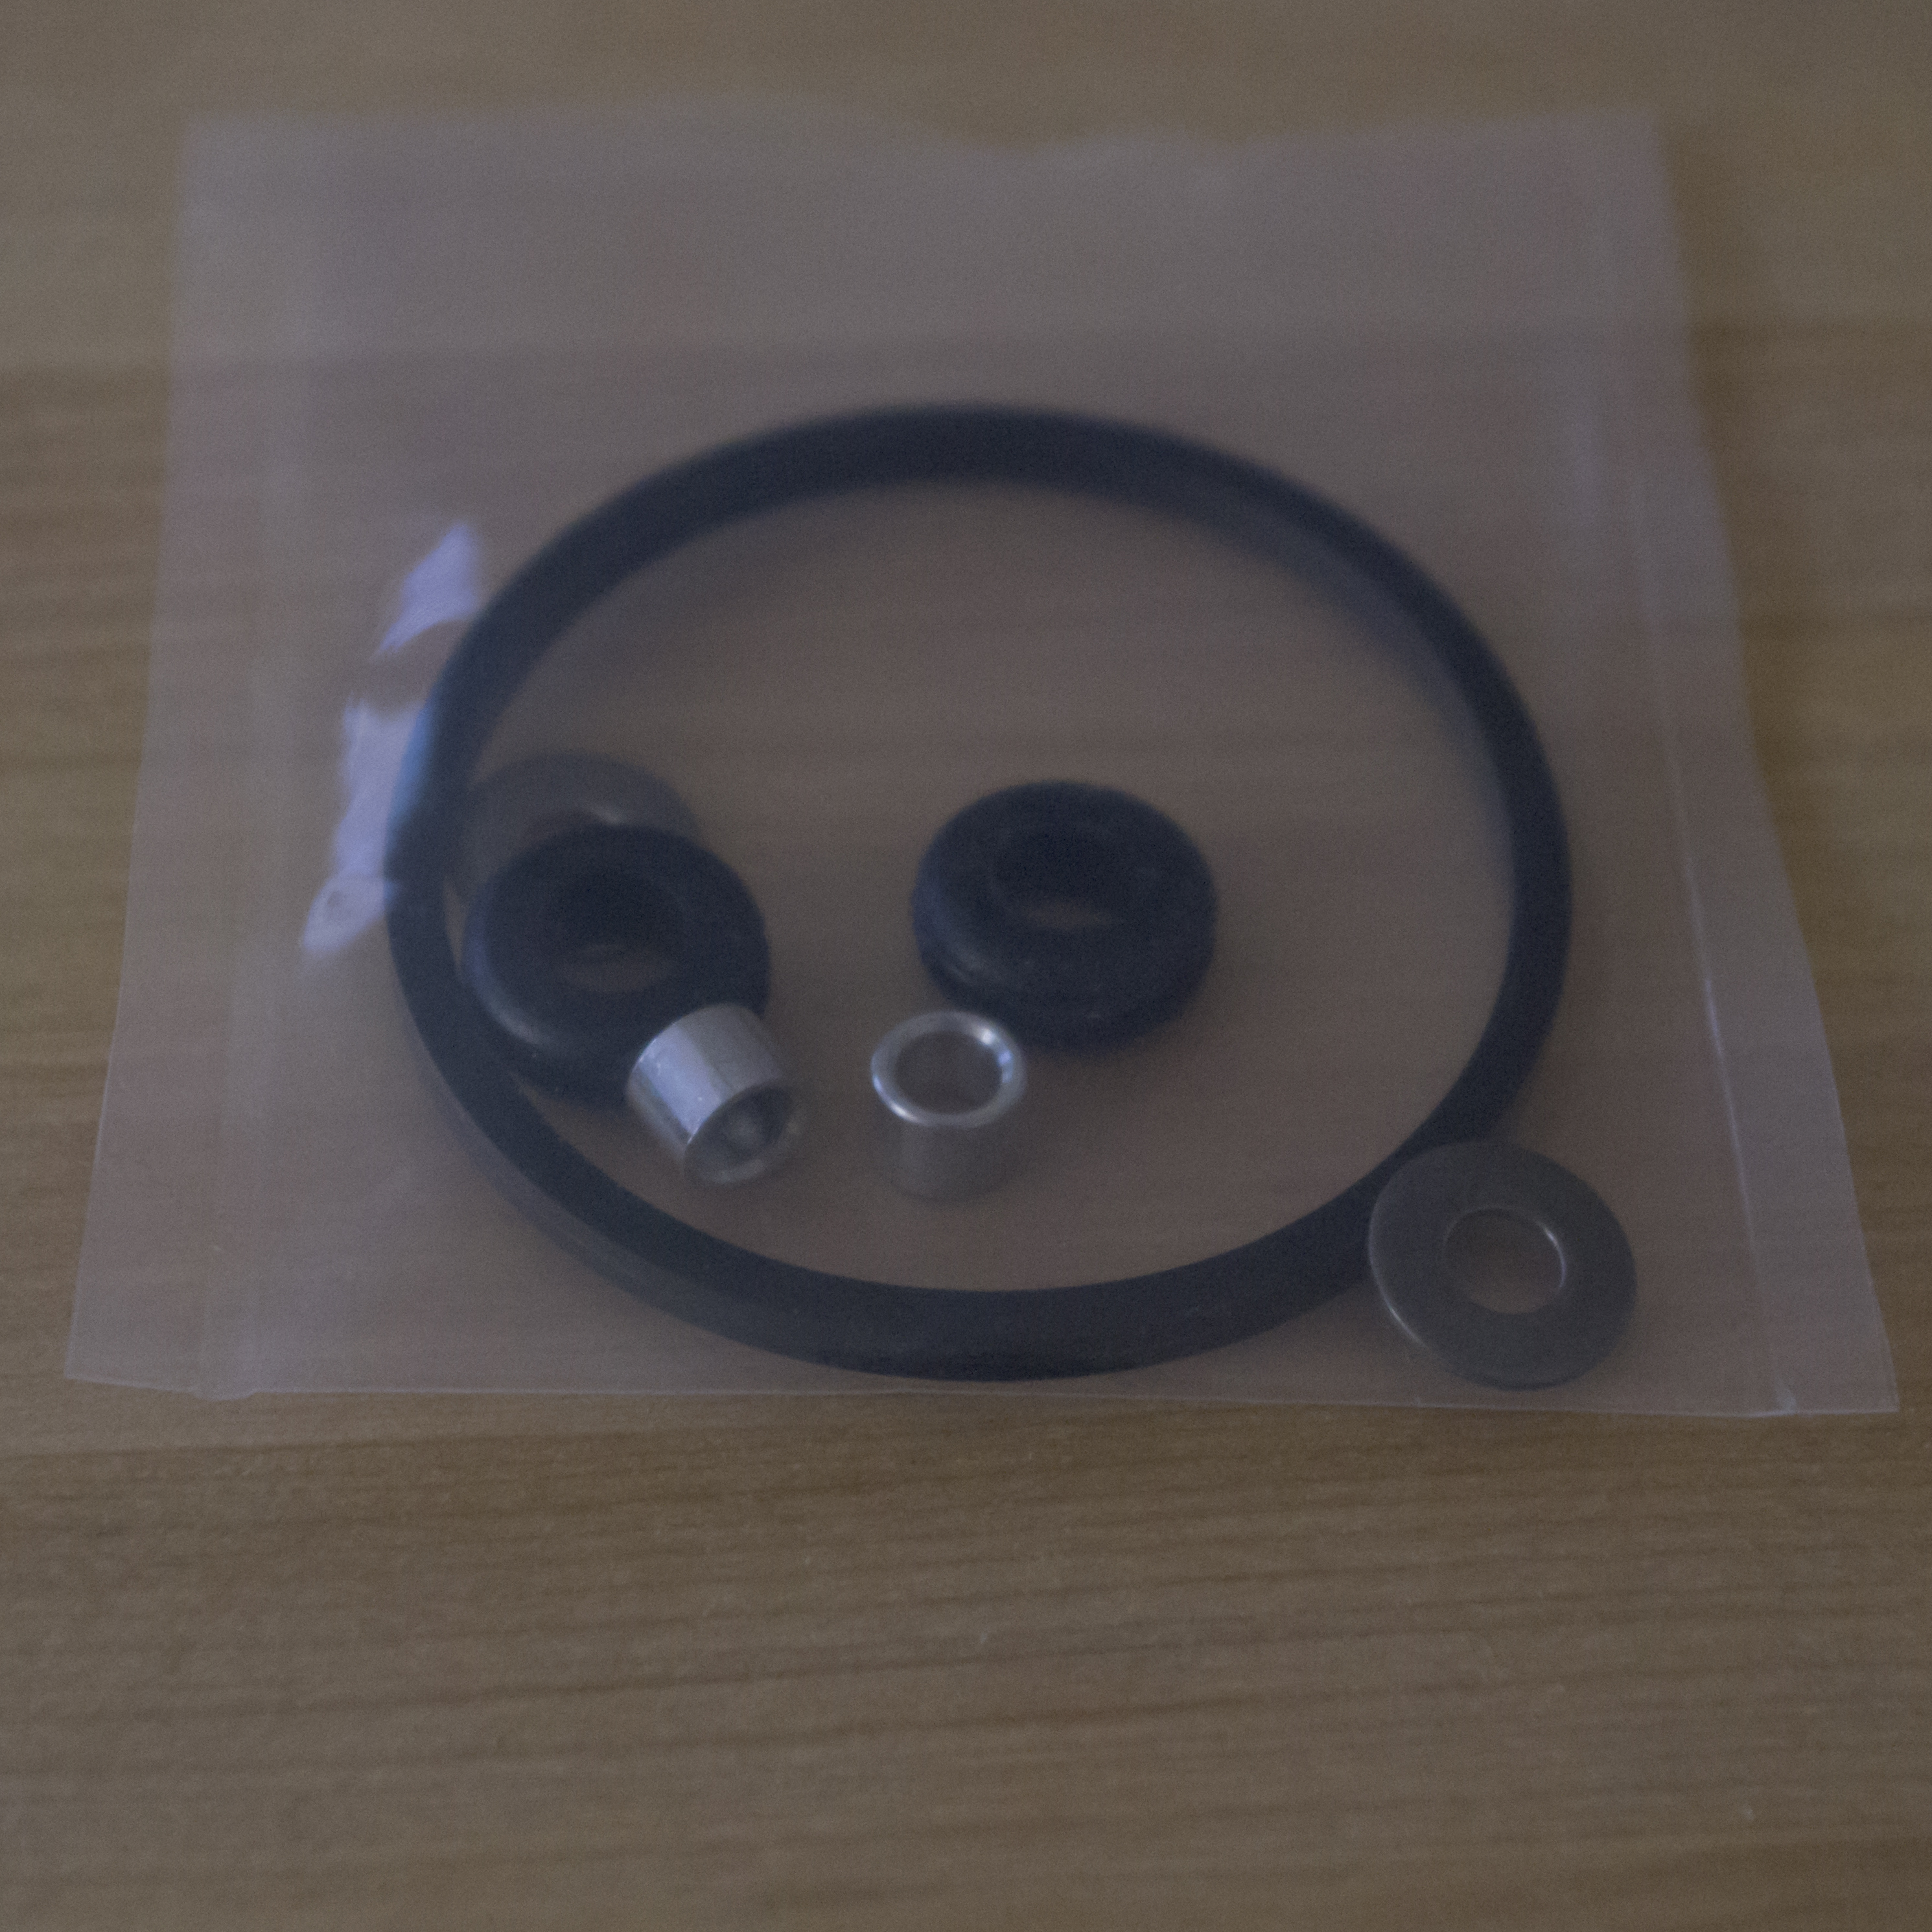
Tachometer fitments: gasket for the tach, hole plugs for the back of the instrument cluster.
Now, I’m a newbie — both at motorcycling and at tinkering with a bike. I love both activities, but I need instructions to help me with the second one. Dime City provided no instructions for installing the tach, so I had to try it blind. The whole exercise ended up as a basic fit check on the parts, because I had to take it all apart in the end and return the bike to stock state — due to not having everything I needed. Hopefully, this write-up will help others.
Step 1: Assemble the Instrument Cluster
This part was very straightforward. I won’t go into much detail, here: the photo captions speak for themselves.
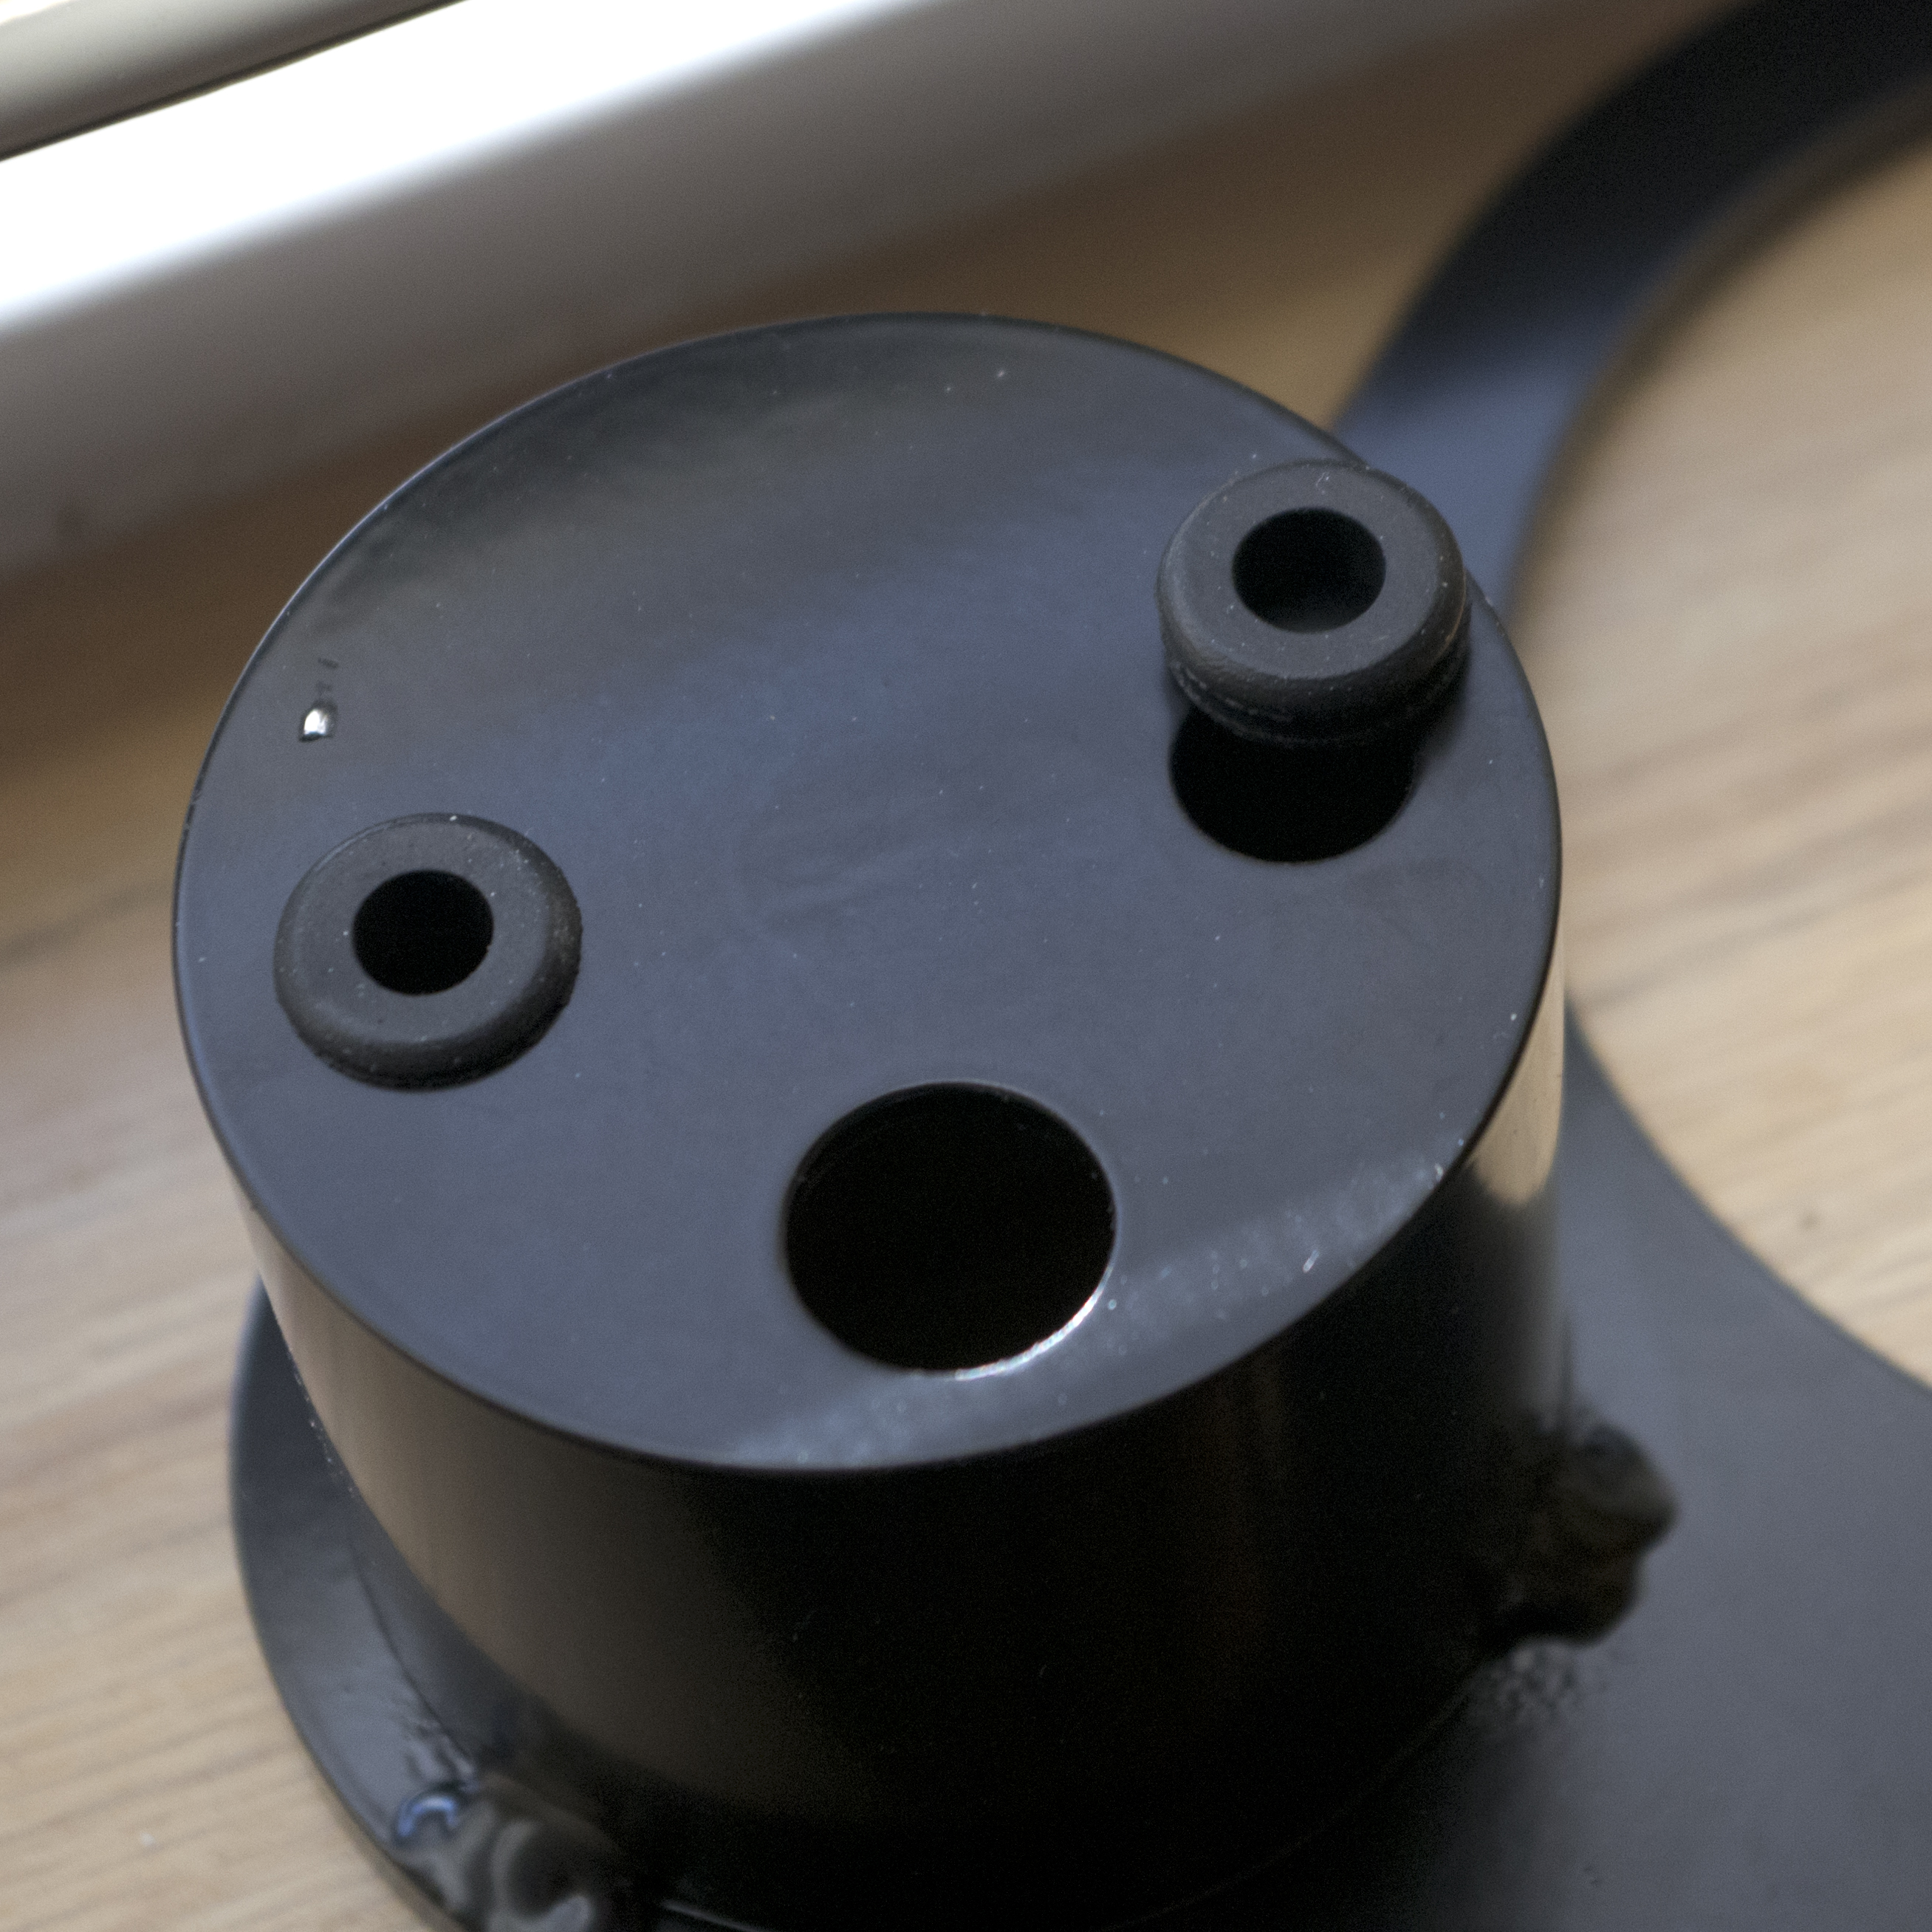
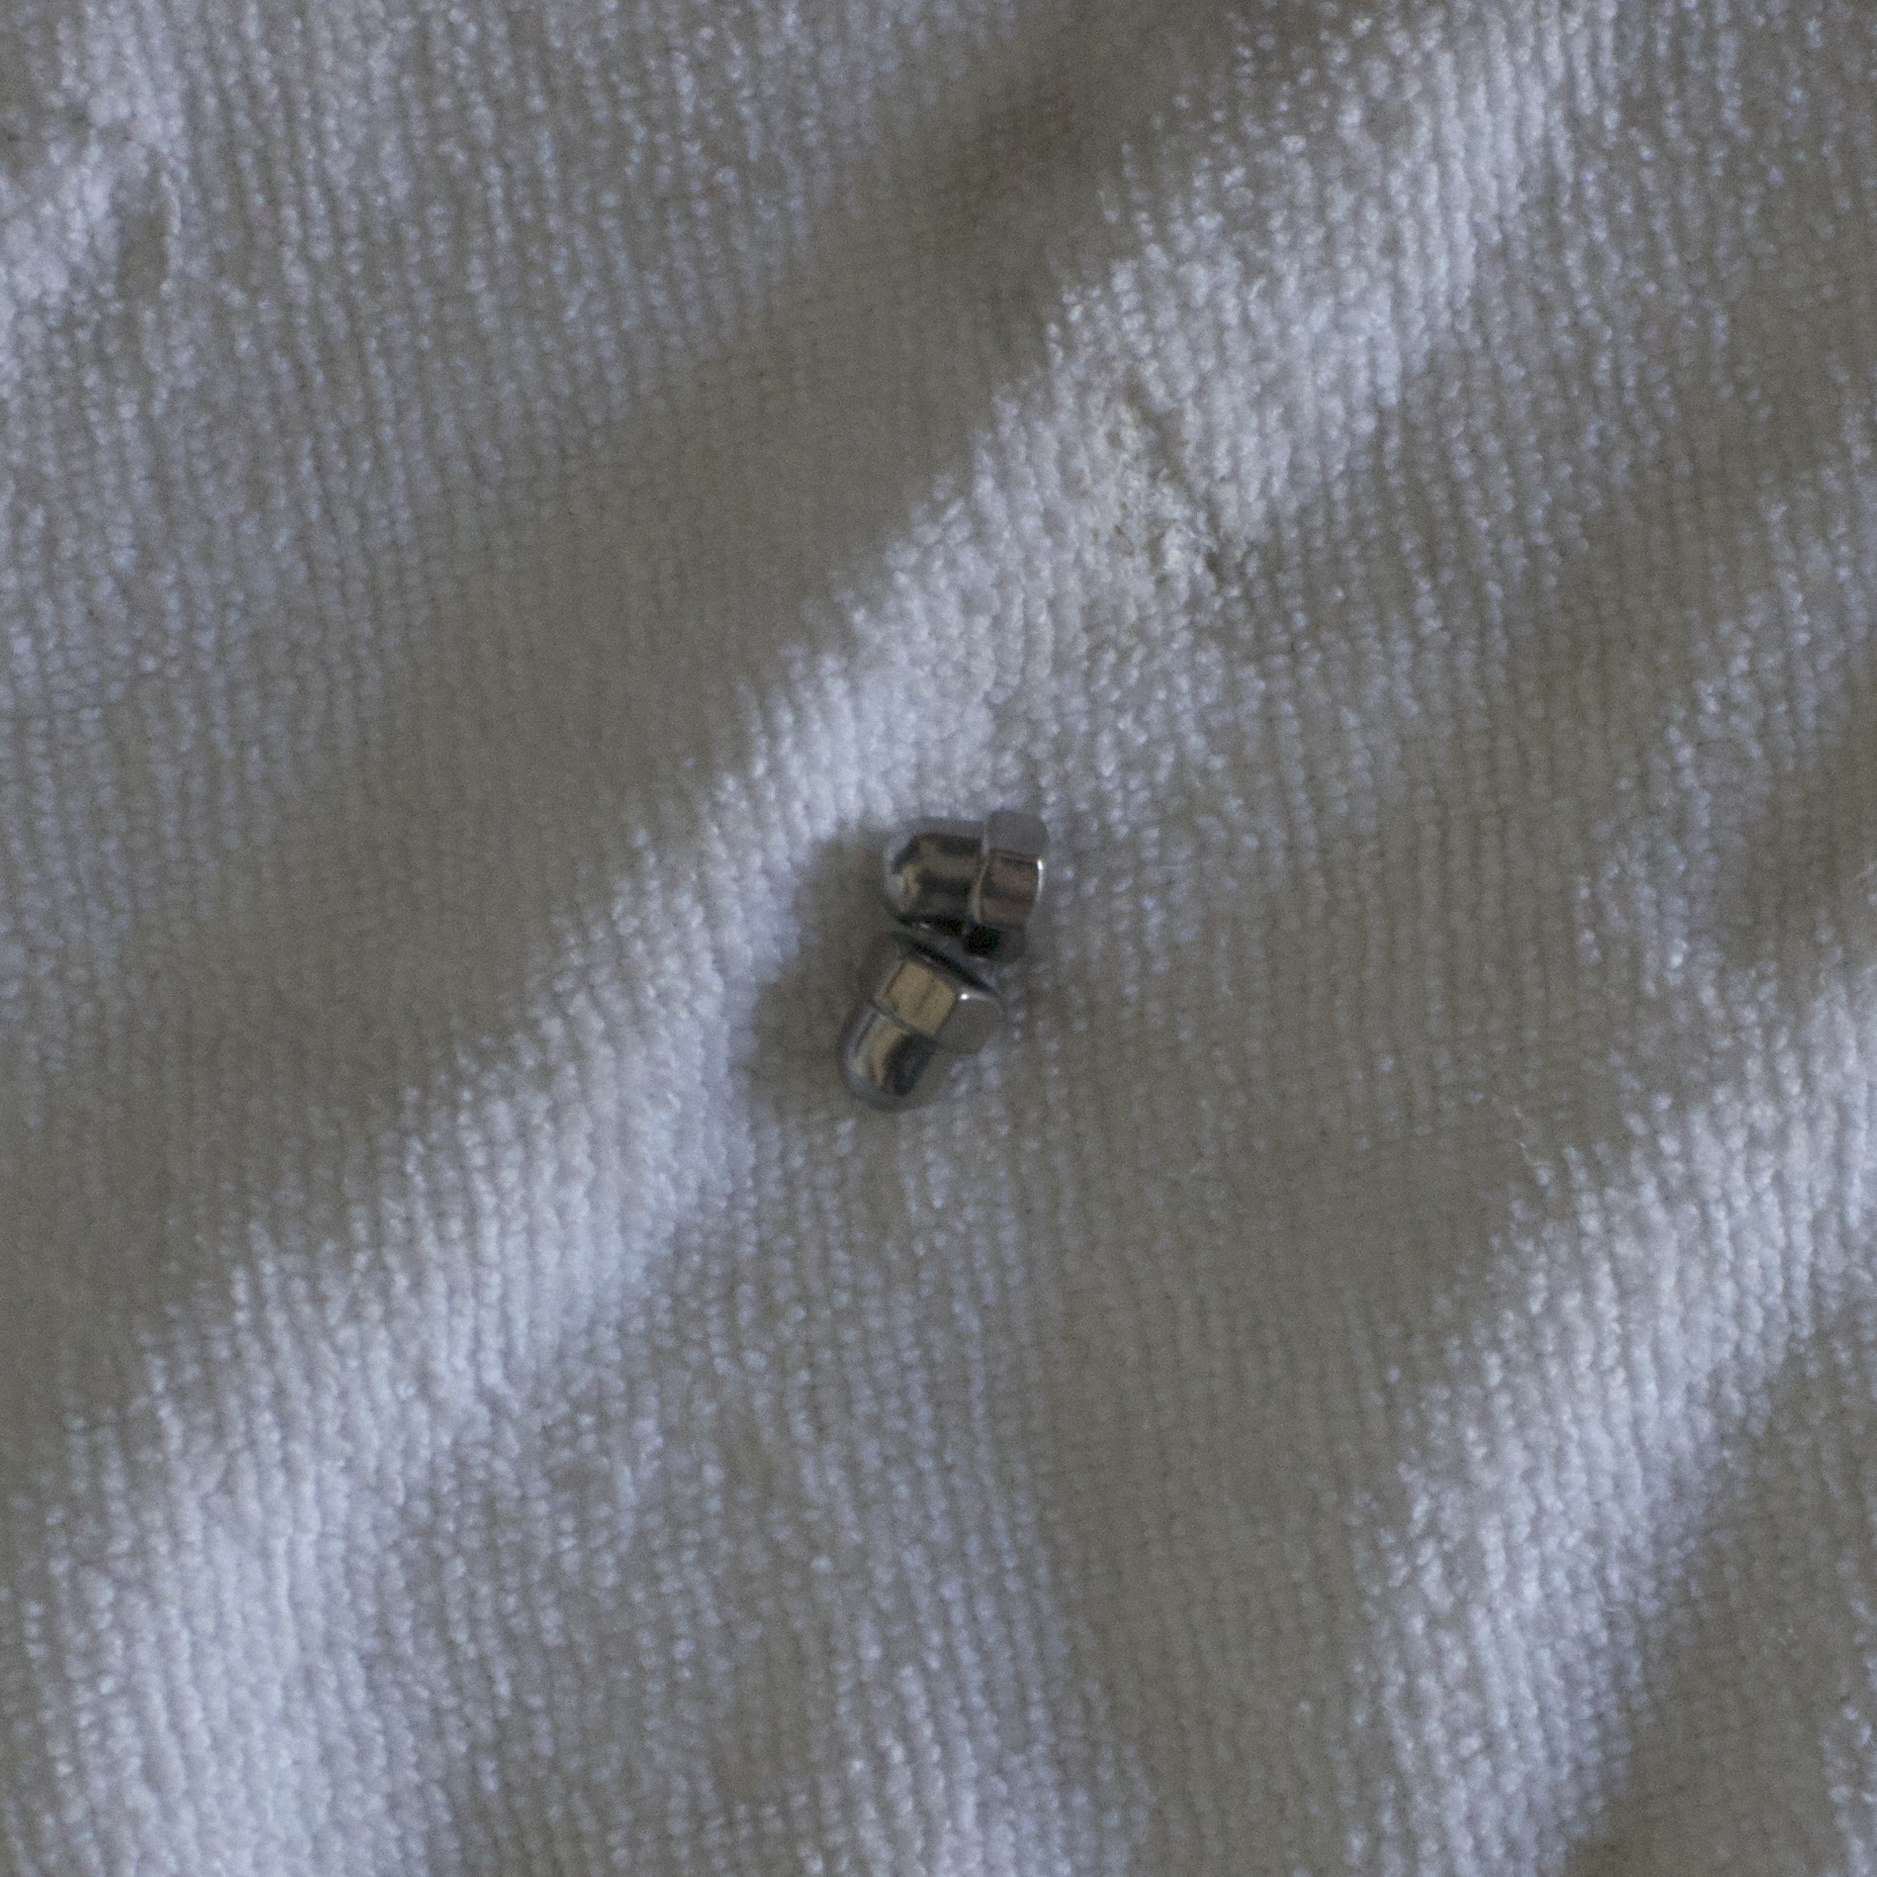
First, install the provided rubber grommets, for the tachometer bolts.

Next, install the metal sleeves.

Remove nut and lock washer from back of tachometer.

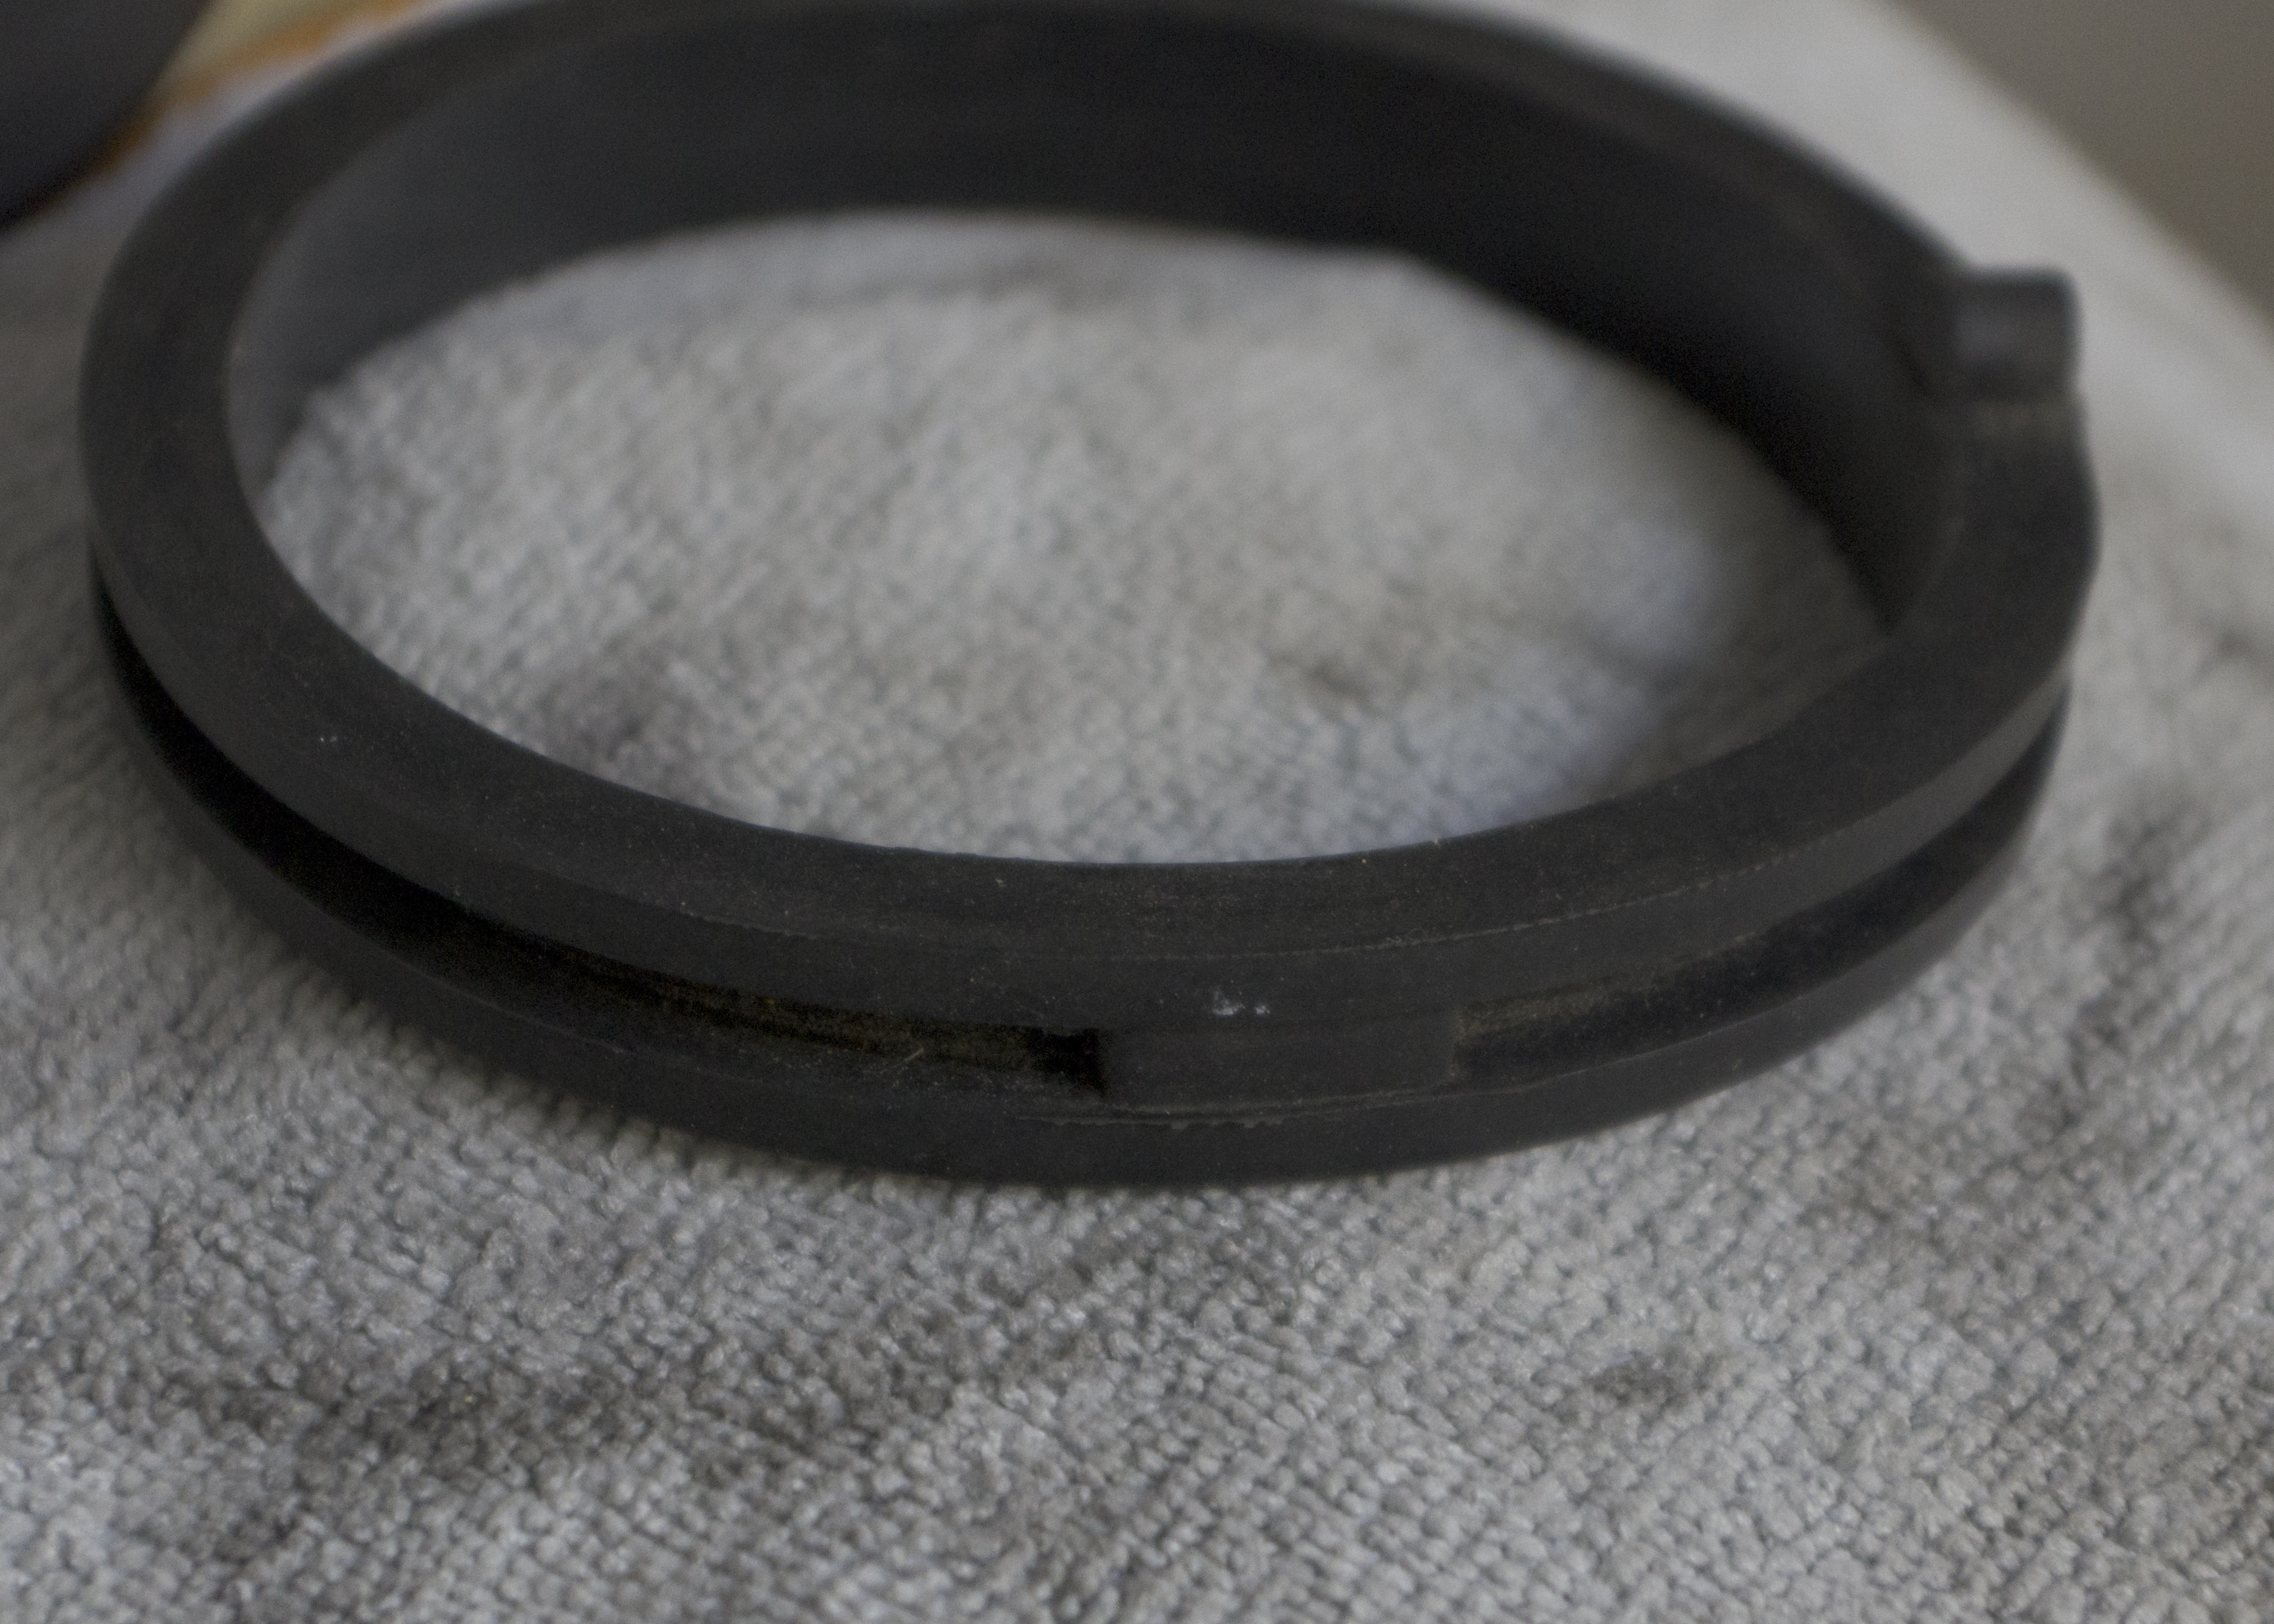
Fit the provided gasket around the tachometer.
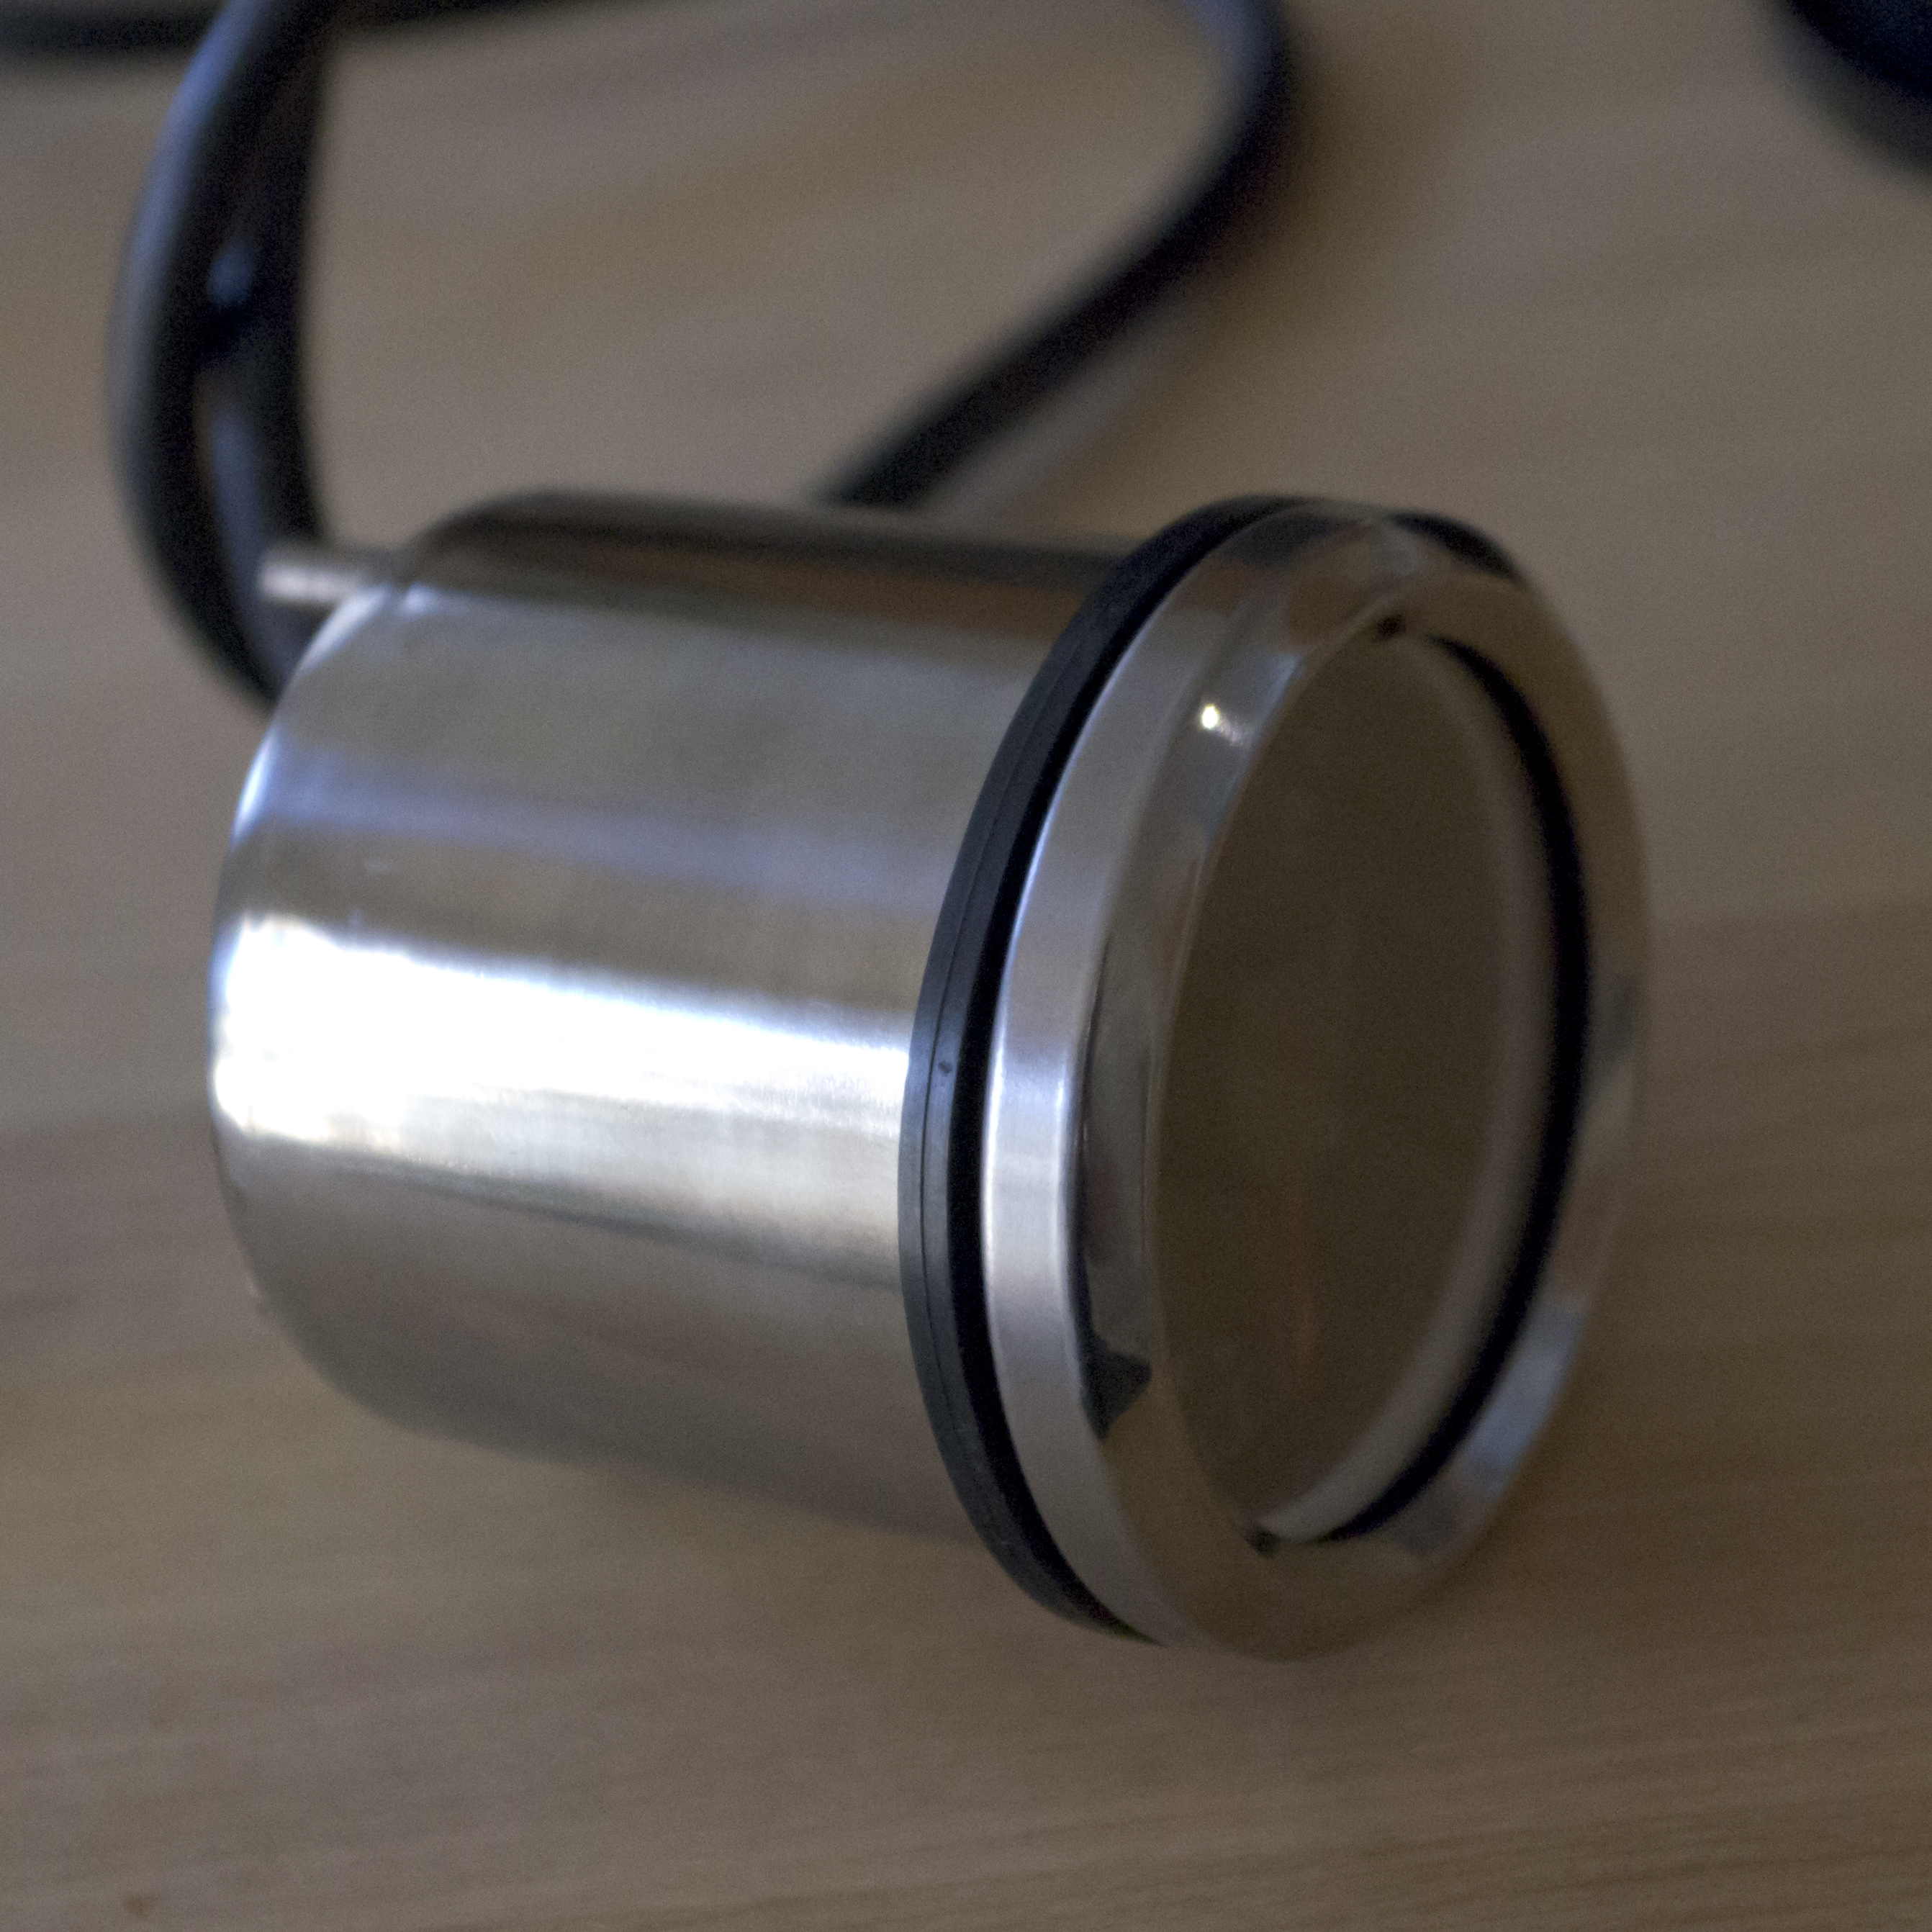
(Gasket in place.)
Thread the cable and tachometer bolts through the holes in back of the cluster, and fit in place.
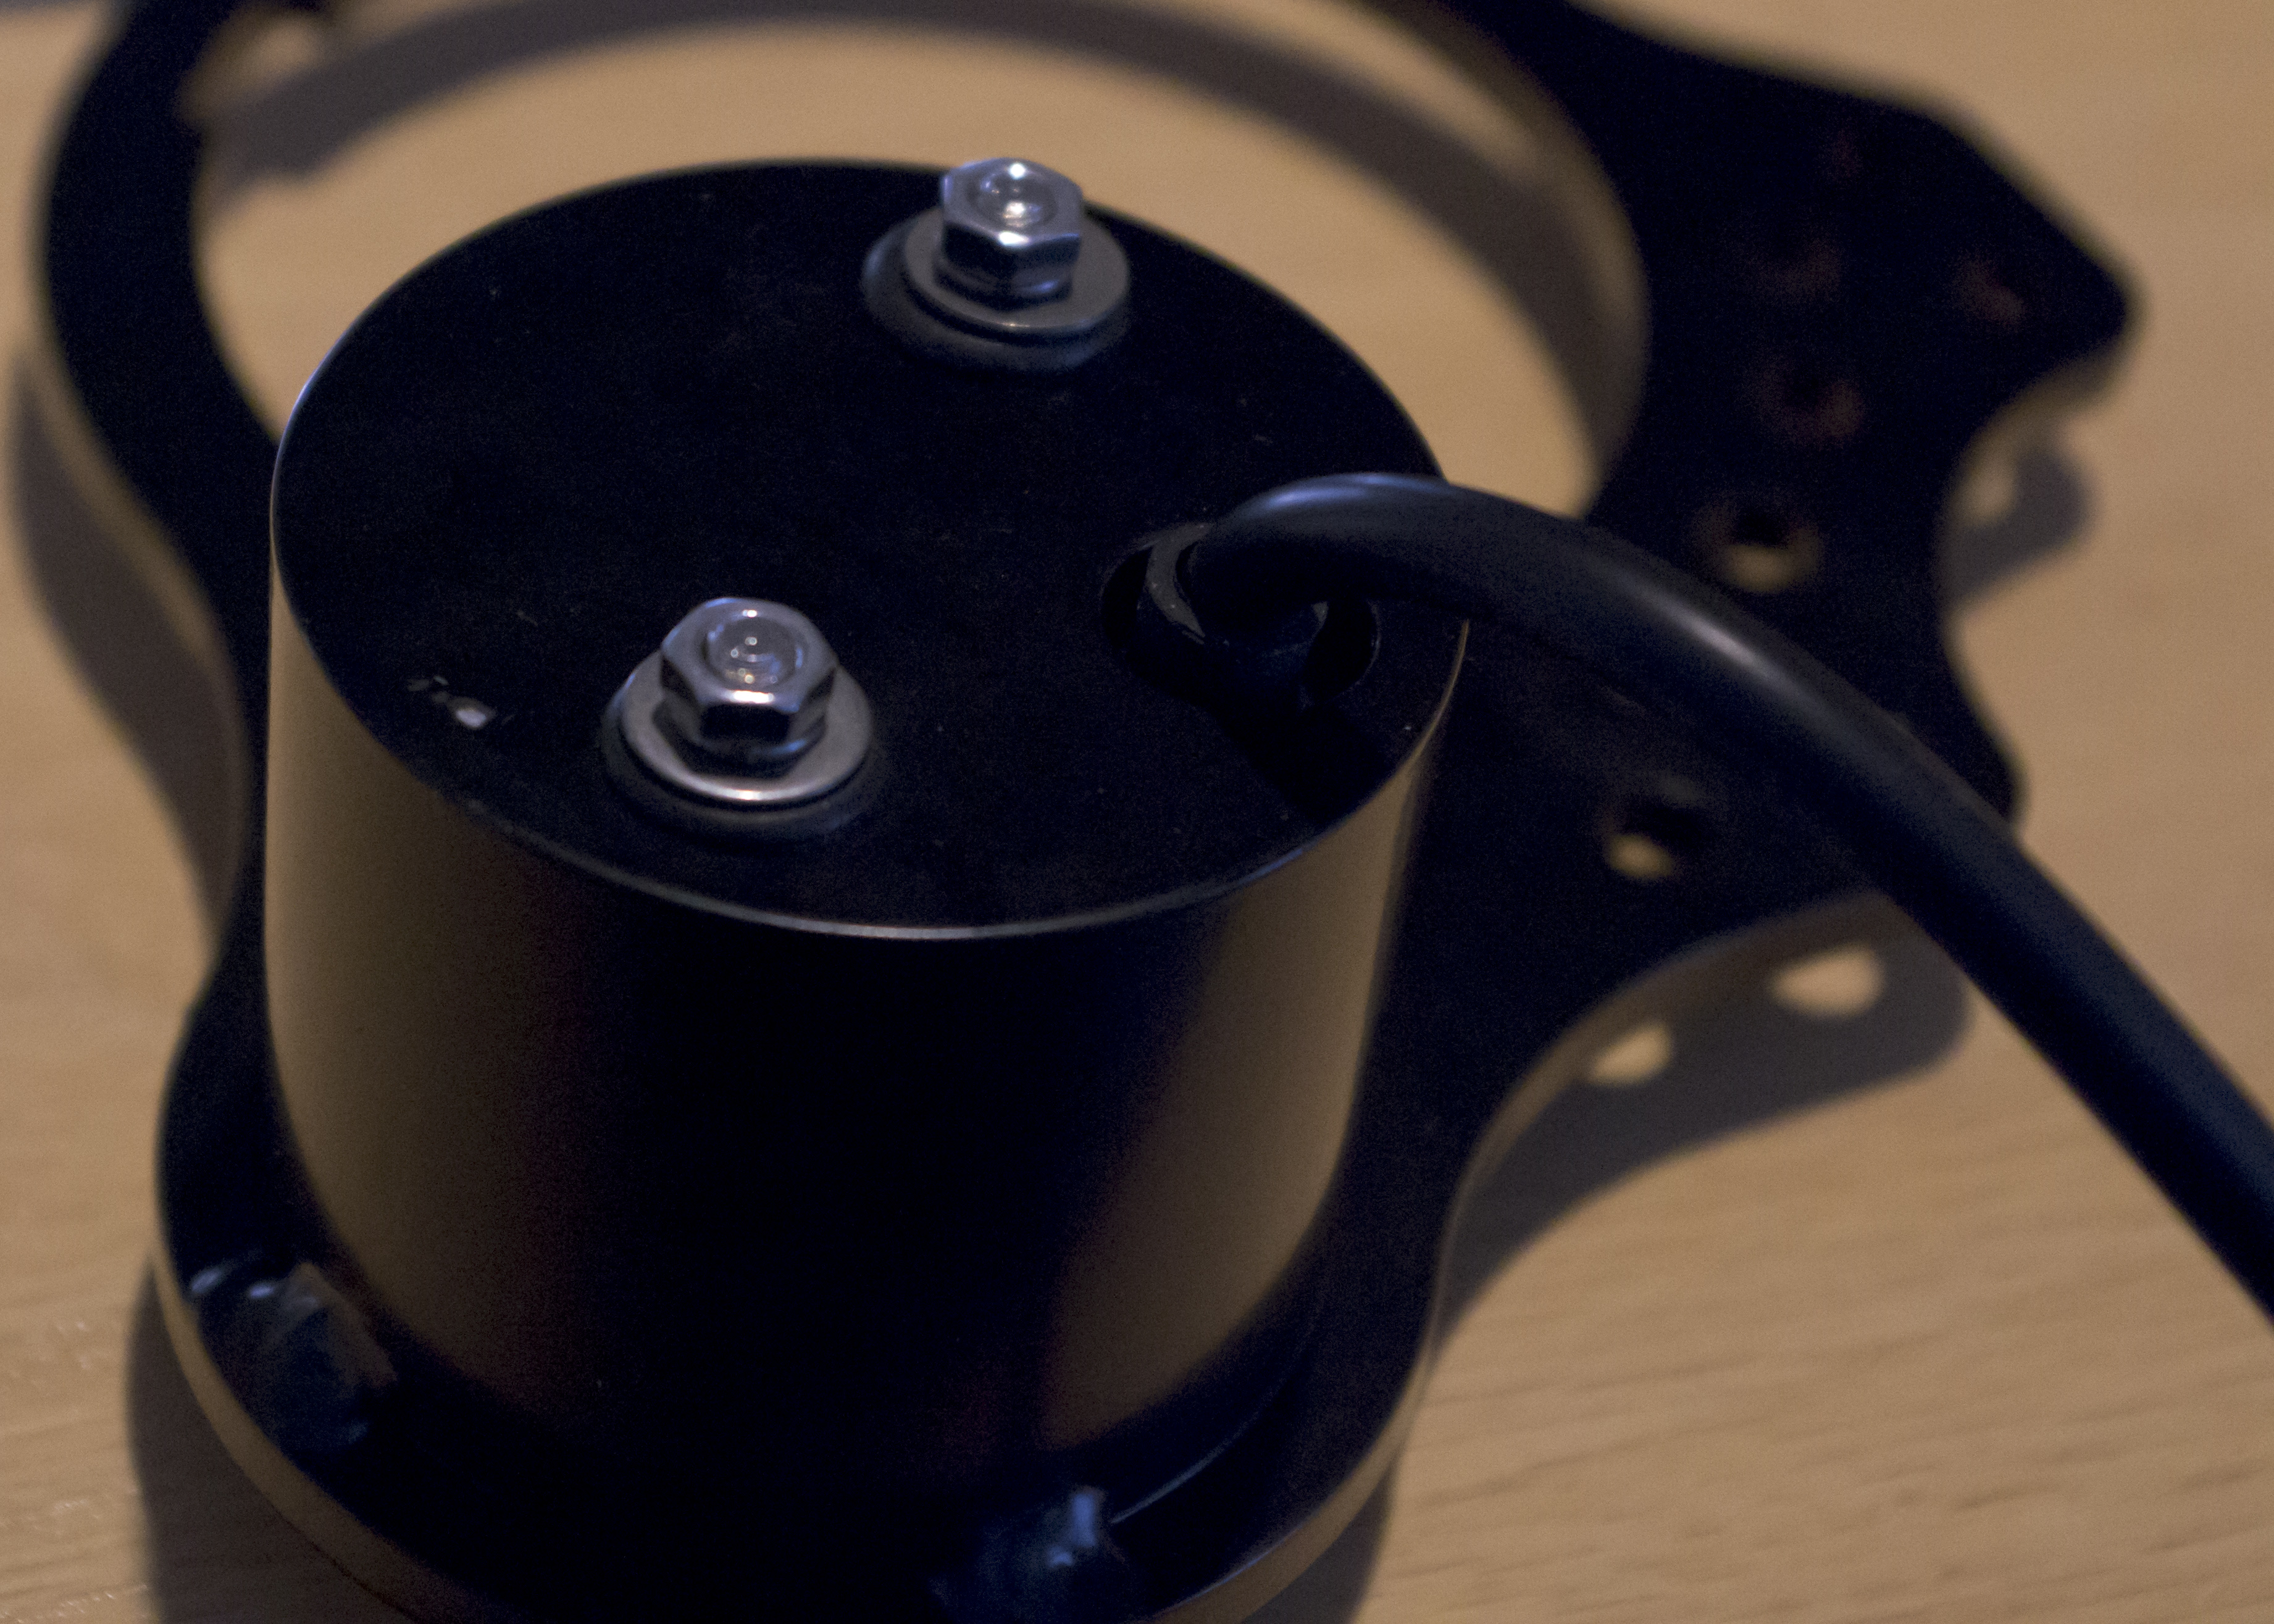
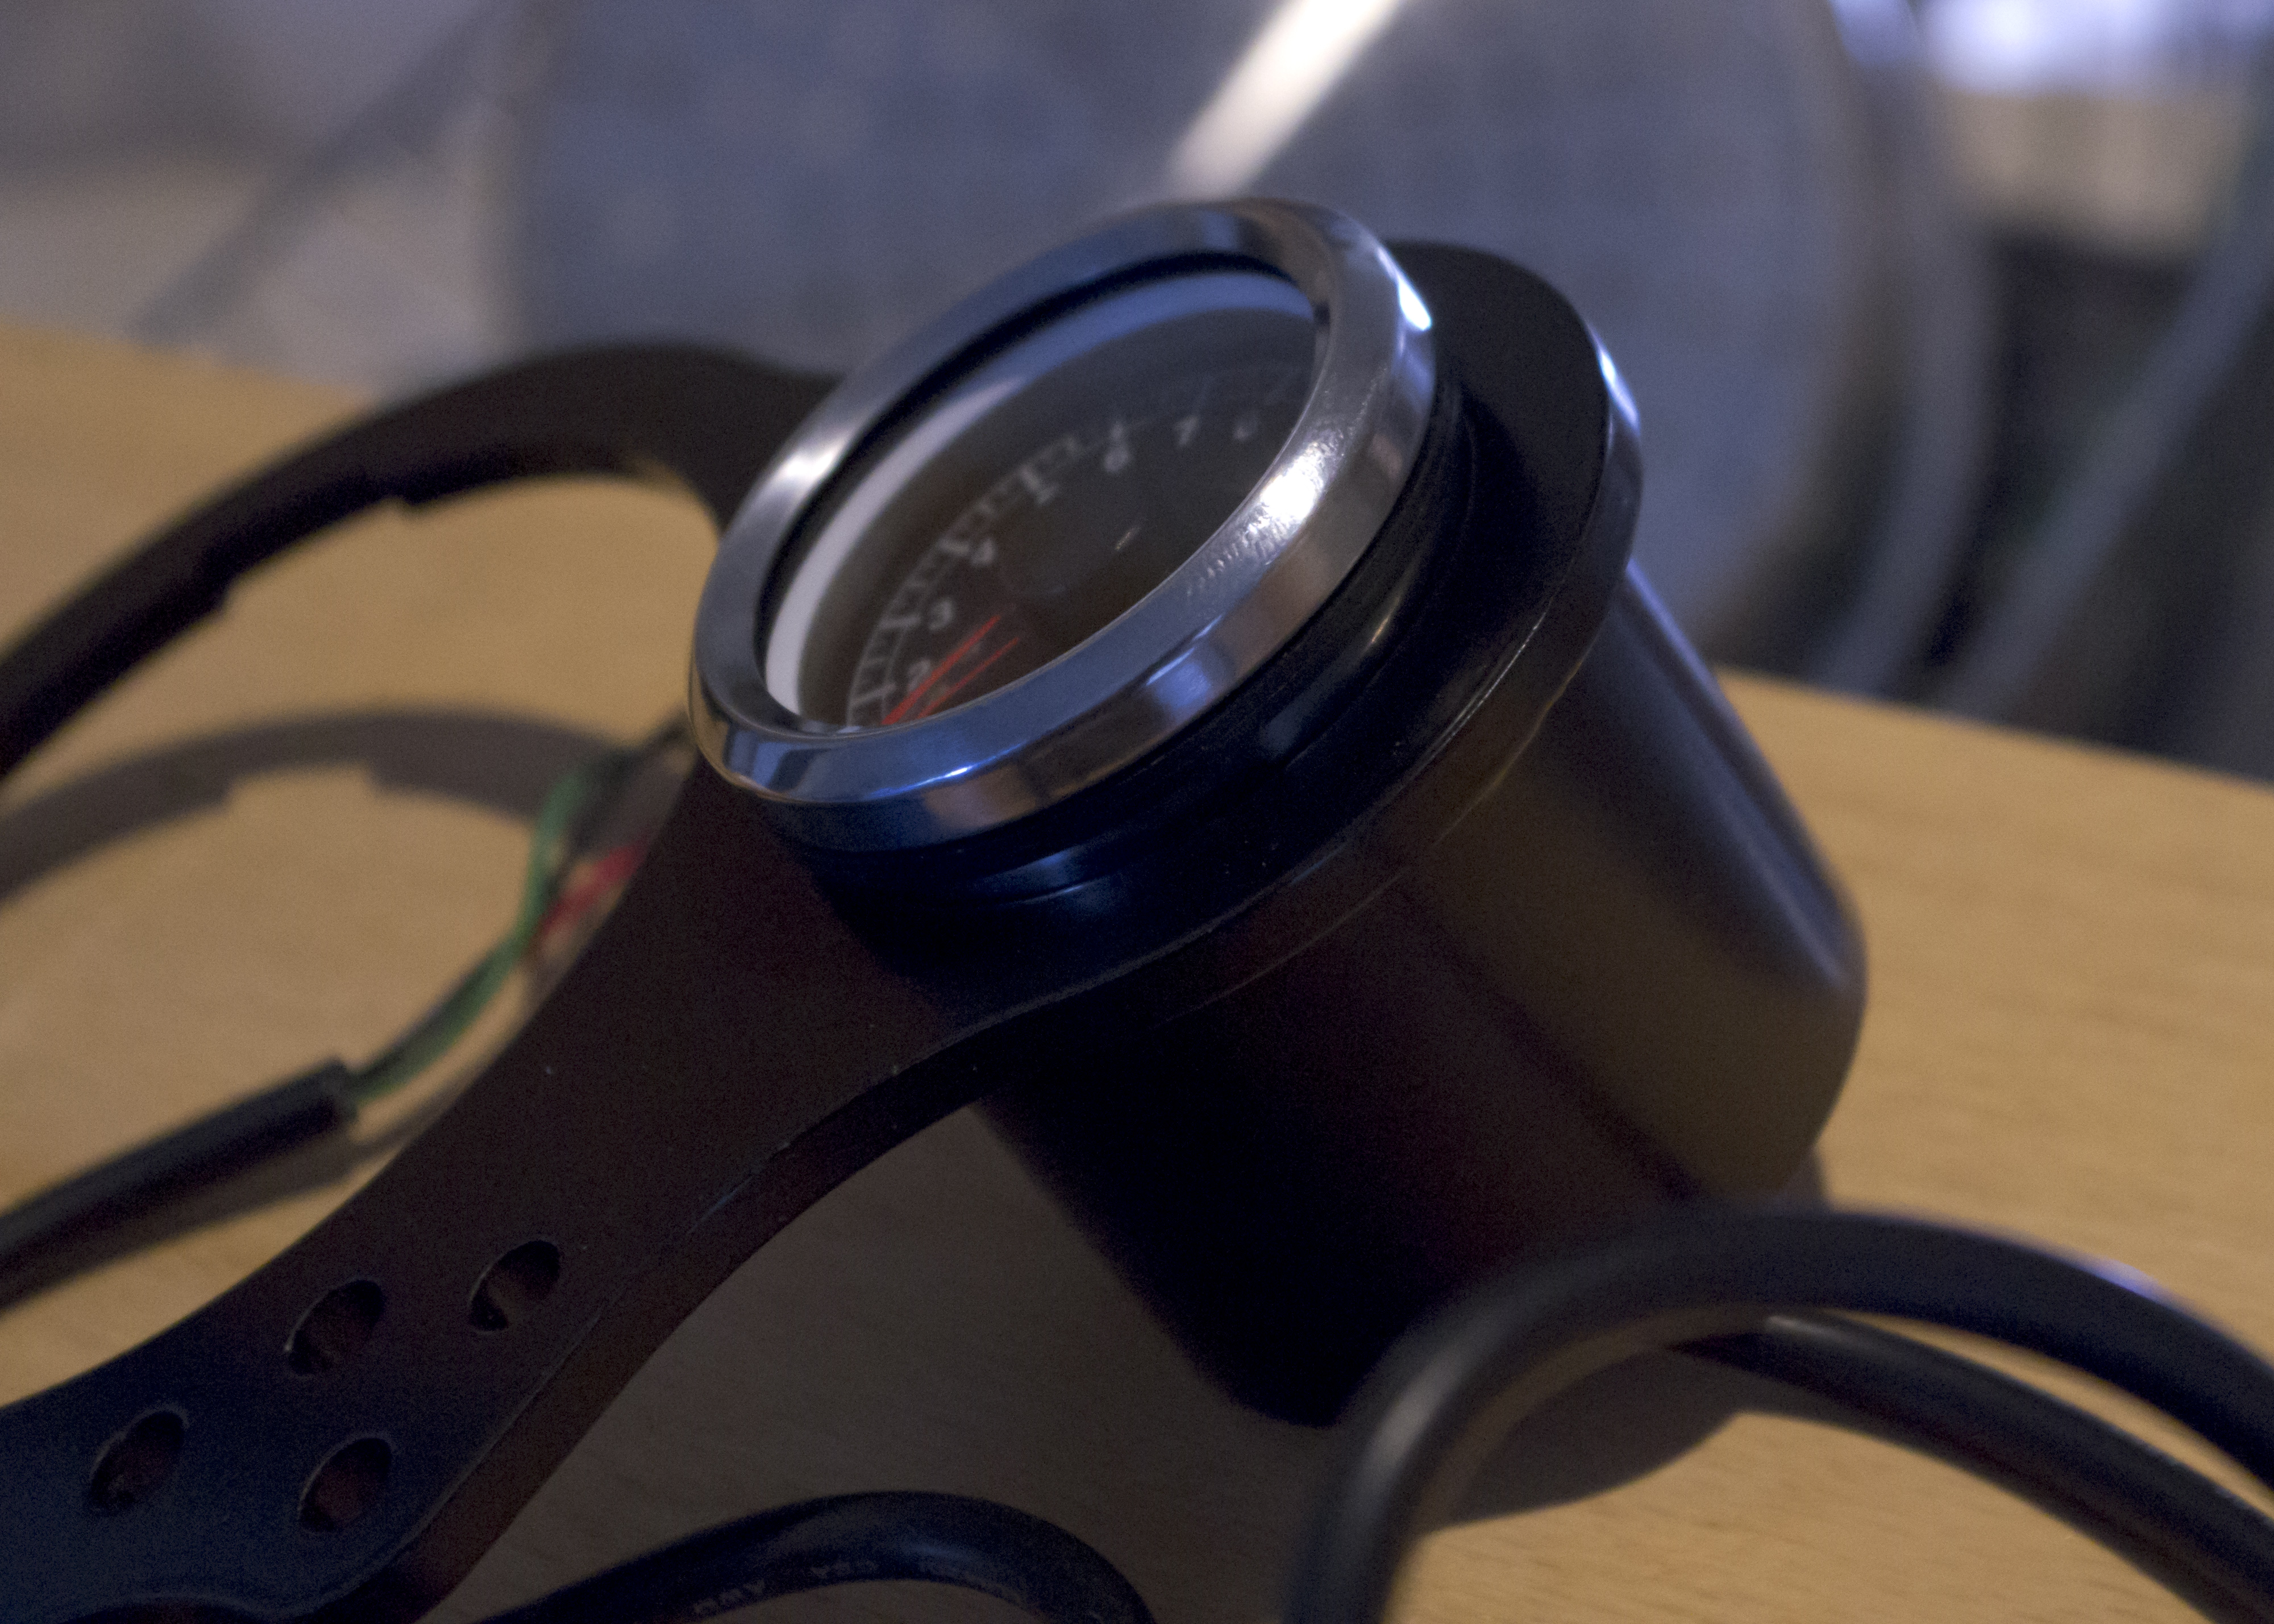
Secure the tachometer, using the provided washers (seen earlier, in the clear plastic bag), lock washers and nuts.
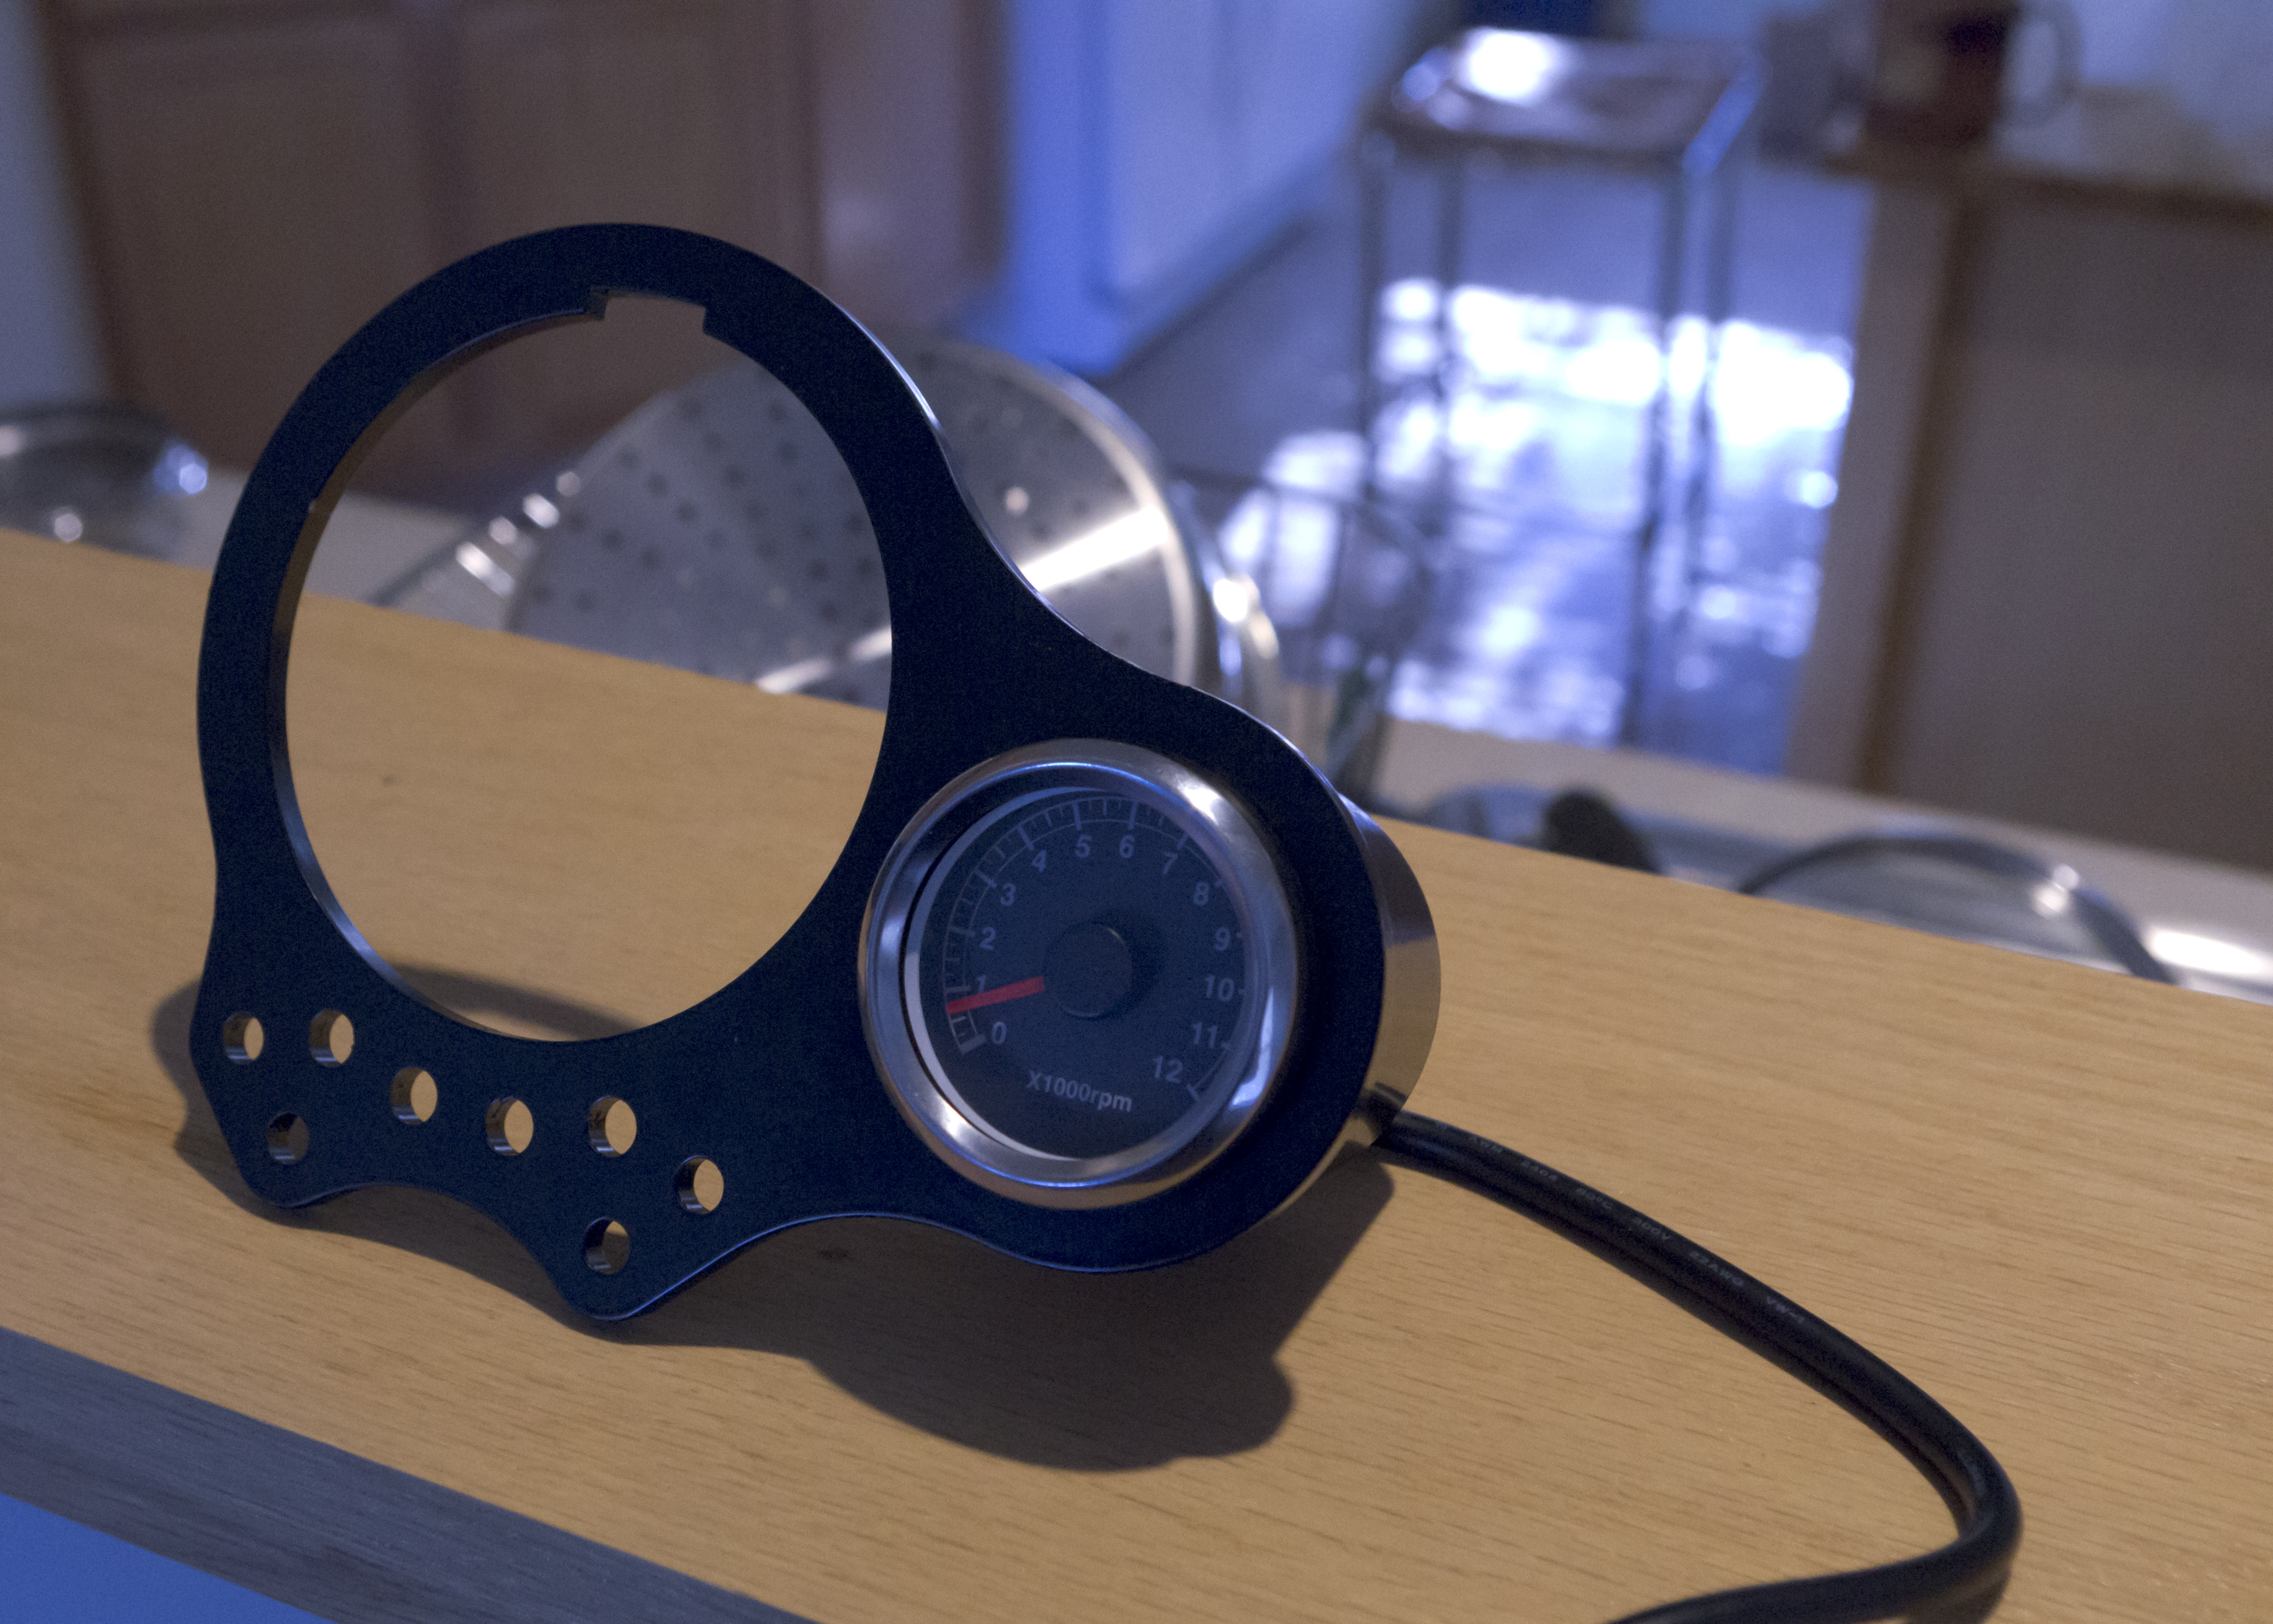
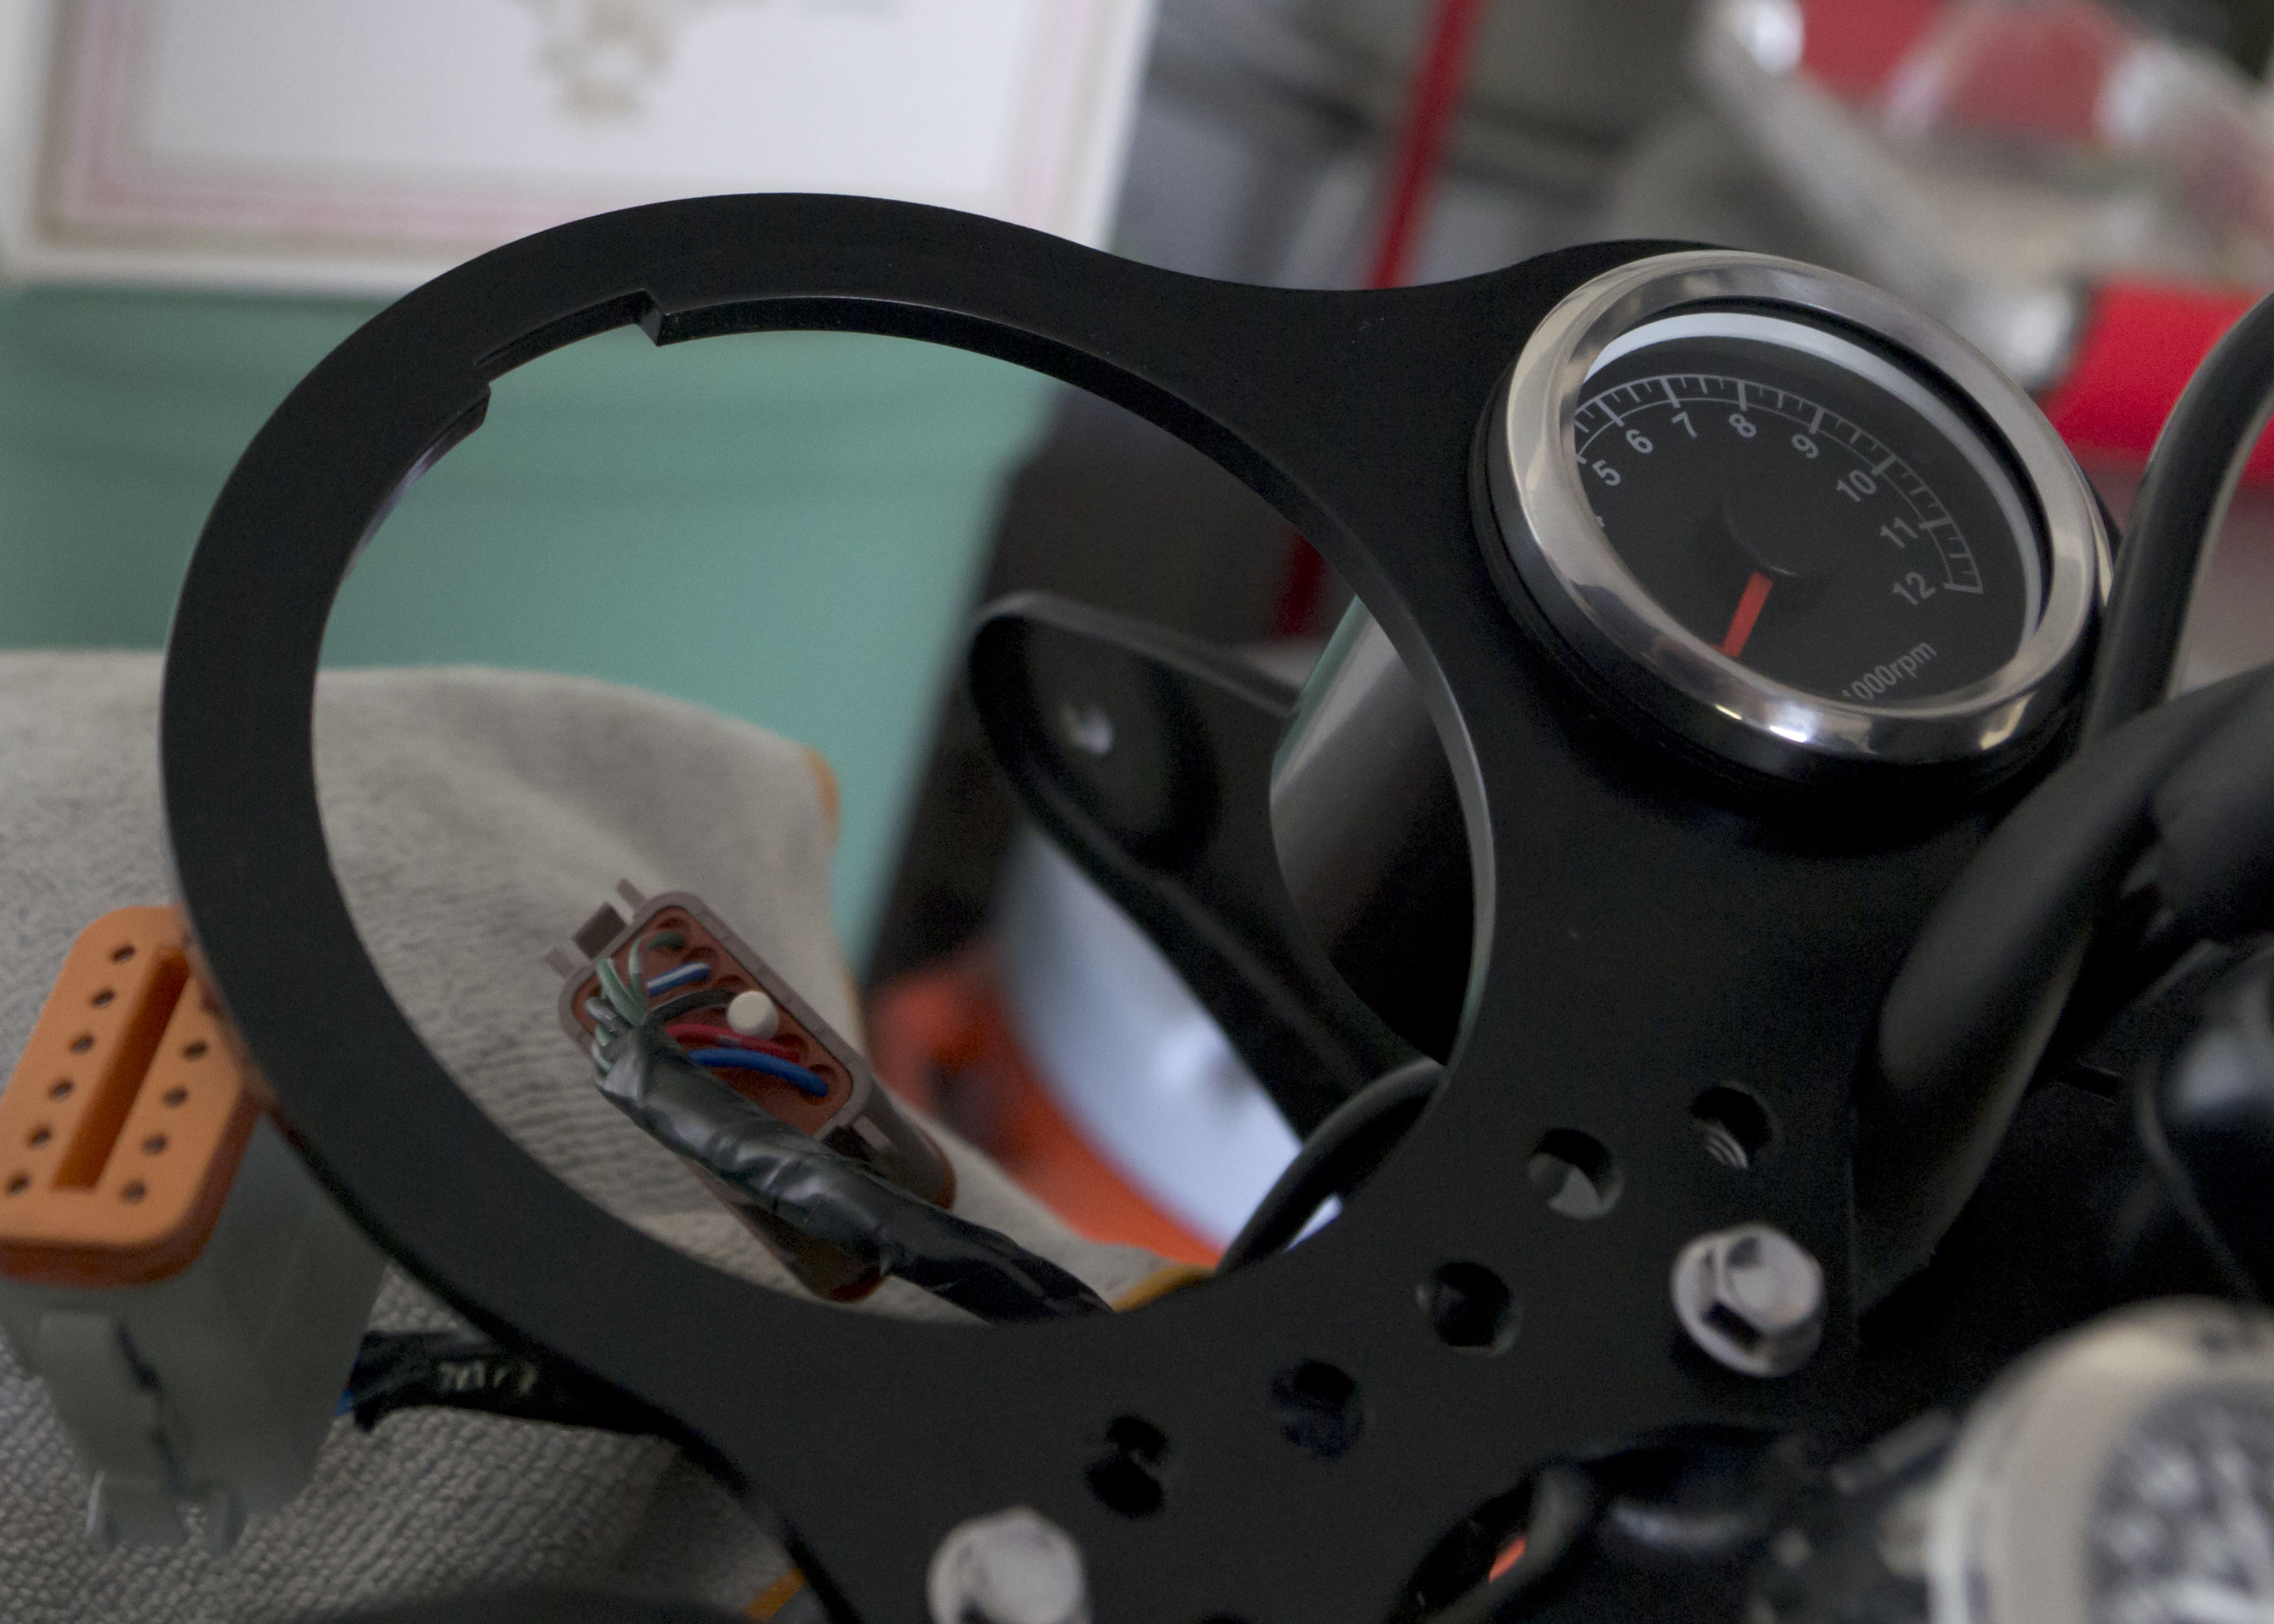
The tachometer — fitted in the instrument cluster. Now, to the garage!
Step 2: Disassemble the Stock Instrument Cluster
My Haynes manual says (chapter 8, section 17): “Before disturbing the instruments, disconnect the battery negative terminal…”

Disconnect the negative terminal: DONE
Remove the nuts from the back of the speedometer housing…
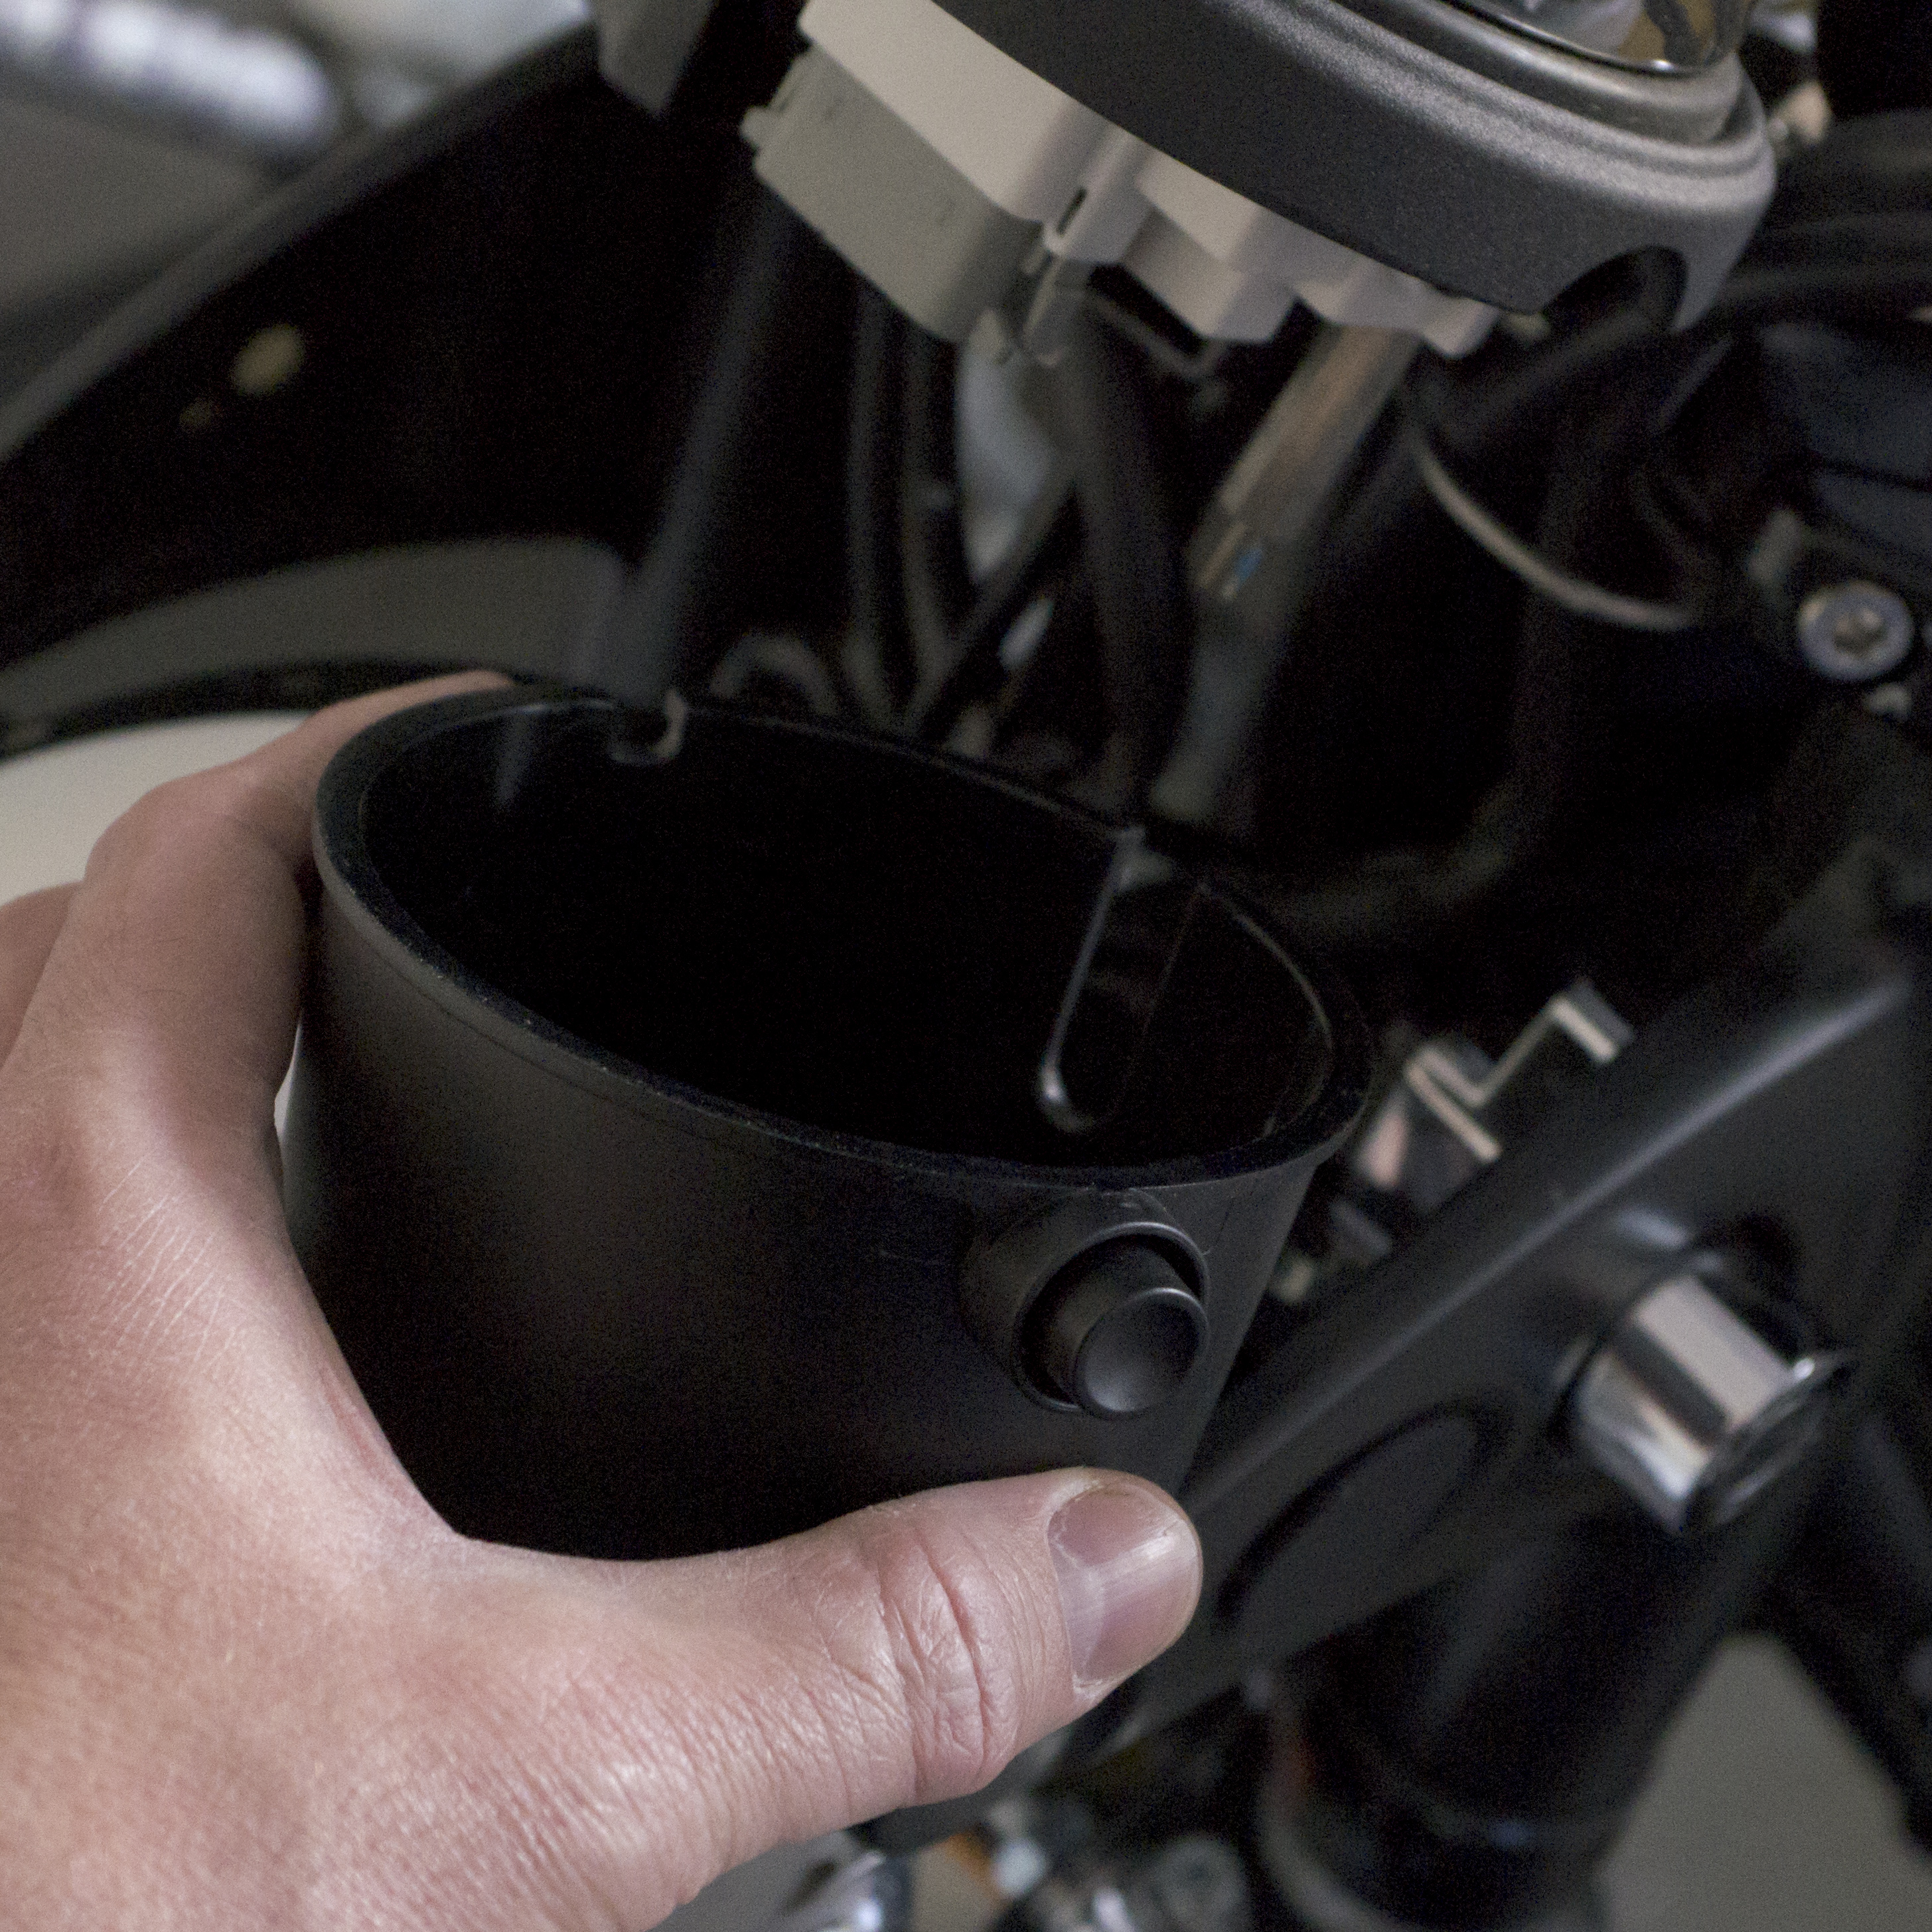
…and remove the housing.

Next, unplug the connector. (It will be stiff, but be patient and firm, but gentle. It will come out, eventually.)
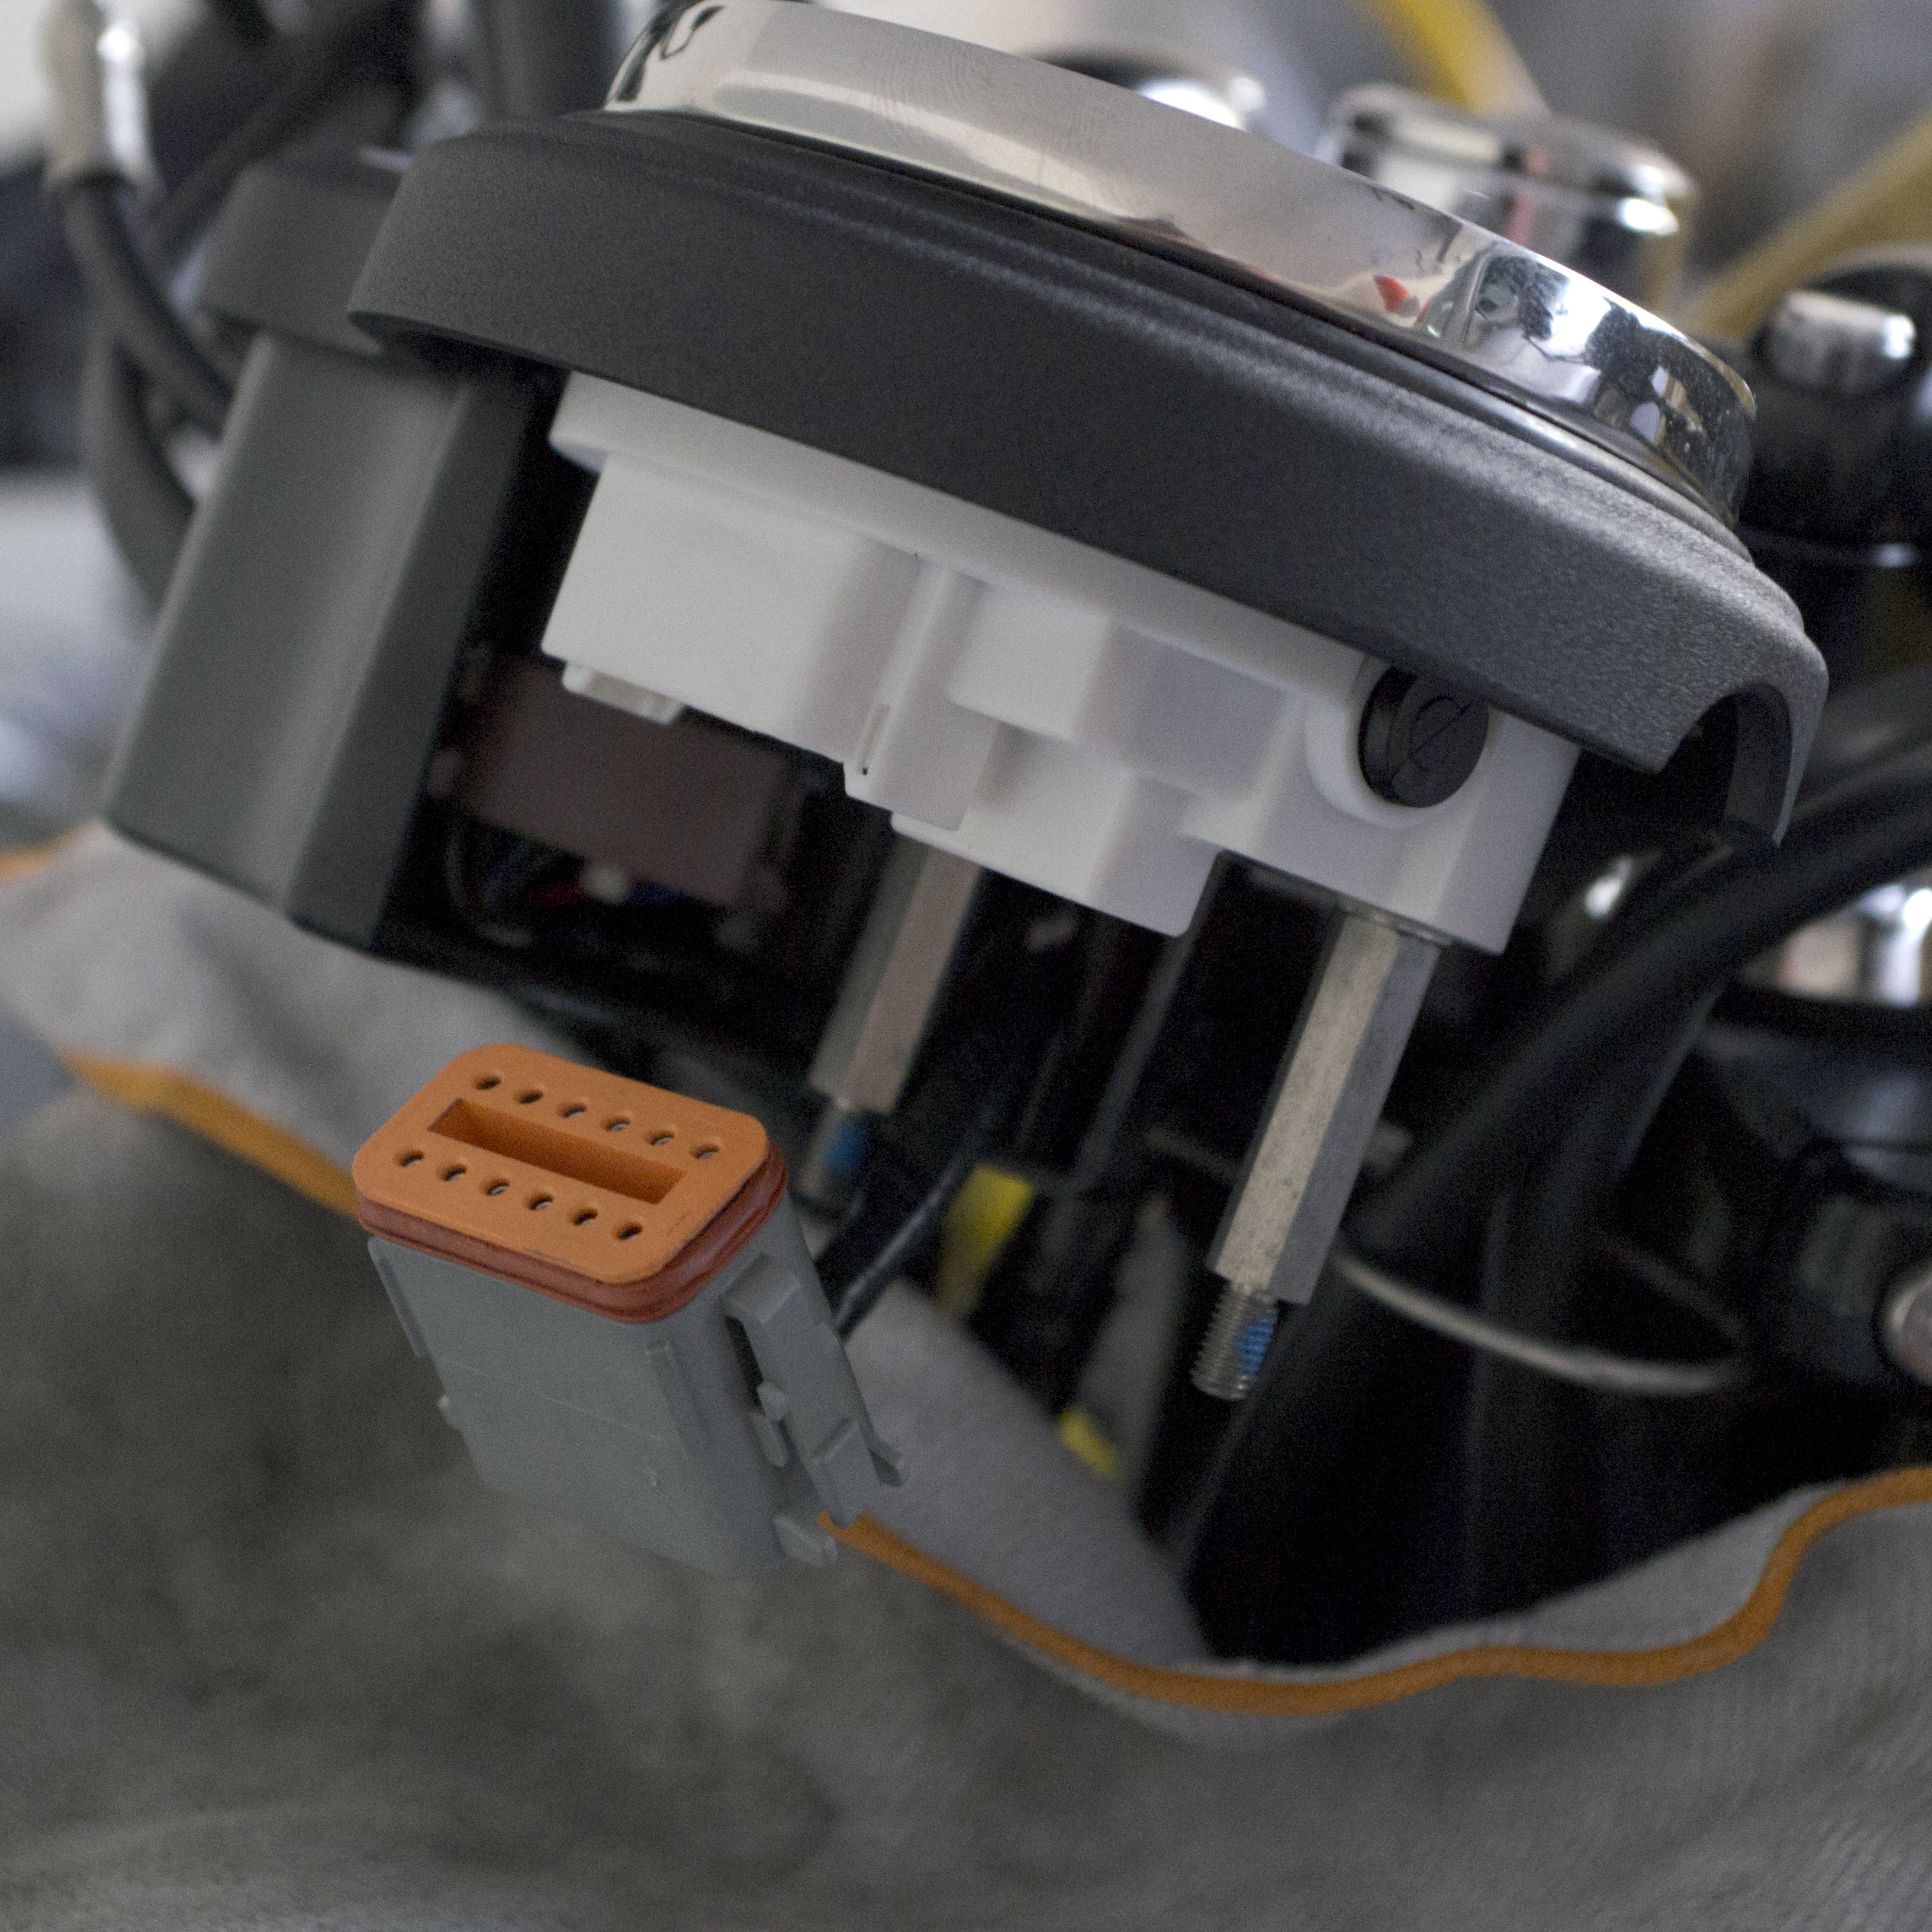
Speedometer after unplugging the connector.
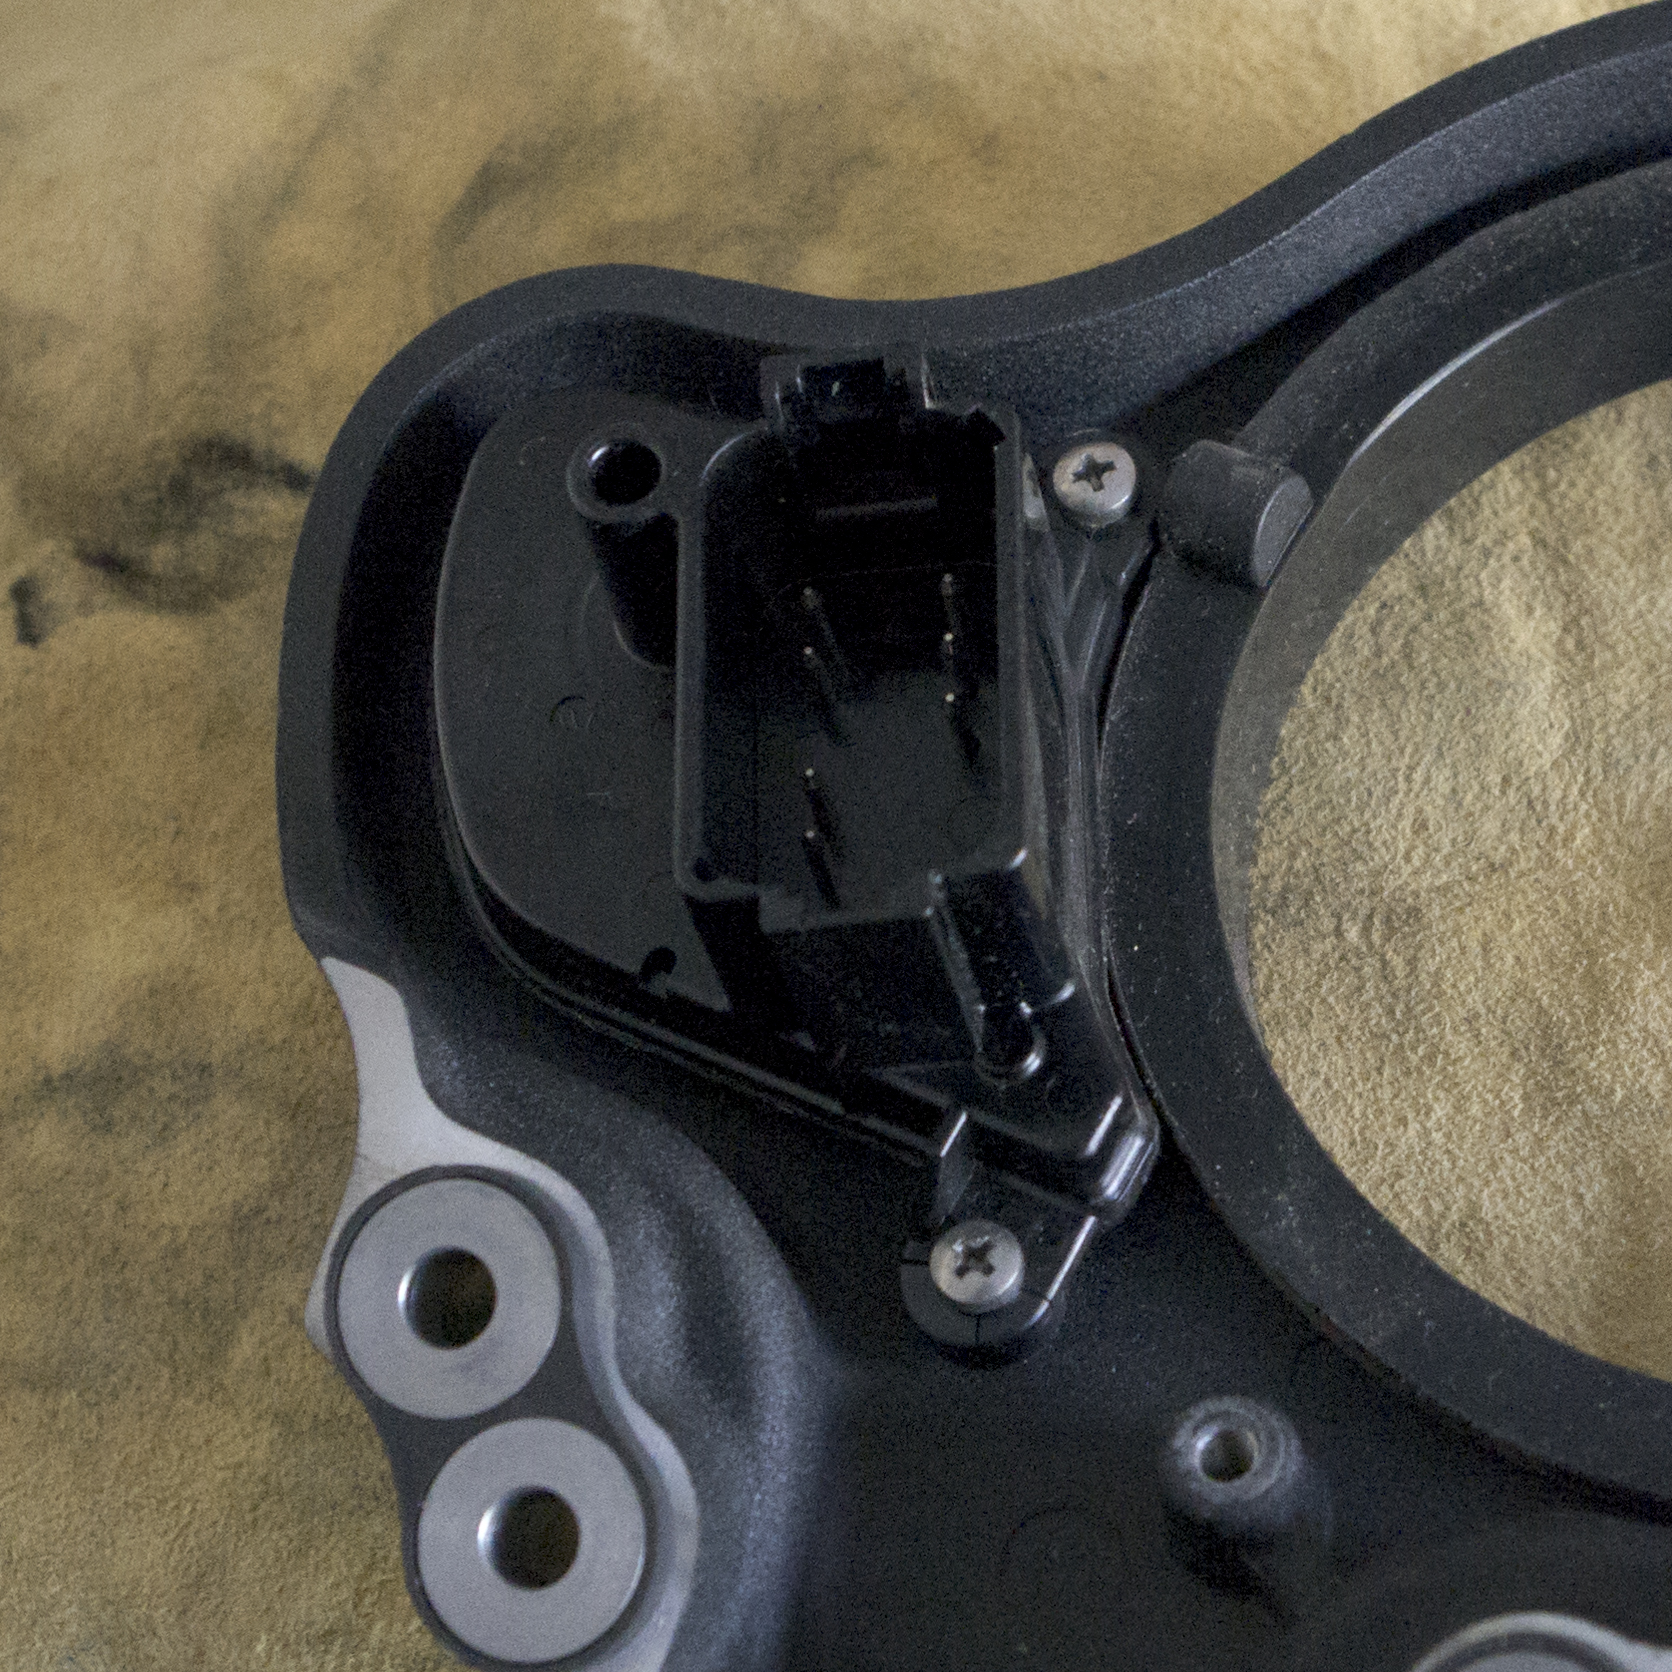
After unplugging the speedometer connector, remove the bolts that hold the indicator housing in place. You’ll see another connector for the indicators. This has to be disconnected, too.

Indicator light connector.
Now, you can remove the instrument panel. Those 4 bolts at the bottom of the panel: take an 8mm socket to them. (Bring a socket extension to the party — they’re pretty far down.)

Instrument panel removed.
Step 3: Remove Indicator Lights (or, “Hey! I’m not going to be able to retrofit these into the new cluster…”)
So, this was the bummer moment. I had an inkling when I pulled the second connector that the indicator lights weren’t going to be re-usable in the new instrument cluster. That inkling was right.
(I don’t see individual LEDs at the end of wires, here…) Removing the indicator lights from the stock panel.

The removed indicator lights. Yep: I won’t be able to put these into the new cluster.

Look again at the holes at the bottom of the new panel: those 4 holes in the middle are where you need to place the indicator lights from your bike.
So, I’ve got the stock panel off, now. Might as well take it the rest of the way. At the very least, I’ll be able to check for any fit problems and ask the guys at DCC what to do. Once I’ve finished, I’ll take everything back to stock.
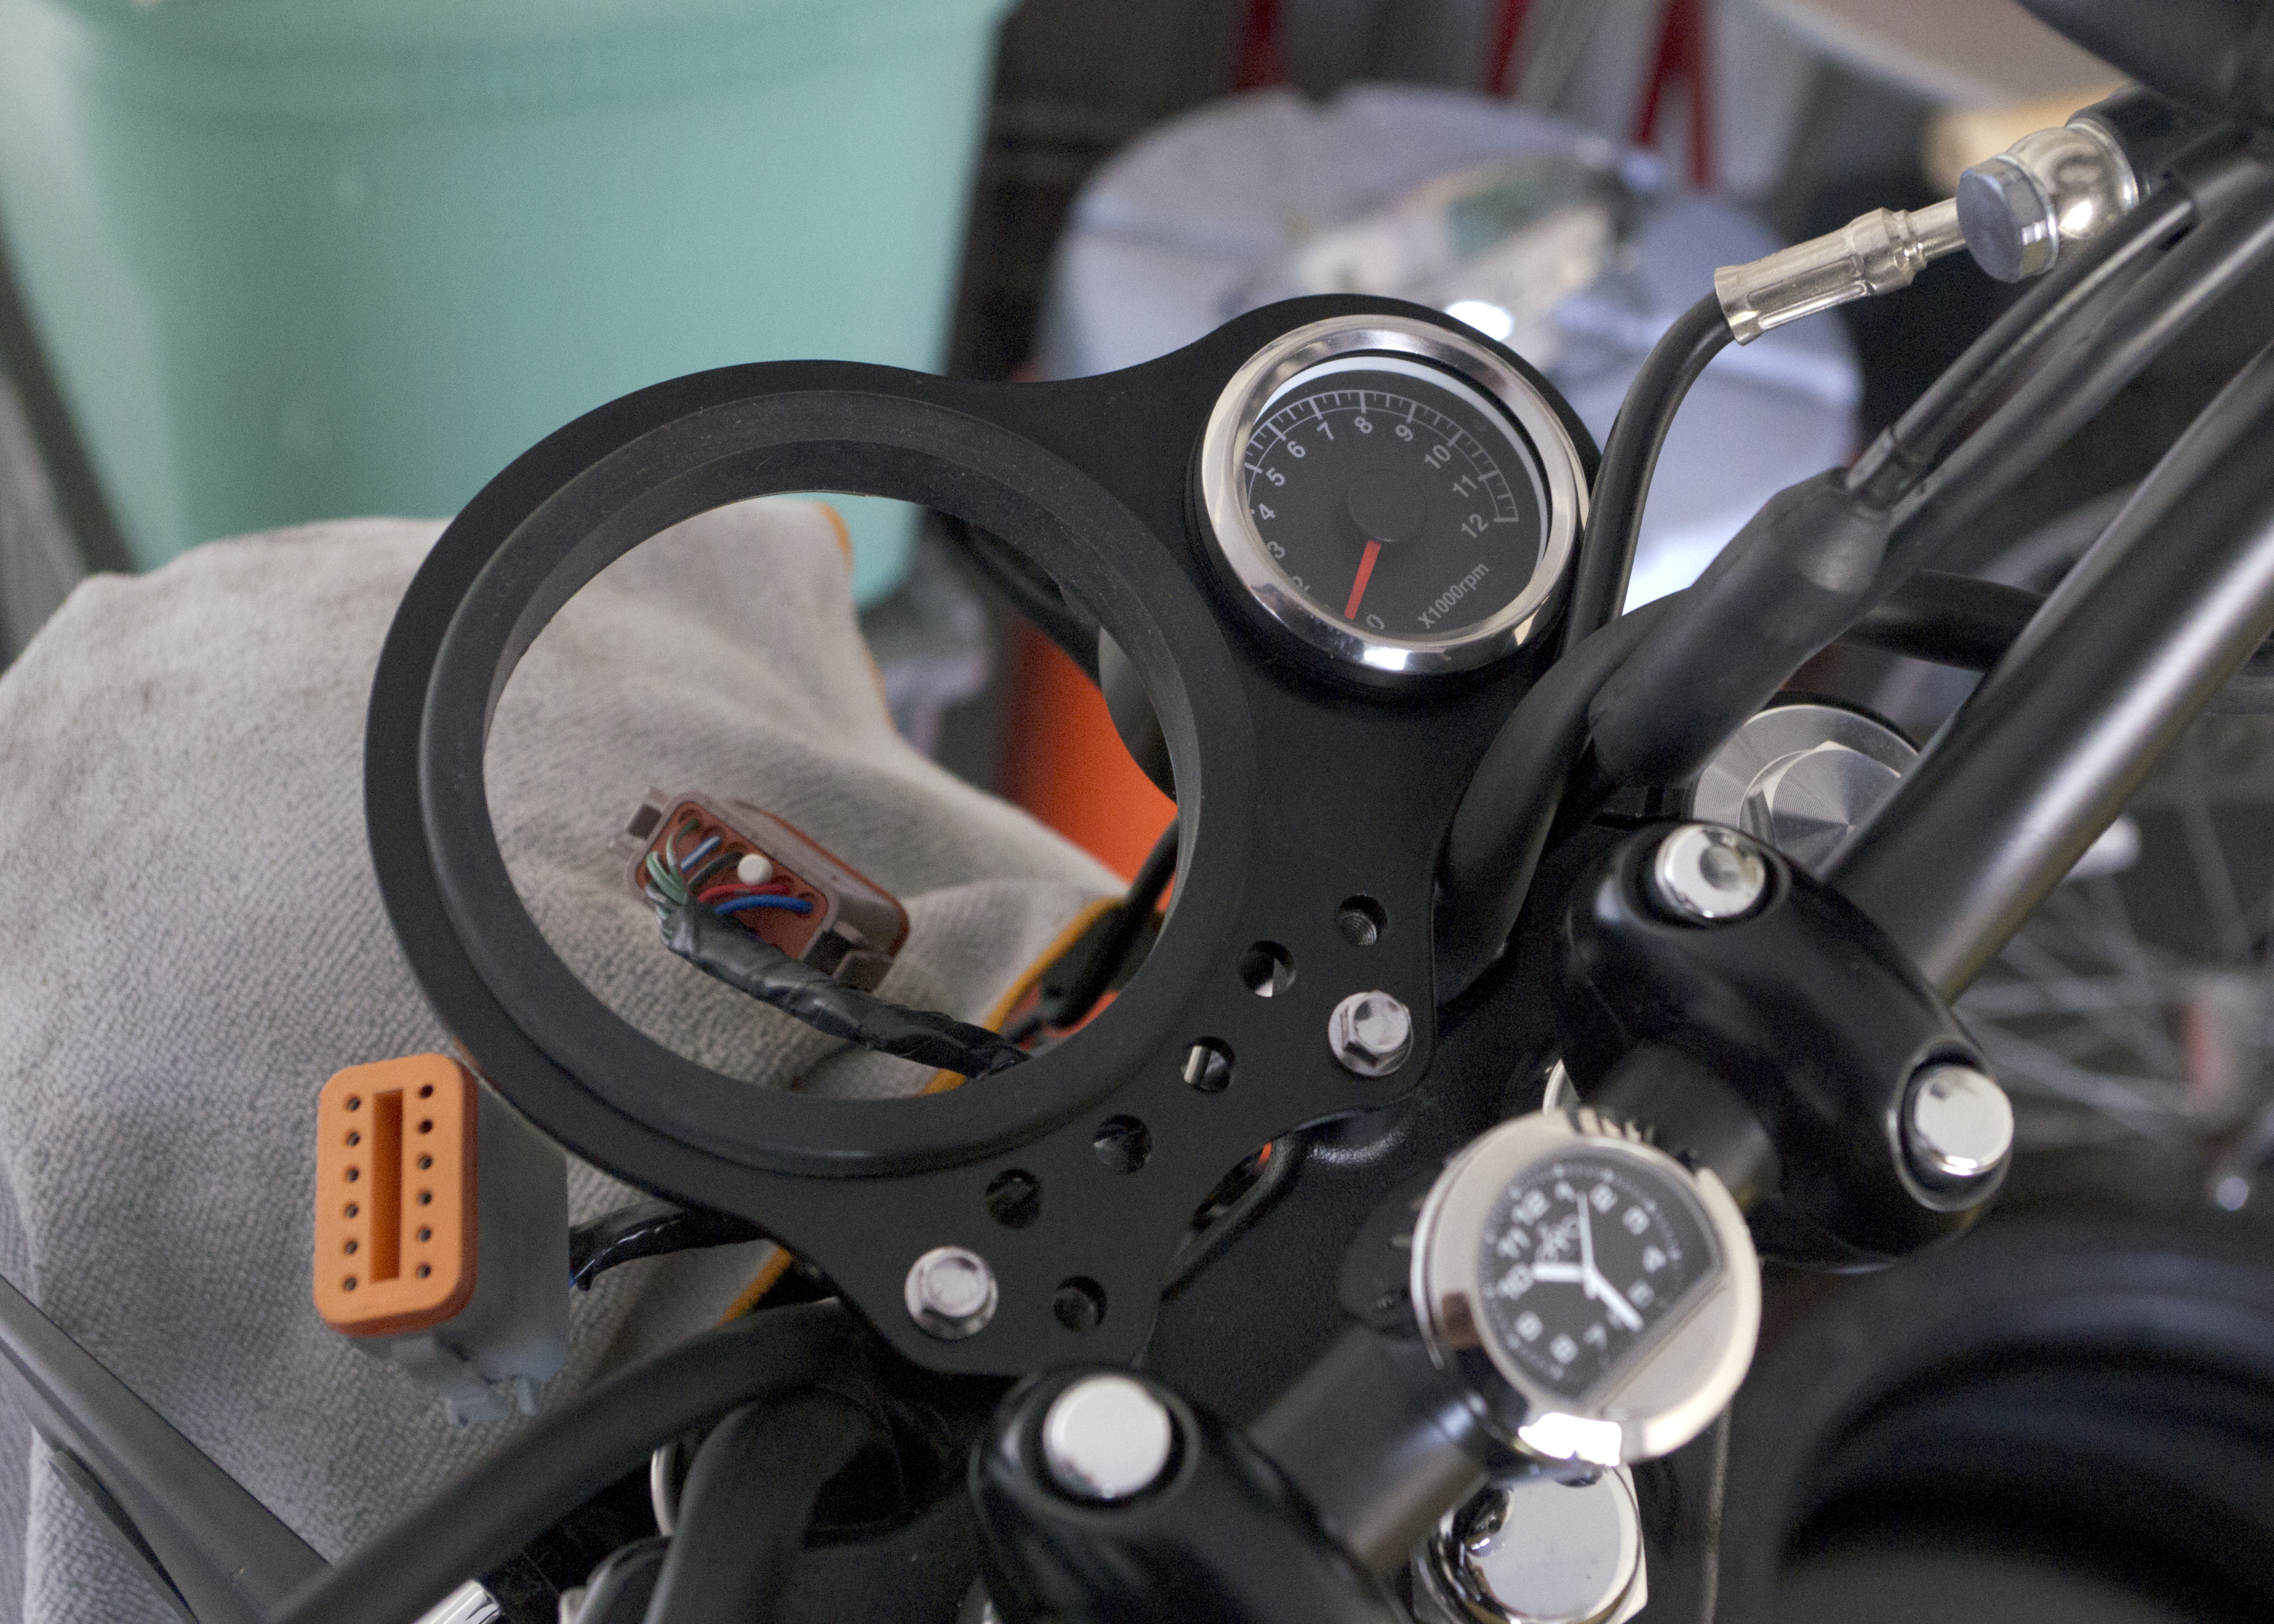
I bolted the new panel in place (just roughed it in, using 2 of the 4 bolts), to check for fit. It was a bit snug and I have one concern: the brake line is getting pinched, right by the tach. Is it tricky, or easy, to move a brake line?…
The new panel, bolted in place. (Sort of: I didn’t see the point in using all 4 bolts. )
Line up the dovetail in the stock speedo ring with the notch at the top of the DCC panel.
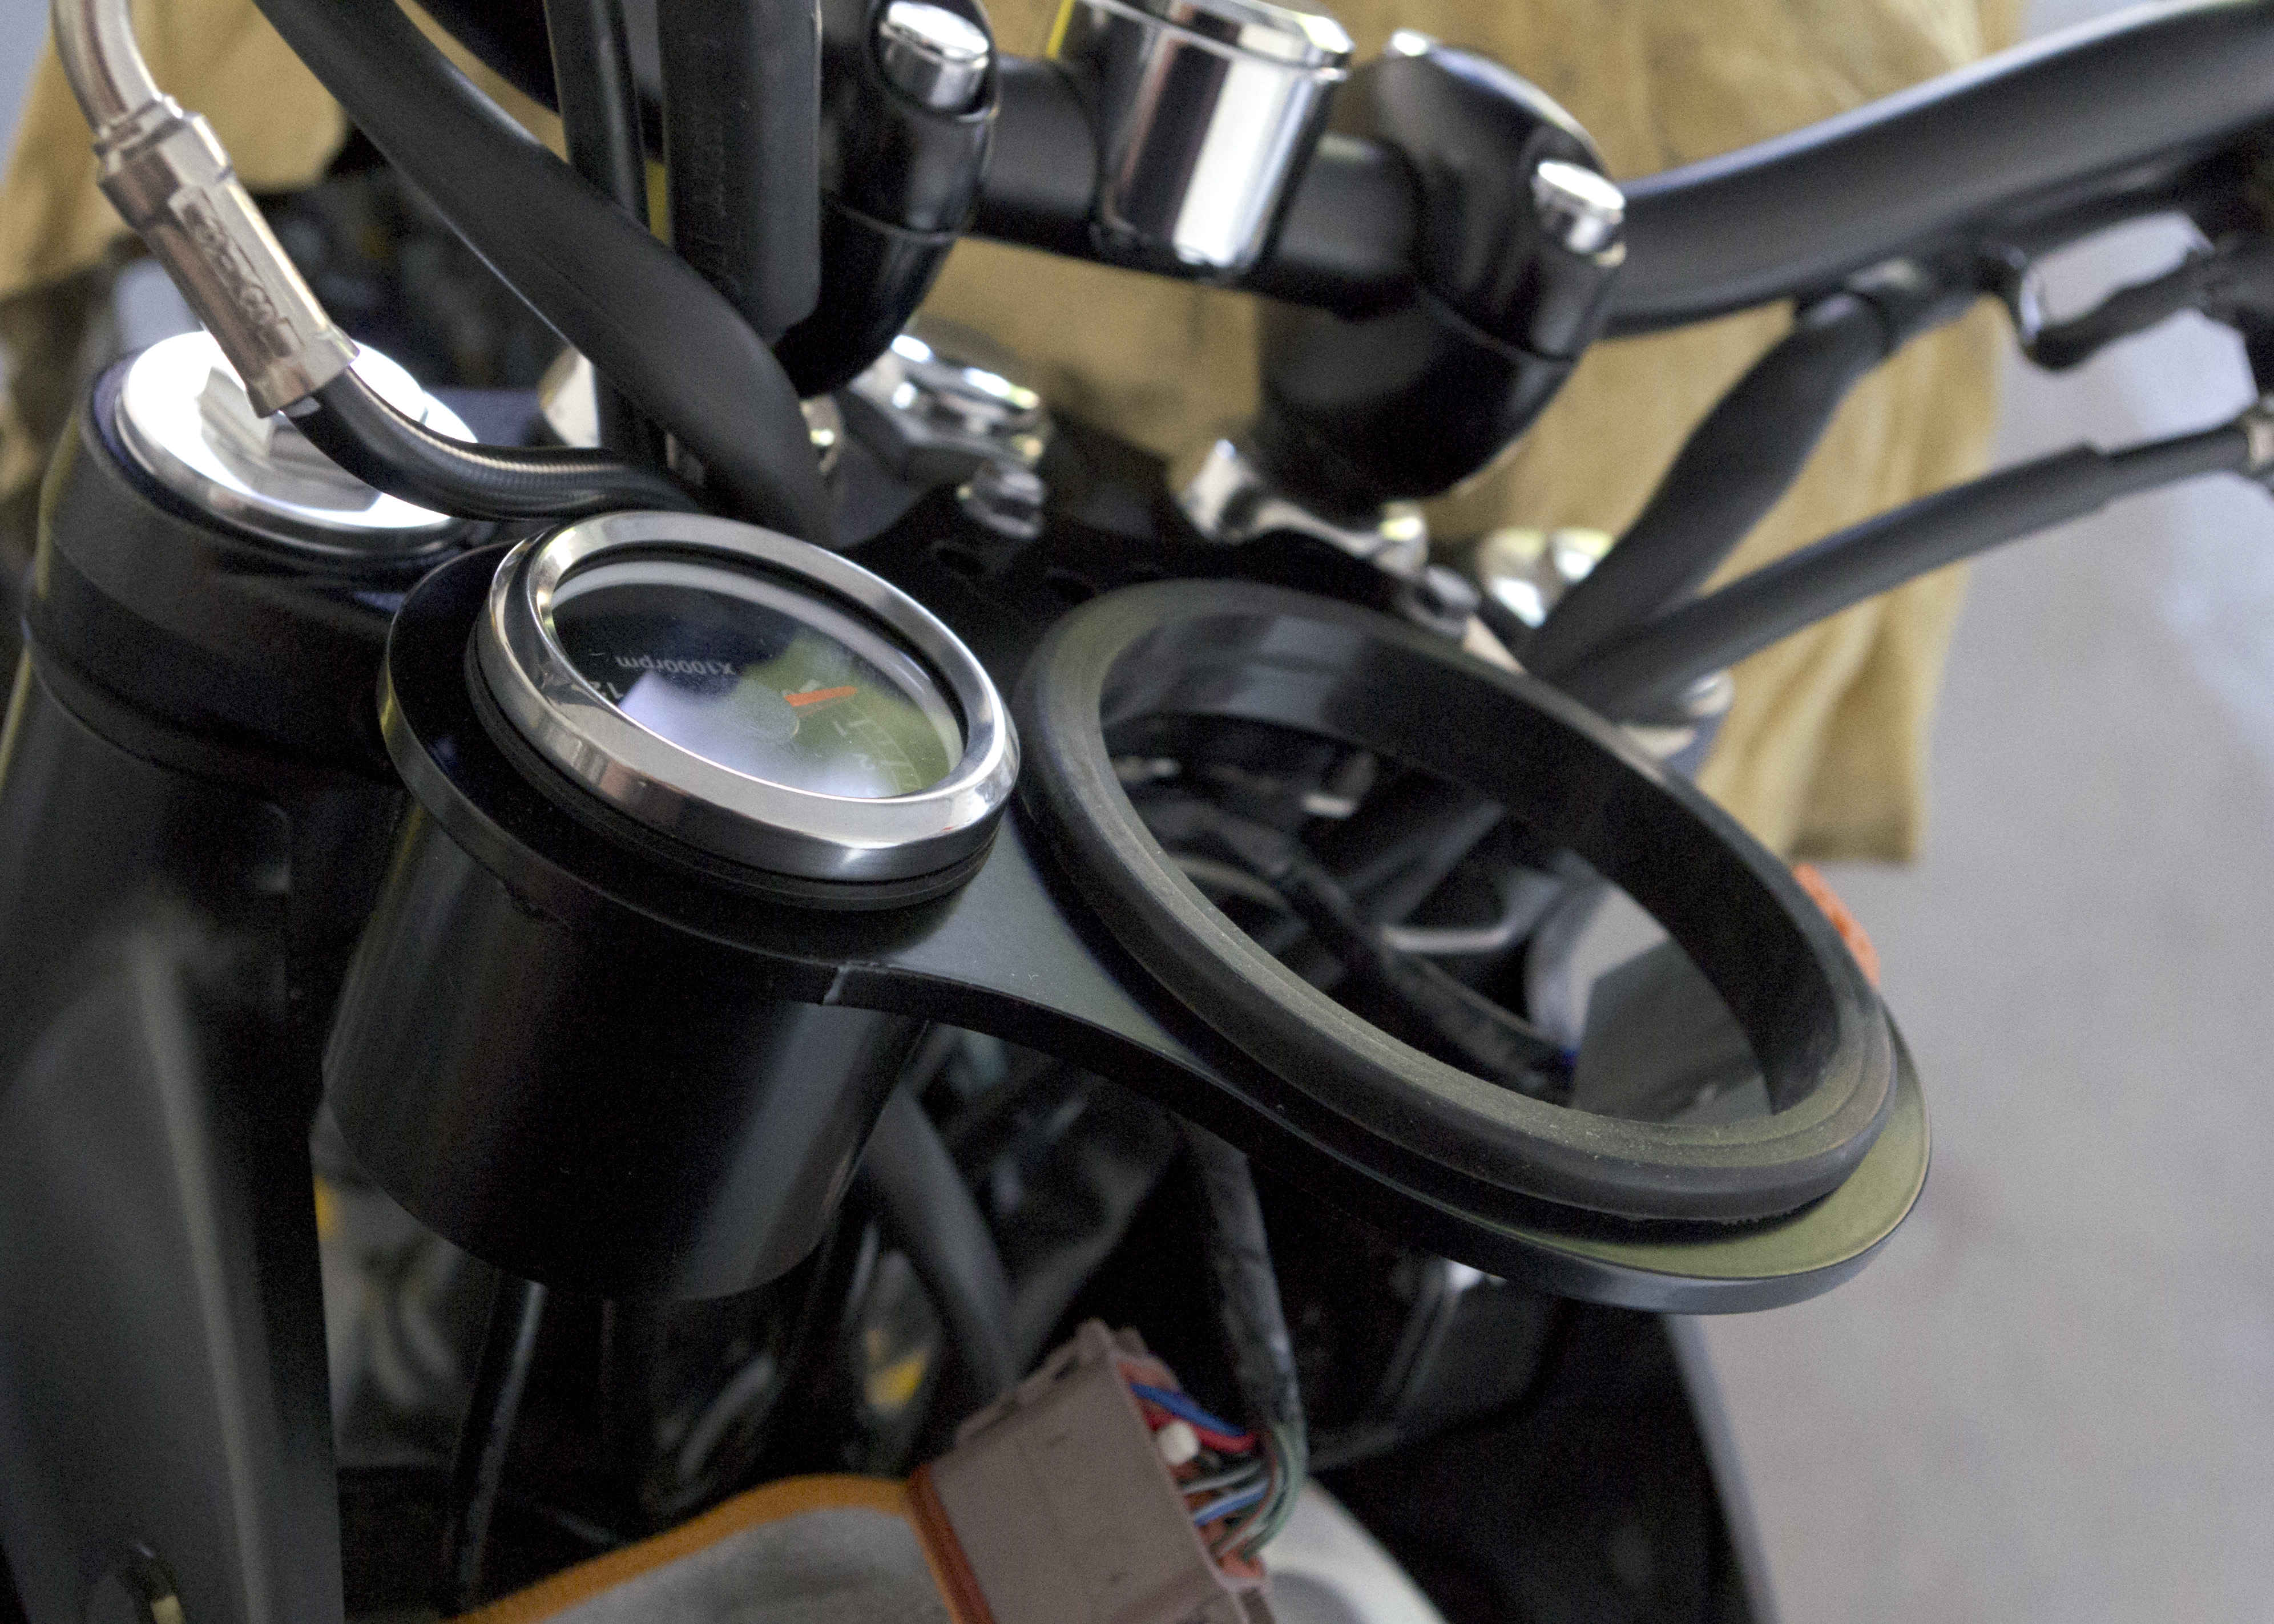
Stock speedometer gasket in the new panel.
Now, it’s time to drop the speedometer in place.
…And to re-connect the speedometer connector. Once that’s done, line up the speedometer bolts with the holes at the back of the speedometer housing and secure everything.


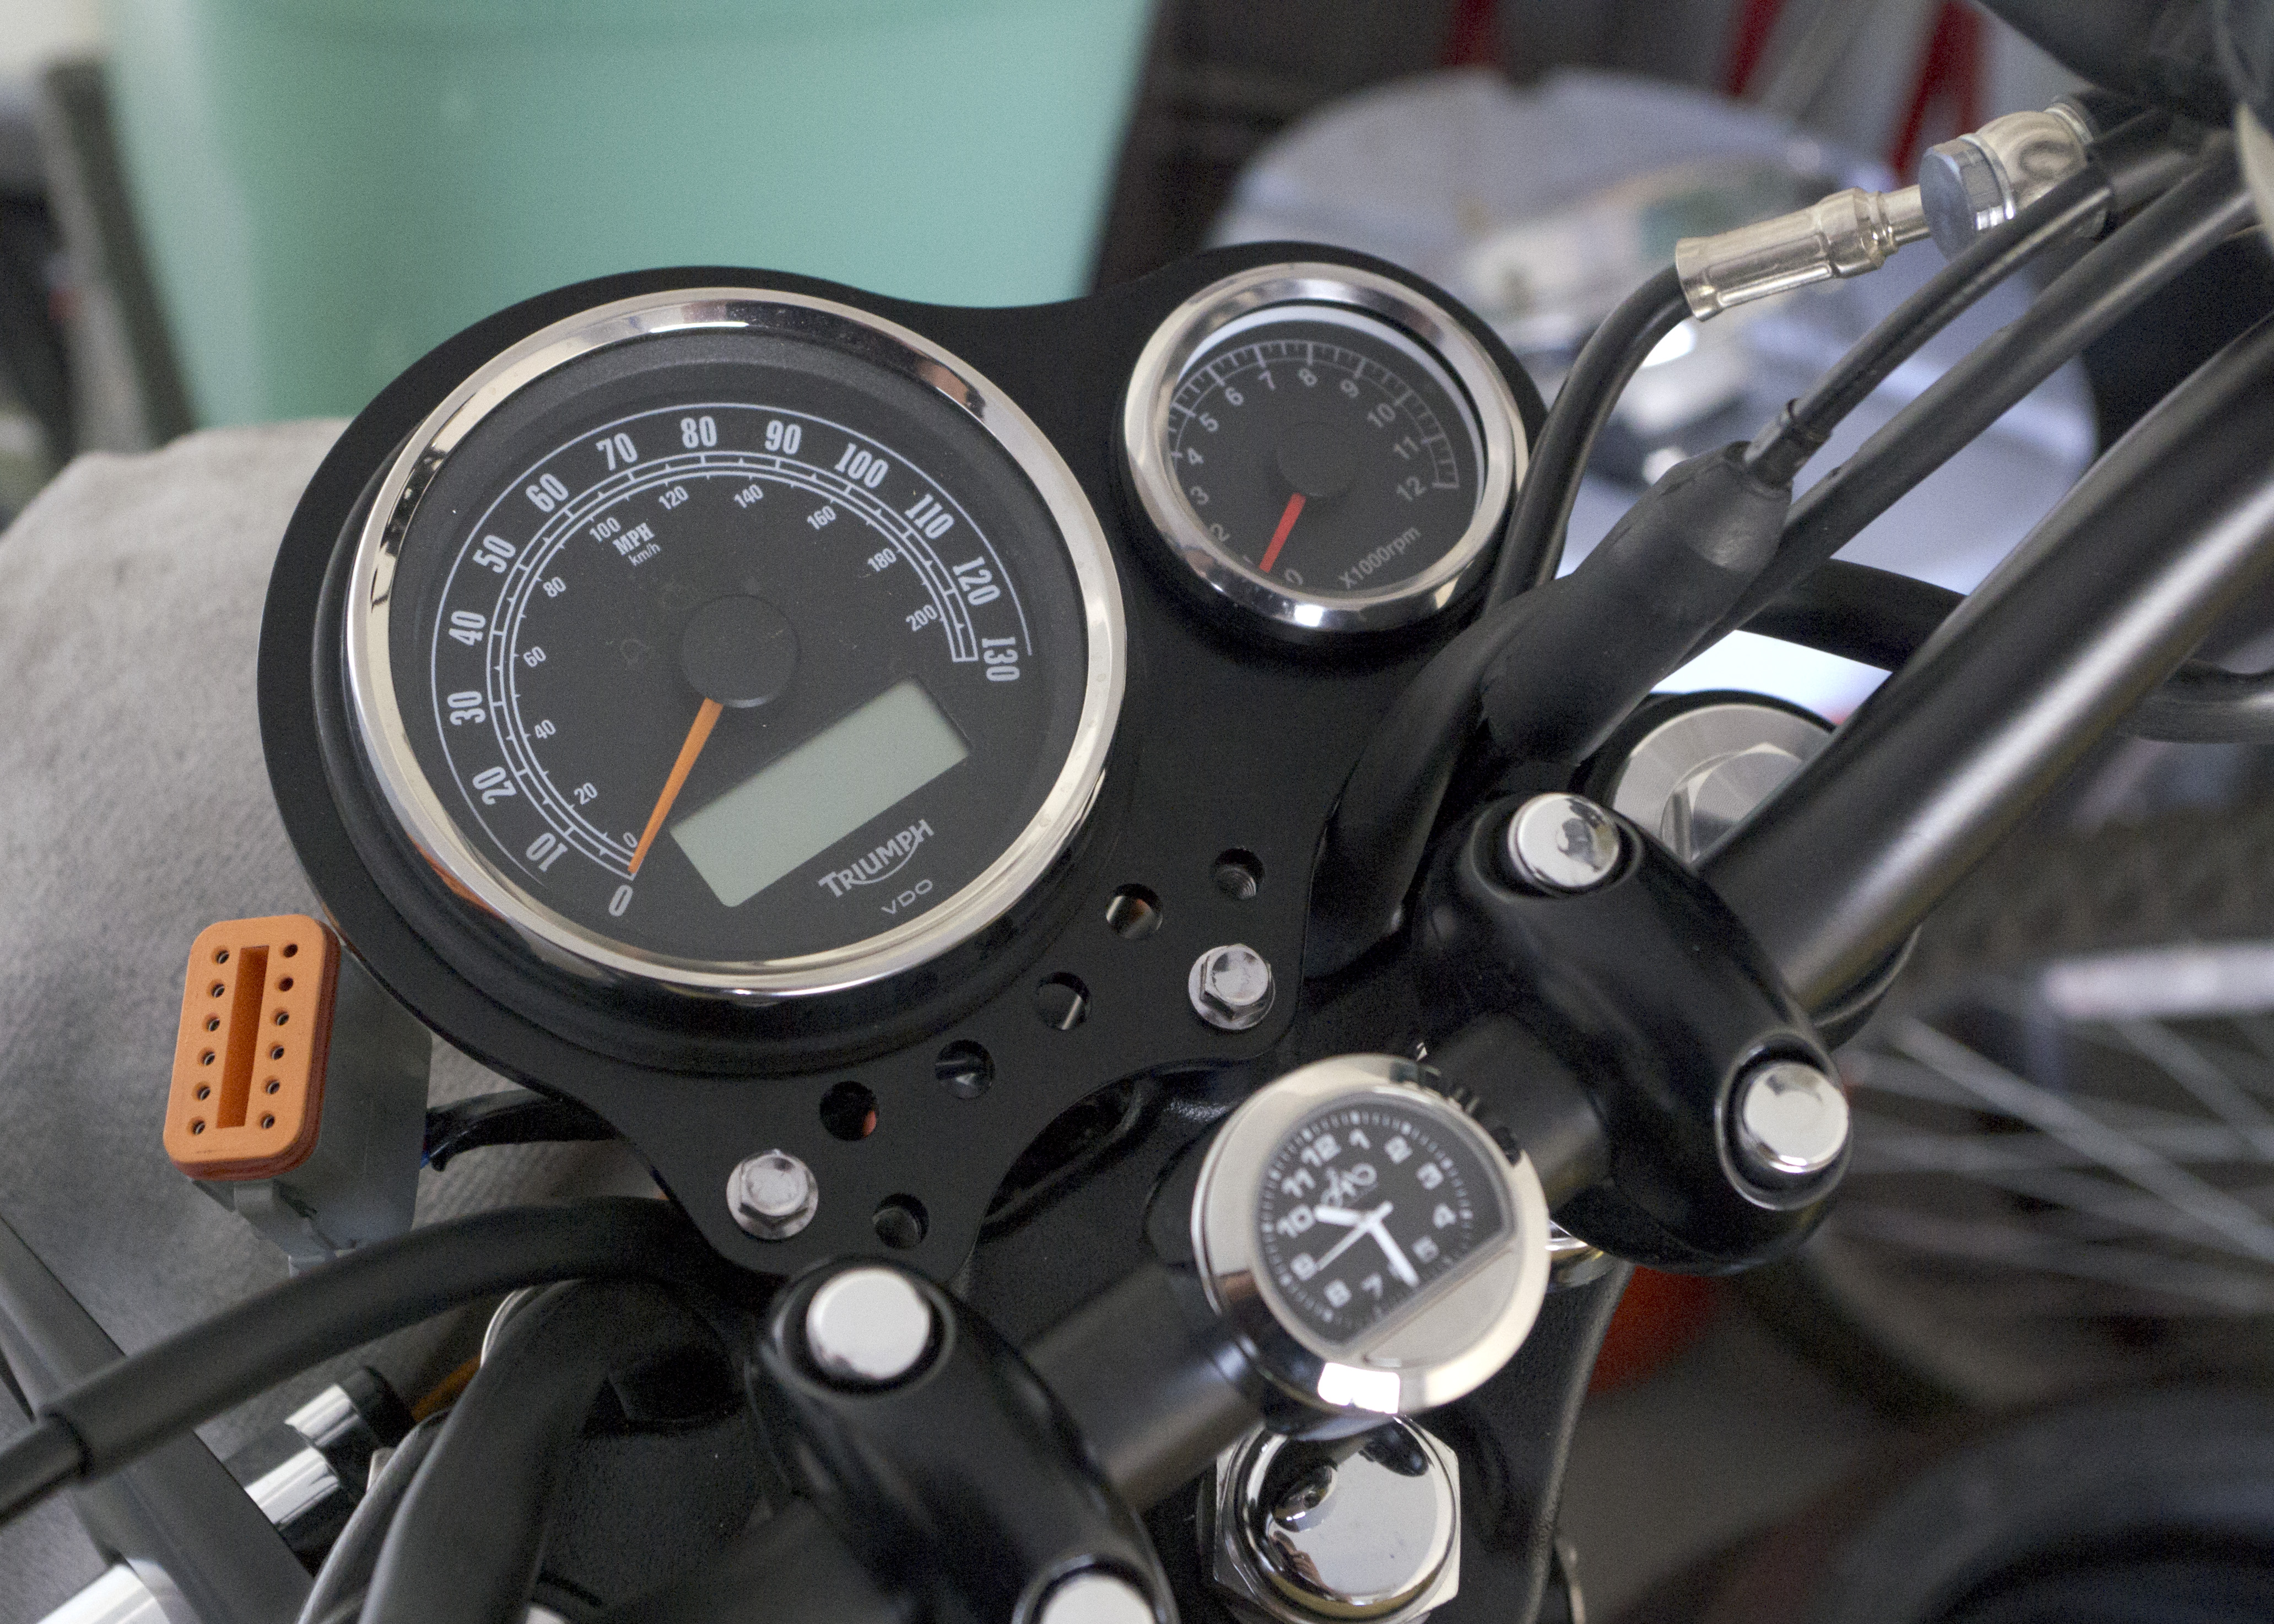
Looks really nice and clean!

Not bad!! 🙂
So, I know now that everything fits. Pretty much. Unfortunately, I can’t ride without indicator lights. So, I took everything back to stock, after taking this last picture.
Summary: I Need Help
Without the ability to re-purpose the stock indicator lights in the new panel, I’m stuck. I plan to email the guys at Dime City with a link to this post and try to get their help. I bet they have some LEDs that will work well, here. I bet they could also help with the inevitable wiring questions. I’m also going to ask on Triumphrat.net — there are some really wise folks, there.
I do wonder, though, why DCC doesn’t mention this on their site. I’m not a spendy kind of guy. But, I would rather learn about the extra parts I need when I’m building my order, instead of later on. Having to place a second order for what I’ve discovered I need means having to pay for shipping a second time — and shipping isn’t exactly cheap, these days, even for the slow stuff.
But, I do love this panel and am looking forward to riding with a new tach — someday!
Awesome post, Lee! Sorry about the problems. I do hope DCC comes through for you. Perhaps they should put a link to this post in the package when they sell this kit! Your photo instructions are great!
I agree with Rbirkley, great post. This is a pretty cheap way of adding a tach, compared to the Triumph kit. Looks good too. I’d like to know how you got on with the lights as I’m thinking about upgrading my Bonnie.
Hi, nice post, Mr. Lee. Is it possible to remove the glass from the original speedo? I need to clean it from inside. Thank
@Murilo: it may be possible, but I’d have to disassemble everything to see.
If you don’t have a copy, I’d highly recommend you purchase the Haynes Manual for the Bonneville (currently, covers years 2008-1012). Their write-ups are very thorough and well illustrated.
Lee, many thanks!
Lee,
Any news from DCC or updates on making this conversion work on your bike yet? Seems like a pretty poor customer experience if: (1) there weren’t clear instructions, and (2) the kit was not set up properly for your model and year of Bonnie.
It seems to me that if a brand like DCC wants to build a good reputation with their target audience and customer profile, they will learn from this, make it right for you, and not make the same mistake with other customers.
The Internet and social media is making it difficult for brands like DCC to get away with not addressing these kinds of customer issues.
Randy
Well, I usually like to give someone the benefit of the doubt. As such, I’m willing to allow for the possibility that there is a certain level of customer that Dime City Cycles is aiming for, and that I don’t fit that category. When I wrote and asked what LEDs they used for their own build, I was pointed to a set that they carry. (I wondered why there were no links from the bracket to “additional required items”, but what do I know?)
When I wrote again, saying that I would probably be buying those LEDs and could they provide a wiring diagram, since their build is on a VDO instrument Bonneville (just like mine), I got the reply “No I truly would not, it would be all DIY.”
So, at this point, I feel I’ve wasted enough time (and money) with Dime City. As I said, I’m probably not enough of a mechanic to fit the category of customer they are shooting for. So, I’ll push on with other projects and buy from other sources. (Just installed a matched set of Hagon 2810’s and fork springs, purchased from the very helpful Mike, at bellacorse.com.)
I’ve purchased some LEDs from Mouser, and I like them. I got some excellent wiring advice from DeCosse on the Triumphrat.net forum (including a tip to use a terrific product called Posi-tap (http://www.youtube.com/watch?v=Yiimgl-Rdmw)). I plan to finish the dashboard build and I will use this bracket. But, it will still be several weeks before I have all of the parts that I need to finish the project.
Once I complete it, I will post another post here.
In the meantime, I would offer the following tips:
– if you are a weekend wrencher (meaning, like me, you ride more than you modify and you pretty much don’t race)
– if you want a tachometer
– if you need to replace your instrument cluster in order to have a tachometer
– then, Google ‘D9 bracket bonneville’ and follow the links to newbonnevilleriders.com. The man’s work looks really good. I haven’t talked with him, so I can’t offer any stories from experience. But, if I could start over, I would start with him. I’ve read his posts and he seems more than willing to help people build full solutions out of his bracket kits. (He’s even posted a sticky about what instruments work with VDO and pre-VDO bikes.)
Thanks for the follow-up!
–Lee.
the d-9 dude is the go to guy for all kinds of custom brackets made especially for the bonnies/thrux….he can be found via the triumphrat.net forum….everyone swears by him. me, I just bought the cheap tach…these can be attached to the speedo using the little y brace that comes with the tach…the tach then just sits at the 2 o’clock position In relation to the speedo….my point is you do not need an expensive bracket to fit those small speedos.
You must have been going through this just before I started down my path to use DCC’s solo-speedo bracket. At the time, the description on the single-gauge bracket page suggested that the LEDs would come with it, but they don’t, as you know. They’ve since updated both gauge descriptions to reflect this and to link to the LEDs they have for sale.
I was similarly surprised that there were no wiring instructions. After getting the bracket, I wrote them to ask 1) where were the LEDS (see above), and 2) how do I wire it. I was given a similar “DIY” response. I bought LEDs from Radio Shack, ones that included a resistor for a 12V system.
I wound up having to wait to install it (ya know, life gets in the way of bike projects), but I did get the job done over the Christmas holiday 2013. I went to triumphrat.net and searched their posts, and I found what I needed. I DID have to cut into the wiring harness. I DID get out the volt meter to check and re-check what I was cutting.
Also, something that’s not mentioned on at all DCC, but is *SOMEWHERE* in a triumphrat post: a diode. If you use the stock 1-light turn signal indicator, you have to wire in a diode so that the 2 leads from each turn signal do not cause all the lights to blink. After another trip to Radio Shack (two, actually, the leads to the diode are VERY FRAGILE), I got all the wiring done, including using a basic 9-pin male/female connector from the Shack so that I could remove the speedo if needed.
Although I am not surprised about the DIY nature of the thing ( I tend to like that part, honestly), I was disappointed to get the poor response from DCC, and even more disappointed that you seem to have had even worse issues with them. I think their customer service has eroded as they’ve grown.
Around the time of our similar experiences, they were moving into the “Triumph-approved” parts phase and added a ton of stuff from Triumph and other 3rd-party Triumph suppliers.
Before that, I had gotten excellent service (2012 – early 2013). They had special-ordered shocks for me and charged their standard price, for example. I’d asked for and was given good advice on some other installation issues, too.
I would have expected that the experience would have improved by now, but I can see from the page that linked me to this one that, as of April 2014, it has not.
It’s a real shame because, for a while at least, I thought I’d found a source for good parts and service.
I wonder if a significant number of others have had this experience. Is there any solid information about that?
Steve,
Thanks for taking the time to share your experience with Dime City Cycles. You sound like a reasonably capable DIY guy who can figure stuff out on his own. What I dislike about the typical DCC attitude when questioned about a product is that just because they claim to cater to the DIY crowd, they are absolved from having to provide information or to communicate clearly about their products. That is just not a good business practice.
As a business owner, I know the challenges of managing people and growth. You can easily lose the ability to maintain the customer service and foundational principles that lead to the growth in the first place. If you are not careful, you may be bigger and appear more attractive in the marketplace, but what you deliver has suffered and is even sub-standard.
I fear this is what may have happened at DCC.
So my word to anyone reading this post and comment is “Buyer Beware!”
Steve… what do you ride?
Randy
Randy,
You’re right about losing focus during growth. There’s many places that give “poor” service, but there are also many places from which to buy, yet many people forget that.
I really miss the days of “bike shops.” I stared riding in the late ’70s, and there was a local independent shop owned by a Triumph fanatic. I got my love of Triumphs from him. He would not touch a Japanese bike himself, but he had a mechanic on duty to cater to those of us who rode “rice burners.” He loved talking about bikes, and he would explain whatever I didn’t understand. His wife ran the parts department, and she could find parts for my Japanese bikes (I used to ride Hondas and Suzukis) faster and cheaper than ANY of the local dealerships. Nobody kicked you out if you were just hanging around, and he had enough British iron on his floor (almost all of which he’d assembled, rebuilt, etc.) to keep you ogling for an afternoon. I really miss him.
(NOTE: you can edit this part out of the post if you think it’s too long, but I thought you might want to know)
As for rides, I have a ’12 Bonneville A2 (base), gold. Besides the new gauge bracket (i hated the stock offset bracket), not in this order:
1) I put new Progressive springs in the forks (one of the seals blew, so I figured I’d do more while i was in there),
2) new Progressive 412 shocks with heavy-duty springs
3) gutted the airbox and put on the UNI pod filters (UNI 92 or something, I have to check my book), and a small UNI filter for the crank case breather.
4) put on the TEC 2 – 2 exhaust (knock-offs of the Arrow; decent stainless pipes, but their service after the sale leaves something to be desired
5) used TuneECU to adjust my fuel map to suit 3 and 4; used the Triumph Arrow 2 – 2 map as a base.
6) added the MFW adjustable pegs, positioned up and back relative to stock (vs. rearsets). The (key) mount part number for Bonnevilles is MFW.051.07.07.00 . I got them from Twisted Throttle, who I’ve found to be good, although for some reason they did not (and still don’t) have that part number listed on their site, so I wound up having to write them about it. Some folks have used the mount that fits a Yamaha FZ 6, but it’s a different part number, I think it’s smaller and results in a looser fit.
The guy at TT was great. He got me the correct part (it’s listed on the MFW site in Germany, too), and gave me free shipping as an apology for the “hassle” I went through (a couple of emails!). THAT is good customer service.
7) the Triumph King and Queen seat (from madss.com, their OEM prices are great!). Some find it ugly, especially for a cafe-style bike, but all i know is that I can ride literally all day (350 miles or more) without any hot spots or discomfort, and my eyes are not the part of me that is using the seat!
8) Emgo viper fairing (what I’d call a “bullet cafe fairing”) — my first purchase from DCC. It’s plastic, so it does shake in the wind, so I made-up an aluminum rod with bolts on the ends to fit between the top windshield mount holes, and this really minimized the “shaking.”
9) center stand and tall back rest from Triumph, part of the deal when I bought the bike new.
I’ve about run out of things that I want to add to it! I’m not a speed demon, but I do like optimizing the engine for what it is without having to crack the case (not great at engine internals).
I’m thinking of painting black accents on the tank with red pinstripes along the edge to complement the gold. I’ve painted the front fender so that it is flat black on the sides with a gold stripe down the middle — my first-try at pinstriping with red tape didn’t go well, so I pulled it off and need to re-do the fender.
I’m on the fence about putting on lower handlebars bars (not clubman or cafe style, my back can’t take it). The stock bars in stock position fit with the fairing, so I’m not in any rush.
If this doesn’t answer your “what do you ride” question, I can write about bikes for hours!
Nice site, by the way. I just discovered it and I like what I see.
Ride safe!
Steve,
I’d love to see pictures of that windscreen. How does it fit with the stock handlebars? That emgo Viper is pretty similar to the Bellacourse Bikini fairing (http://bellacorse.com/bcc056.htm) that i was considering. It is the change in handle bars that is really holding me back. The stock bars are really comfortable for me (though not so sporty). But the notes say lower bars should be used and though I’m not old, I’m not getting younger either.
I’m interested in using something similar too, but only if it lowers the profile of my gauges a bit. Did you notice if the new bracket lowered the gauges at all?
@steve:
Thank you for your note! May I ask what the symptoms of “fragile diodes” were? (My turn indicators gave out, this week.)
@tony
Yes, this bracket lies flat. So, the hight of the instrument cluster is lower than stock.
Hi Lee,
I’ve just run into this exact same issue on my 2013 Bonneville project. Got the dash installed and the mini LEDs that Dime City specs to use as idiot lights, but like you’ve pointed out, there are no instructions on how to bridge the gap between the printed circuit board of the OEM lights and the 12V mini LEDs. I’m in the process of figuring this out, and if you’re interested, I’m planning to share the results so that people can actually get the look they want on these newer Bonnevilles.
I actually popped my light unit apart and took a closer look at the circuit. I’ve also been using a test battery to jump across the connections in an effort to understand what’s going on. Here’s what I’ve figured out at first examination:
• Each LED on the printed circuit board is ringed by a set of resistors. This makes sense as my multi-meter was able to confirm 12V signal coming from the connector.
• There also appears to be several solid-state diodes (think of these as one-way valves for electricity) included on the circuit board between the different LEDs. There are posts on the board where if I jump them up +/- the oil light comes on, and if I jump them -/+ the neutral light comes on. So theres obviously shared power and/or ground being used in the circuit and diodes are directing traffic for the current. Now I just have to figure out how to recreate that circuit using components off the board and utilizing the resistors built into the mini LEDs I got from DCC. I have a feeling that it’s a mix of positive-side switches and ground-side switches.
I have the Haynes manual with the wiring diagram for the bike, but unfortunately it dead-ends at the printed circuit and doesn’t show what that little board is up to. I’m thinking at this point I’m going to just grab a bread board from Radio Shack and re-create the circuit old-school one loop at a time. That should allow me to then create a new plug that will plug right into the OEM harness without having to destroy that connector. Fingers crossed.
Nathan,
Awesome comment and thanks for sharing! I’m sure many followers of this blog will appreciate your work on this!
I’m sure Lee will weigh in as well.
Randy
Glad I can help, but why is it that no matter how many times I write my own name as Nathaniel, people always call me Nathan. Drives me crazy. Seriously guys. It’s not my name. Why is this so hard?
Thanks, Nathaniel!
I have yet to clean up my wiring, so I’ll be interested to hear your results. Electrons and their pathways are supposed to be essentially simple — but we never seem to be able to leave things simple, do we?…
🙂
Ha! Well I have a feeling this is relatively simple, it’s just been miniaturized on this circuit, so it’ll take a little detective work to suss it out. According to the wiring diagram, both the the oil circuit and the neutral switch are ground-side. That is, rather than being between the battery and the light, they’re after the light but before the ground. The switch completes the circuit by grounding it. This is common for oil and neutral lights, I think, because they’re essentially self-grounding because they’re mounted right to the engine block.
Anyway, the fact that I was able to jump the two separate lights by reversing the polarity on the same posts makes me think they share the same “hot” wire. There’s a bunch of extra stuff in that connector for the OEM tach and alarm systems, so I’ve got to isolate down to just what that little light array is using and go from there. It’s four lights, so it should just be four circuits that intersect somehow. It looks like for these two lights, anyway, it’s a shared “hot” wire.
There appear to be three diodes total for the four lights, but there are seven posts plugging into the harness, so that’s the puzzle. Four lights, three diodes, seven wires. Then the challenge of making a sustainable connector for all of it. Should be fun. I’ll keep you guys posted.
So I’m happy to report that I was able to successfully reverse-engineer the dash light circuit on my Bonneville and wire it into the LEDs from DCC on the dash. Everything looks great, but I’ve got to install one more diode. I’ve got a back-circuit leak of current over to the speedo that’s causing the check-engine light to light up. I’m confident nothing is actually wrong, but that I’m leaking current and signaling that light from the power circuit that all these negative-side switch dash lights seem to run on. Once I install that additional diode and confirm that was the problem, I’ll share my wiring diagram. You can see the results here: http://instagram.com/p/n4BRApTG5u/
I’M INTERESTED IN THE POLLISHED SPEEDOMETER & TACH CUPS FOR 2014 T-100 EFI.
Linwood,
Thanks for your comment and question. TriumphBonneville.org does not sell products. It is a personal blog site. I usually reference where I purchase items that I describe or photograph within my blog posts. Based upon your description, I think you might be interested in these available from Bonneville Performance: http://bonnevilleperformance.com/product/billet-instrument-cups/
Good luck!
Randy
did you figure out the wiring connections for the tachometer?
I’d like to see that wiring fix as well.
Any updates on the wiring fix? Thanks
Does any know why my instrument panel on a 2002 triumph bonneville america not work after trying to install the factory tachometer