So, it’s been almost a year. Almost a year since I finally threw in the towel, trying to successfully install the bracket that I bought from Dime City Cycles. I wrote about that, here.
Since that column, I’ve learned from the sensei’s over at TriumphRat.net (most especially from DeCosse, bless him!) about wiring up the tachometer to fit. I’ll give a summary here, but the original thread can be read here.
A little background refresher: Randy’s bike is an ’08 Bonneville. Mine is a ’13. That means they’re different bikes. Randy’s is a carb’d bike, mine is EFI. (Randy’s is also prettier than mine. He has a drill press…)
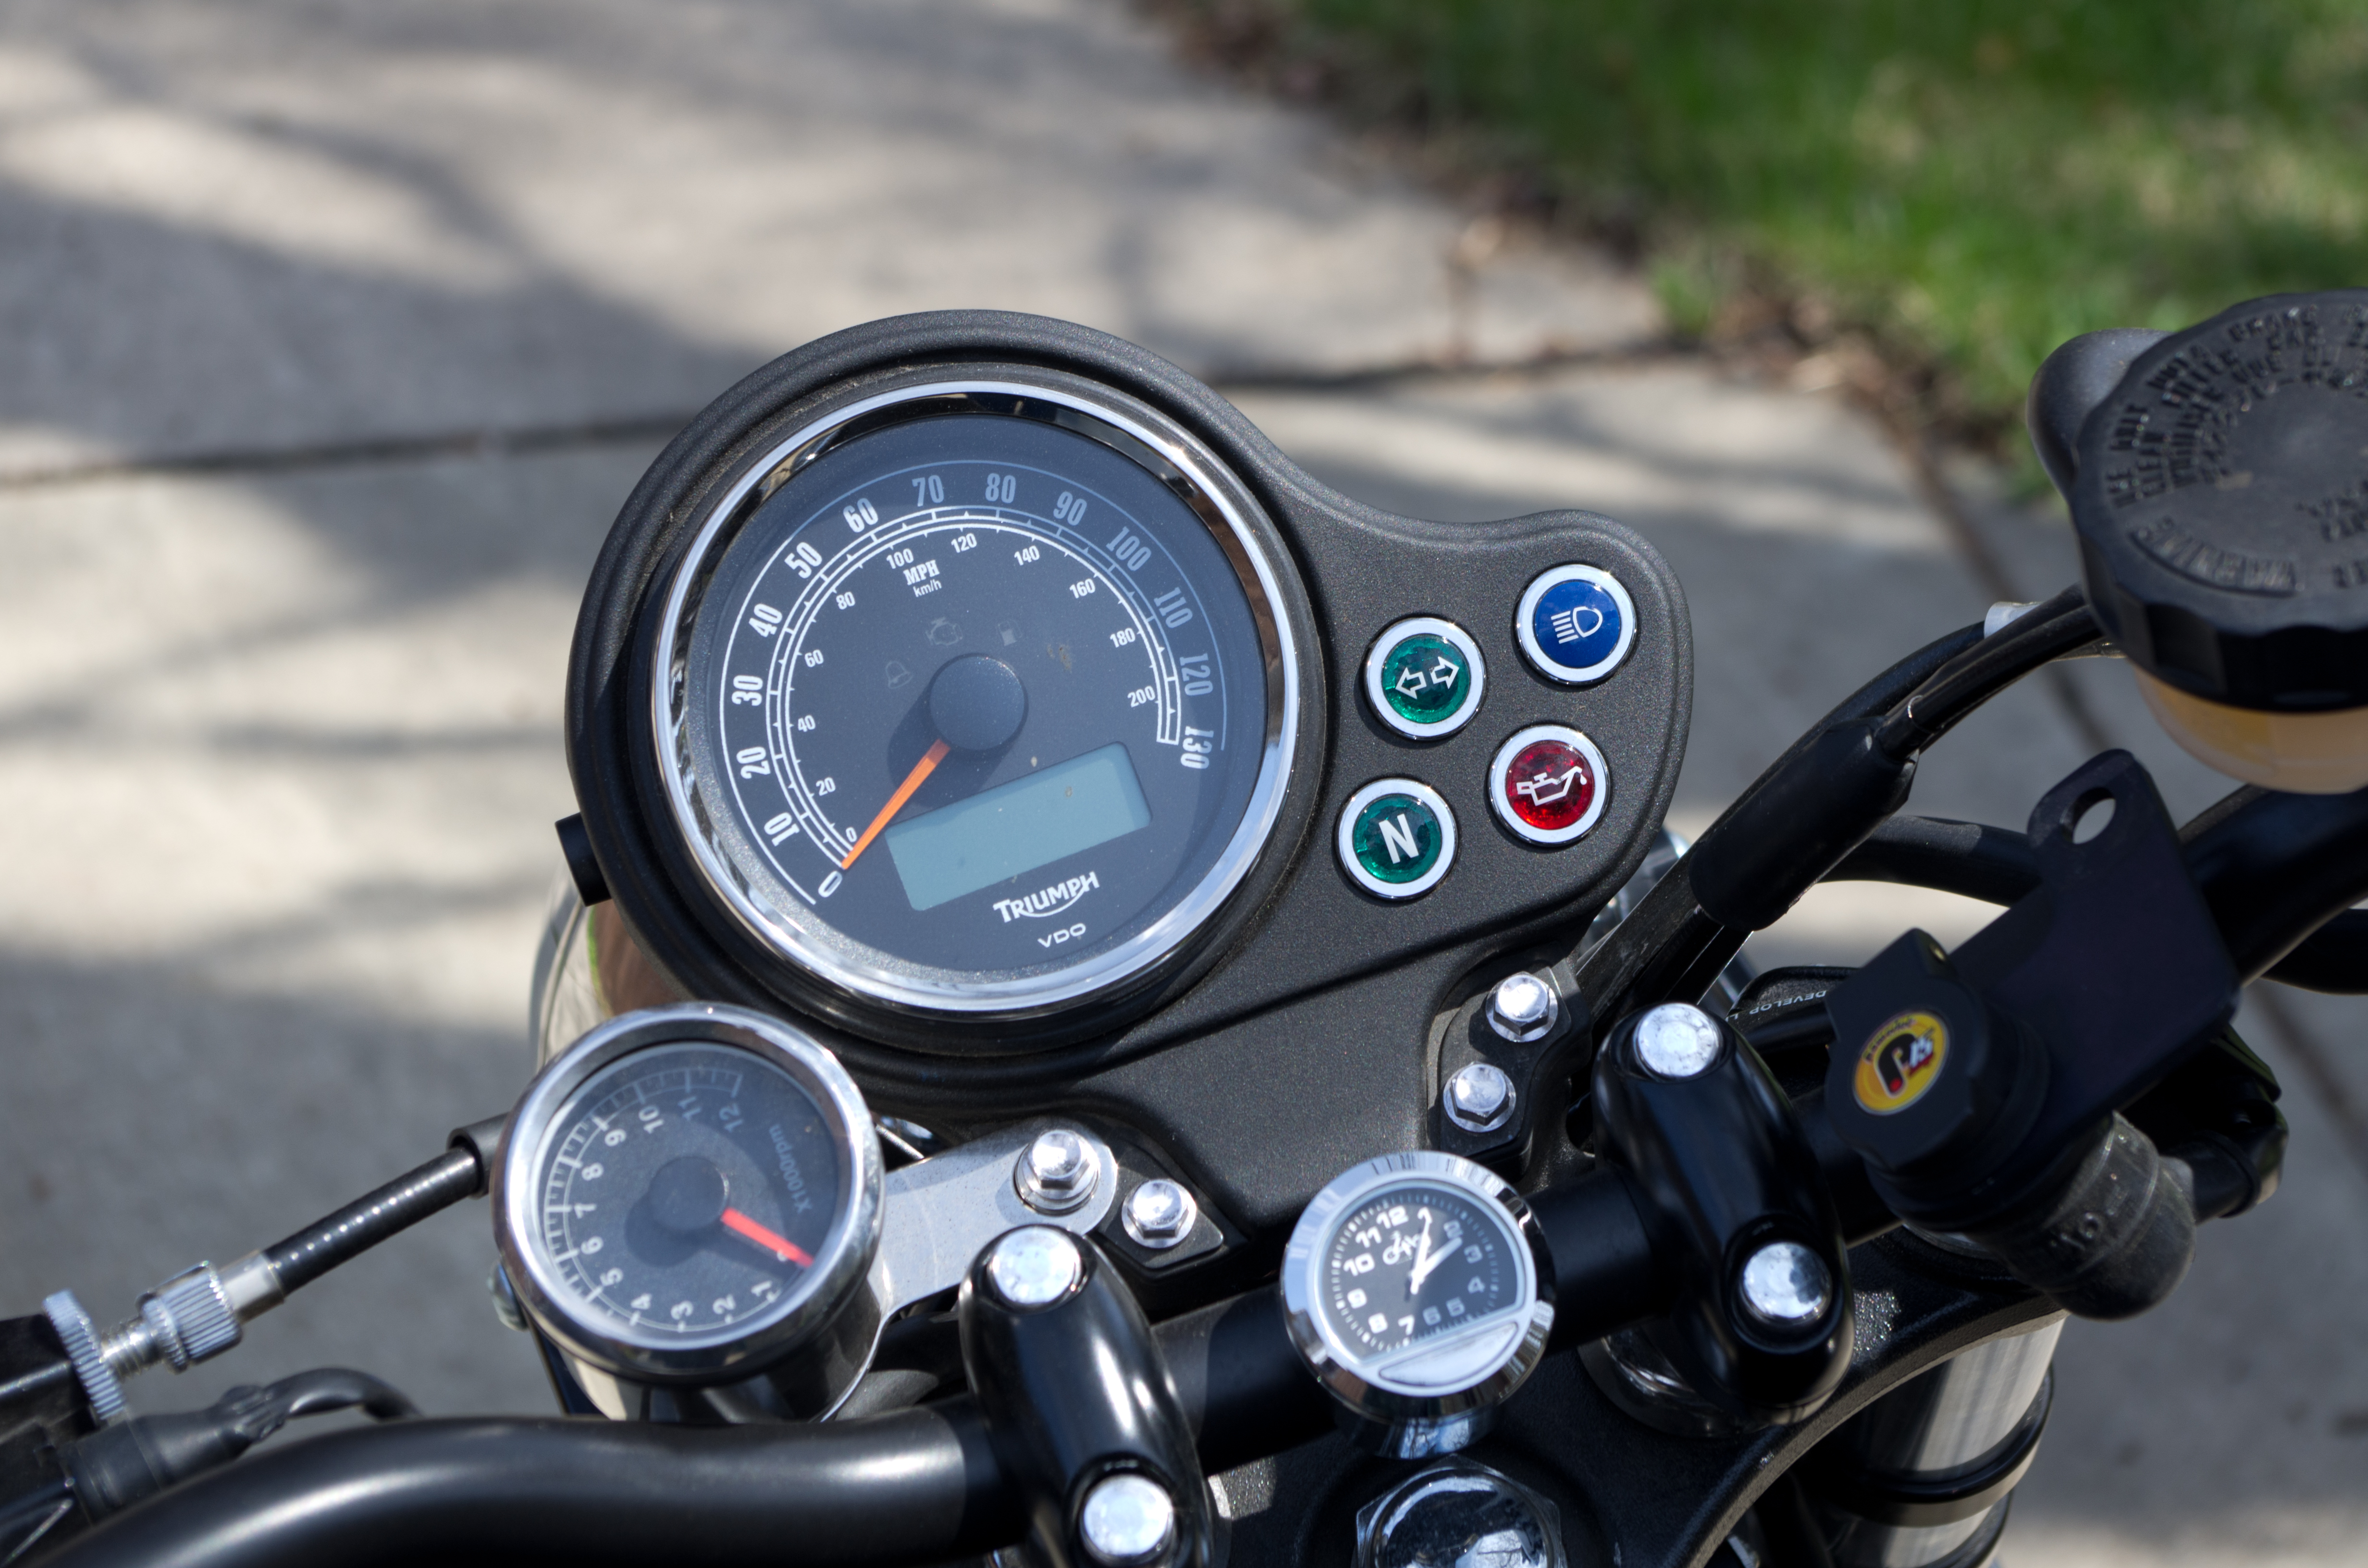
Mine also has this technology called “CANBUS”. I don’t know how it’s supposed to be good for you. But, if you remove the speedometer, the bike will not start. So, your replacement options are limited: you can either buy another speedometer from Triumph, or you can spend A LOT of money on a Motogadget speedometer. And that’s about it. The really nice Acewell speedometers are not CANBUS compatible (as of this writing). Forchetto, of TriumphRat, has mentioned that people install them anyway, and just find ways to hide the OEM speedometer under the seat, or something, so that the bike will run.
Thankfully, I was perfectly satisfied with the OEM speedometer. Also thankfully, the presence of CANBUS does not mean that you can’t install a tach. It just has to be an electronic one.
A little digression, here, to sing the praises of a truly magnificent product: Posi-Taps! I don’t know who dreamed these up, but they are a GODSEND for a project like this! Because the wires you need to connect the tachometer to are bundled into the stock idiot light loom, the Posi-Taps made it dead easy for me to *tap* that wire and hook my tachometer into the wiring, without destroying the loom. (See images, here.)
So, here is the quick wiring summary I promised (with many thanks to DeCosse, over at TriumphRat.net, for lighting the way. Also thanks to Mike):
- As shown in the detail link, above, you will need to remove your gas tank and get to your ignition coil. At the coil, tap into the green/pink wire and run a line to the instrument cluster at the front of the bike. (NOTE: when referring to dual-colored wires, the dominant color is mentioned first. In this example, the wire is predominantly green, with a pink stripe, or pink dashes. A predominantly pink wire with green stripe or dashes would be called pink/green. Green/pink and pink/green do NOT mean the same thing.)
Connect this line from the coil to the green wire on the tachometer. (As a reminder, these instructions are based around the tachometer that I bought from DCC.) - At the instrument cluster, there will be two looms. One connects to the speedometer, the other connects to the tachometer (if you have one), or to the idiot light cluster (if you don’t have a tach). On the non-speedometer loom, there will be numbers, TINY numbers, marking the connections. You will want to tap the wires at connection points 2 and 3. #2 is Ground, is black, and should go to the tach’s black wire. #3 is ignition power, is green/red and should go to the tach’s red wire.
- If the tachometer is attached to the bike, you are done. Start the bike and give it a test.
A Whole Winter Later…
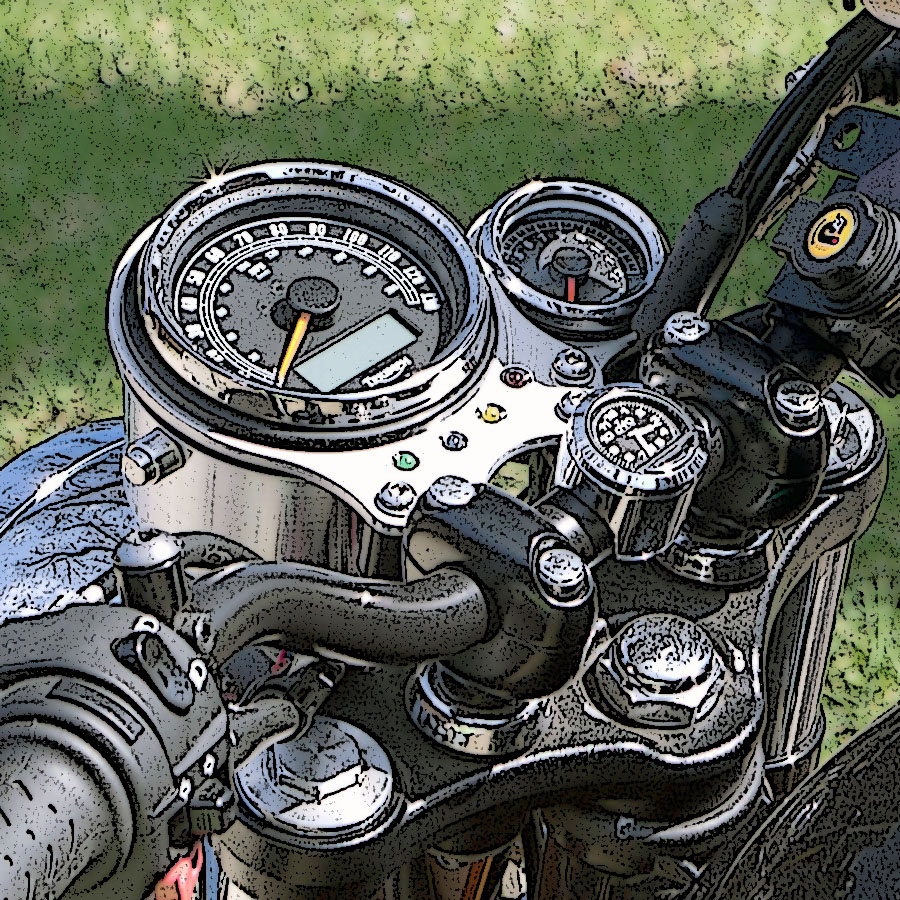
Having accomplished getting a tach to run, I decided not to keep messing about with DCC’s “bracket” (and lack of LEDs — or even any hint that you might need them…) and I rode a Franken-Bonnie, for a while. Sure, you have to tilt your head to read the tach, but my head was stuck in a tilt, anyway, from scratching it over how to get the darn thing working…
Franken-Bonnie
Seth helped me to the next phase.
Totally Unique! (Or, I’m the Only One Who Has One of These, Right Now, and I’m Not Sure I Want to Share…)
Today, I installed a new bracket. Seth, of D9 Bracket fame, built me an extra lovely bracket and included an offset add-on, just for the tach. (He made me promise to do a write-up, so that he can tell others how to install a tach on a CANBUS bike.)
Here’s the prep table:

D9 Bracket assembly
And a closer look:
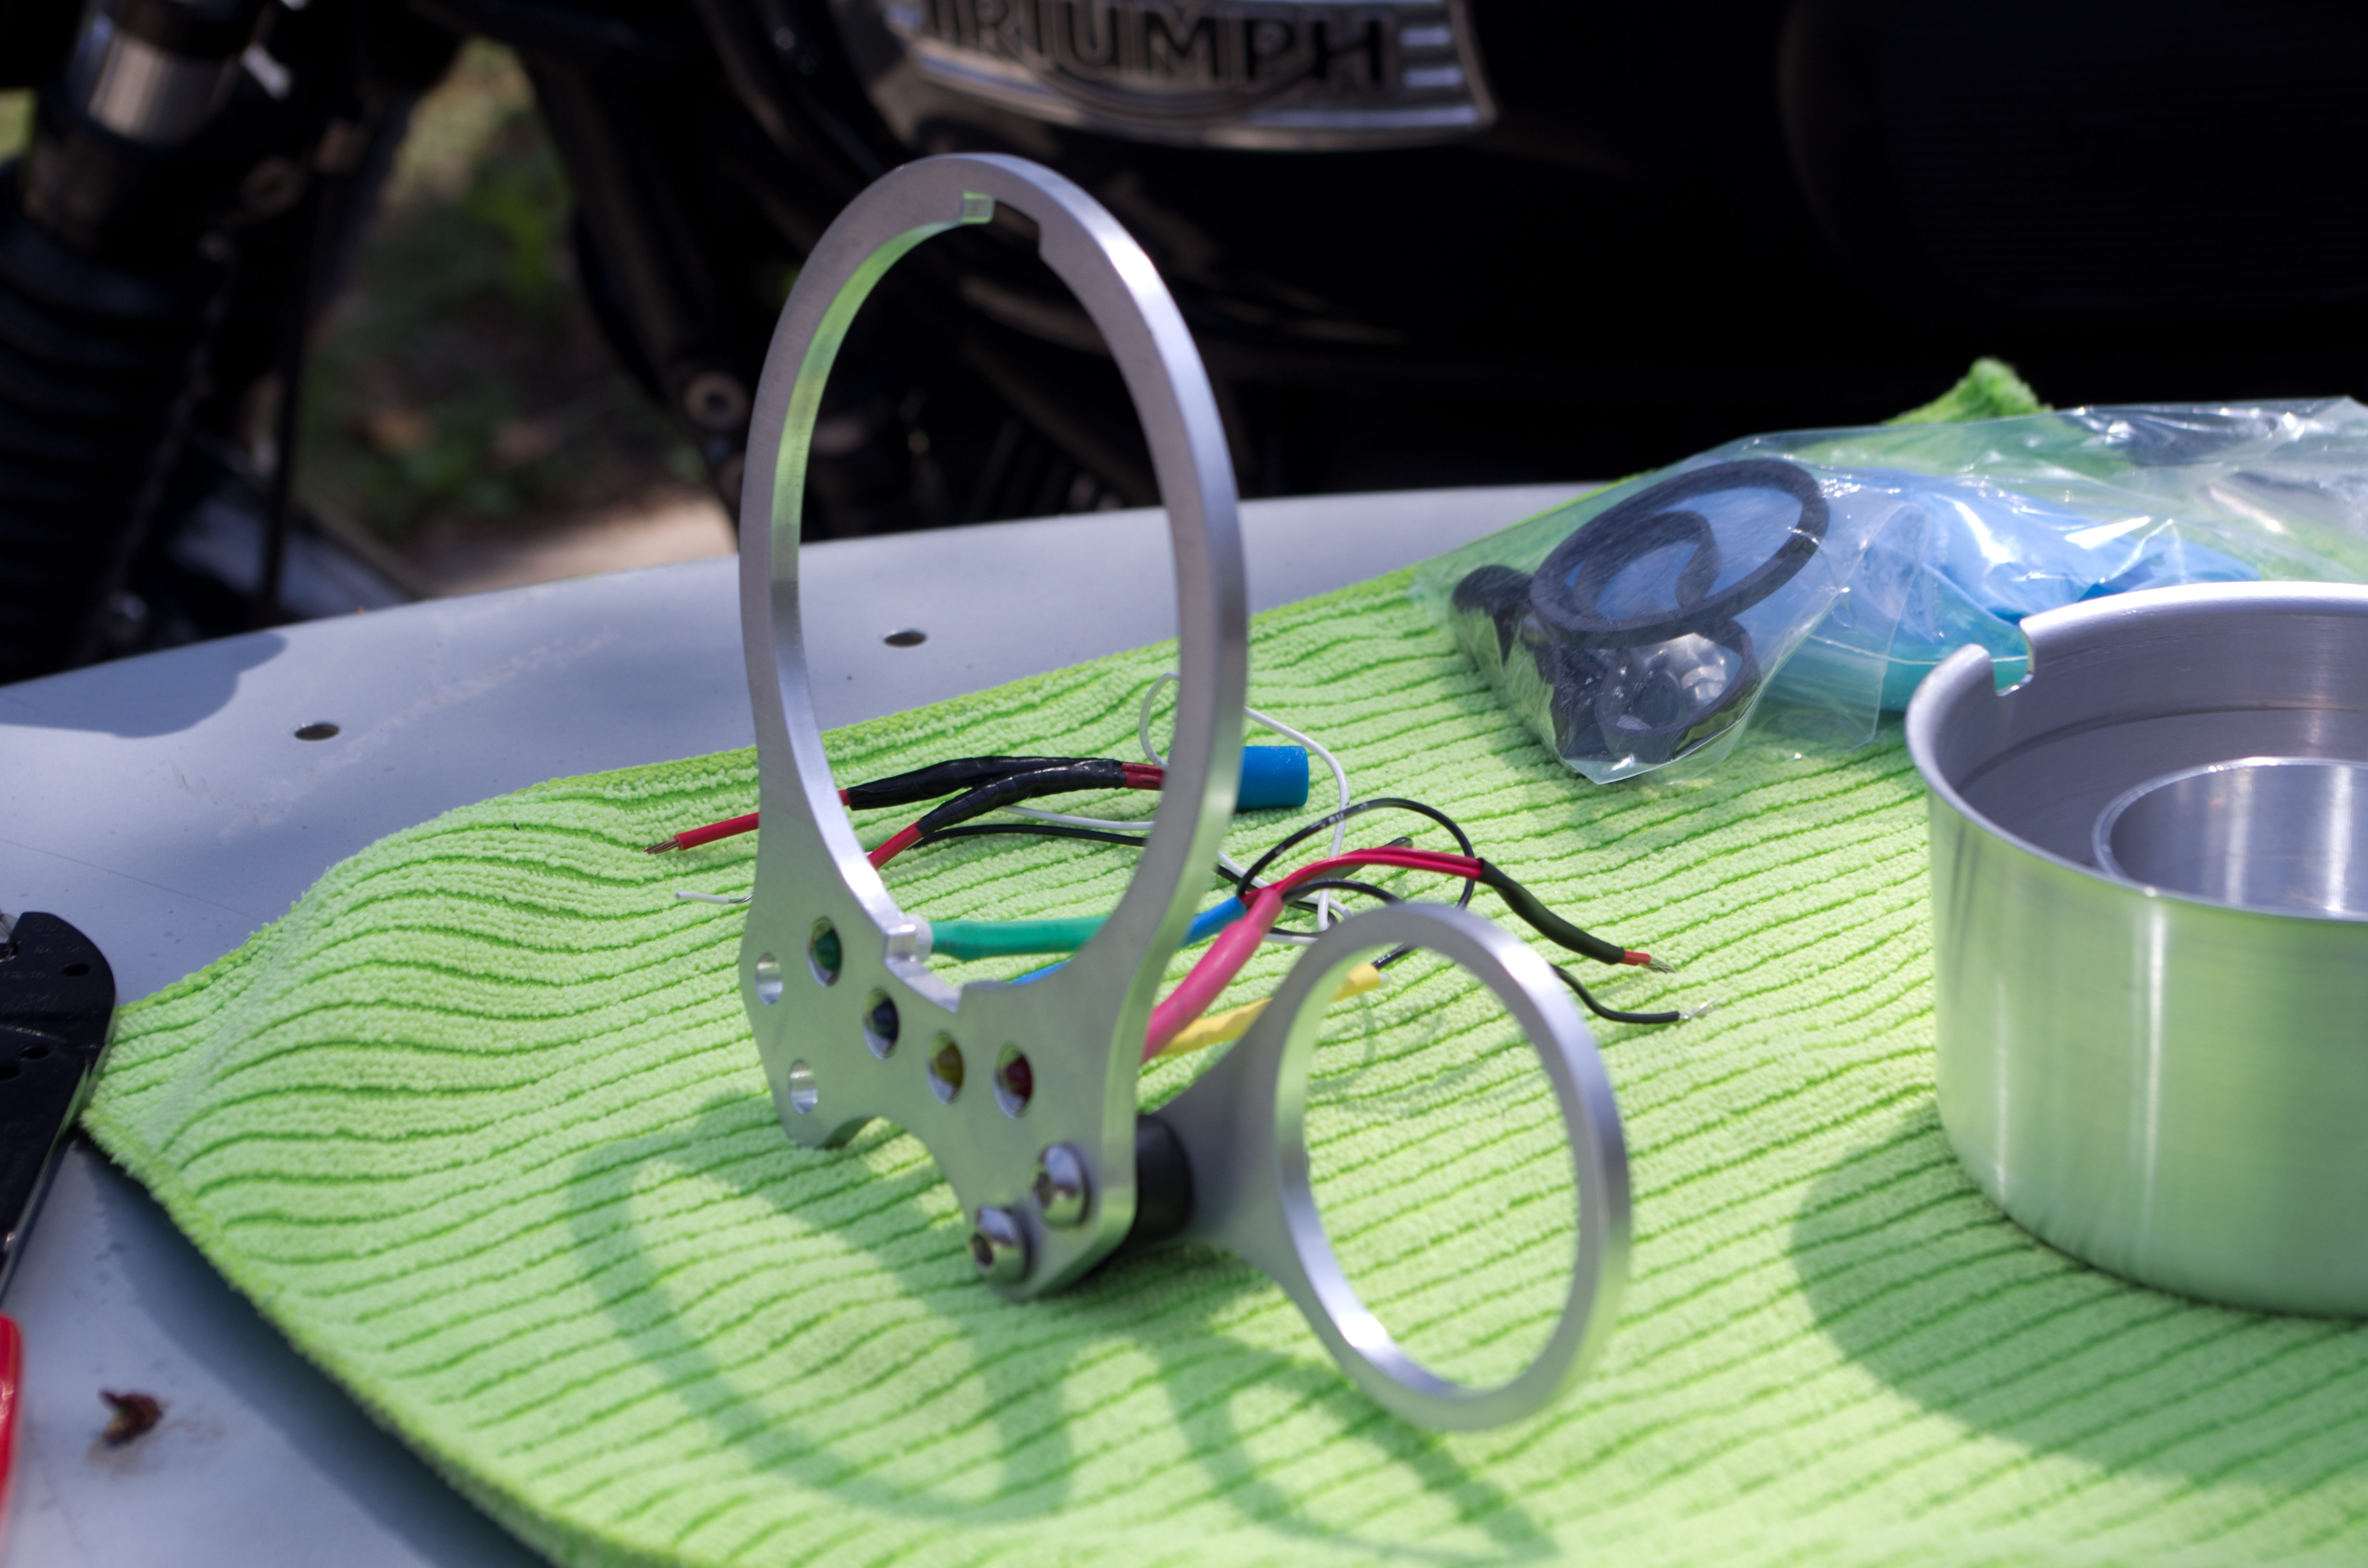
D9 Bracket assembly
It’s full service, with Seth: he even included the LEDs, the diodes that are necessary for the LED that serves as your turn signal indicator and gloves. I went the extra mile and got the matching spun aluminum instrument cups, too.
It Comes Together
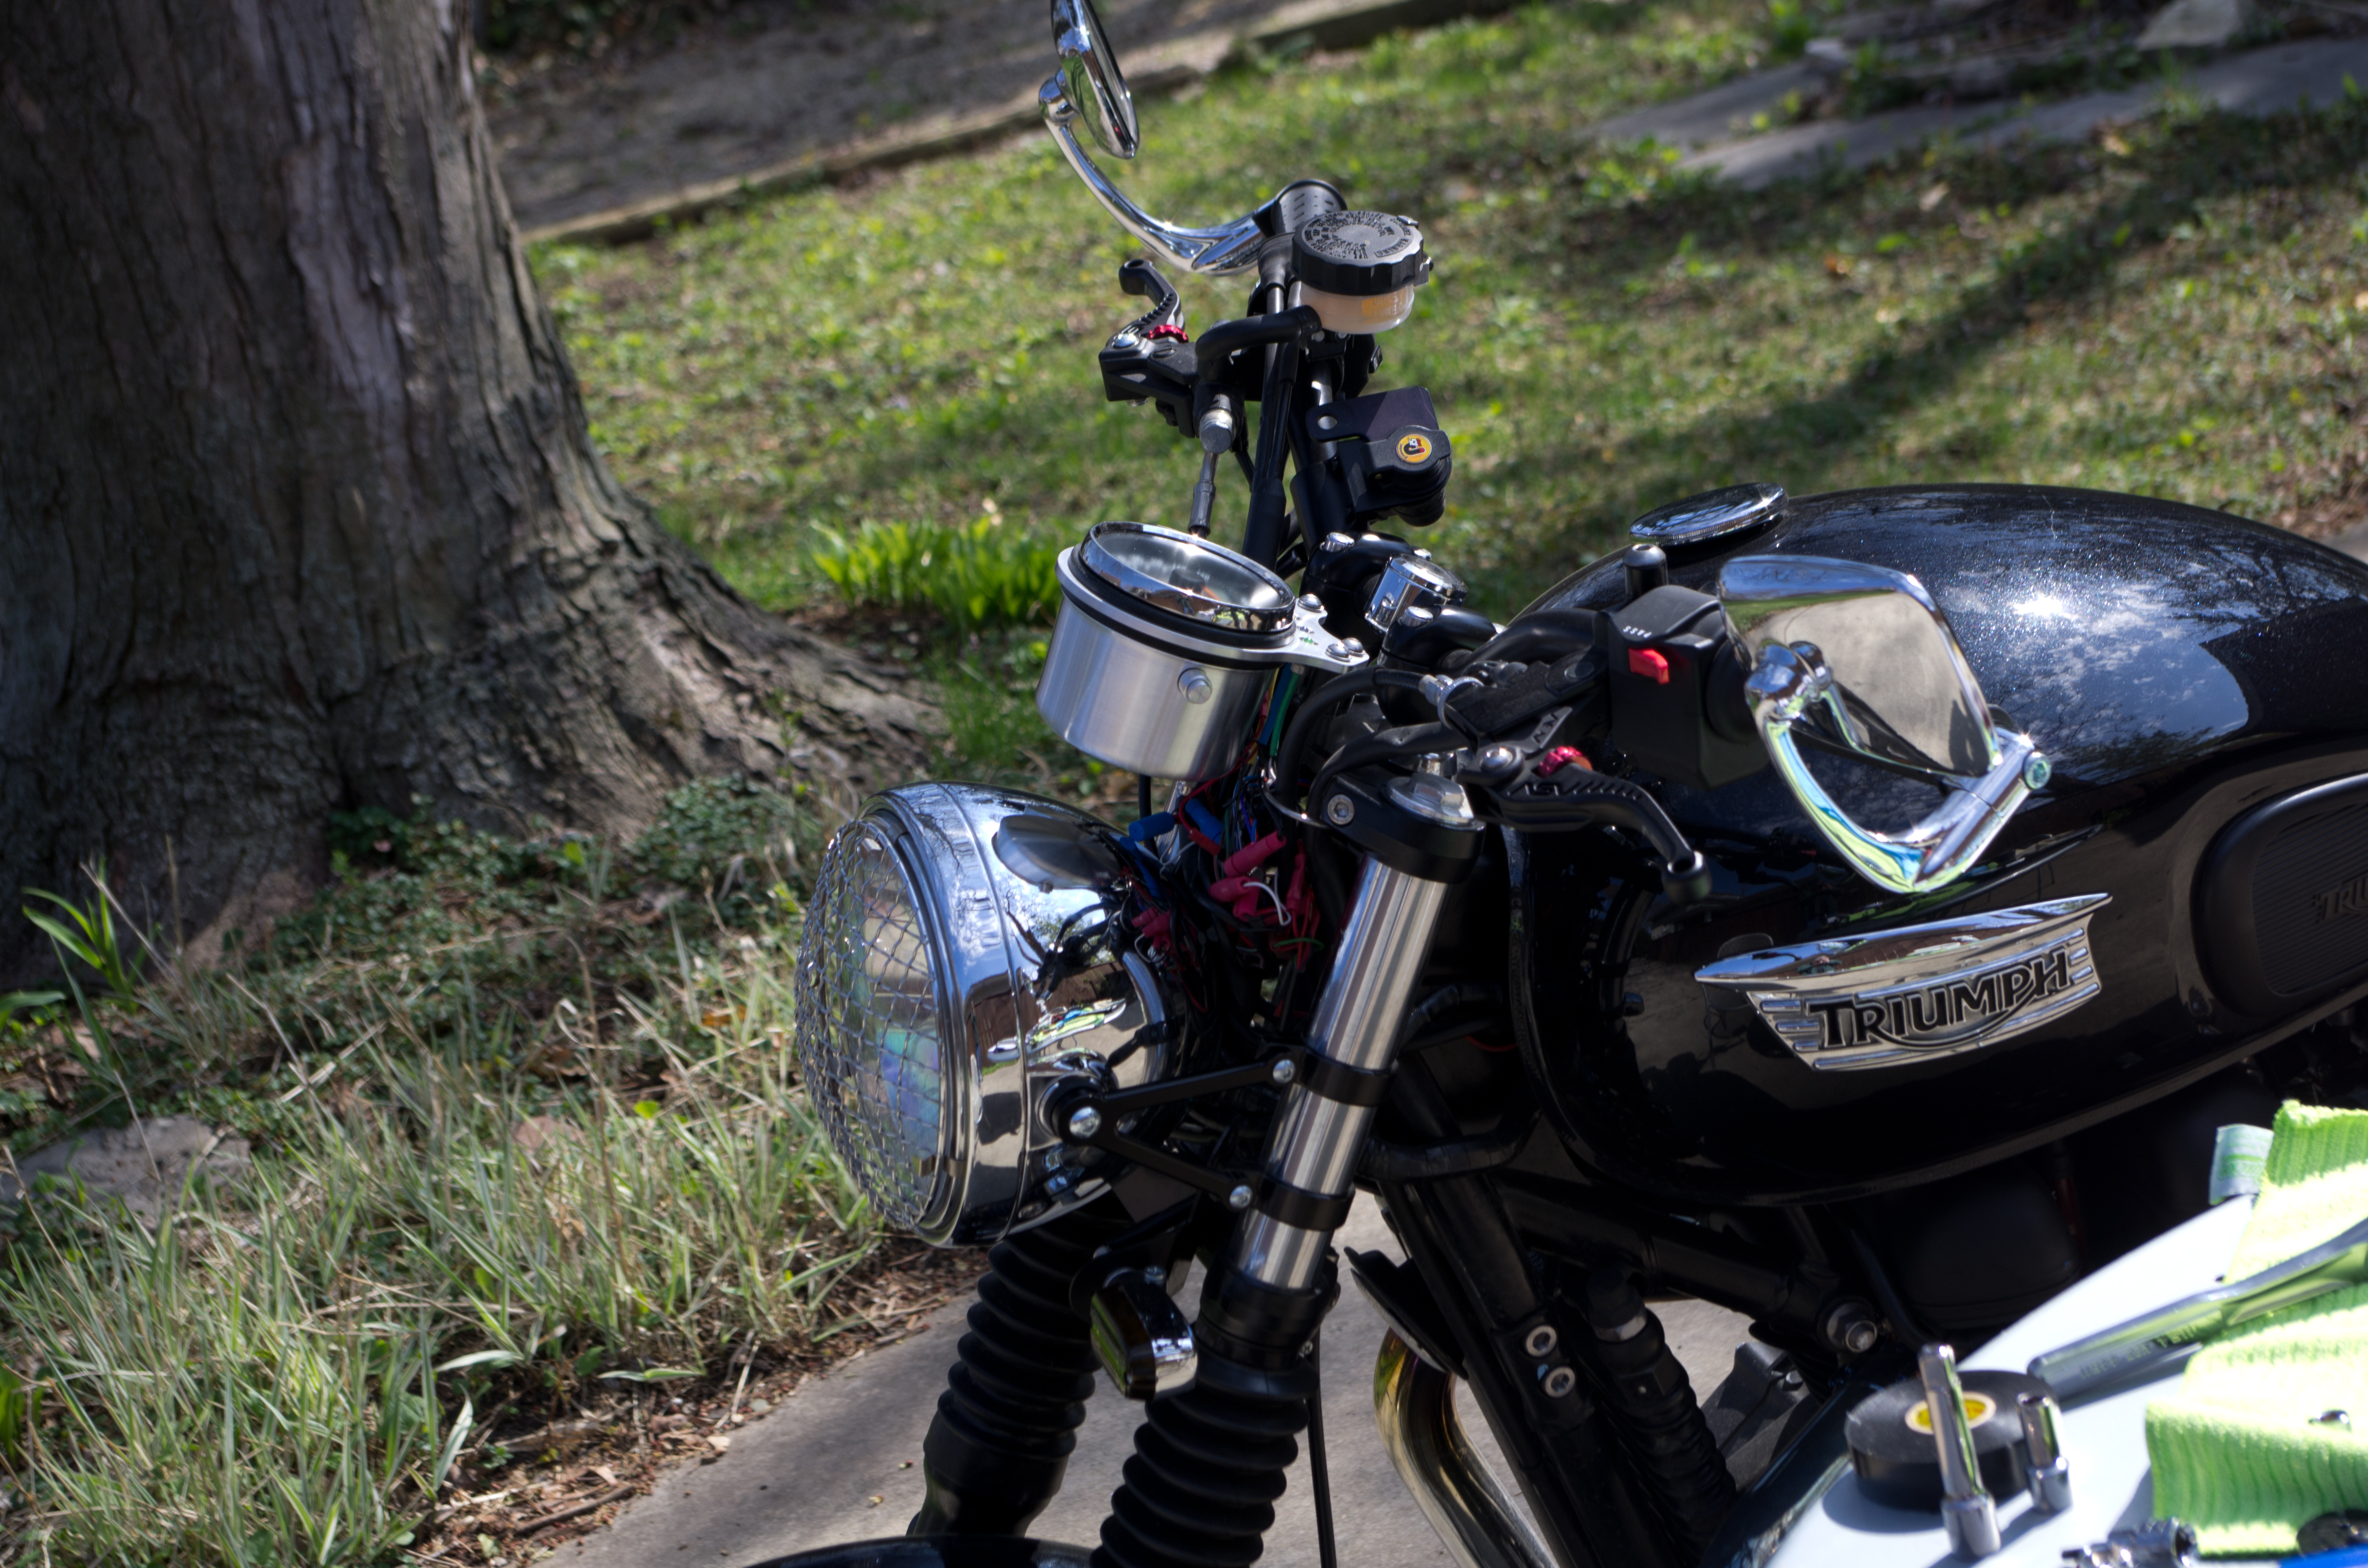
The LEDs need to be individually joined to the wiring at the idiot light loom (mentioned above). That loom lived in the stock instrument cups, but there won’t be room for it inside those cups (or any replacement cups) once you’ve wired the LEDs to it. So, you’ll need to plan on having that loom live outside the instrument housing, for now.
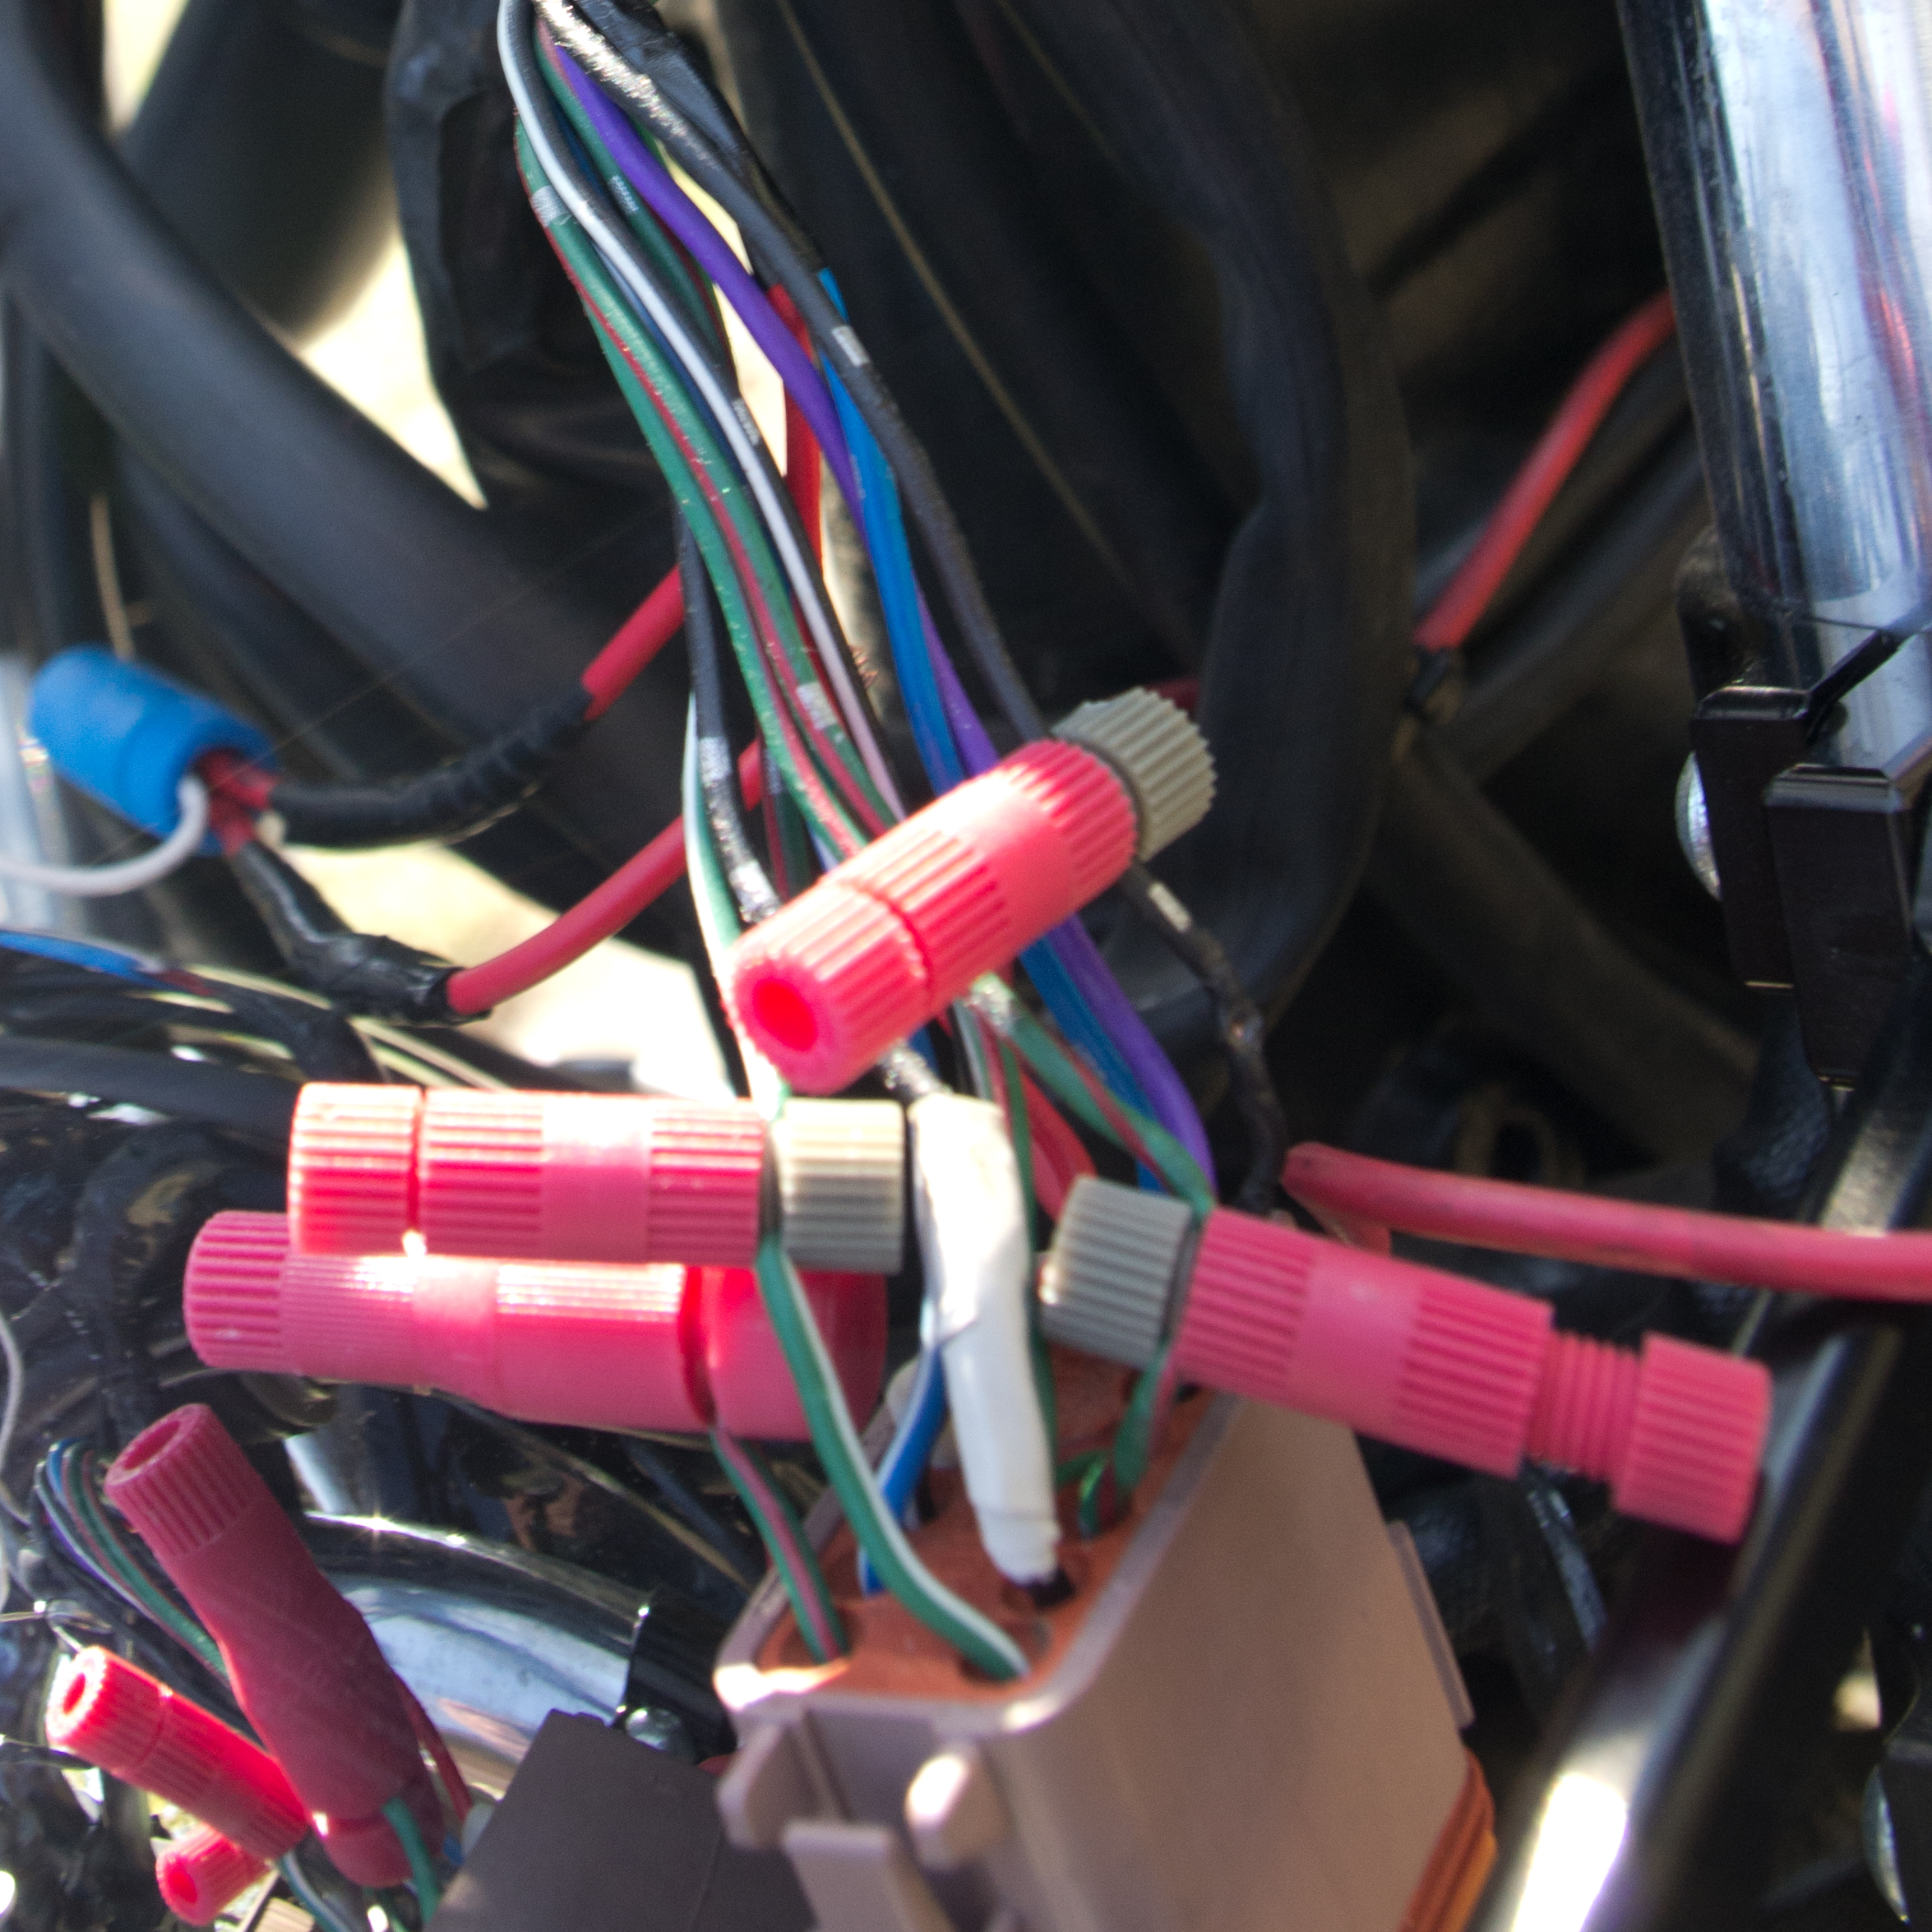
It’s pretty ugly, but I will be cleaning this up!
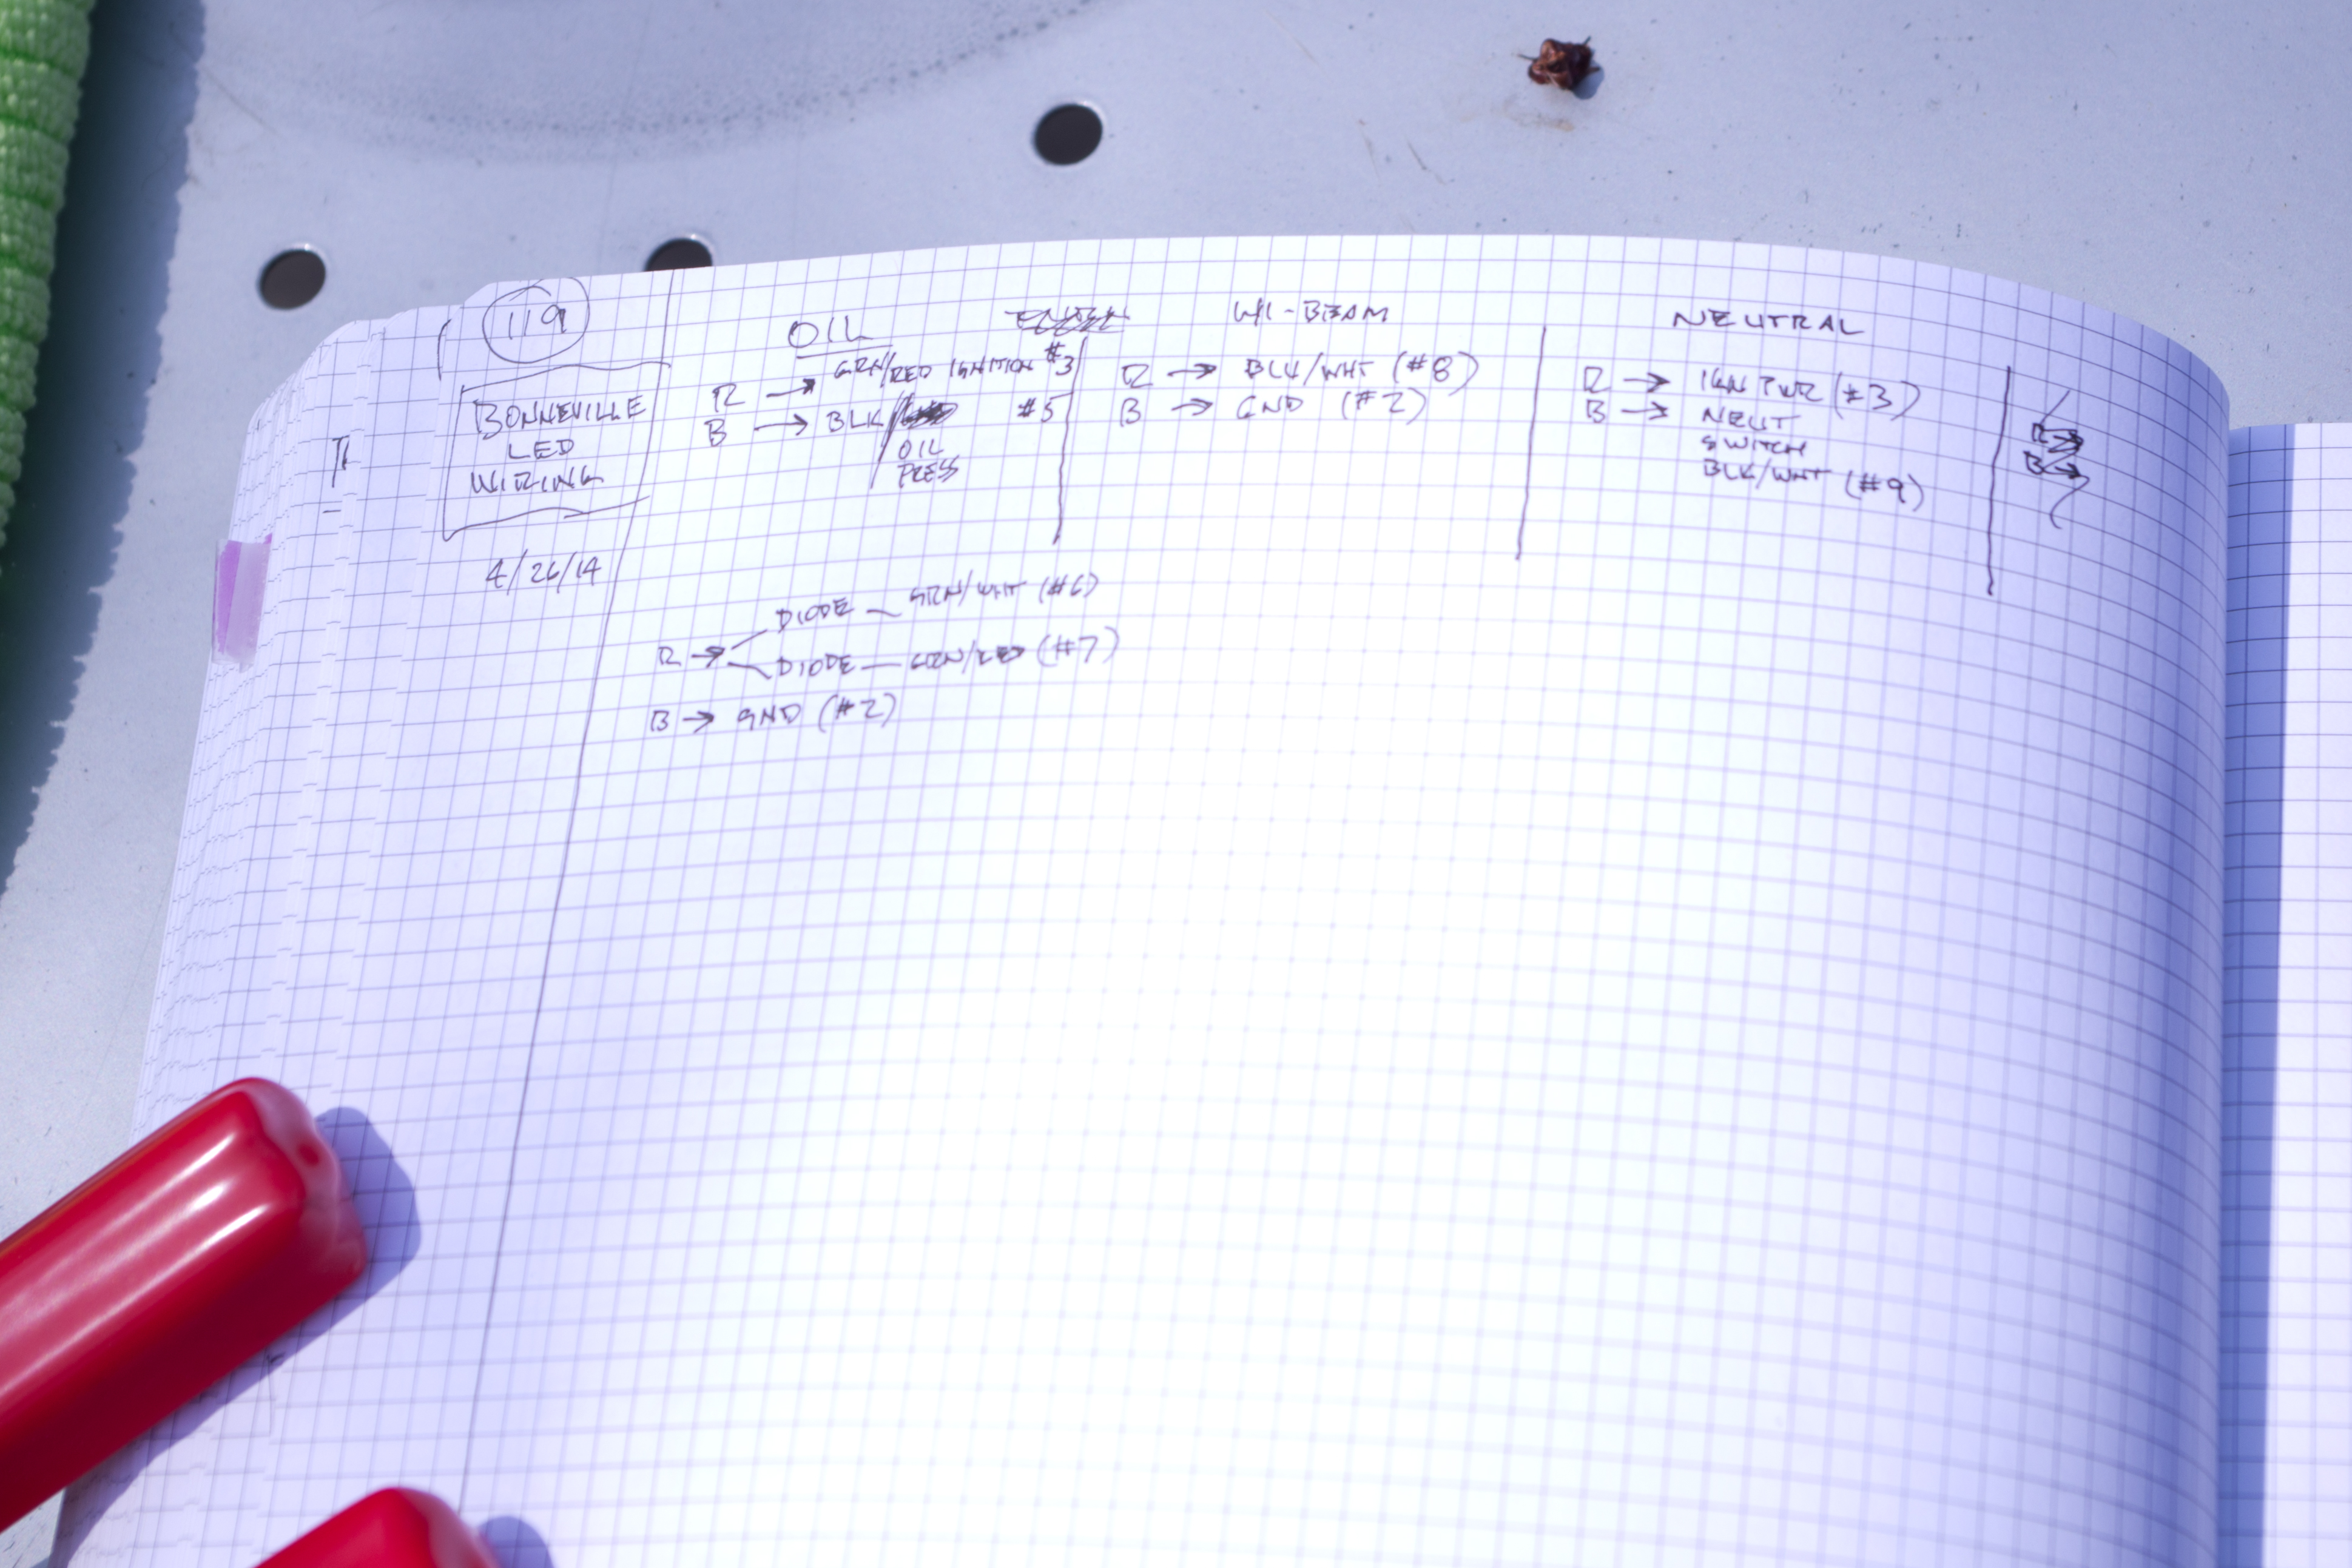
I took notes from TriumphRat.net, just in case WiFi didn’t reach my back yard…
DeCosse posted pretty comprehensive instructions on LED wiring, here. Seth also sent me the same. After this afternoon’s efforts, I do have problems with my turn signal indicator not working. But, I expect I should be able to get that sorted out — maybe by the end of summer. 😉
And here is the finished installation:
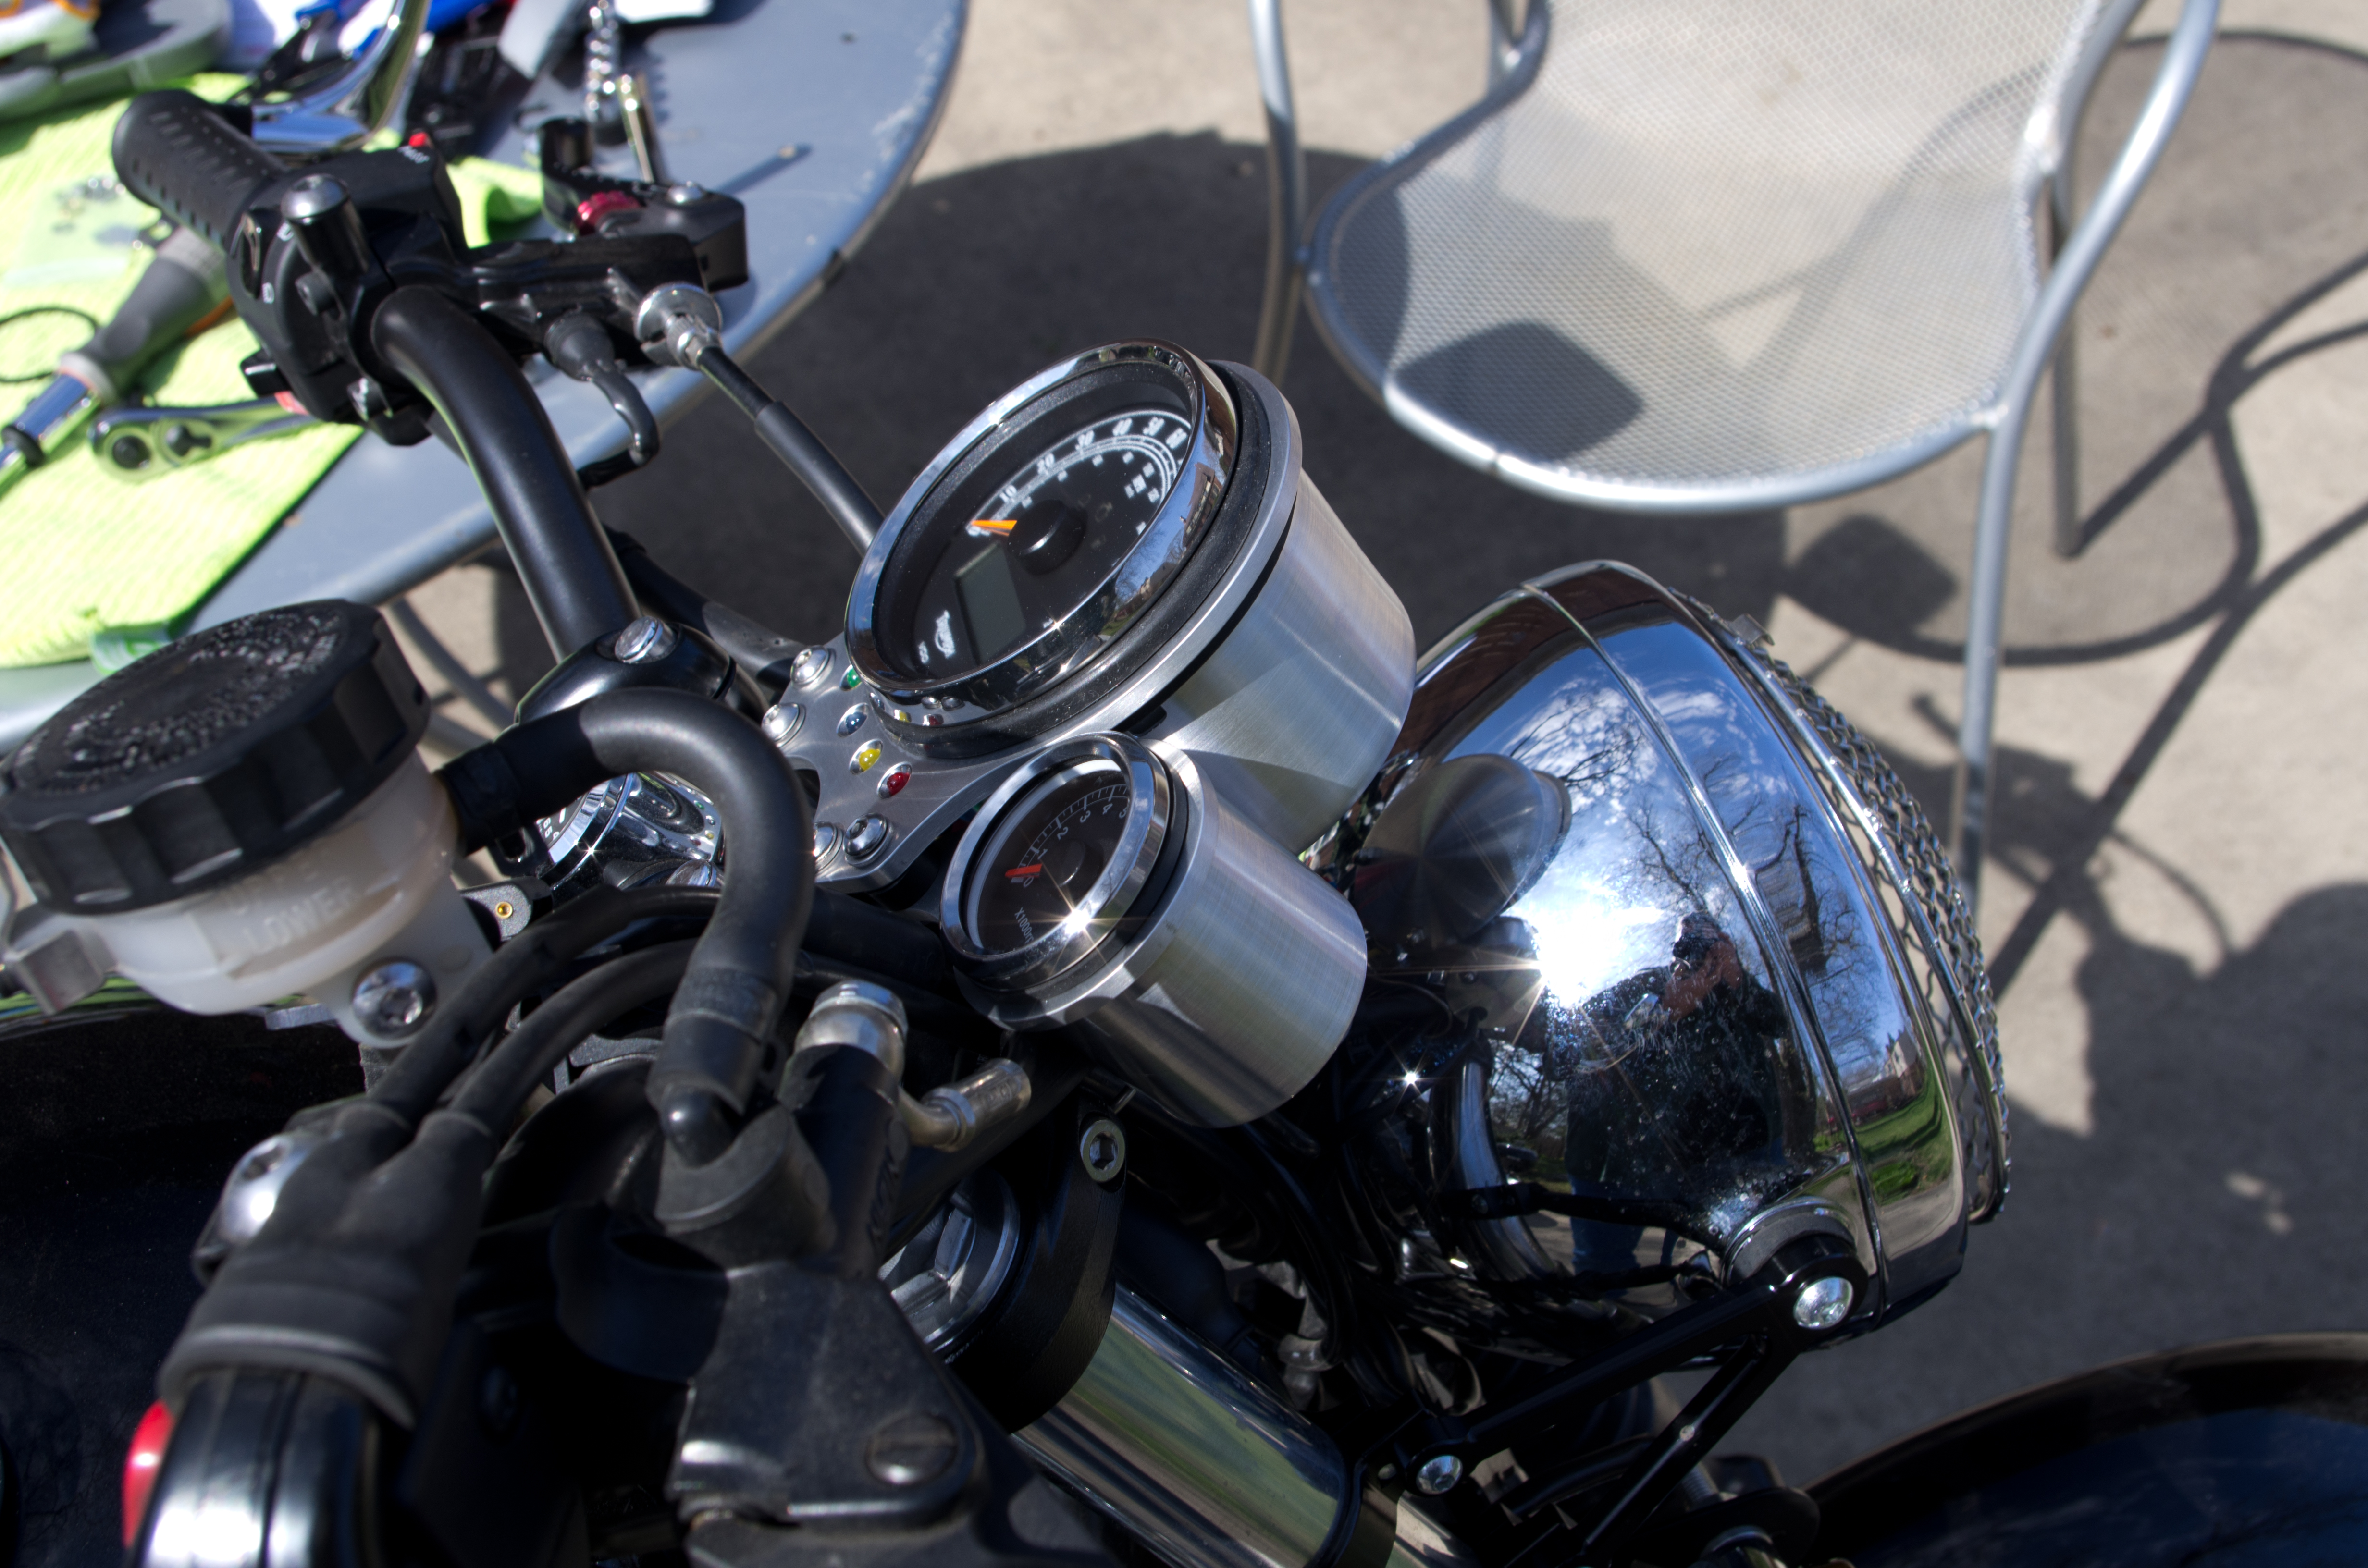
Seth’s latest masterpiece…
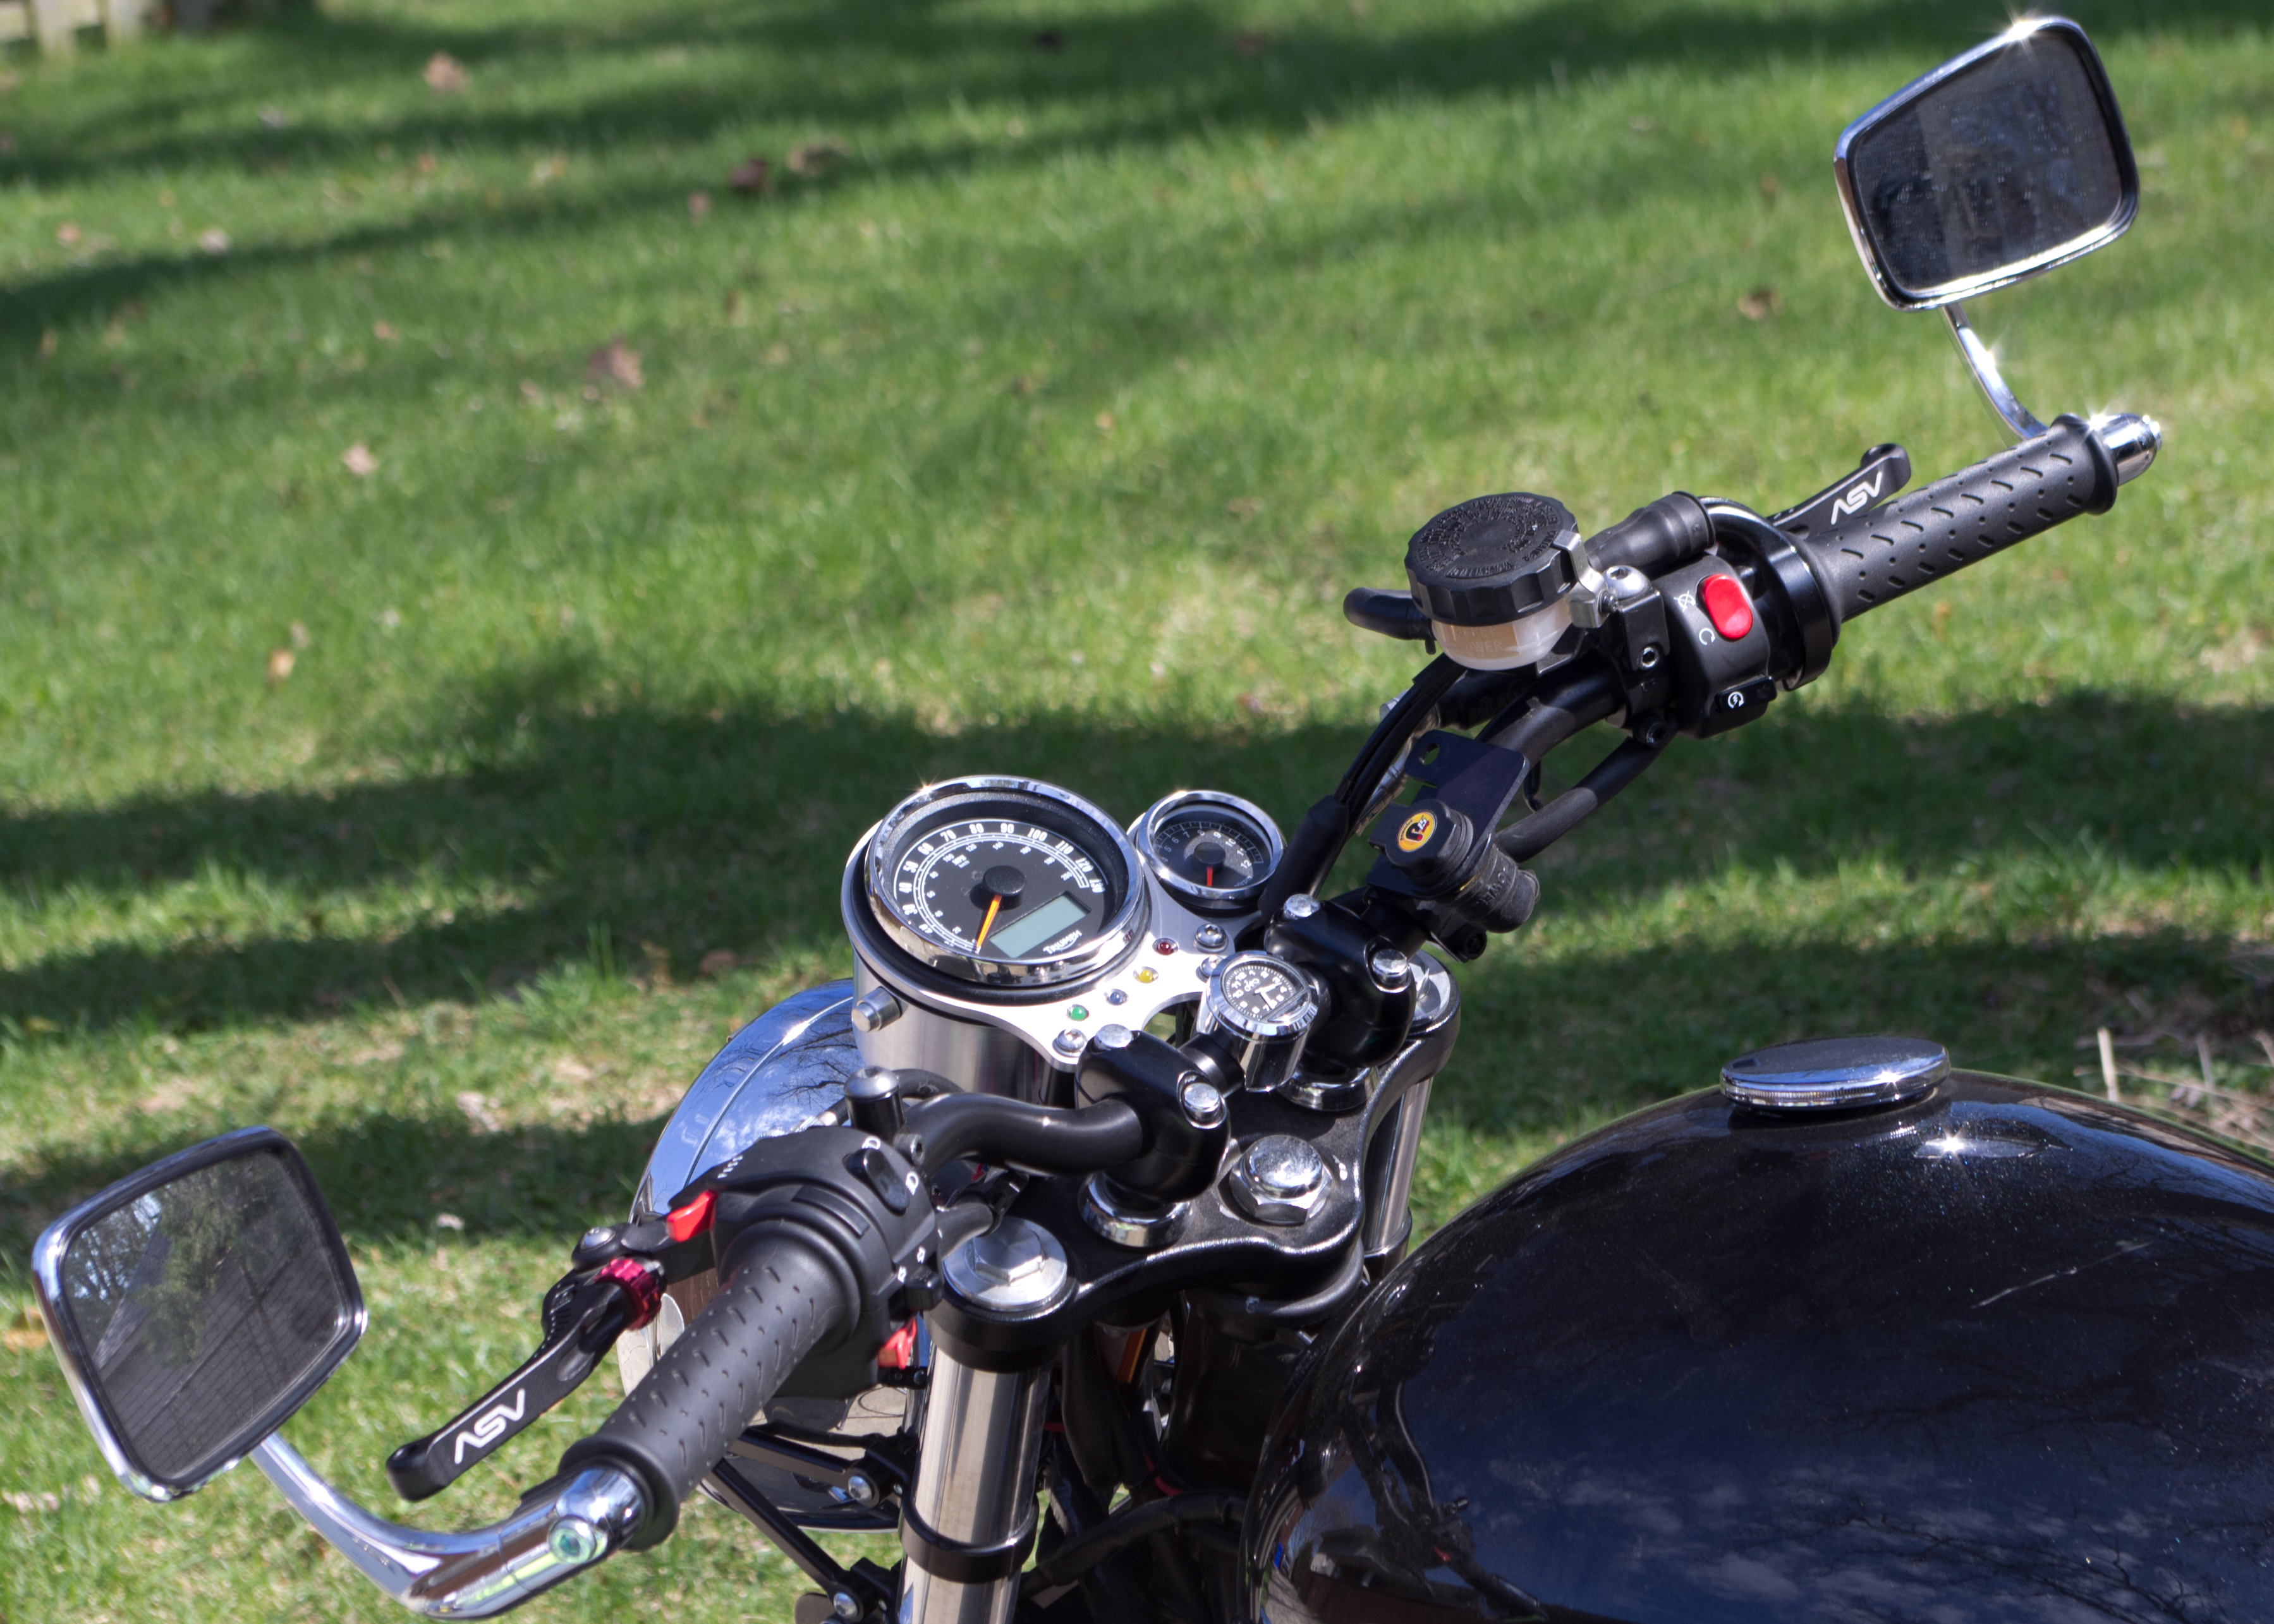
(Now, there’s a good looking upgrade!)
Thanks, Where Thanks is Due
I couldn’t have done this without:
- Kind and knowledgeable souls, who give help freely and willingly (DeCosse, Forchetto, et al, at TriumphRat)
- Seth: who brought a vision for a new design and a “why not?” attitude
- Taking a break. Seriously, sometimes the best thing to do is walk away from a project for a while, and then come back to it fresh!
Now that everything is hooked together and working, I may try and see if I can ditch the loom completely and just connect the wire ends to one another. I’m a little nervous about that, as the CANBUS interface might cause problems, But, if I can ditch it, it will be easier to tuck all that mess inside the headlight — or somewhere else — rather than riding with a zip-tied bundle, hanging behind my headlight.
If you have any questions, or if I have omitted anything important, please let us know. Thank you for reading. Please, be sure to check out Seth’s other designs at his PhotoBucket site.
Safe riding!
Lee… another great post! Well written, well documented and very practical! I am sure many CANBUS owners will benefit! The new bracket looks great… you can always say you had the first one!
Randy
2014 T-100 INTSTRUMENT CUPS POLLISHED STAINLESS STEEL OR ALLUM ? thank you!
Hello Linwood,
Thanks for your comment. I assume from it that you are interested in purchasing instrument cups for your 2014 T-100? If so, we do not sell any products on this site. This is strictly a blog that shares information and experiences with the modern classic Triumph Bonneville twins like yours.
I have 2 suggested sources that you can contact.
The first is Bonneville Performance, specifically at this URL: http://bonnevilleperformance.com/product/billet-instrument-cups/ You can buy a set of billet aluminum instrument cups for $220.00 plus shipping.
The other option is having them custom made by D9 Brackets. You can reach Seth Bernstein at [email protected] and explore the possibilities with him. Seth made the bracket and cups featured in this blog post.
Regards,
Randy
hi there, do you happen to have the pin out diargram for the ecm block (efi canbus)
I was thinking about this, and my though is to connect the led leads to the existing led lights on the circuit board that is in the stock housing and either tape the whole thing up and tuck it or try to put it in the light housing, the other option is to run the leads to the blinker indicator from the turn signal wiring but I think the first option would be easier as you would not need much else to make it work, just the ability to solder the led leads to board.