I decided that with 31,000 miles on my 2008 Triumph Bonneville, it was time to replace and upgrade the clutch. This was also influenced by the previous upgrade of a new Mikuni carb kit from Bonneville Performance which had noticeably increased horsepower and torque.
I purchased the Barnett clutch kit from New Bonneville, and discovered that it came with the gold springs. I was familiar enough with the discussion on TriumphRat.net to know that most experienced owners preferred the Barnett green springs. So, I asked New Bonneville if they would swap gold for green, which they were kind enough to do.
Step One – Drain the Oil
First I referred to my Haynes shop manual and made sure I had everything I needed for the project.
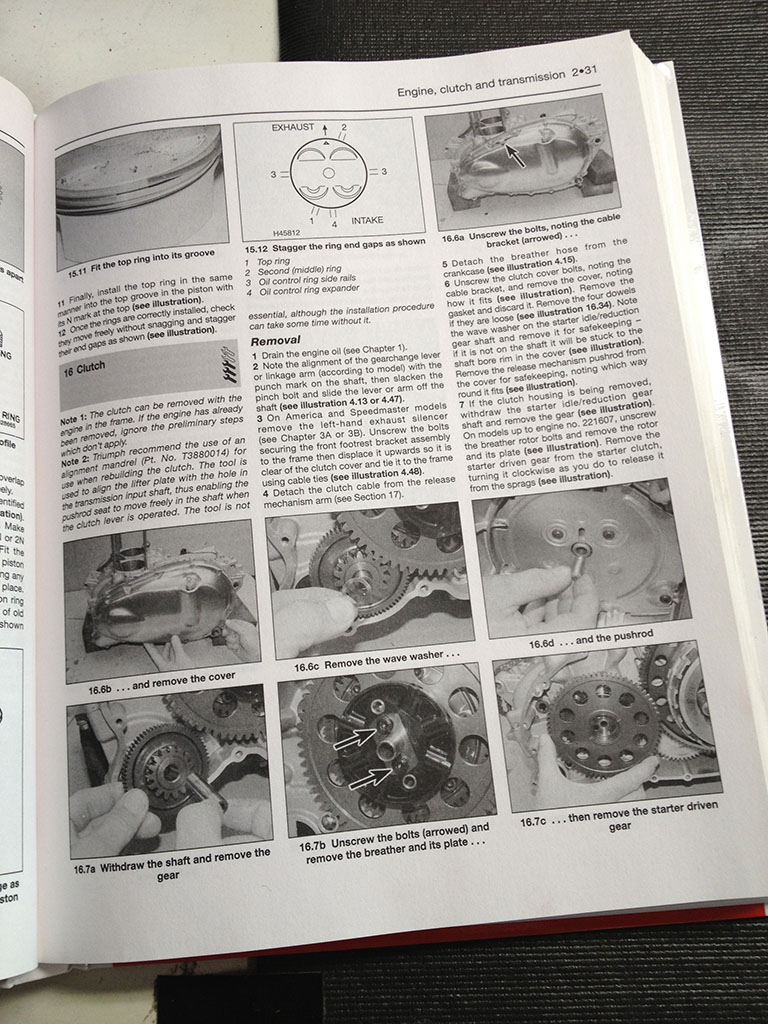
Haynes Shop Manual for 2008 Triumph Bonneville
Then I drained the oil and got my new Motul oil and K&N filter ready.
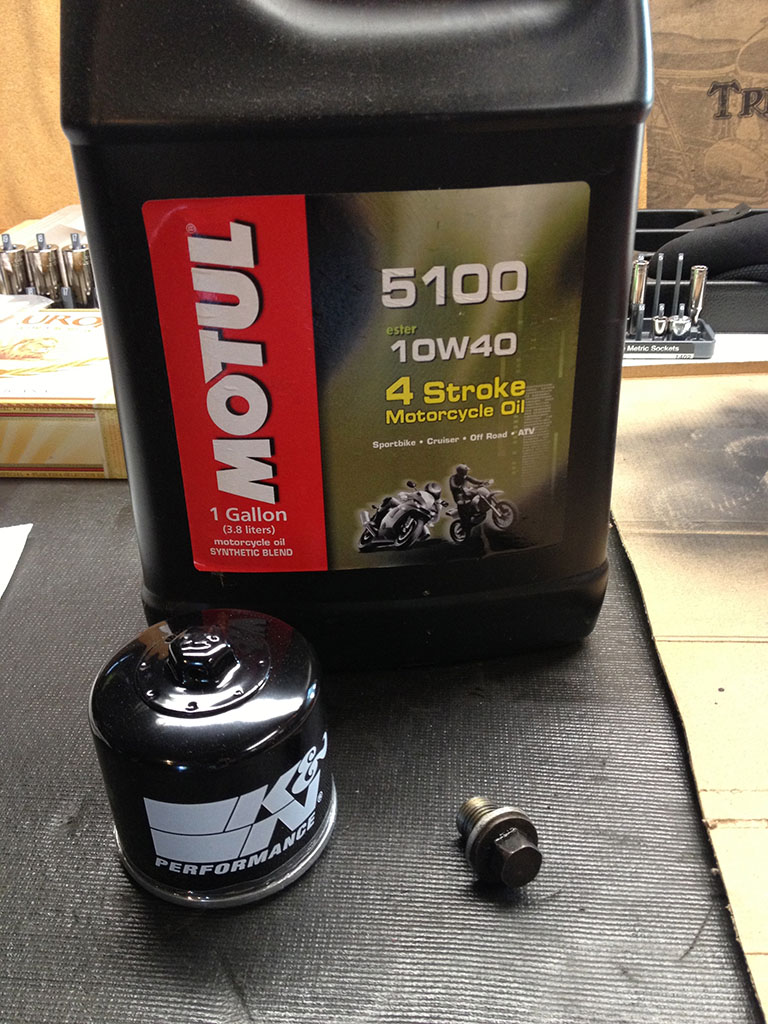
Motul Synthetic Oil and K&N Oil Filter
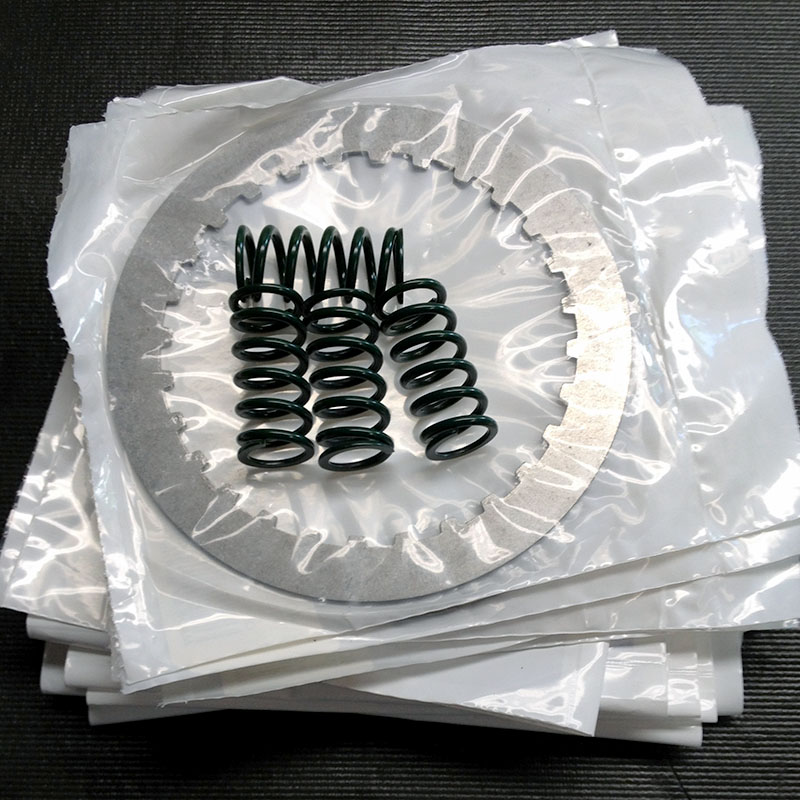
I also made sure I had all the parts to the clutch kit assembled and ready.

Barnett Clutch Kit: steel plates, friction plates and springs
Step 2 – Remove side cover
Next I removed the clutch cable and foot shift lever, and loosened the bolts on the cover.
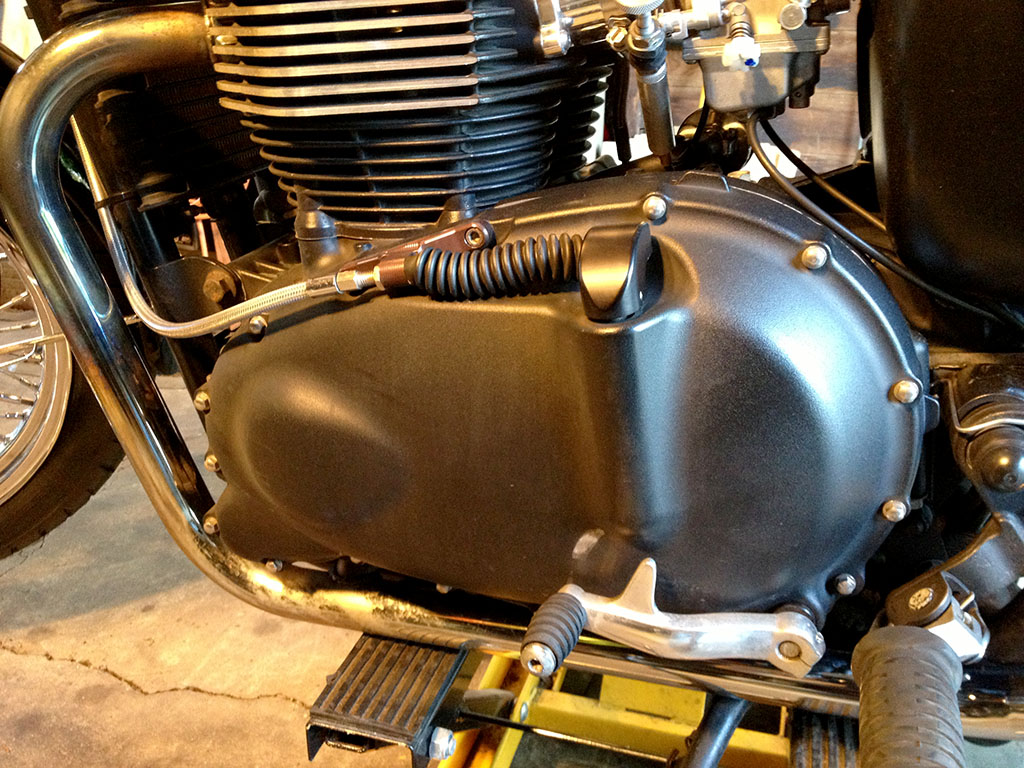
Transmission cover before removal
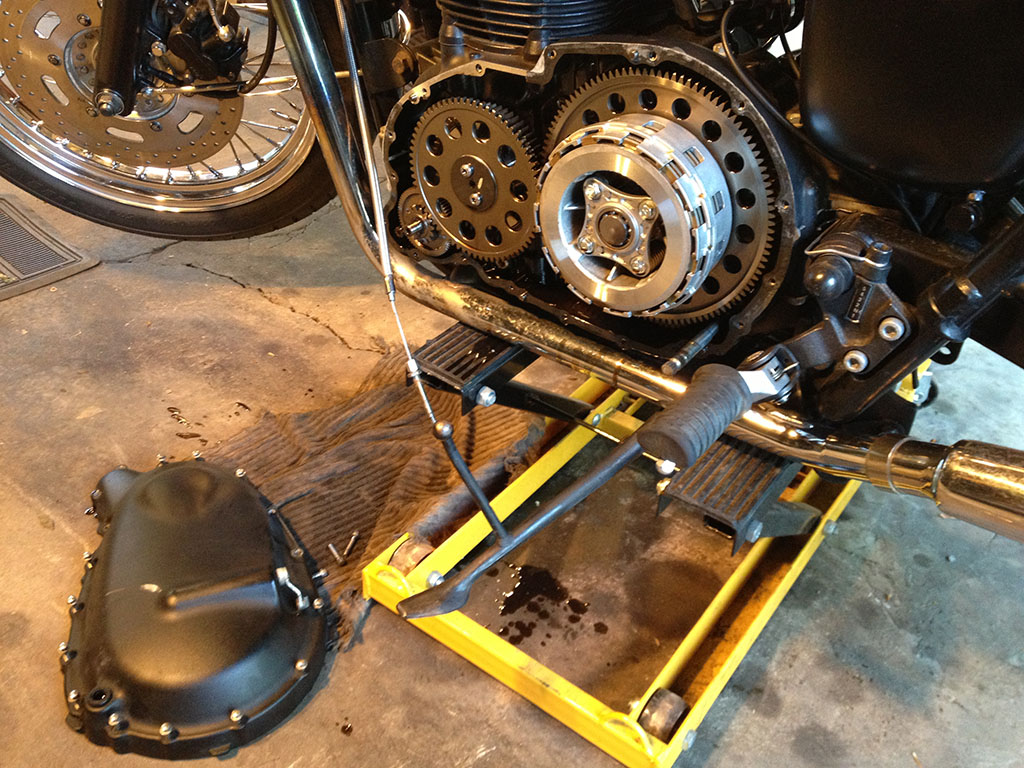
Clutch cable and shift lever removed, transmission cover removed.
I removed the cover and as much of the gasket material as possible by hand. A lot of it stayed stuck pretty hard on the surface of the engine/transmission housing. This reality eventually proved to be the biggest challenge of the whole project.

Exploded view diagram of 2008 Triumph Bonneville Clutch Assembly
Step 3 – Clutch Assembly Removal
Next I removed the center clutch bushing (Part #12), noting how easy that was to remove. Followed by the 4 bolts (Part #2) that hold the clutch lifter plate (#10) that holds the clutch springs (#3) in place. Then the springs and the washers behind them came out.

Next I used a large socket and a 1/2 drive ratchet to loosen and remove the center 22mm clutch nut that holds the clutch basket on the shaft. To get this nut loose required me to put the bike in gear and clamp down hard on the rear brake in order to get enough torque and leverage to loosen this nut (Thanks to Triumphrat.net for this tip!).
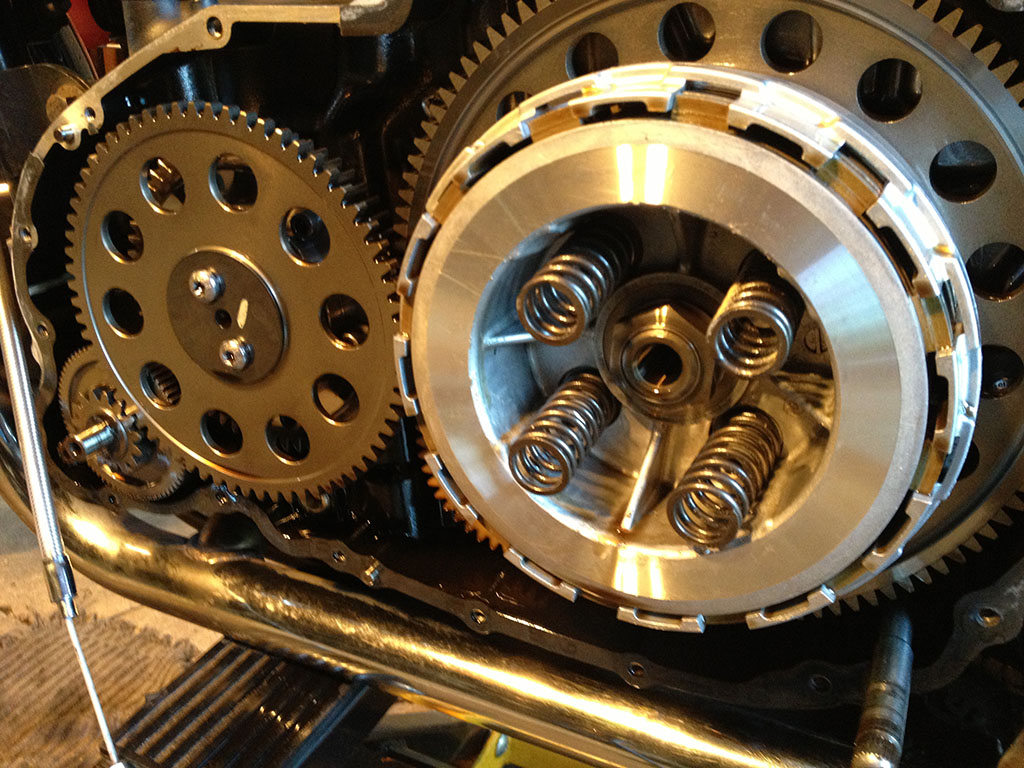
Clutch backet showing position of springs before removal and replacement.
Once removed, I was able to pull out the entire basket assembly of alternating steel plates and clutch plates. The part at the rear is the clutch pressure plate (#4) – see below.
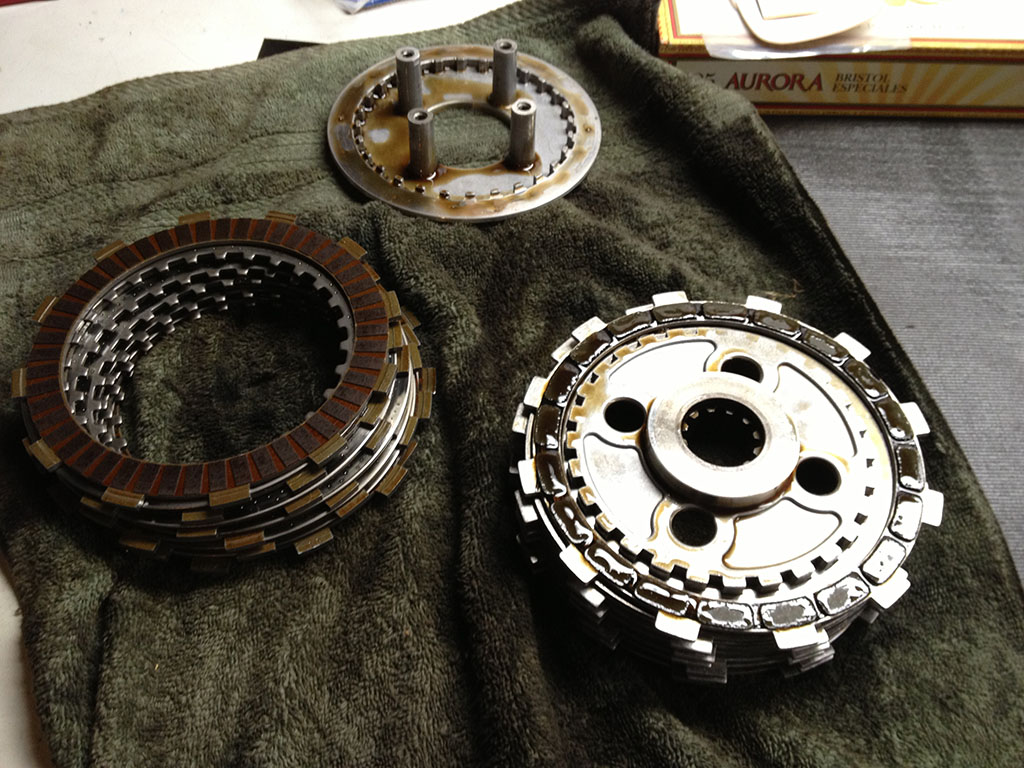
OEM Triumph Bonneville Clutch assembly removed.
The next photo shows the outer clutch housing (#9) which was left on the bike after the clutch basket assembly was removed.
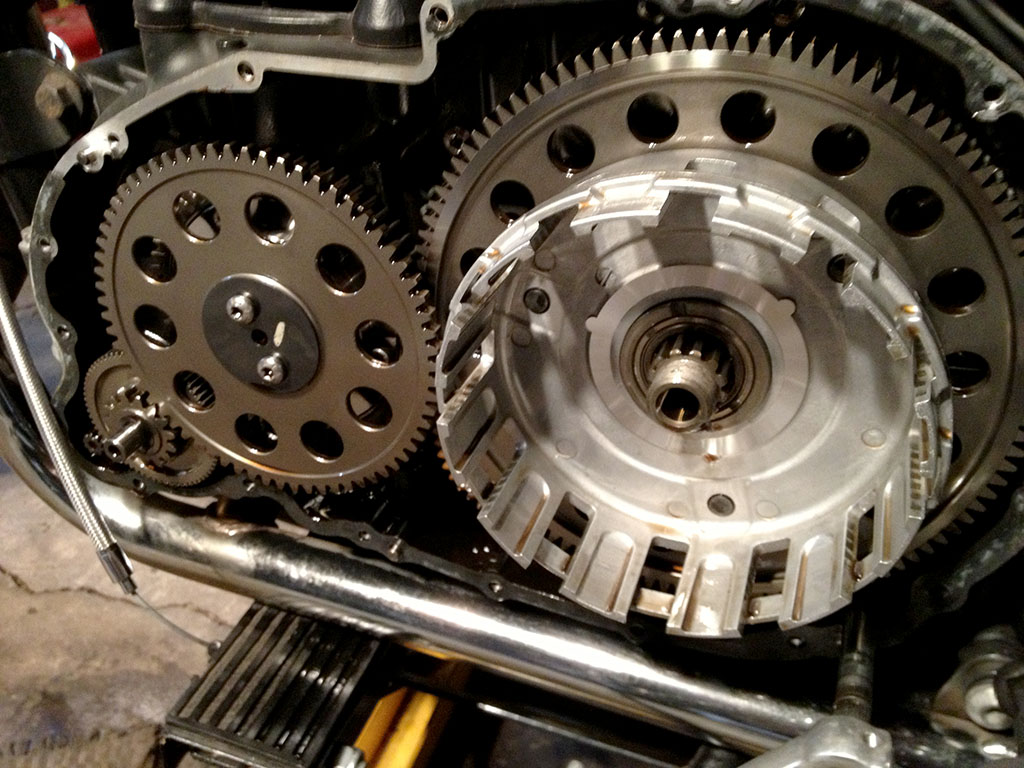
Clutch housing on bike.
Step 4 – New Clutch Assembly and Installation
Next I stacked the Barnett clutch steel plates in an alternating pattern with the friction discs. There were 2 friction discs slightly different from the rest. I put these on the inner and outer most positions of the stack, with the ones that were the same in the center (again, many thanks to Forchetto on Triumphrat.net for this tip!). The entire assembly was then carefully reinserted into the housing already on the bike. The center 22mm nut was put back in place and torqued to 105 Nm.
Next I inserted the Barnett green springs in place over their washers and carefully hand started the bolts holding the clutch lifter plate (#10) over them. Then I evenly torqued these to 10Nm.
I put everything back together in reverse order following the Haynes shop manual.
Step 5 – Gasket Removal

Scotch Brite polishing ball drill attachment
The most difficult and time consuming part of this job was getting the old gasket off of the aluminum gasket surfaces. I noted how many people on Triumphrat.net expressed caution about using metal scraper devices to do this, since they could easily gouge or nick the surface, creating leaks. I tried combinations of paint thinner, parts cleaner, plastic paint and body scrapers, wire brushes, Dremel tool, drill attachments, 3M Scotch-Brite polishing balls and yes even a few metal scrapers to get it all off and cleaned. This took several hours of slow, tedious work! I also had to protect and make sure pieces of the gasket didn’t stay inside the transmission housing. I used parts cleaner spray to keep things clean.
Step 6 – Side Cover and Gasket Installation
Permatex Ultra Black
Once I had the old gasket off and the surfaces cleaned, I used small amounts of Permatex Ultra Black Silicone gasket material on both surfaces. I positioned the new gasket (purchased online from Bike Bandit) on the transmission housing and the silicone material helped to keep it in place. I made sure that the “wavy washer” that everyone on Triumphrat said to not forget, was in place, and the clutch release lever “bullet” shaped piece was also in place. Then I positioned the cover back in place, with the shift lever going through its seal properly. I hand started all the cover bolts and then torqued them down evenly to 9 Nm. This was followed by attaching the clutch cable assembly to the clutch release lever, and the foot shift lever on the shaft.
Step 7 – Add Oil and Final Adjustments
I added new oil to the engine/trans, checking to be sure there were no leaks. I adjusted the clutch hand lever to where I liked the feel of it. I looked over everything again, and then fired it up. The oil pressure was good and no leaks or weird noises to concern me. The test ride went well. I liked to positive feel of the new clutch even though it requires slightly more effort that the original. Back in the garage I checked everything again to be sure there were no leaks. I did the same thing the following morning before heading out to work. The job was done!
Did you end up using the clutch tool that Triumph sells to reinsert the assembly? If not, did you find some other way to hold the assembly in alignment
Werm42,
You know, I don’t remember why I did not need the tool. I don’t even remember reading that I needed it in my repair manual. Let me check more into this and get back to you.
Randy
Hi Randy.
I own a 2010 T100 which I suspect has a worn or slipping clutch bush/bearing which intermittently emits a horrid squeal just at the transition point between engaged and disengaged (with no odd noise at any other time) and can happen on changing up and down (and in any gear if you really try). I replaced a set of Triumph friction plates, then a set of Barnett friction and clutch plates to get to this point and I don’t want to buy the entire clutch assembly for the sake of a bush or bearing (the dealer’s solution). I am searching High and low for a serious supplier of air-cooled twin spare parts (rather than performance shops that sell little more than fuzzy dice and cup-holders), so if you know of anyone that can help, can you please let me know? Sorry I am getting off topic here, but i am getting desperate for someone who knows what they are talking about. You sound like the right guy.
Kind regards,
Ian B.
Did the clutch today, didn’t use the tool to get it aligned. Found the re-assembly relatively easy, even without some “magic $70 alignment tool”. Can see how an aligner for the clutch pack might save a few minutes. New Barnett Heavy Duty clutch, and green springs did the trick.
Good write up! What would we do without Propforward and Forchetto on TRAT? I’ll be doing this same procedure very soon.
The Haynes manual says to remove the starter idle/reduction gear shaft and gear but nowhere else do I see this is necessary for clutch discs replacement.
Also, it’s important that the wave washer goes back/stays on the end of the starter gear shaft – it can sometimes stay in the cover and is forgotten or lost. Dire consequences if that wave washer is absent.
Cheers, Ruger
Hey Welcome Ruger! Thanks for the comments… you are absolutely right! Randy
I have the kevlar clutch kit on my Bonnie now and notice some screeching sounds after it had been installed. Are you getting any of that after your install?
Tony,
No, I did not have that issue. I would say that sounds like there is a problem with the install.
Did you follow the instructions on the correct order of the plates? Did you replace all the parts on the inside of the transmission case correctly? Did you tighten bolts to correct spec’s?
Randy
Hi Randy,
Unfortunately, I did not do the install myself. A local Triumph “Dealership” took care of the install. I may follow your walkthrough and try to reinstall it myself.
Thanks,
Tony
I need help I was charged a whopping $1,000 to change the clutch
A screeching noise when the clutch is being engaged is the throwout bearing (i.e.: clutch release bearing). It should be changed when you replace the clutch, especially if heavier springs are used. Pretty cheap part from Triumph…
Any chance you can take it back to the dealer and have them address it?
My motorcycle was in a collision on the high way. All brakes and steering components were replaced. As well as right side covers, muffler, and pegs. After the repairs I noticed my motorcycle would grind when taking off from first gear when cold or early during the ride. A month or two later the clutch went bad. I replaced the clutch with the Barnett clutch and it hasn’t been more than a month and the noise came back. What can it be?
Hello David,
Thanks for your comment and question. Sorry to hear about the accident… hope you survived it OK. I have a few followup questions:
Judging from what you have shared thus far, the accident doesn’t seem to be related to the clutch issue… unless the bike dropped on the left side. If it went down on the left, the gearchange shaft could have been bent and contributed to the clutch going bad. More likely, the original clutch just wore out, and the new Barnett clutch was not installed properly. I wonder if the mechanic forgot the “wavy washer” that is so easily misplaced and unnoticed. It is part of the starter drive assembly and can be purchased here.
I’ve included a photo of it and an exploded view diagram (part #6) below.
Let me know…
Randy
Hey Randy sorry for the super late reply. I honestly didn’t think you would reply so fast and then I just forgot about the post haha. The bike fell on the right side. South bay motor sports in San Diego did the repairs. The clutch went bad at 4000 miles and I replaced it myself. I didn’t really like the way they dealt with the situation. They pretty much just said sucks for you but we’ll change it for 400. Also, they left one of my turn signals loose and didn’t adjust my headlight. Anyways I changed out the clutch myself and I did not forget the wavy washer. 100% sure of that. The sound died away for a while but it is now doing it again and more often. Clutch feels fine and the motorcycle has 13,000 miles now. Any ideas on what it might be?
David,
Does it screech all the time or just when the clutch is engaged? If it is while the clutch is engaged, according to ccrider’s comment it sounds like it may be the throwout bearing. It’s not an expensive part, but you’ll still need to crack the tranny case again.
Randy
FYI. When removing covers that have a gasket, use a sharp putty knife and remember to angle it so you don’t gouge the surface. Then use a knife sharpening stone on the surface to get any residual gasket material off. It works very well. Just take your time and the surfaces should be true and ready for a new gasket. Remember to use only a small amount of sealant on the new gasket. You don’t want to use so much were the excess is squeezed up and a small peace dislodge on the inside of the cover and floating around in the oil system going through the pump and causing oil pressure problems. I’m ready to install a new clutch on my Bonneville.
Antonio
Antonio,
Good suggestions and advice… I agree! Thanks for posting and good luck with the new clutch!
Randy
Thanks guys i will keep it in mind. I am going to ride it until my clutch goes out. Then I will switch it out and update you guys on the situation.
Hey Randy,
quick question. I’ll be doing my 20000km revision soon, and although I’ve absolutely no problems with my clutch, after reading this post, I’m wondering if I should replace the gasket anyway! Haynes manual doesn’t state it, but I’m not sure I want to go through the trouble you did. What do you think?
If you are removing the left side cover anyway at 20,000Km, I would plan on replacing the cover gasket. I doubt that you will be able to get that cover off without destroying the OEM paper gasket. You can replace it with an OEM paper one, or you can get a reuseable one from COMETIC GASKETS. These are used by the American Flat Track Racing Team on the Bonneville Performance Supertrackers. I ordered mine from Mike Zolikoff ([email protected]) who was very helpful… (800) 752-9850. I would also consider replacing the clutch while you are at it.
Thanks for the speedy response! That’s the thing, I didn’t plan on removing the left side cover at all, given that my clutch is operating flawlessly, and the bike is only 5 years old. I’m only considering it now, after reading your post. I guess I’m trying to think about the future, and avoid gasket-removing problems a few years down the line.
I’ll have a look at those gaskets you mentioned, much appreciated.
Hi Randy, replaced the clutch on my 2001 bonnie. All went well, everything torqued to specs. I closed the case and reconnected the clutch cable. I have very little tension in the cable. Took it all apart and did it again. Same problem. I feel a little tension from the small spring that controls the little bullet that hits the plate lifter but nothing else. Any ideas?…thanks
Jay, it’s been so long since I did this that I don’t remember half of it. Anyway, I do seem to remember that the items 13, 14 and 15 in the attached diagram need to be in the correct position when the cover goes back on.
I have a 2002 Bonnie America with clutch chatter and rough acceleration in first gear. I want to upgrade to a 2009/2015 clutch from a fuel injected bike. What hardware changes will be required? any help/tips appreciated. One question is will the exhaust have to be removed?
James, I’m sorry but I do not have a lot of experience and knowledge with the “America” version of the Bonneville line. You will probably need to talk to someone at Triumph, or maybe a dealer, to assess what parts may be needed, and the mechanical procedure. On the Regular Bonnevilles the exhaust pipes do not need to be removed to get the left side cover off. It may be different on the America. Best of luck. Randy