Why new carbs?
Even though I have my CVK’s working better than ever, there is still some roughness at idle and difficulty cold starting. Lot’s of people upgrade using the Keihin CR’s or FCR’s. However, I noticed some also use the Mikuni’s. So, in anticipation of spring and the desire to have an uneventful summer riding season, I began researching carb upgrades for the 2008 Triumph Bonneville.
How I discovered Bonneville Performance
![]()
I discovered Bonneville Performance online after seeing this street tracker at an International Motorcycle show in Chicago. I was so impressed with how it looked and the performance it was capable of that I went home, found their website, studied their products and services and bookmarked the site for future reference.
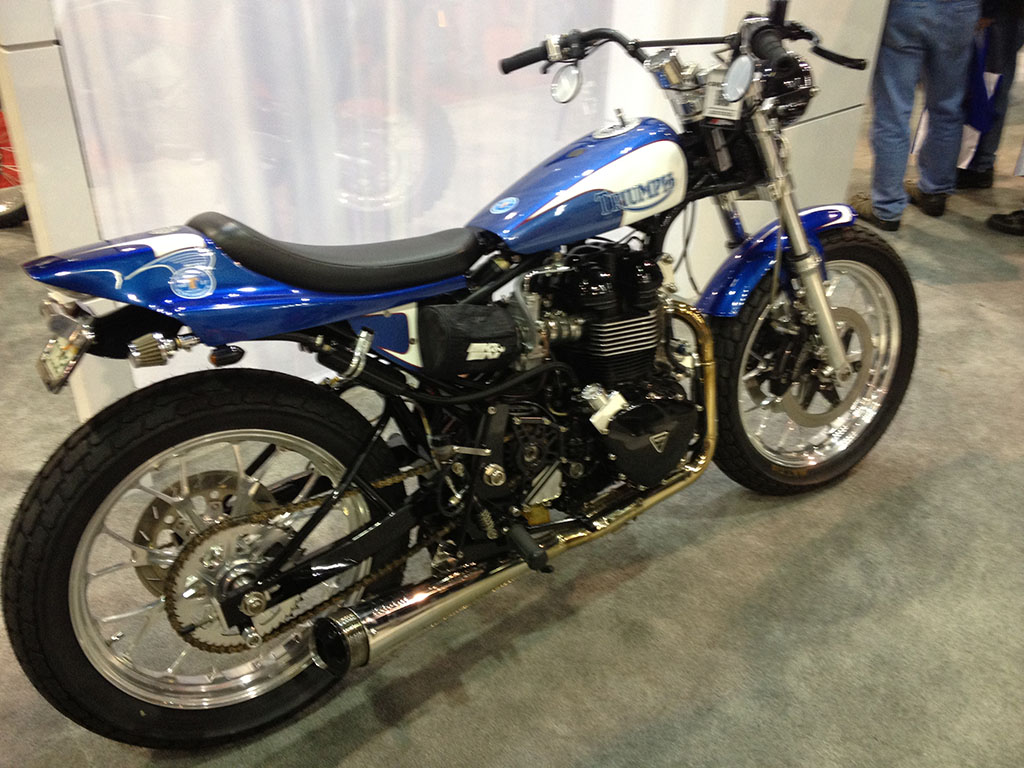
Bonneville Performance Street Tracker at International Motorcycle Show Chicago
So, when I started thinking about carb options this spring, I remembered being impressed with the carb kit offered by Bonneville Performance. On his website, Bill Gately claims that his Mikuni carb kit will raise torque and horsepower 30% and that he has the dyno results to prove it. He also notes that his kit includes an enricher/choke which he has custom designed. The Keihin FCR’s have 7 jets and adjustments, and the Mikuni’s only have 3 jets with an idle screw and air screw. I like that. I also like that if I ever install a Wiseco big bore engine kit (also sold by Bonneville Performance), I can still use the Mikuni’s.
Bonneville Performance Mikuni Carb Kit
Here is the Bonneville Performance Mikuni carb kit described:
The 800GT Carburetor kit was specifically developed for the new series Triumph Bonneville’s. The kit is designed by and manufactured exclusively for BONNEVILLE PERFORMANCE. It consists of twin 42MM HSR Mikunis (pre-jetted for your bike), CNC machined billet manifolds, airbox adapters, and top and bottom braces. It also includes O-rings, throttle control rod for carbs, all fasteners and throttle cables. A single pull twin cable choke is also available. The billet pieces can be ordered chrome plated, highly polished or matte finished. The carbs can also be ordered in matte or highly polished finish.
This is a bolt on kit! For the the best performance we recommend an aftermarket tuned exhaust system. We have used Bub’s and Specialty Spares exhaust systems while testing the performance of our carb kit.
This paragraph really jumped out at me:
If you are tired of erratic idle sped, sluggish response and general unpredictable behavior of your stock CV’s, this kit is your answer to a rock solid performer at low, mid and top end range.
My Order
The initial carb kit I ordered was a bit different than the stock kit because I already had TPUSA billet intake manifolds which I wanted to use if possible. The throttle cable ends for the Mikuni’s are different than the Keihin’s, so a set of throttle cables are required. However, I also wanted to retain my stock throttle cable and control setup instead of modify them using other third-party parts offered by BP. So Bill ordered custom stainless steel braided throttle cables from Barnett to be furnished with the kit.
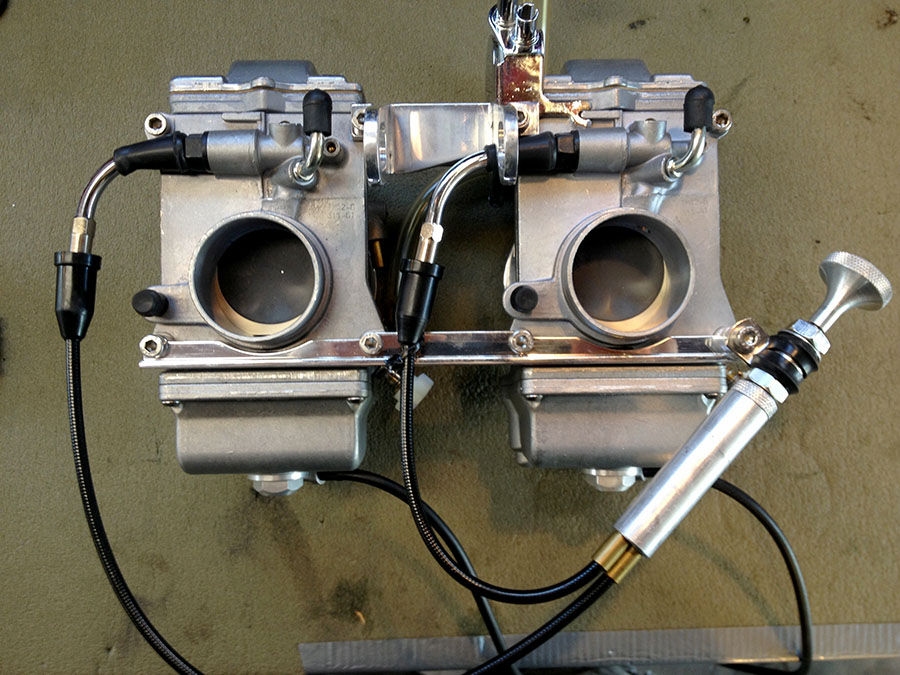
Here is some additional information on the Mikuni HSR42 carbs themselves.

Twin Mikuni HSR42 carbs with Bonneville Performance choke
I will be describing and documenting my entire carb kit conversion experience here in this post. Bill Gately at Bonneville Performance has been very helpful and accessible in answering my questions and coming up with a slightly altered kit solution to better fit my needs.
APRIL 20, 2013 UPDATE
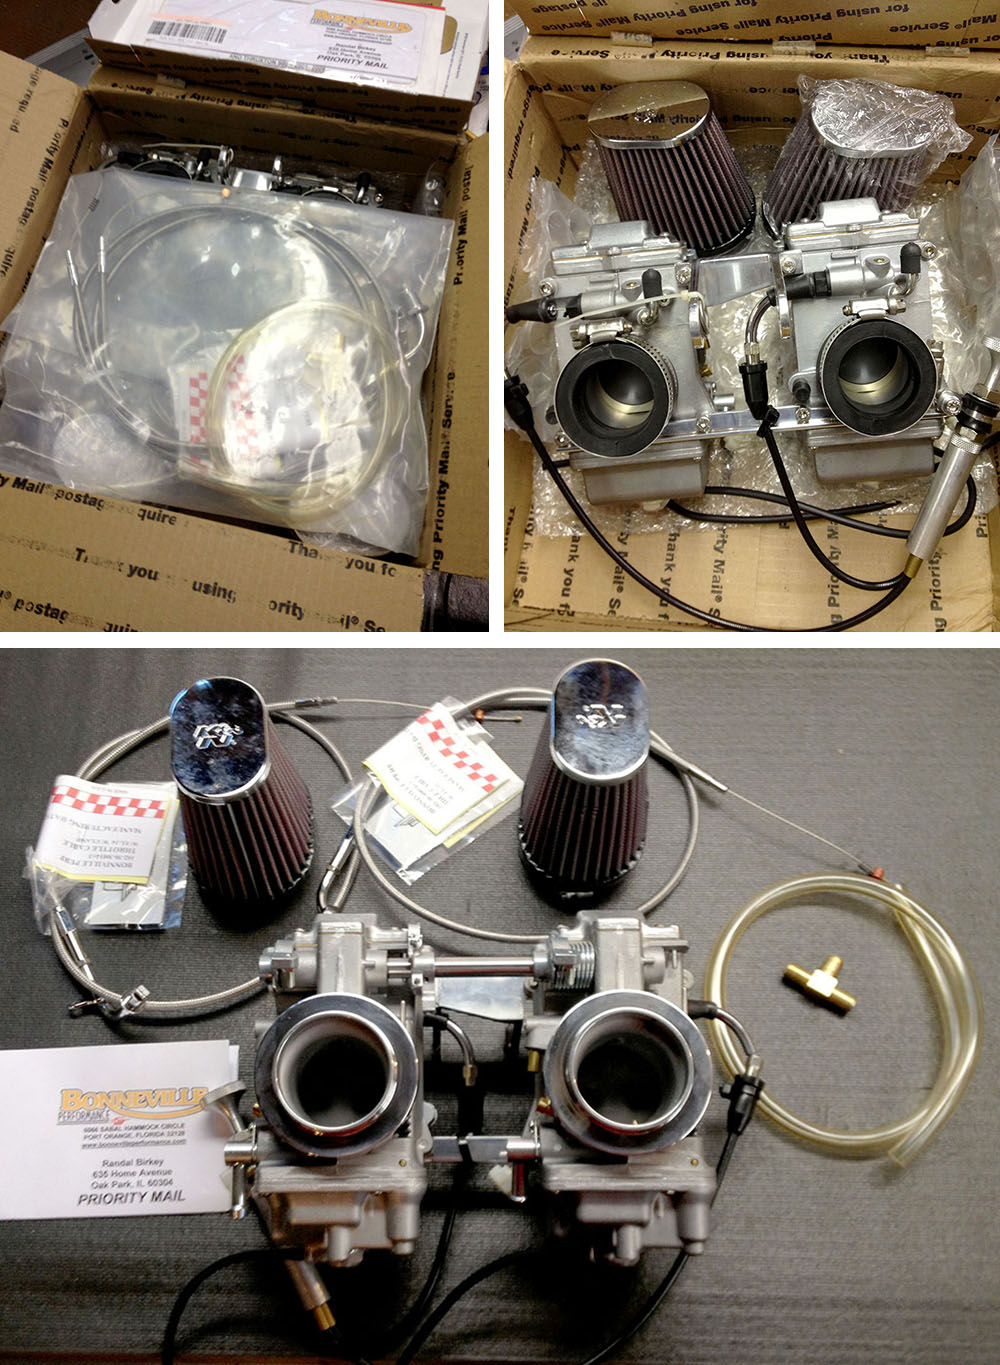
The Mikuni carb kit arrived on April 19, 2013 via USPS Priority Mail. The shipping box appeared to be in good condition.

Package from Bonneville Performance with Mikuni Carb Kit
Inside contained all the pieces of the Mikuni carb kit. Carb assembly, fule lines, throttle cables, K&N filters, and the instructions. I didn’t notice any damage at first.
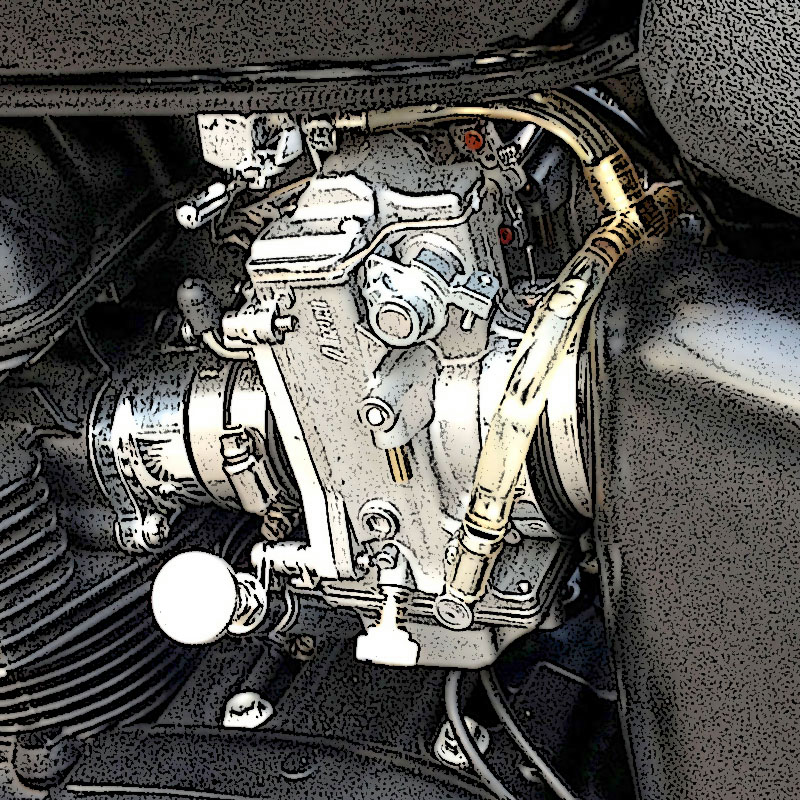
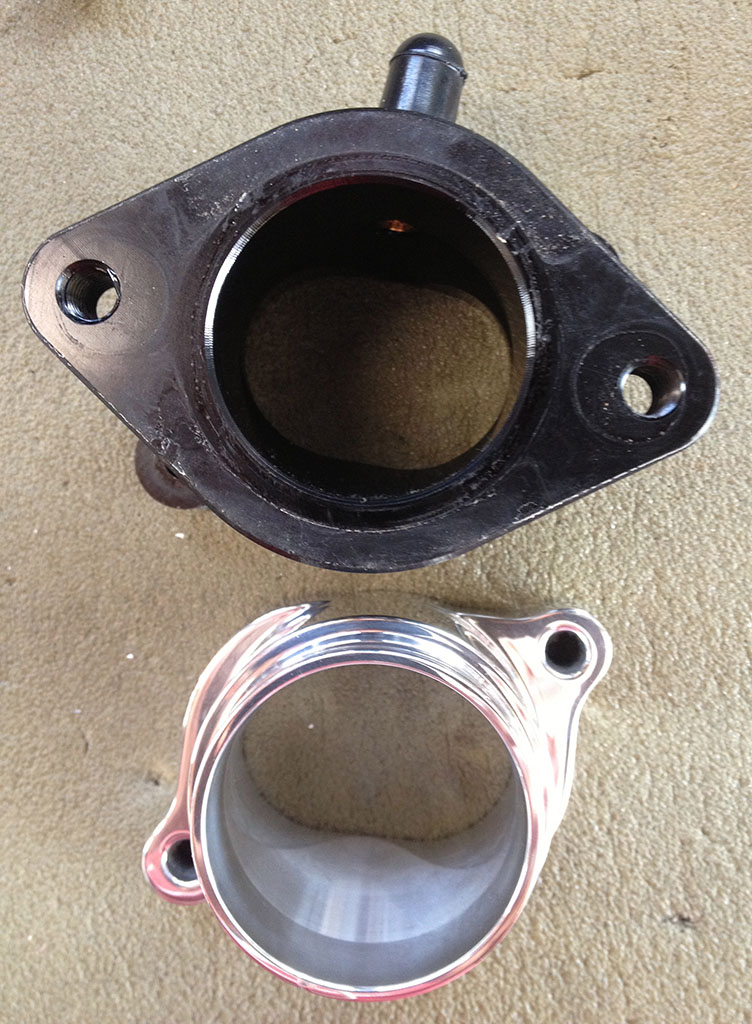
One thing I noticed right away was the size difference between the Mikuni HSR42 setup, and the stock Keihin CVK’s. A LOT more air can flow through the Mikuni’s!
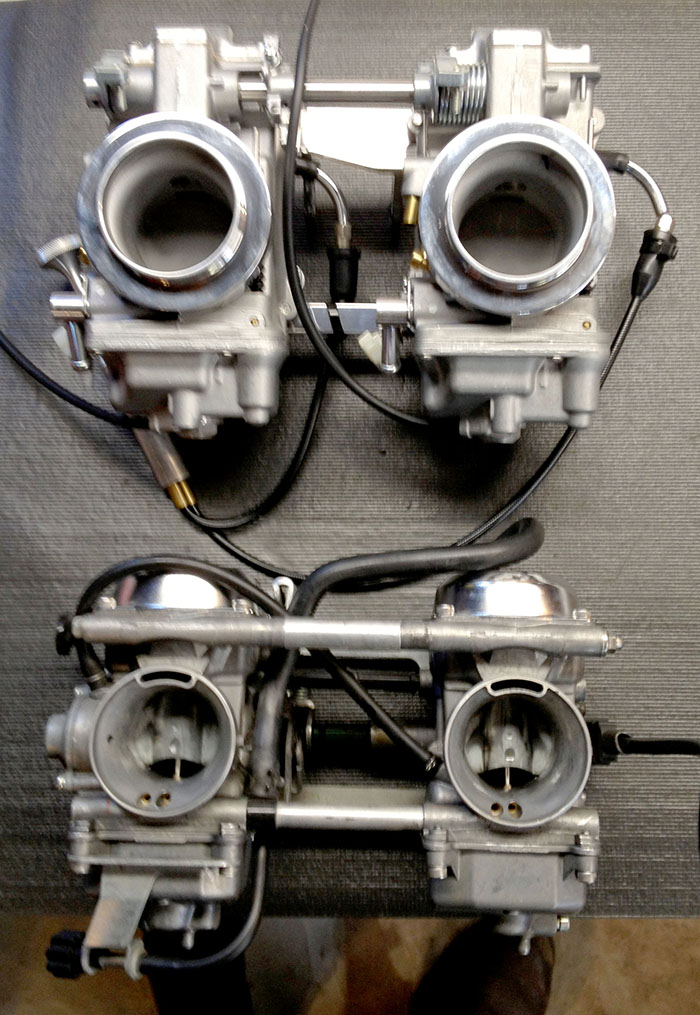
Size difference between Mikuni HSR42 (above) and the Keihin CVK’s (below).
I began the conversion process on Saturday, April 20, 2013. I put my Bonnie up on a floor jack, removed the gas tank, side covers, and twin OEM Keihin CVK carburetors that I have modified over the years (see other posts).
Per the BP instructions, I also removed the upper carb mounts to the engine. When I went to pre-fit the new Mikuni carbs to my existing TPUSA billet manifolds, I realized that they would not align properly (see photo below). I contacted Bill Gately at Bonneville Performance (who answered his phone on a Saturday) and we discussed the situation and decided that he would send me his BP billet manifolds on Monday.
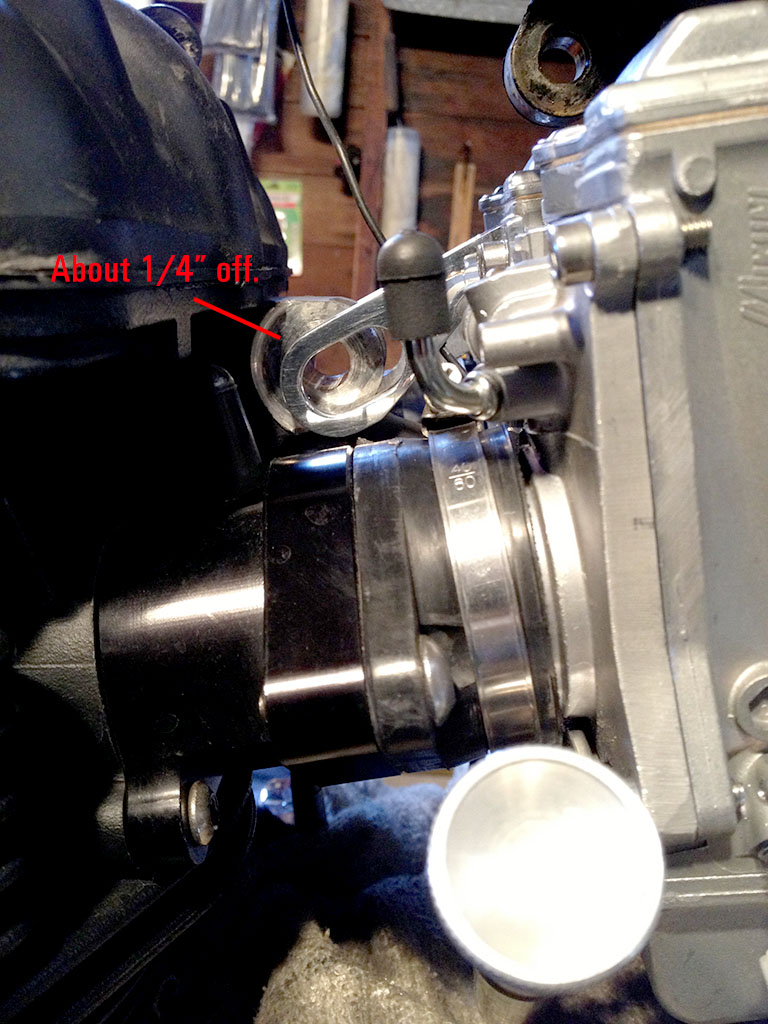
Misalignment of carb mounting bracket when using TPUSA billet manifolds.
I also discovered that one plastic part of the choke assembly had broken during shipping, so Bill also agreed to send me a replacement piece to repair and correct that.
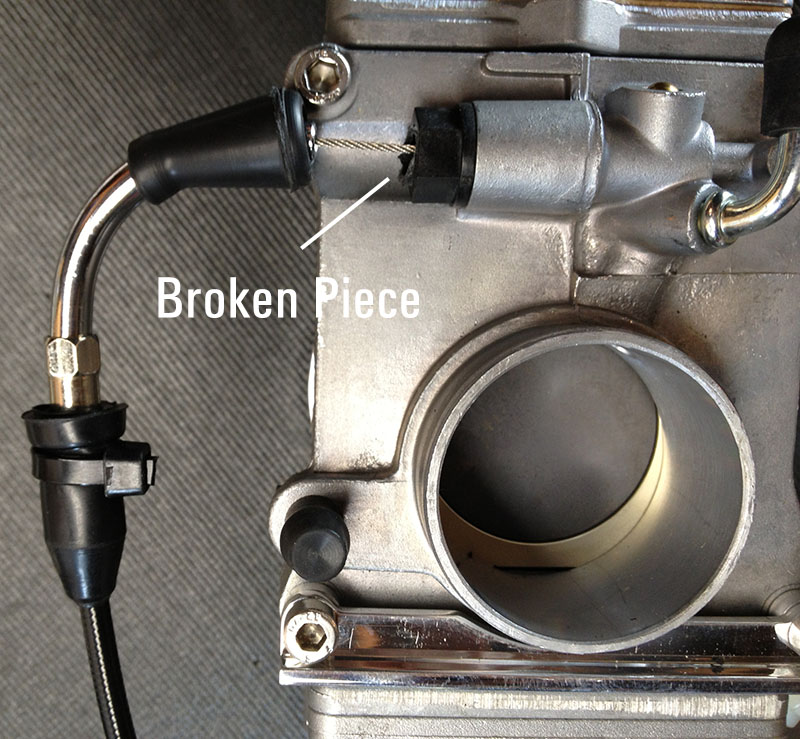
Broken plastic piece of the choke assembly.
April 24, 2013 Update
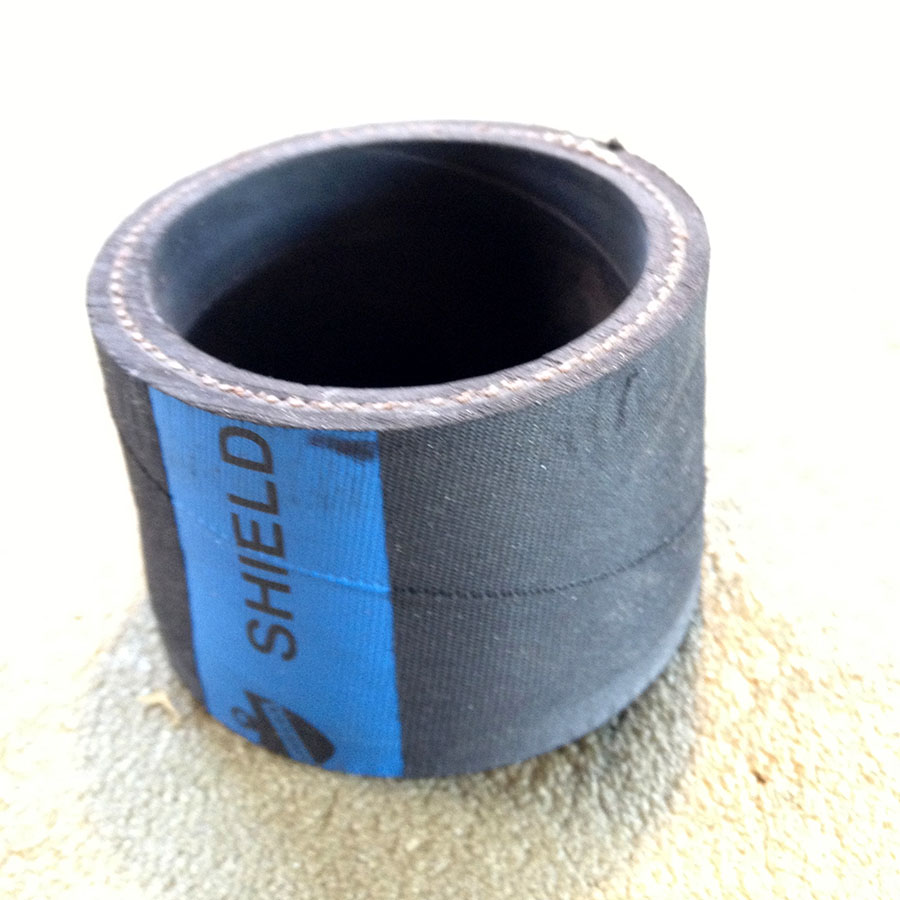
The BP intake manifolds and the replacement broken plastic fitting arrived and I was able to do some more pre-fitting and mounting. In the process of talking with Bill Gately on the phone, we discovered that my kit was also missing a piece for attaching the throttle cables to the carbs! He was very apologetic about this oversight and promised to ship that mounting part plus some marine grade rubber connectors that go between the carb and manifolds. Bill prefers the marine grade rubber over the stock OEM connectors because they last longer.
Here is a photo of the new BP polished billet intake manifolds on my 2008 Triumph Bonneville 865cc engine (Thank you Lee Hoffner).
865cc engine with Bonneville Performance billet manifolds installed – Photo by Lee Hoffner
Here is a set of photos comparing the Bonneville Performance billet manifolds to the TPUSA billet manifolds. You can see why the Mikuni carbs did not fit properly when using the TPUSA manifolds. There is about a 1/4″ difference in overall height.

Billet intake manifolds, side view comparison with connectors.
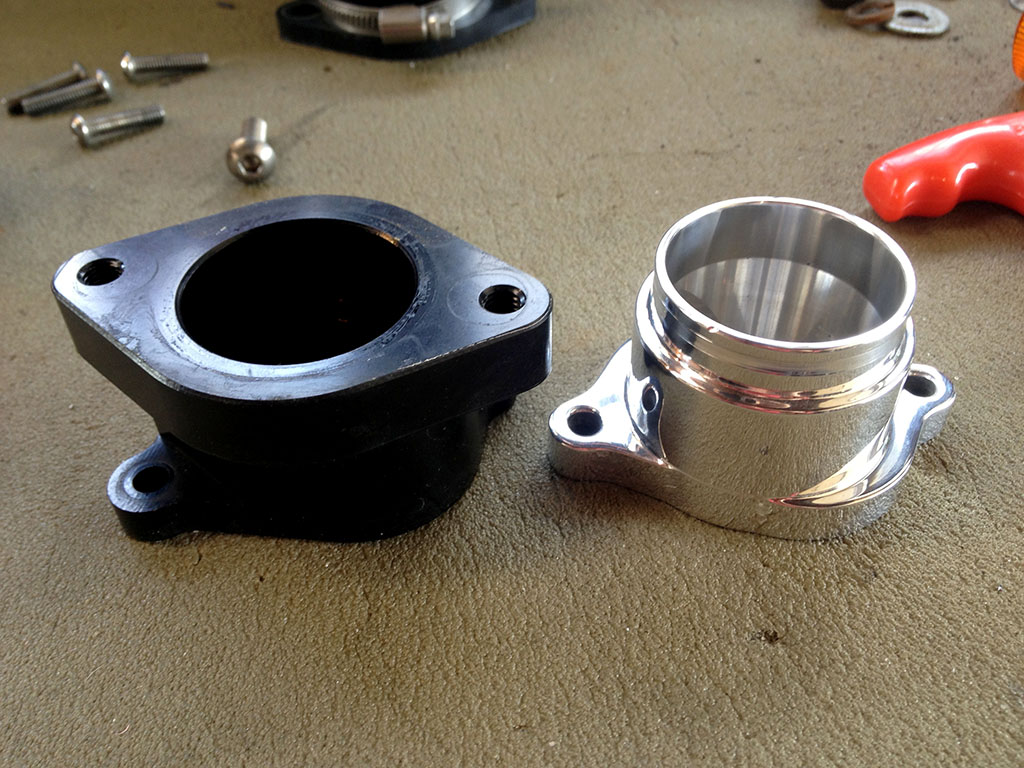
Side by side billet manifolds comparison: TPUSA on left, Bonneville Performance on the right.
End view comparison
One thing I really like about the Bonneville Performance manifolds over the TPUSA design is the way the o-rings seat in their slots. Bill has designed the manifolds with small knobs that hold the new o-ring in place so it doesn’t slip out. This makes installation a breeze! You know this part was designed by a guy who has done this before!
O-ring detents make installation much easier!
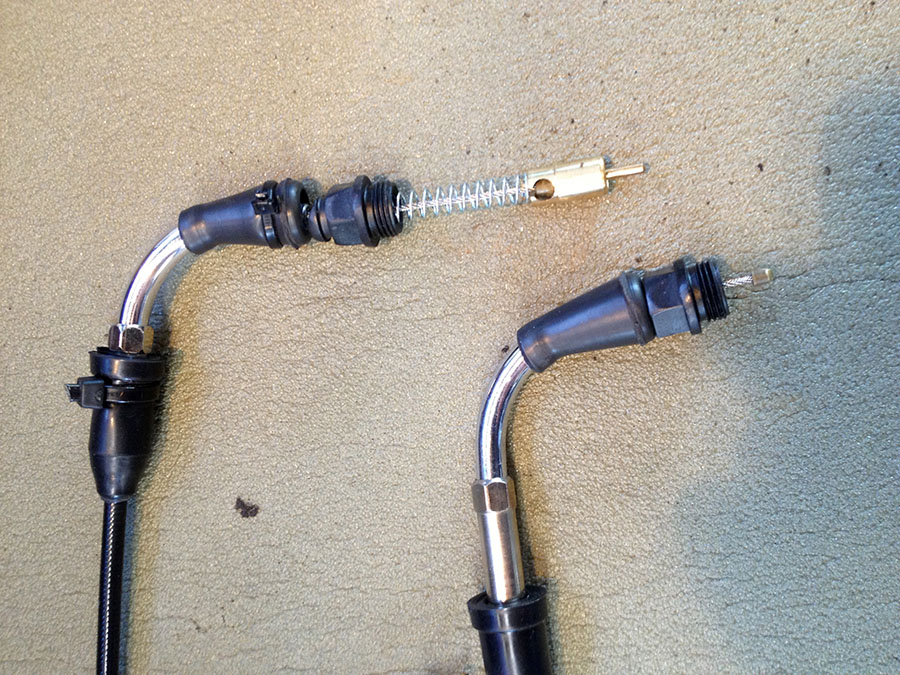
Here is the missing piece required for the throttle cable connection… which Bill is shipping to me.
Throttle cable connection piece.
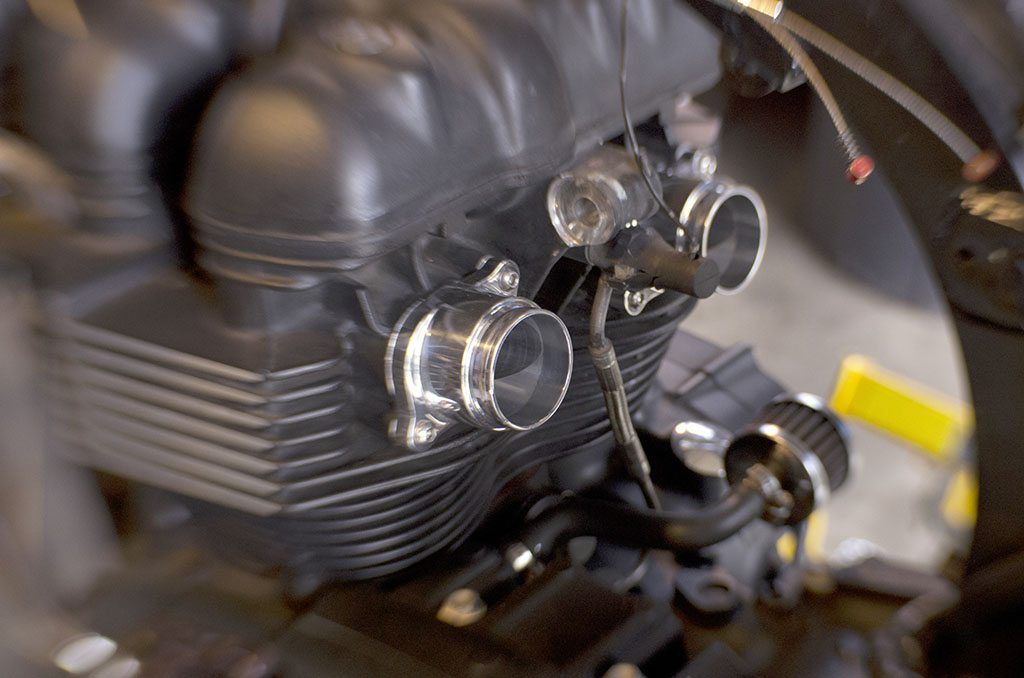
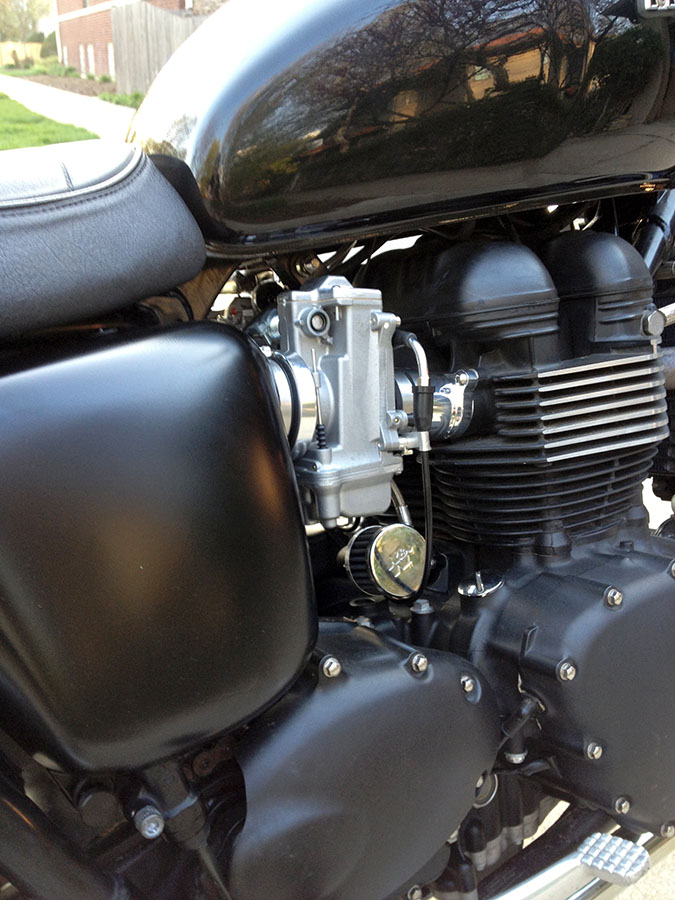
How the Mikuni carbs are looking with the new manifolds on my 2008 Bonnie.

APRIL 27-28 2013 UPDATE!
Well, my hopes to get the 2008 Bonneville running this weekend were not to be! The missing Mikuni throttle mount and marine rubber connector parts from Bonneville Performance arrived late in the day on Saturday via USPS. On Saturday, I was able to hook up the throttle and give the new carbs a try at starting the bike! It kicked over a little bit and when I tried to use the choke, not much happened.

Mikuni carbs waiting on my shop bench – photo by Lee Hoffner
Then I noticed gas leaking out of the left carb bowl, right at the gasket seam. I gave Bill Gately a call and we discussed it. He thought that perhaps the float was stuck on the left carb. I did not have a short 2.5 mmm Alan head bit that would allow me to access and remove the float bowl bolt heads, so I stopped the project until I could get the bit on Sunday.
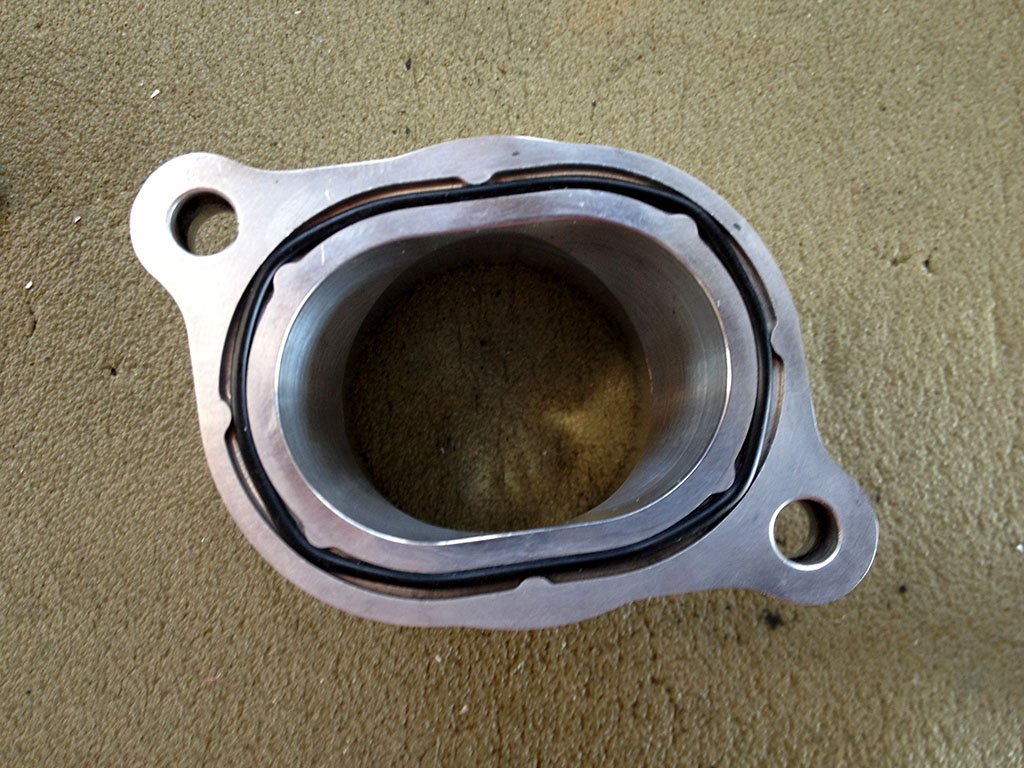
After getting the tool I needed on Sunday, I removed the float bowl, and discovered the float was working fine. However, I noticed that the float bowl was missing a gasket, which accounted for the gas leak! See the empty slot in the photo below.
Left carb float bowl removed, showing missing gasket.
I called Bill again (who answered his phone), and he was very apologetic, and offered to send me the float bowl gasket, two new marine rubber connectors (shorter), and some parts to fix the choke cable which after discussing with him, I realized was also broken during shipping in more places than I had originally noticed. The broken choke cable is probably the main reason the bike did not start.
Marine grade rubber connectors.
Right carb choke cable showing junction spot where the assembly was broken.
Yes, it is frustrating to have this project go on longer than necessary due to misjudgments about the manifolds, and missing and broken parts. I am anxious to get the Mikuni carb conversion kit fully installed and the Bonnie running so I can report on the hoped for improvement in performance! I also hope that if anyone out there decides to do this upgrade, your experience will be better than mine!
WEDNESDAY, MAY 1, 2013 UPDATE
The parts arrived! I was able to install the missing gasket between the left carb float bowl and carb body.

Then I connected the bowl to the bottom of the carb with the 4 stainless steel 2.5mm Alan head bolts.
Next I repaired the broken parts of the choke assembly with the new parts that BP had sent.
Choke assembly repairs.
Newly repaired choke assembly mounted back on carbs.
Then I attached the new marine grade rubber connectors on the billet manifolds using stainless steel clamps. This then allowed me to position the carb unit in a place to attach the two throttle cable ends to the top of the carbs.
Push and pull throttle cables attached at the top of the carb assembly.
Next I mounted the carbs on the rubber connectors, clamping them with additional stainless steel clamps. I then connected the top carb mounting bracket to the engine and frame.
This was followed by attaching the two new K&N air filters, and threading the carb bowl overflow hoses to drain out the bottom of the bike. Next, I mounted the gas tank and connected the fuel line.
I gave the bike a trial start to see if it would run… and it did. It coughed and choked a bit at first, and I used the choke assembly to help it along. I noticed a popping sound during idle, so I gave Bill Gately a call. He described how to adjust the airflow on each carb using a long flat head screwdriver. The popping took only a minute to fix!
Finally I added the side covers, seat, gas tank vent hose, and then gave everything one more going over. I then took it for a spin!

Everything all put back together and ready for a spin!
The first run went well. I noticed a more powerful throttle response right away. On decelleration, the bike makes a gurgling sound without any of the “popping” that I had become used to with the modified CVK’s. During the 5-mile side street ride I was not able to take it over 40 MPH, and the bike performed better than the previous carb setup. I am anxious to try it on the highway within the next day or two.
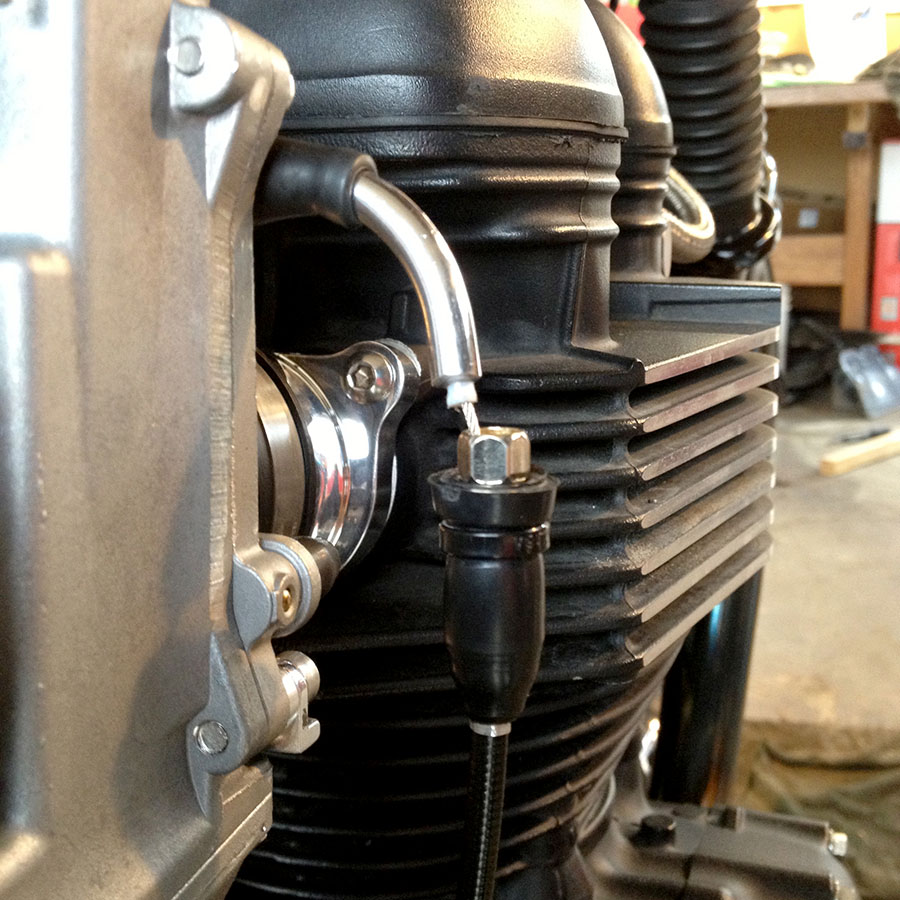
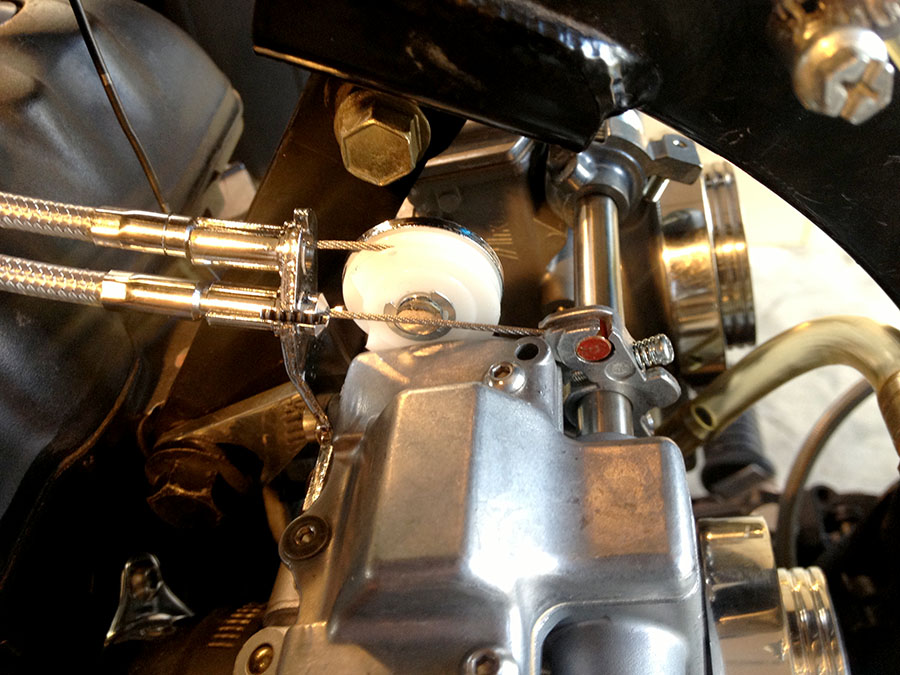
Mikuni carbs installed – right side view, with choke cable bracket.
After the maiden voyage, it seemed to me that the right side choke cable was a bit exposed to potential bumps, catches and potential breaking. So, I fashioned a small aluminum brace secured to the right carburetor, to hold the cable more securely in place. I feel better about it now.
I plan to connect with Bill Gately today and see about making more fine tune adjustments for optimum performance.
May 9, 2013 UPDATE
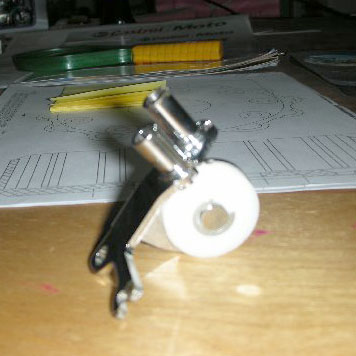
Last night I used my new Motion Pro Carb Synchronizer tool to try to sync the 2 new Mikuni carbs on my Bonnie. I purchased it online through Amazon for approx. $65.
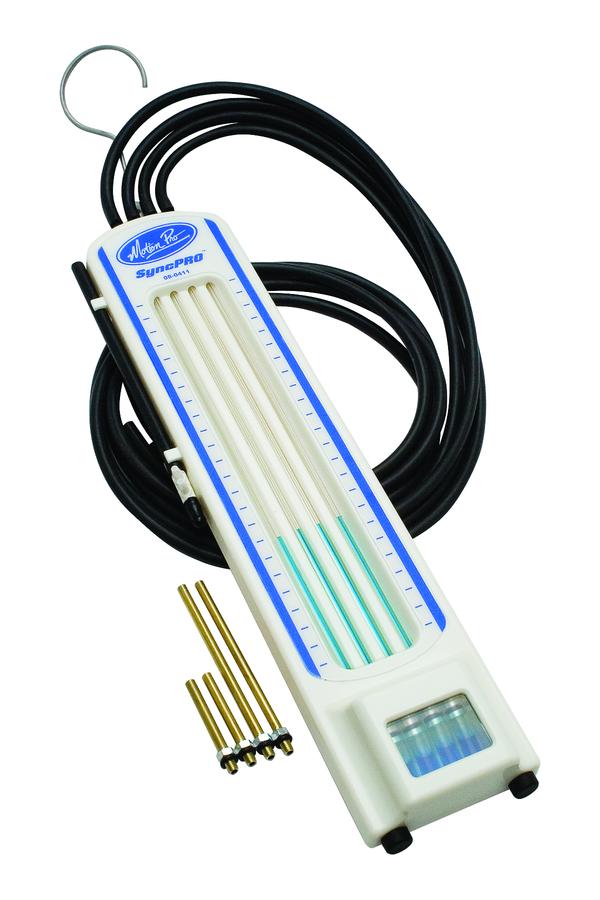
Motion Pro Carb Sync Tool
It was fairly easy to set up and calibrate, although the instructions could use a few more diagrams or photos to help people understand how to get it setup. Anyway, once applied to my carbs I saw what I had assumed was true that the carbs were not balanced. The left carb was pulling about twice as much as the right carb. I am sure this is what was causing the smell of gas (too rich) and poor gas mileage.
I called Bill Gately and we discussed the matter. He gave me a set of steps to take as follows:
- Turn the idle mix screws all the way in, then back them out 7.5 turns.
- Set the air mix screws at 3/4 turn out.
- Pull off the Air filters and watch the 2 slides to see if they sit evenly and both lift evenly when throttling up.
I did these steps, and I even pulled the carbs completely off to recheck the enricher cables (choke).
Once everything was back together and tightened down, I started it up again, and it seems to run much smoother. The carbs are still not completely balanced the same, but are better. I think there still may be an issue with the enricher cables that are affecting the balance between them.
May 20, 2013 UPDATE
This past weekend I was able to make some additional adjustments. I took apart the choke-enricher cables and made sure they were pulling the same amount on both carbs. I aded an extra throttle spring to pull the throttle closed much quicker upon release of the grip. I used the Motion Pro to sync the carbs again and seemed to get it running a little better. My average gas mileage is now between 36-43 MPG depending on percentage of highway-city driving and road conditions.
Sunday, May 26, 2013 UPDATE
I am riding down to Springfield, Illinois to watch the AMA Flat Track Races on Sunday May 26th, at Bill Gately’s invitation. I will have him look my carb kit over and help me get it completely dialed in. I am very excited about seeing the races as well, especially after viewing this promo video produced by Triumph.
http://youtu.be/P_kfFMc4VdU
Sounds like I could use that! Not having a garage like you and keeping my bike on the streets of Chicago, the idle and start-up during colder weather can be a pain vs. my fuel injected Bonnie that was stolen. I’m well on my way with upgrades and new paint scheme. This might be on my list next with all that HP and torque! My carb bike definitely has less giddyup than my fuel injected Bonnie. Here is what my current Bonnie looks like now: https://www.facebook.com/photo.php?fbid=10151507772323567&set=o.181648645201015&type=1&theater
Brad, I saw your bonnie photo on Facebook… Wow, you’ve done a lot of work since I saw it last. Did you do the pain yourself? I’ll update this post once I get through with the Mikuni conversion and let you know what I think.
Hi Randy, wondering how the Mikunis are working for you now? Sounded like a lot of unnecessary problems initially….. you nearly discouraged me from them! Looking at getting some FCR’s but not set on this just yet. Just ticked 30,000 miles on my Bonneville. Been a really good bike so far with failures only on rear spoke, coil and clutch cable [my fault for not lubricating at handle bar end].
I do it no favors stretching it’s metal where ever I go. All I do is regular oil changes. The valves still haven’t needed adjusting yet. Love it, just need a touch more power. Great bike for down here in New Zealand where you can hardly go a quarter mile without a corner.
Cheers, Pat Reardon
Pat,
The Mikunis are working very well now as I have dialed them in with fine tuning and synchronization. Having seen but not experienced the FCR’s I would recommend the Mikunis simply because they are easier to adjust and fine tune. However, with any major mod like this you will probably run into some issues and need to persevere. It ALWAYS happens! It usually pays off eventually.
My Bonnie wants to cruise along at 80-85 MPH (4000 to 4500 RPM) and from there with a quick twist I can be at 90-100 MPH (5000 – 5500 RPM) very quickly… and it still has room for more.
I’m considering a camshaft change next… to add even more HP… I guess I am a HP freak! 🙂
I’m surprised that your Bonnie has not needed a valve adjustment. Mine was definitely out of spec at both 12K and 24K miles. You may be surprised if you have yours checked. I noticed a distinct improvement in performance after both adjustments.
Randy
Thanks for the reply Randy, my bike came in from the States and had had a hard life being smashed both sides and speedo replaced so I can only guess the mileage. Bike had 3800 miles on the clock but had worn down a set of front brake pads….. it’s been 24,000 miles since I’ve replaced them so I’m picking the bike has done at least another 20,000 miles on top of the 30,000 I’ve done. Who knows, it may well have had the valve clearances done. I checked them at 25,000 miles and they were still within operating tolerance.
Need to check them again soon.
Have ordered some FCR’s before I saw your reply here so will let you know how they work out.
Most people in NZ live at sea level so this is what I told Carlos Schmidt
at Triumph Performance USA to jet mine to.
Will also consider a hot cam once I’ve got used to the carbs….. natural progression they call it!
Hello Randy,
you did an extremely useful tutorial here! Good work! Nice pics as well!
I’ve got a pair of Miks HSR42 as well on my 2004 Triumph Thruxton. I bought them in 2008 from Bonneville Performance as well.
I see from the pics that yours were supplied without the accel pump system and with one return spring only. I have the accel pump disabled and I am now running them with just one return spring as with two the force needed to twist the throttle was really too much and I was often snapping the throttle cable.
I have a stock displacement engine (865cc) but the head has been ported and flowed, with high compression forged pistons (11:1 comp ratio) as well as sporty cams.
The HSR42 are very easy to tune. There are just a couple of things I dislike about them:
1) with the accel pump disabled you cannot crack the throttle full open from low rpm or it will bog seriously. Once you get used to it you learn how to open then throttle with the correct timing and the acceleration is really strong. Sometimes if you do it wrong and the engine bogs the bike stops accelerating and if you are in the middle of an overtaking this can be a little annoying. The accel pumps should cure this (that’s the scope of the accel pump) but I’ve never activated them as I really don’t like the throttle toughness when running the HSR with both return springs on. So I am using them with just one spring. To have the accel pump system working, however, you need both springs.
2) the HSR has been developed to work on Harleys as a single carb. The dual HSR kit has been specifically developed by Bonneville Performance for the Triumph Bonneville/Thruxton/Scrambler. However, there is a problem with that. Basically, to synchronize the carbs at idle you need to use the idle screws. This is not very good as it means that if you need to adjust the idle as a side effect you will also alter the carbs sync (quite annoying). There is some slack on each slide valve which is altered by the idle screw and in the end this makes the sync process inaccurate. Also, to alter the position of one slide with respect to the other one you need to open the carbs and since this cannot be done during the sync process it means that a perfect sync is not possible (or it is very complex to achieve). This is a result of the fact that the HSR was intended and designed as a single use carb while we are using them as a pair.
On a side note they are really heavy…I know that our bikes are not lightweight but those HSR weigh twice (if not three-times) as much as the stock ones.
Daniel,
Thanks for taking the time to write your comment based on your experience. I learned some things from your description that I did not know… like the issue with the accel pumps. I have not noticed the “bogging” that you describe. I also did not know about the single carb design and the issues that causes with getting a fine tune and sync setup.
Have you discussed these issues with Bill Gately of Bonneville Performance?
Still, even with the added weight and these couple drawbacks, I prefer the performance gained over the stock Keihin CVK carbs. I think it will be even more noticeable when I upgrade the engine. See my recent blog post here: http://triumphbonneville.org/taking-a-triumph-bonneville-865cc-engine-to-1100cc/
Regards,
Randy
Hey Randy,
Nice write-up. I too have the HSR42s on my Thruxton, and am in the process of rebuilding/cleaning the carbs due to ethanol issues. Want the change the petcock while I am at it, and am considering a Pingel. Is that what you have on yours? If so, do you have the hose barb facing inward or rearward? Is it a Power-Flo?
Jeff,
Thanks for commenting. I do have a Pingel Power-Flo I purchased from Bellacorse – http://bellacorse.net/shop/carburation/pingel-high-flow-fuel-tap-petcock/ I didhave some initial problems getting the gasket to seal properly, and managed to get that fixed by making my own gasket from thicker automotive material. I have the fuel line pointing toward the right side of the bike and back at a 45 degree angle. I’ve created about a 6″ fuel line pigtail that has a Motion-Pro quick release connector at the end (http://www.motionpro.com/motorcycle/partno/12-0047/). This allows me to both shut off the Pingel, and disconnect the tank from the bike with very little fuel loss or mess. I have the rest of the fuel line running under the tank and back to the center where it splits and goes to each Mikuni.
Hope this is helpful.
Randy
Randy,
Very helpful, indeed. Thank you.
On another subject, how did you determine the correct settings for the choke cables? I have experienced choke issues from day one, and have adjusted them several times. How far out from the cable housing should the plunger be?
Thanks,
Jeff
Completed the carb rebuild, enricher cable adjustment, and Pingel installation, and could not be happier! Indeed the enricher cables were too long and the plungers were not retracting far enough. Ended up decreasing the length of the cables by 9mm. The Pingel installation was straightforward, and no leaking with the supplied rubber gasket. As part of the rebuild, went down a size in the main and pilot jets due to living at a higher altitude now.
The Thruxton fires right and runs strong!
Thanks for your help, Randy.
Jeff
Jeff,
That is great news to hear! I am looking forward to rebuilding mine and mounting them on my new 1100cc crate engine from Bonneville Performance… sometime in April or May I hope.
Send photos… and “keep the shiny side up!”
Randy
That’s a skillful answer to a difficult question