Another part to my 2008 Triumph Bonneville that I have decided to modify after my accident is the front sprocket cover. In my case it is a black powder coated cast aluminum part from Triumph.
I have been collecting ideas of various designs and modifications I’ve seen posted online. I decided that I still wanted the protection of a full cover, but to add some personalized touches.
Based upon the Joker Machine headlight ears, I have been drilling holes in various parts of the bike (chain guard, shift lever). I decided upon this same basic direction for the sprocket cover as well.
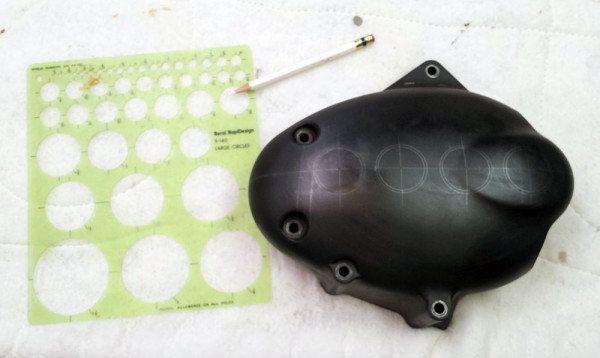
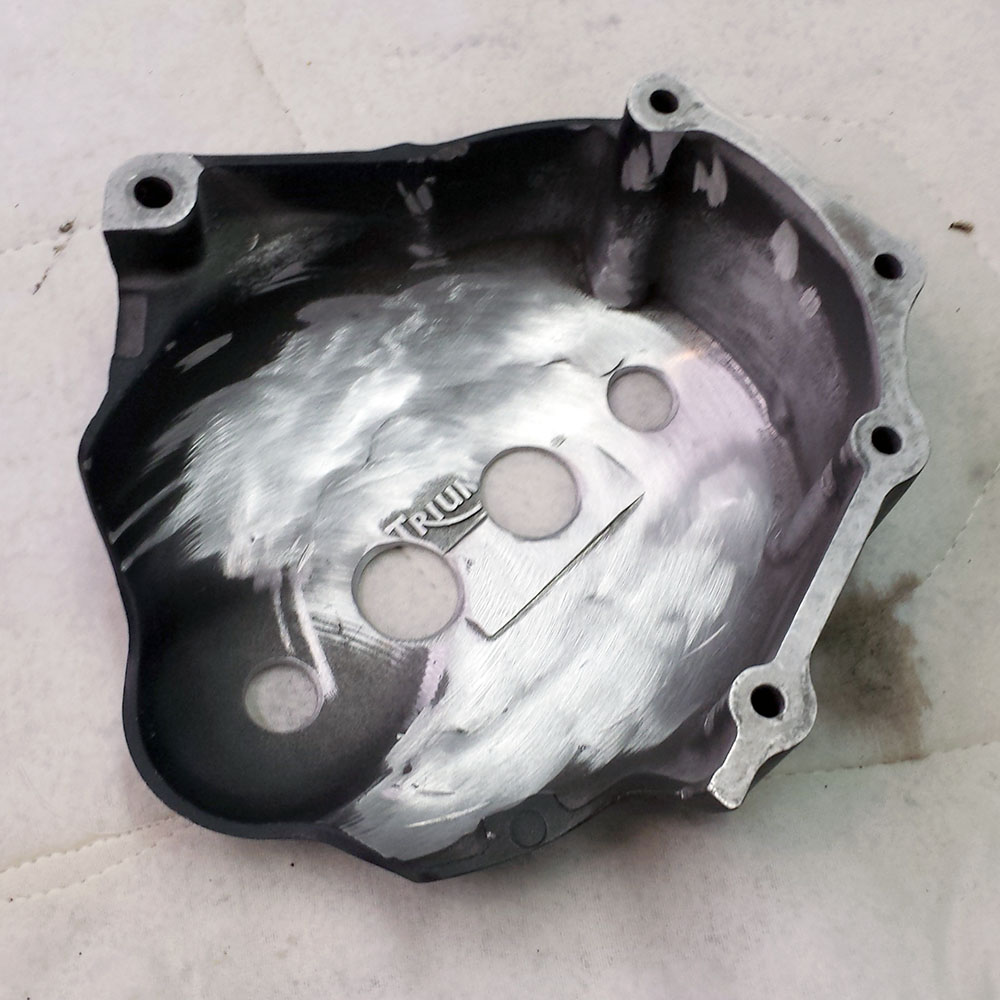
First I laid out my design in pencil on the cover. After several layouts, I decided on 4 holes in a line across the centerline of the cover.
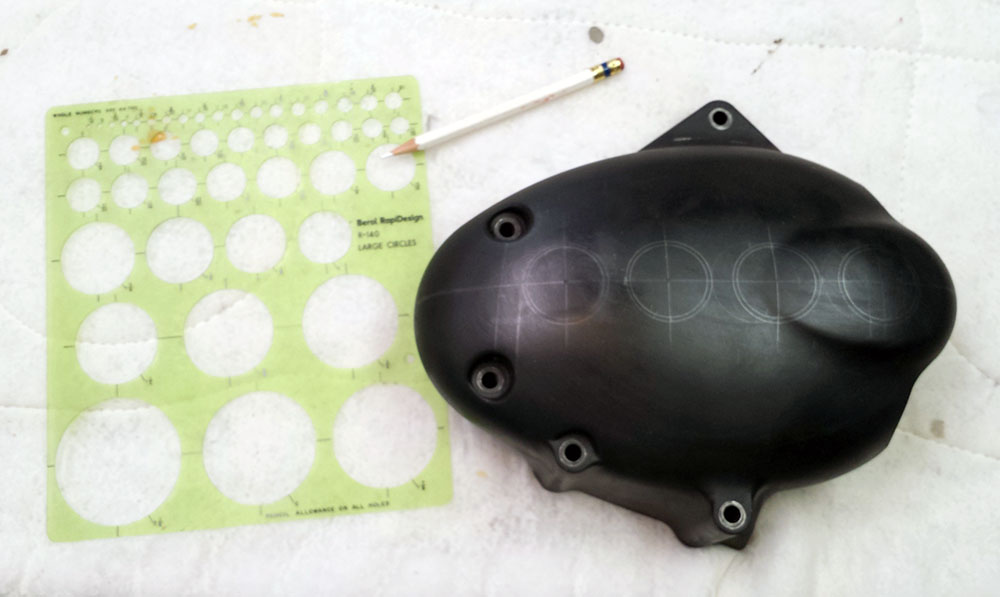
Final 4 hole layout on my front sprocket cover
Next, I center punched each hole and drilled small pilot holes to guide me with the larger holes to follow.
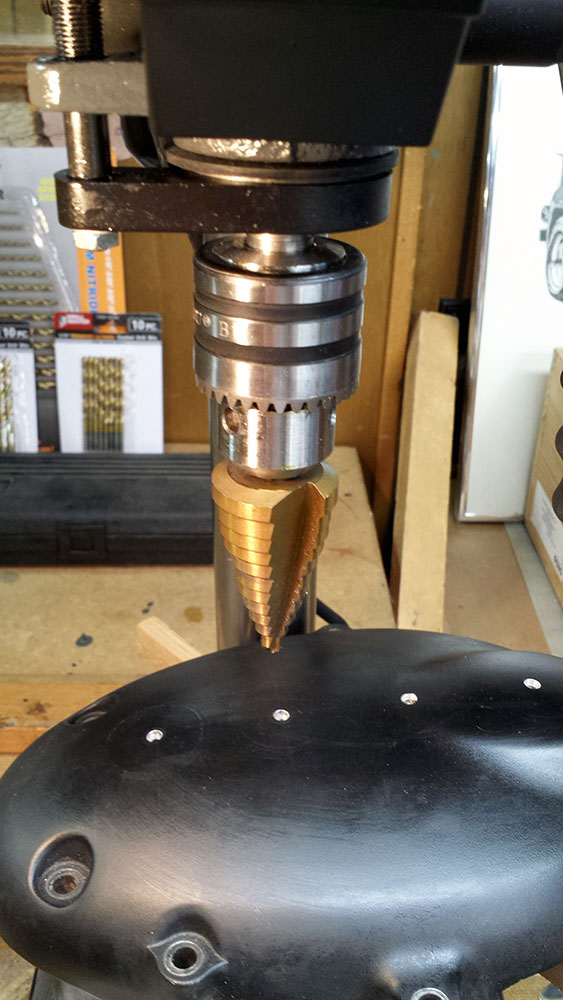
Pilot holes drilled, ready for drilling to larger sizes using a drill press.
After attempting to drill out a larger hole using my drill press, I decided that using a hand drill would be easier and safer, so I switched to clamping the cover in a vice and using the stepped bit in my Makita hand drill.

Larger holes drilled out using a hand drill and stepped drill bit.
I used the stepped bit to also countersink the holes on the outside and inside.
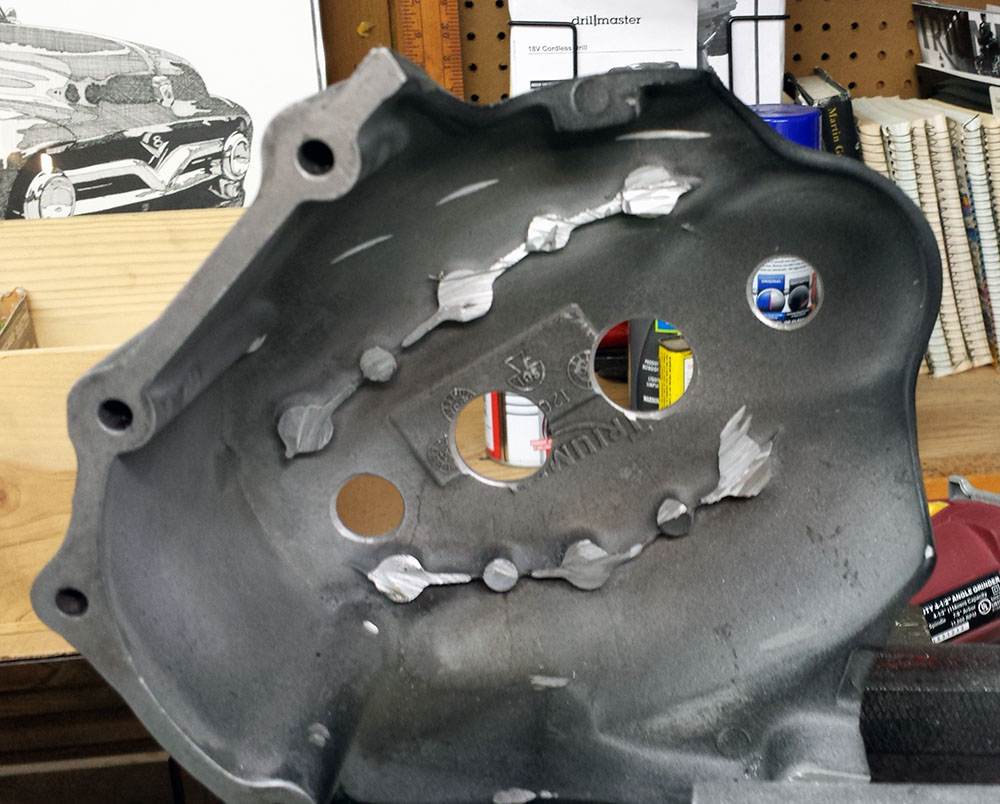
Holes de-burred and countersunk inside and out.
I used a cut off tool and angle grinder with various metal cutting, sanding and polishing wheels to remove the inside aluminum bosses and clean up the holes.

Inside aluminum bosses ground and polished to a smooth inside finish.
I then used metal scotch pads to clean and smooth out the inside and outside, prepping the metal for painting.
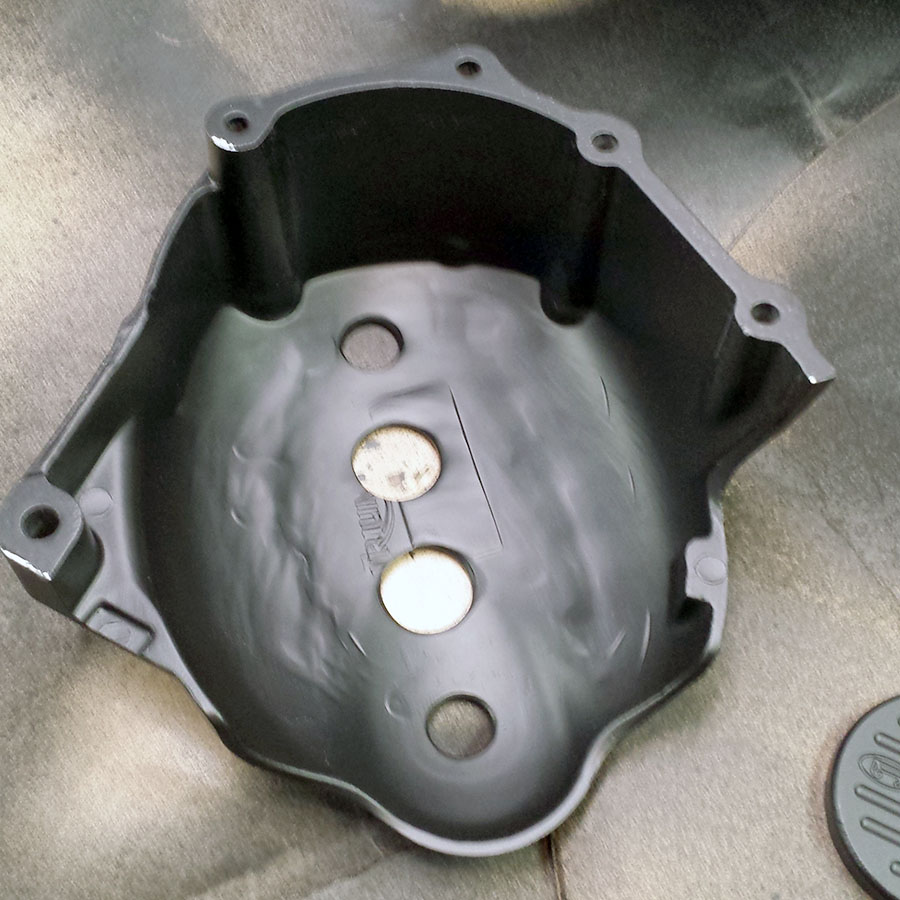
Inside of my modified front sprocket cover
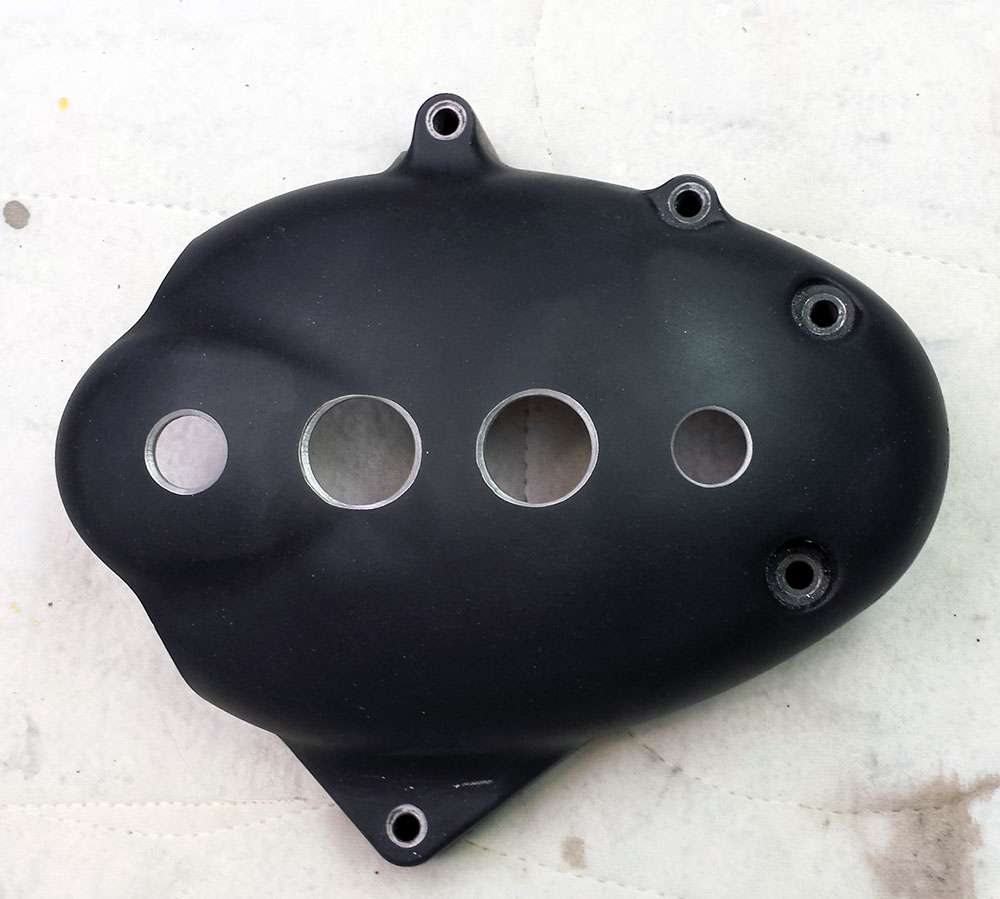
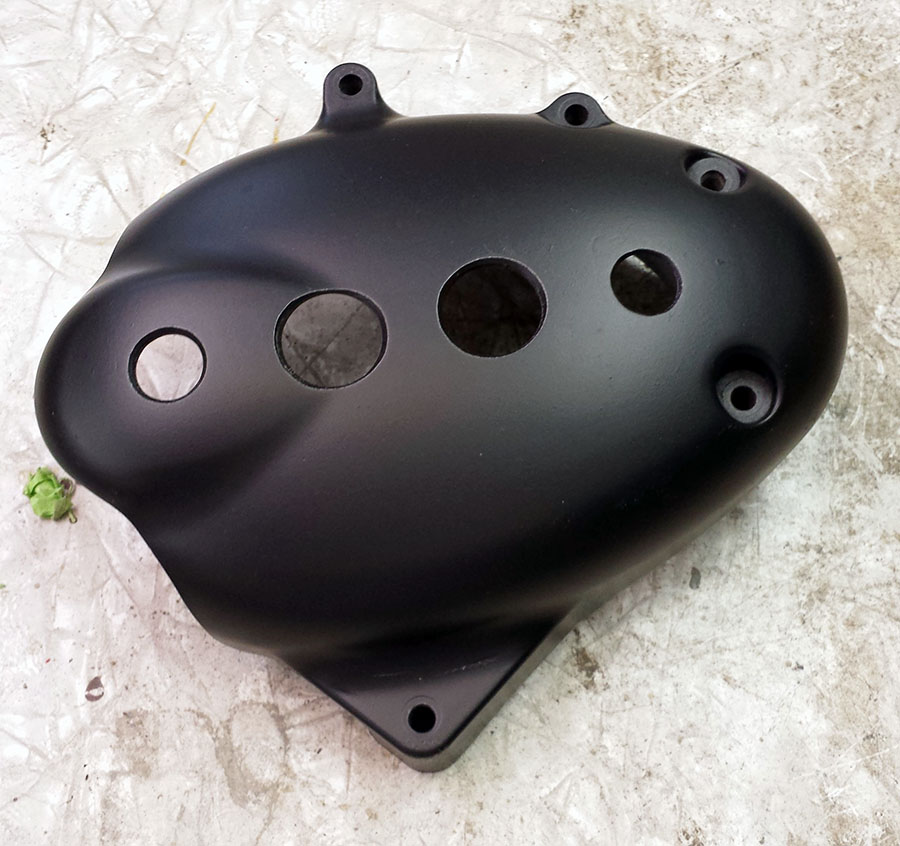
Outside of my modified front sprocket cover.
You can see that I ended up drilling two smaller holes at the front and back and two larger holes in the middle. It just looked right to me.
March 8-9, 2014 Updates
This past weekend I started applying final coatings to the sprocket cover. I am using black Plasti Dip by Performix, which I purchased from Home Depot.
Inside of front sprocket cover with a coat of black Plasti Dip
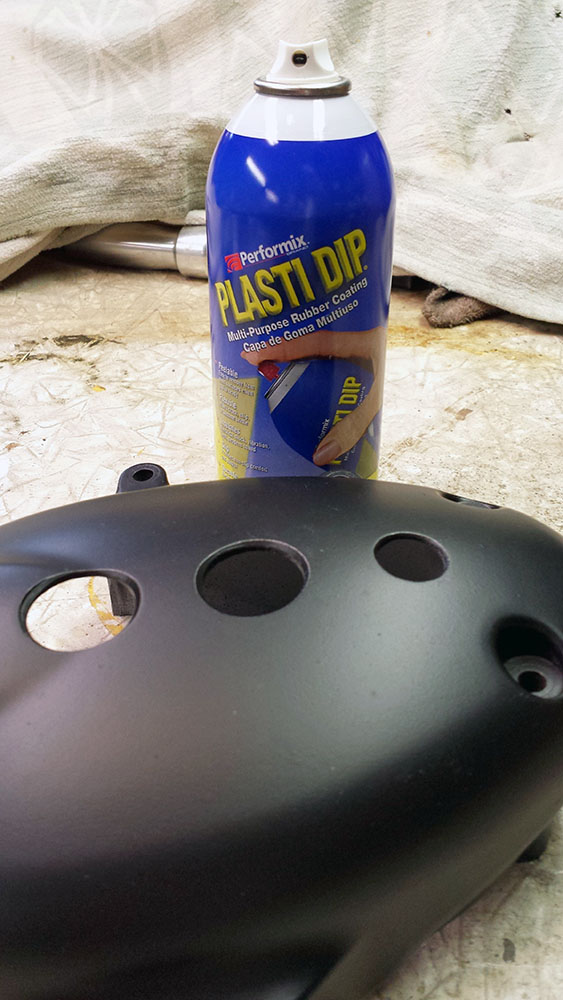
Plasti Dip spray can – by Performix
Now that is a really nice looking finish for a hand held $6 spray can!
Nice metal work, Randy! I can see that I have been away for a while. 😉
Good to see you’re not letting this deep freeze keep you from being productive.
Did the same thing today to my scrams cover. What paint did you use to repaint it?
Fantastic. Just did the same thing. Any idea what black paint to use to paint it back up?
Wade, I have not yet painted mine. I am waiting for warmer weather here in Chicago, so I can paint in my garage (unheated). I was planning to use a satin black Rustoleum right out of a spray can. This is what I have used in the past. However, I recently purchased an air compressor and a paint spray gun. I am planning to go to an automotive paint vendor and get a satin/matte black enamel to use. What paint did you use?