It’s a good day when you come home to be greeted by a package from Bonneville Performance! Wooohoooo! Today was such a day! Right there on my porch in a nice brown box with the distinctive Bonneville Performance logo on it was my new BP Oil Cooler Kit!
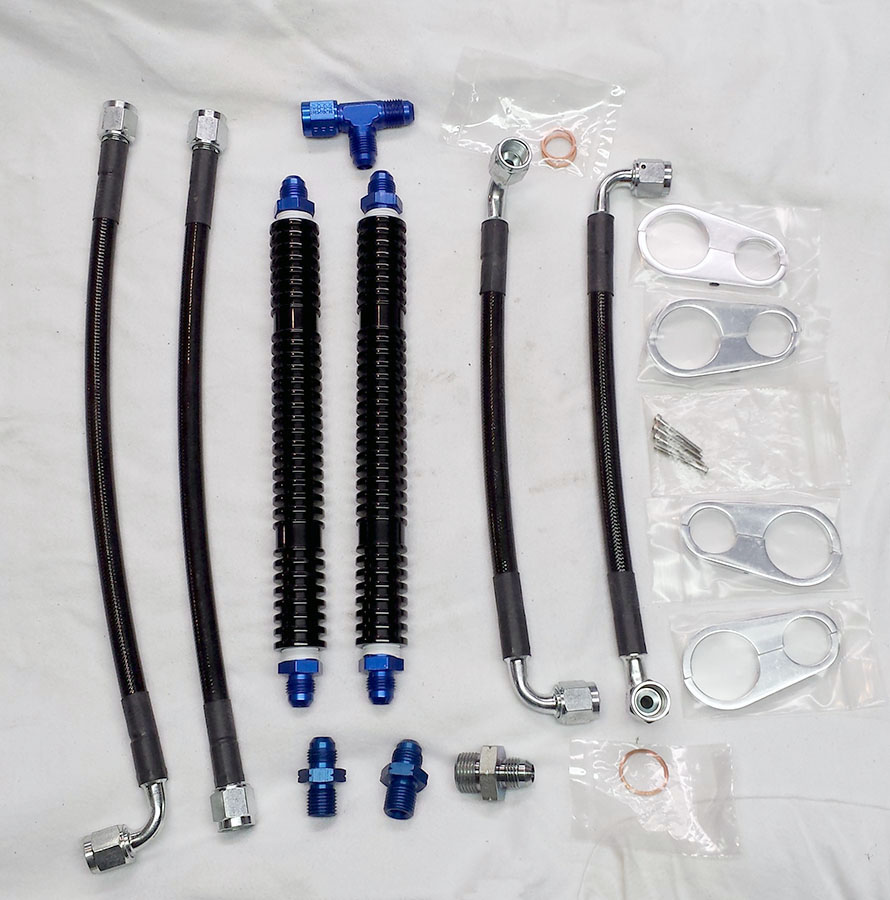
Bonneville Performance Oil Cooler Kit
Unpacking the contents I found:
- 2 – T6 aluminum turbulated oil cooler tubes, anodized black
- 4 – black hoses and fittings
- 4 – Billet aluminum mounting brackets and hardware
April 13, 2014 Update
I printed and followed the BP Oil Cooler Instructions available on the Bonneville Performance website.
1. I jacked up and secured the Bonneville on my shop jack stand.
2. I drained the oil and removed the oil filter and then replaced them with a new K&N filter and drain plug crush washer. Then I removed the entire exhaust system instead of doing Step 5 below.
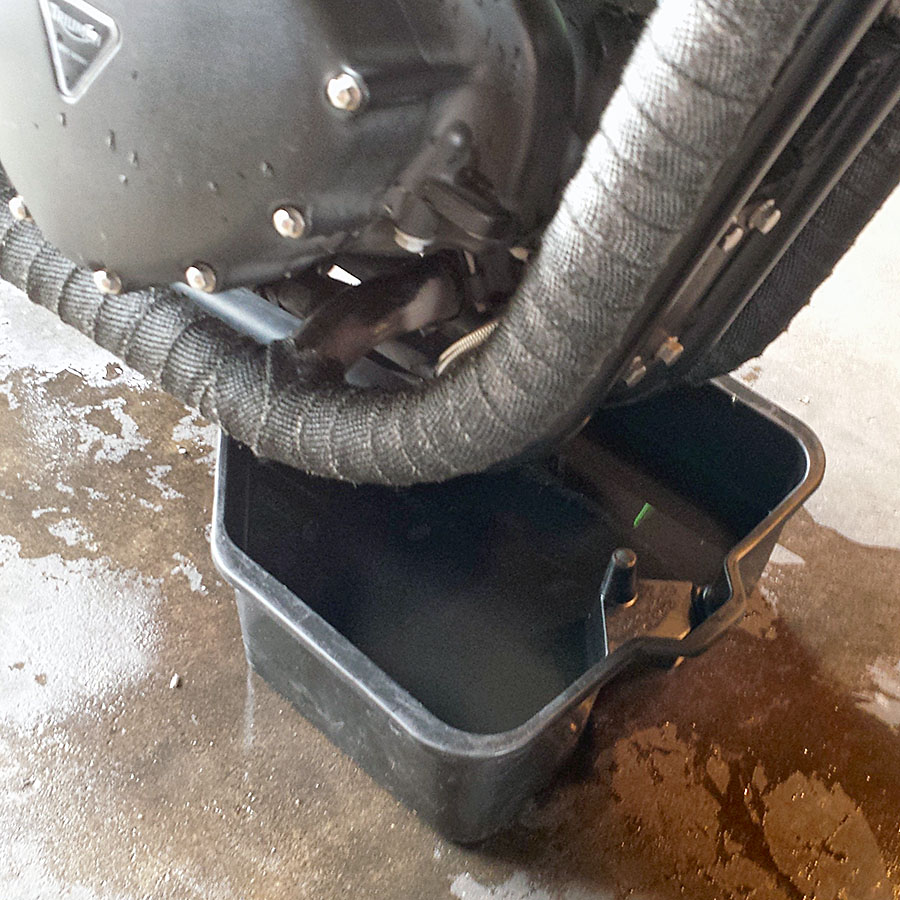
Draining oil
3. I removed the bottom oil cooling system A/N fitting.
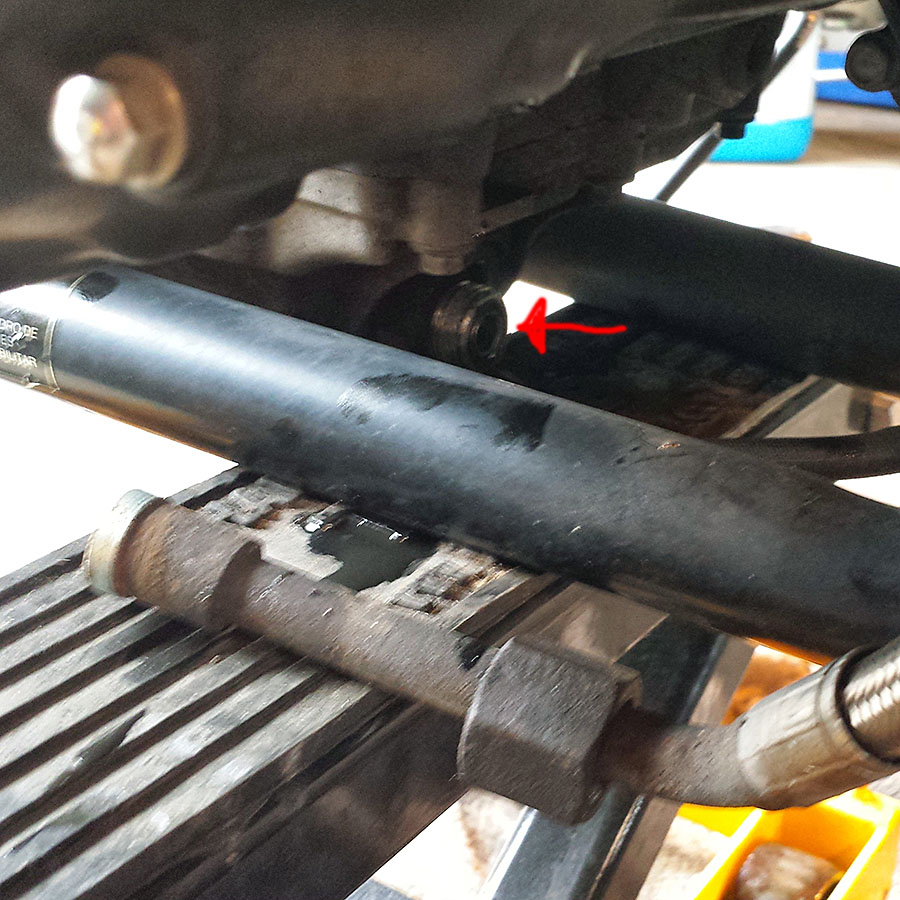
Lower A/N fitting being removed.
4. Remove top banjo bolts from cam cooler fittings.
Top banjo bolts being removed.
5. Remove left or right side exhaust header to allow for the removal of the stock oil cooler. (I removed the entire exhaust system first).
6. Remove fasteners that connect the stock cooler to the motorcycle frame. There were three mounting bolts on mine, one center top and two on the bottom. These came off easily with an 8mm socket.

7. Check clearances and remove the stock cooler through the side where you have removed the header pipe (Mine was easy since the headers were not in the way).
In my case I also removed the backing plate where the top oil cooler mounting bracket was attached, and cut it off since I never plan to put the stock cooler back on.

Top oil cooler bracket removed. Backing plate painted and bolted back to frame.
8. Using Teflon pipe thread tape fasten the dash 6 – 3/8 fittings onto each end on the cooling tubes (This was already done for me by BP).
9. Insert and fasten the 14 mm top engine fittings (blue) with provided copper crush washers.
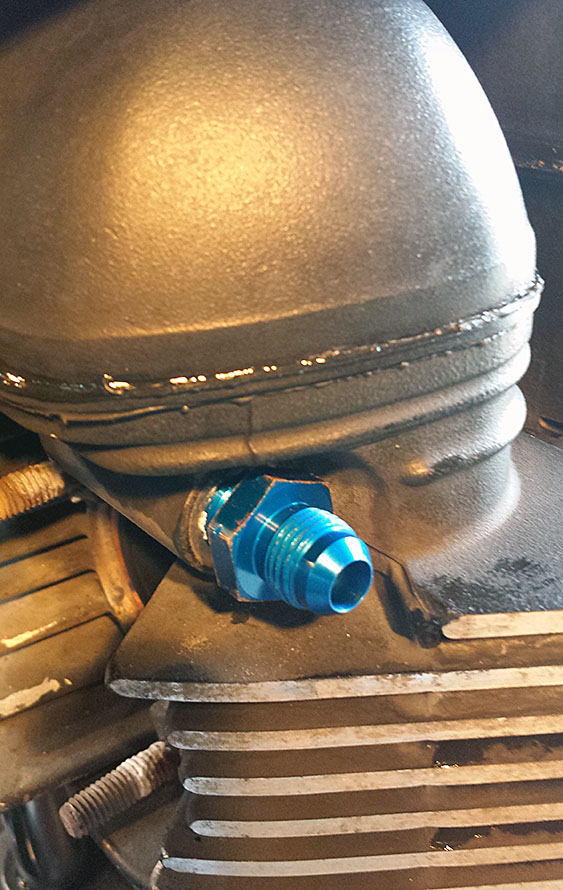
New upper fittings installed.
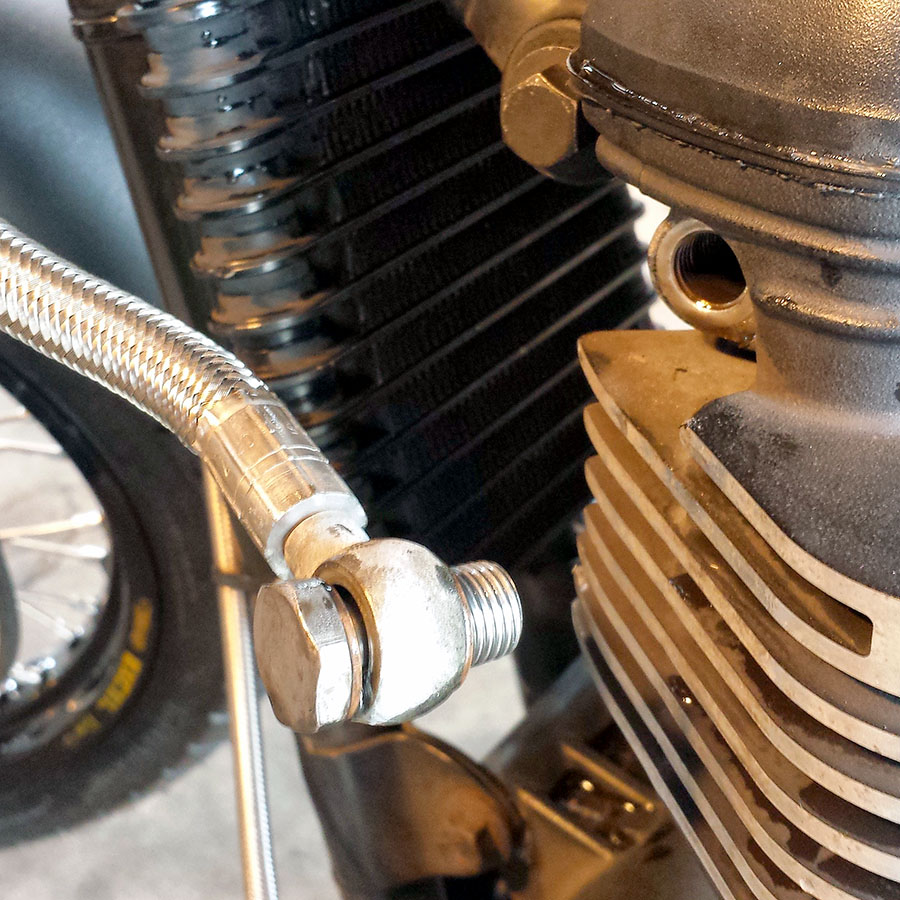
10. Insert and fasten the bottom 18 mm engine fitting with copper crush washer.
18mm fitting attached to lower engine next to drain plug… with crush washer provided.
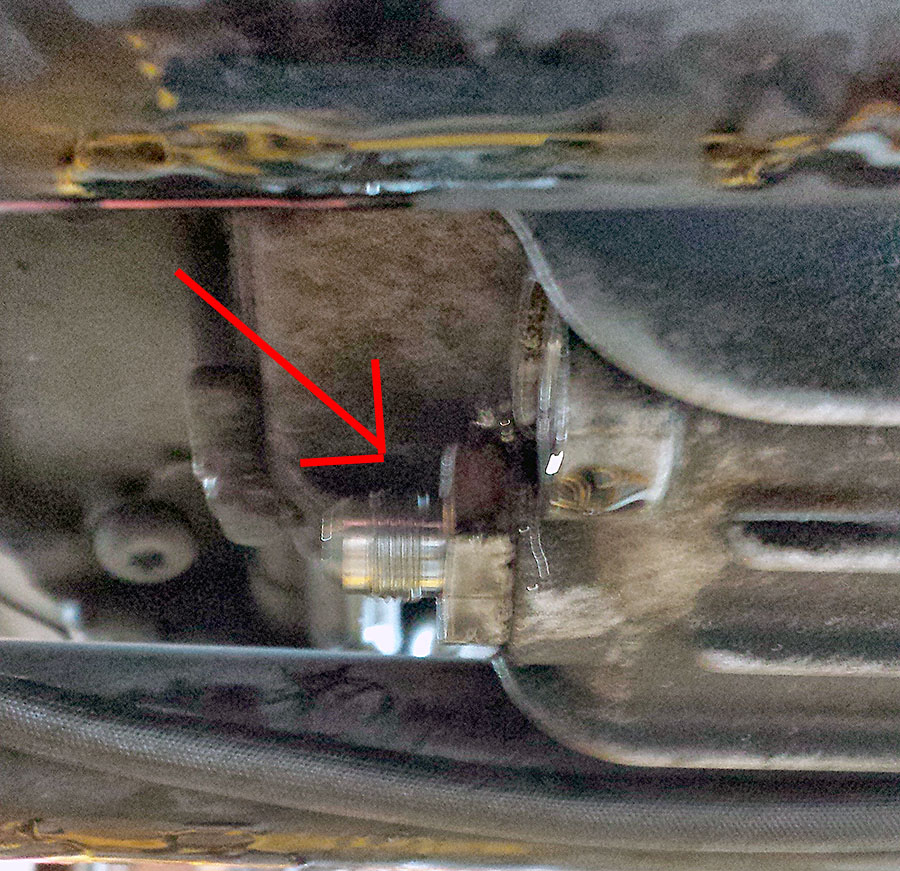
11. Place T-fitting on bottom engine fitting and hand-tighten only.
12. Attach the 2-bottom swedged lines to the T-fitting—hand-tighten only at this time.
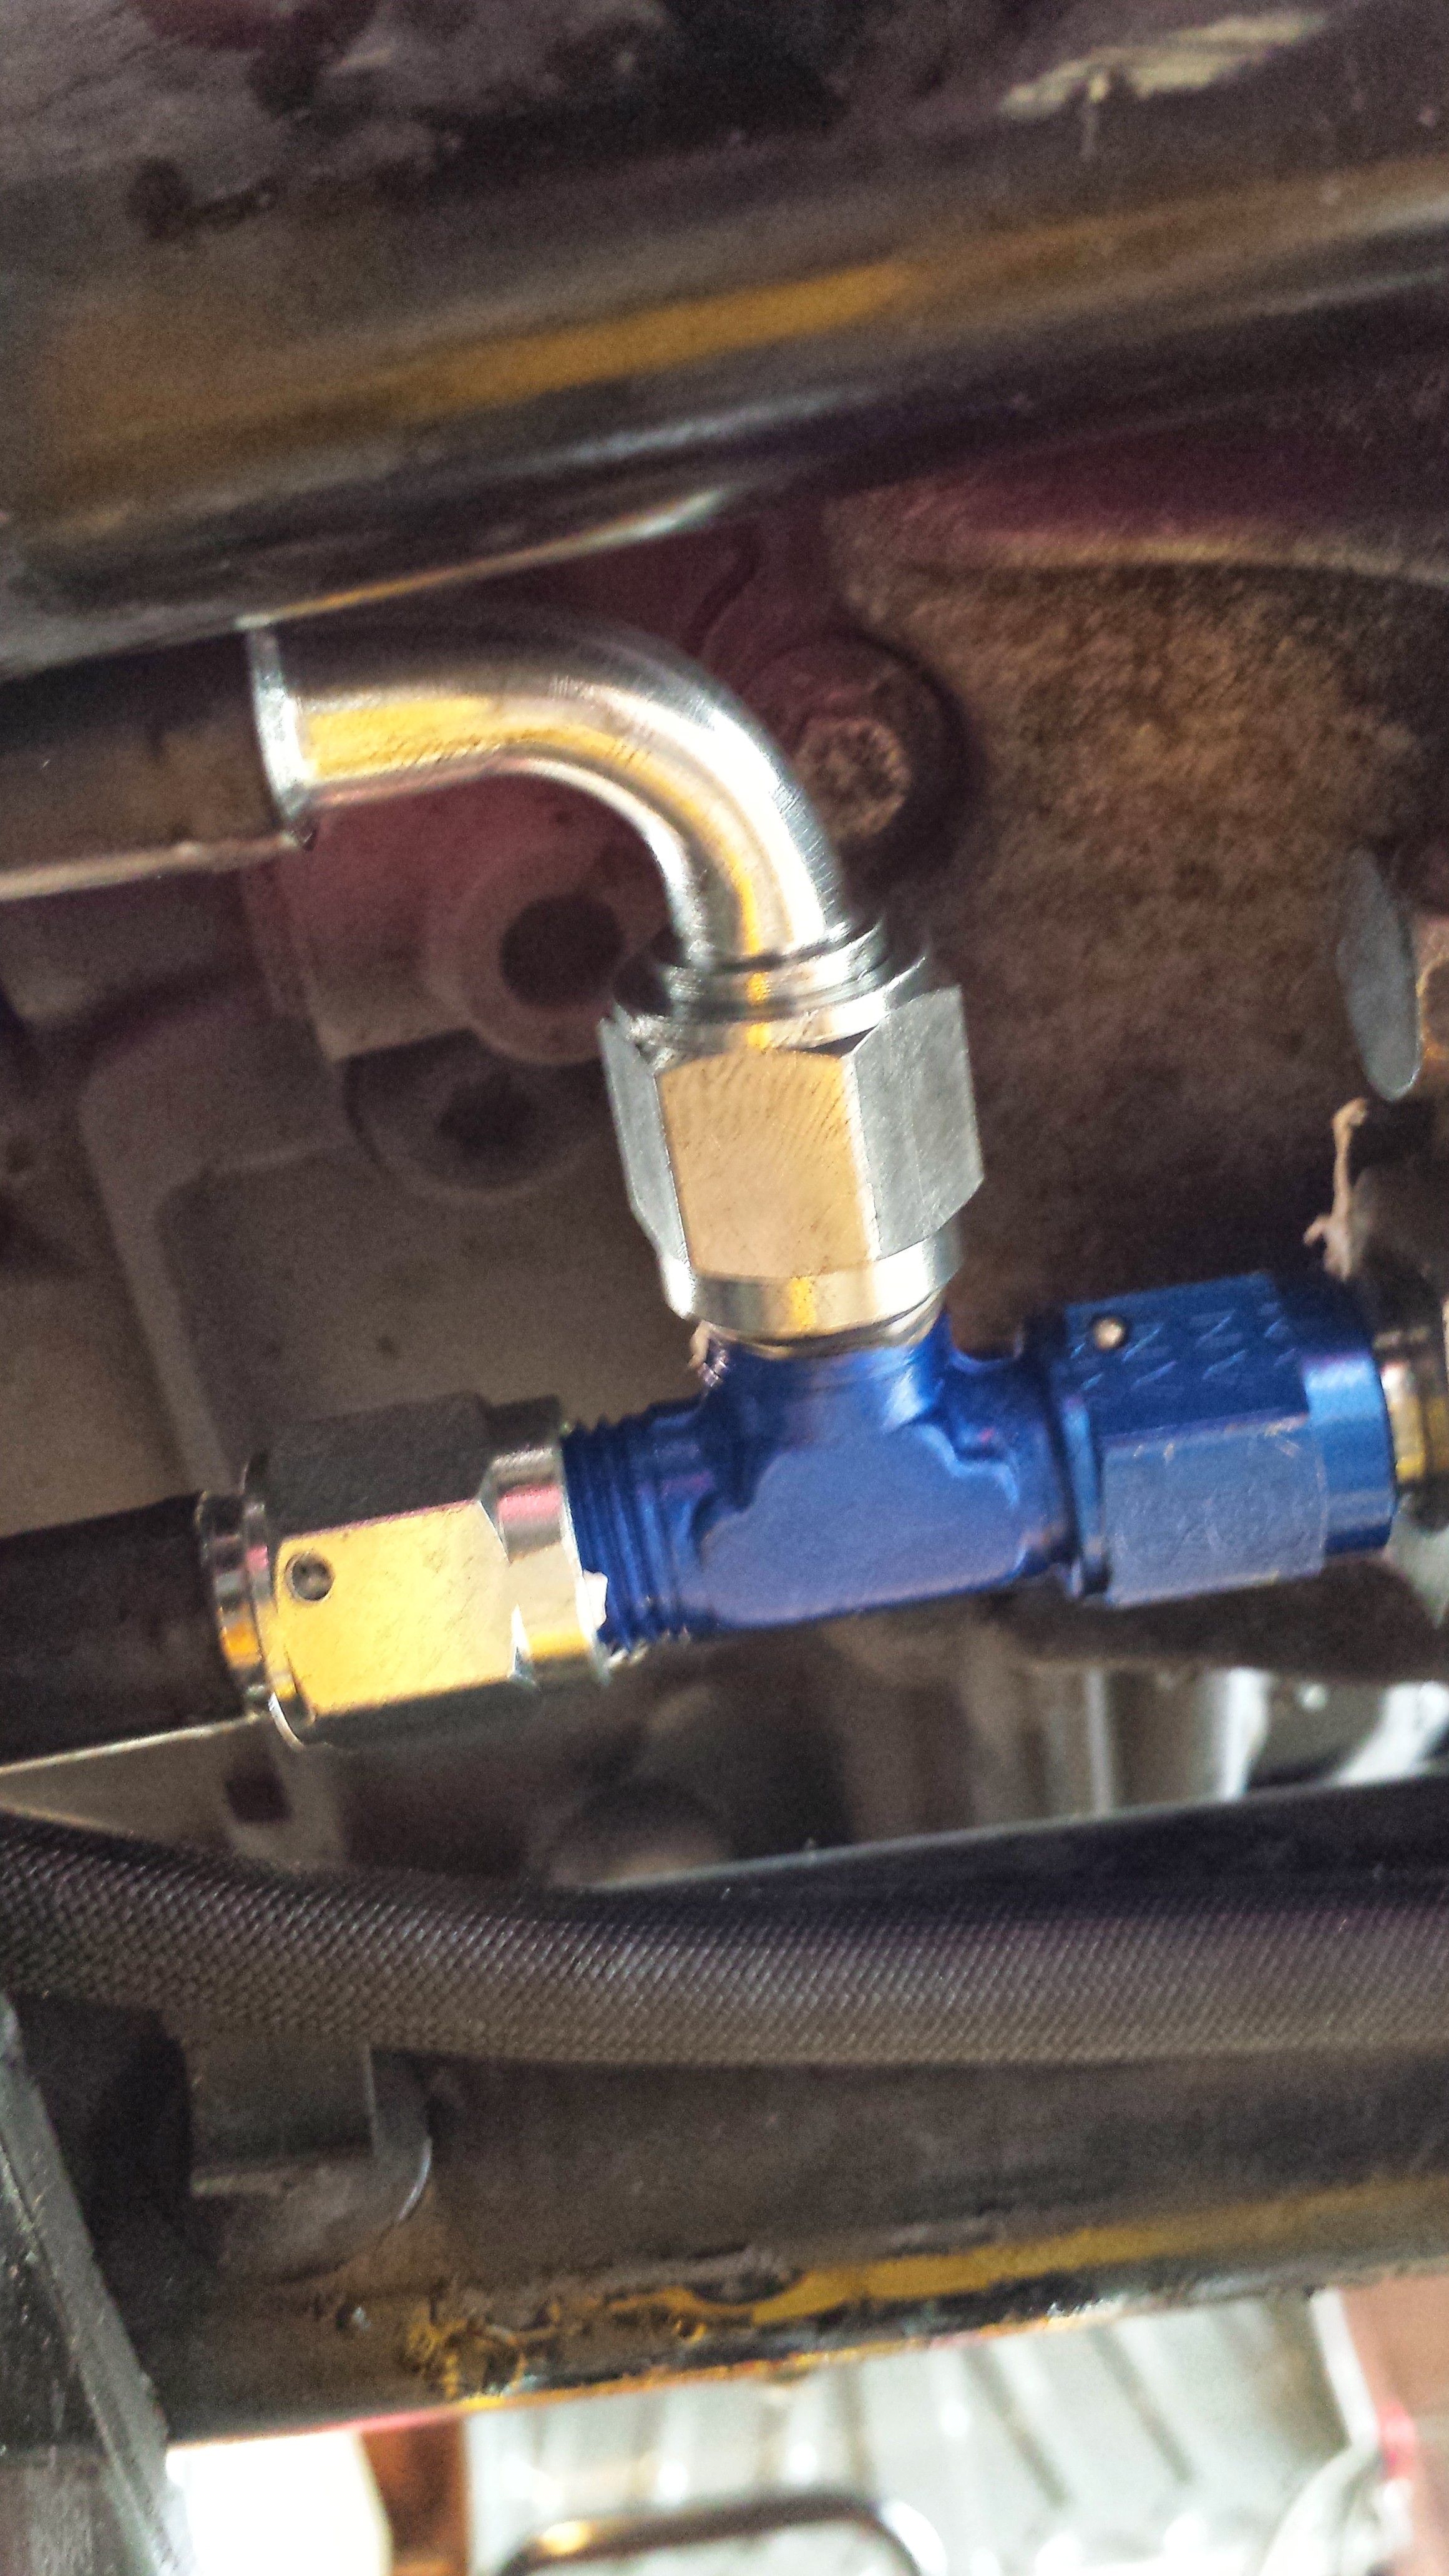
Two lower hoses connected to the T-fitting under the engine.
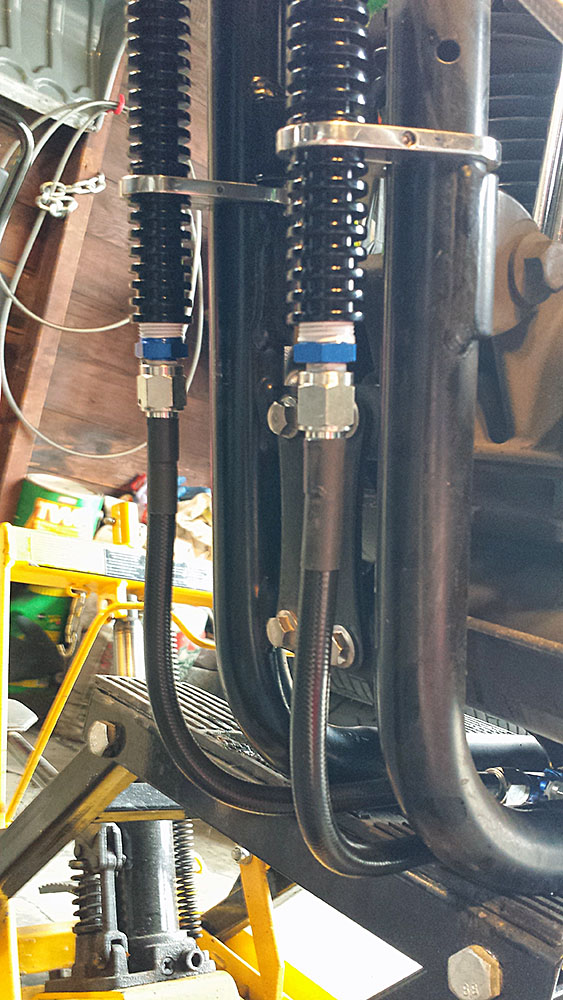
13. Attach the top swedged lines to the top engine fittings—hand- tighten only at this time.
14. Attach each cooling tube to the top and bottom lines—hand-tighten only at this time.
15. Place the top frame clamp in the position on each cooling tube and position on the frame down tube and fasten the clamps loosely.

Mounting cooling tubes to down tubes using provided brackets – top inner side shown.
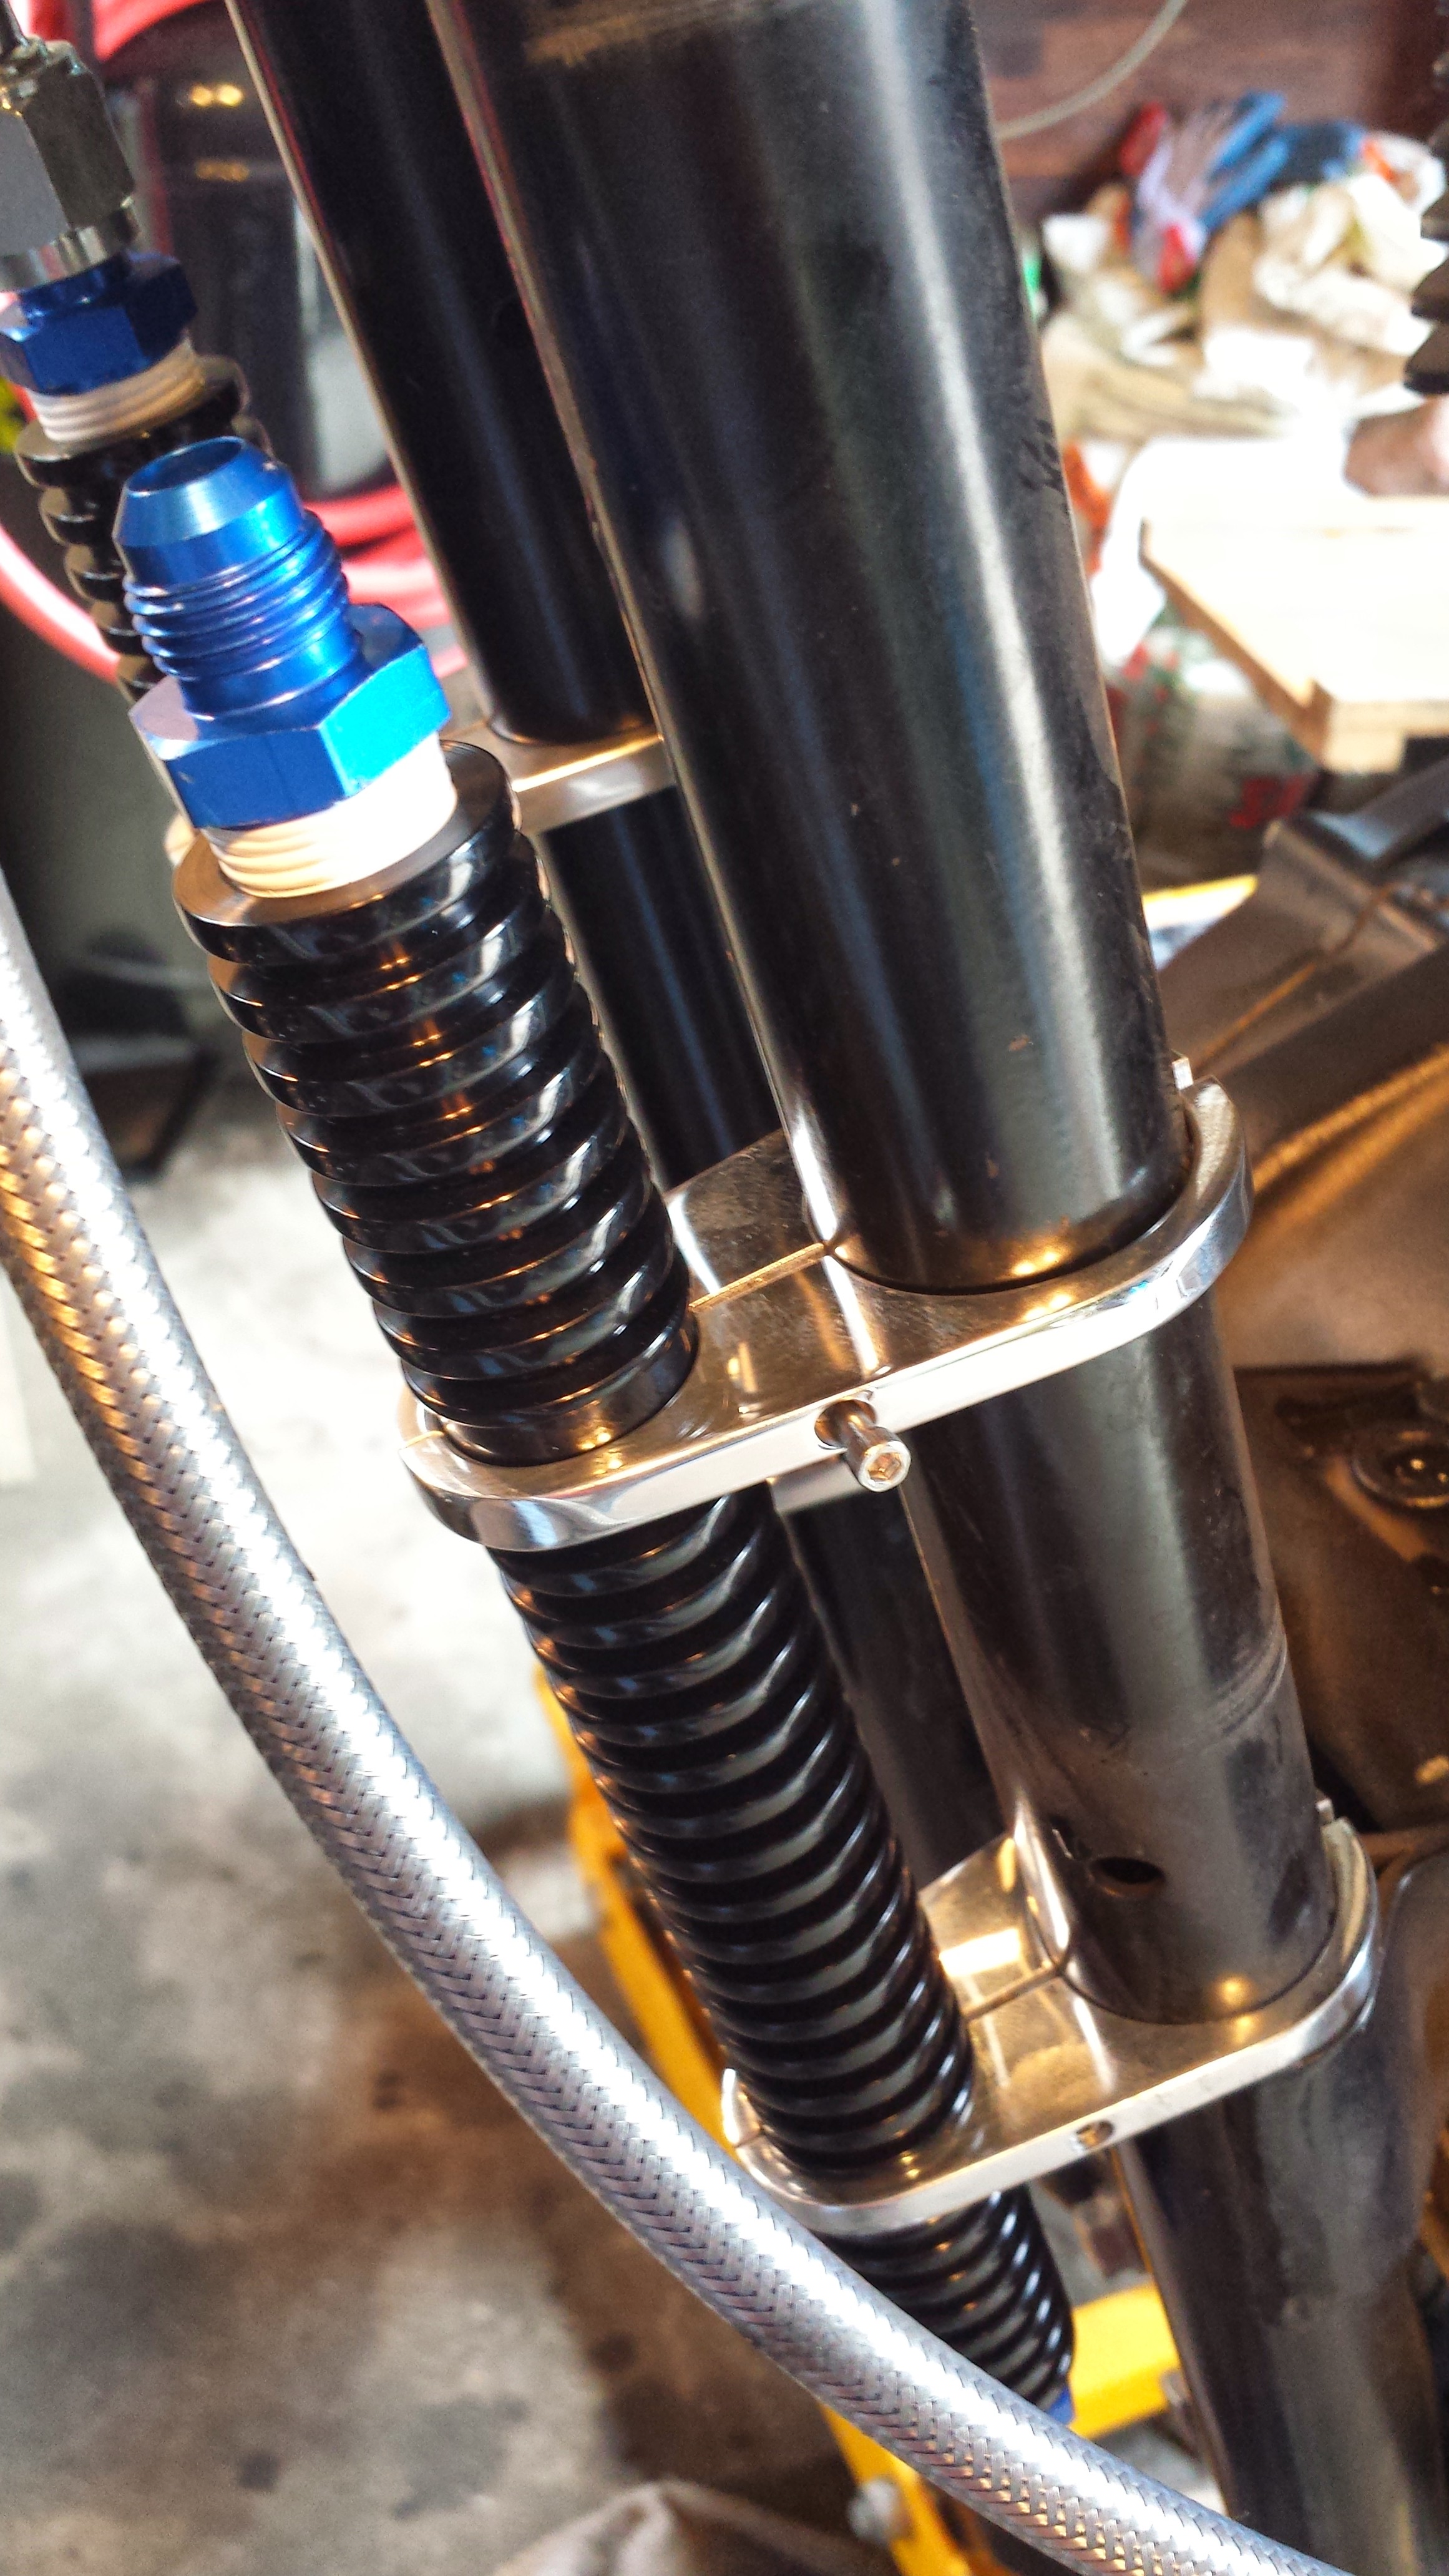
Top outer side of bracket shown in place with center clamp screw being tightened.
16. Once the cooling tubes are correctly and evenly aligned with the frame down tubes fasten the clamps securely to the frame tubes—insure that your top and bottom lines are not twisted or crimped.

Checking fit of upper hoses.
17. Check the positioning of the lines and insure that each A/N fitting is hand tightened and your lines are clocked in the correct position.
Attaching and checking fit of lower hoses.
18. Now tighten each line fitting on the top and bottom one-quarter turn with a 17 mm wrench—a quarter turn should suffice–if you over tighten these fittings you may damage the internal passage.

Lower T fitting and hoses in place and tightened.
19. Check alignment and securely fasten each of the frame clamps.
April 20, 2014 Update
It is done! Works like a charm… no leaks!
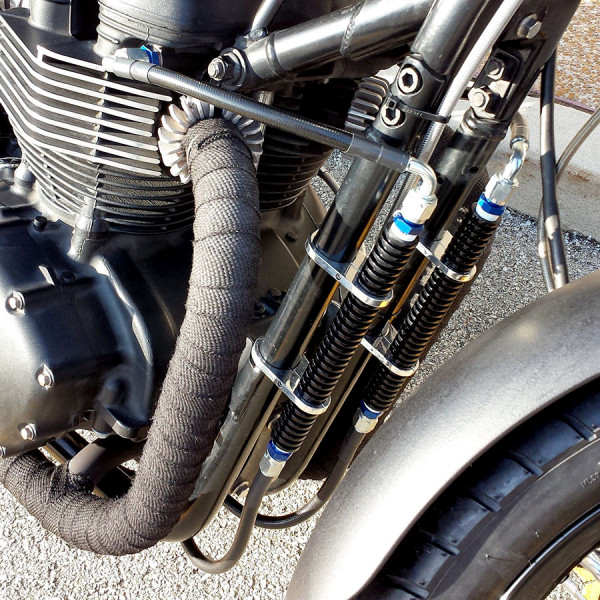
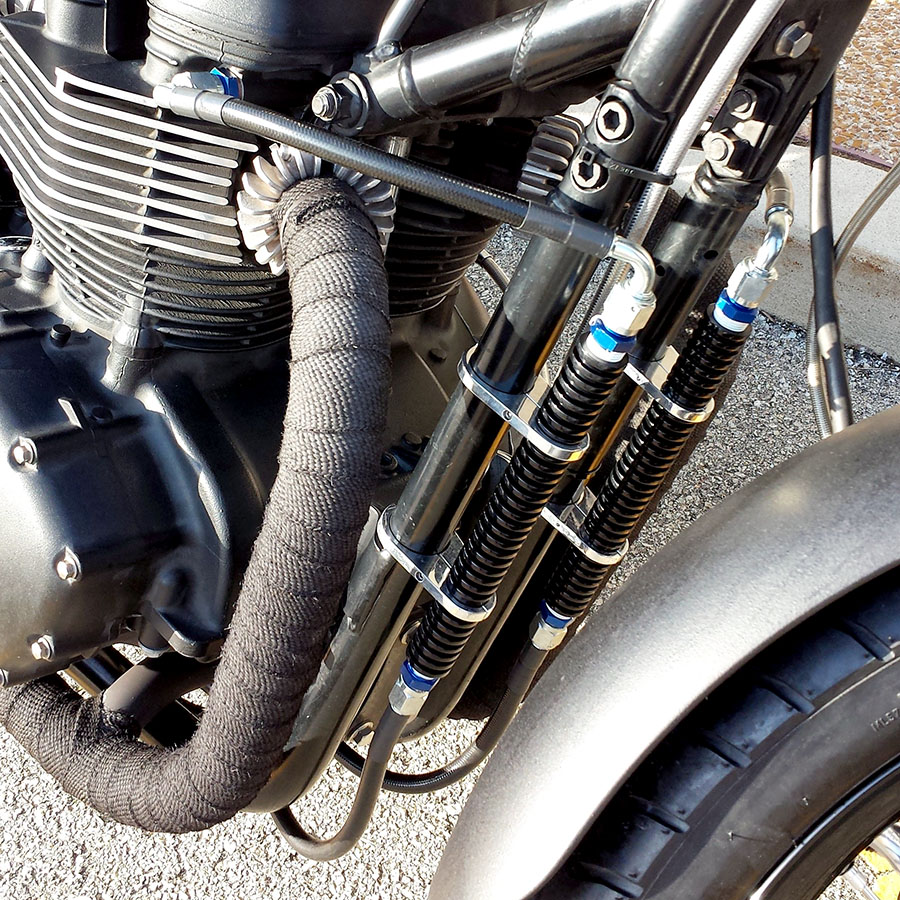
Bonneville Performance oil cooler kit (black) installed on a 2008 Triumph Bonneville Black.
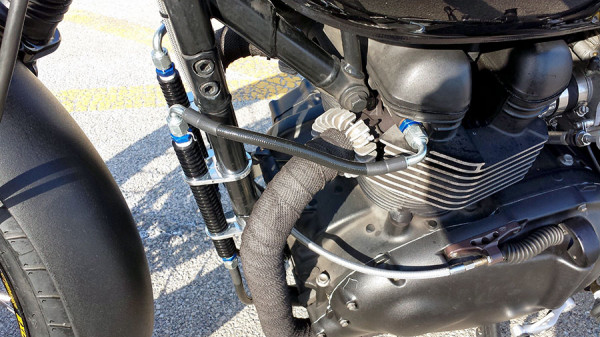
This kit looks great! What an improvement!
Yeah, nothing annoys me more than the look of the stock oil cooler. I’d like to see what yours looks like installed. I’ve been contemplating going with the Streetmaster oil in frame. Any thoughts?
Mike, The Streetmaster solution is nice also… but pretty pricey as I recall. This solution is easier to install and looks pretty good also. I’ll share photos as I do the conversion… you can decide for yourself. Randy
I’ve see that kit on BC, but I always wondered what the oil temp is like after removing the big old radiator
Have you noticed any difference?