Bent Gearchange Shaft Assembly Replacement
When I and my Bonneville went down in November 2013, it landed on its left side and broke off the rubber peg attached to the gearshift lever. The left front footpeg also broke off so the shift lever took on some serious weight and stress. The result was that the end of the shaft that protruded through the left side transmission/engine cover was bent.

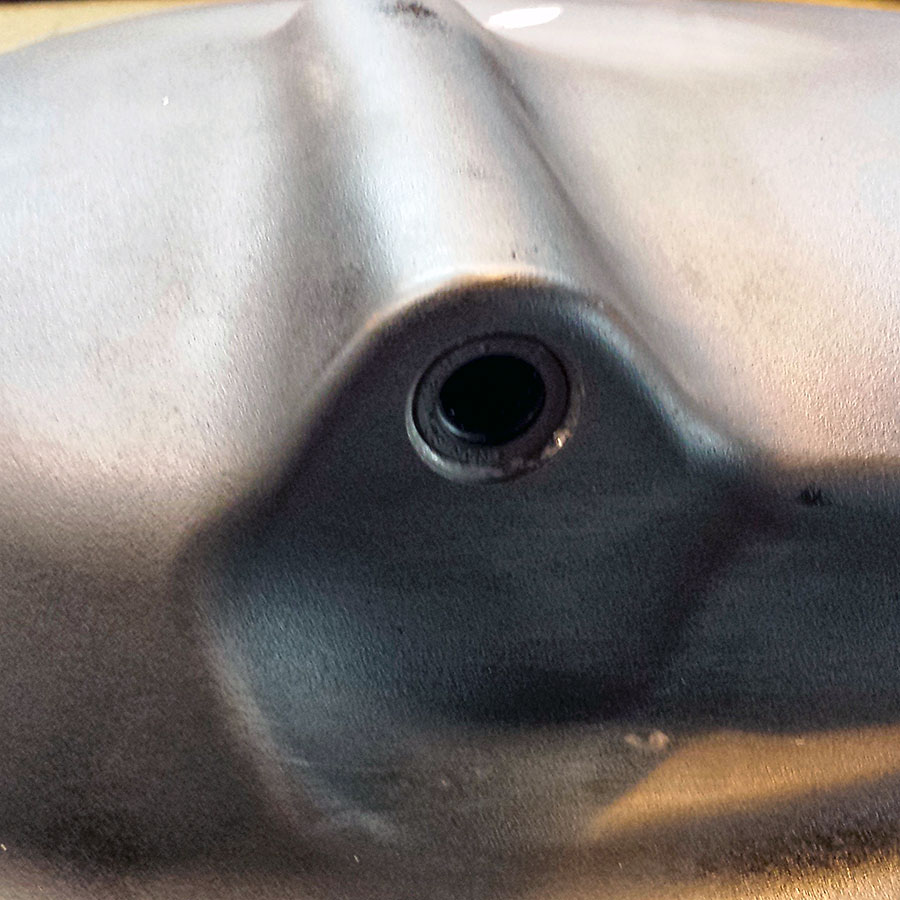
Bent gearchange shaft after my accident.
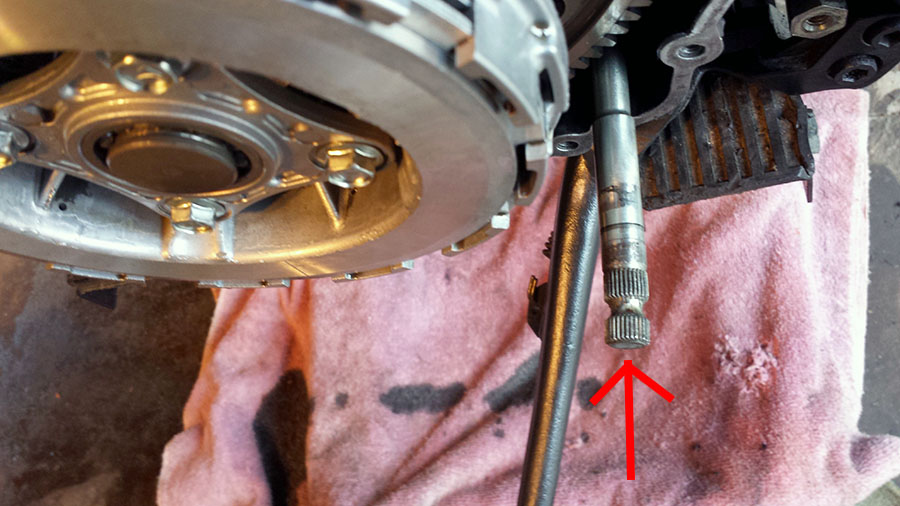
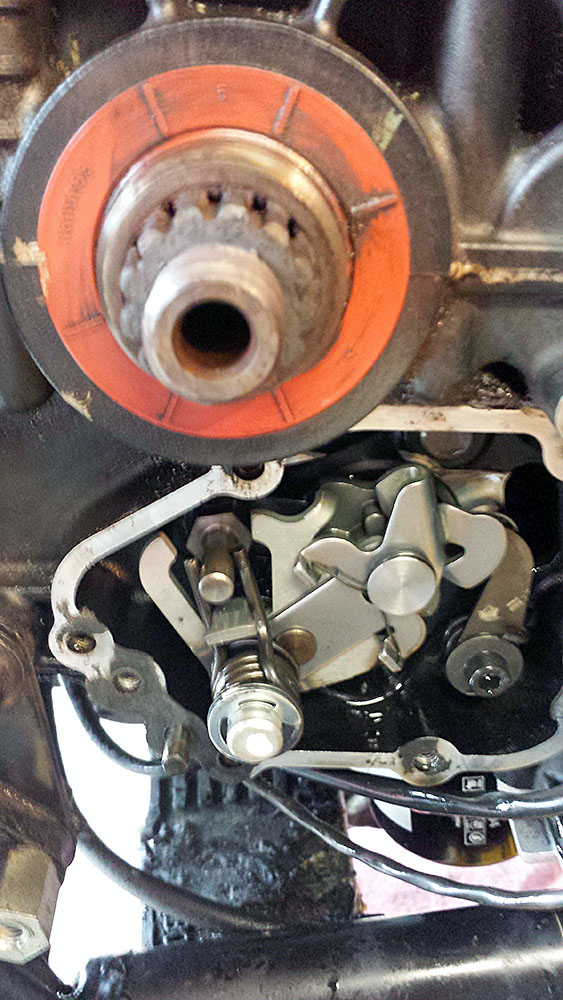
Bent gearchange shaft with transmission cover removed.
Thankfully, it was not bent enough to affect shifting, but given time this shaft would wear out the seal and cause the transmission to leak.
So, last Sunday I started the process of replacing this bent shaft with a new one purchased online at BikeBandit. I found this thread on TriumphRat.net that has proved to be very helpful in this process.
With the Bonneville safely up on a jack stand, I removed the clutch cable and lever assembly. I loosened and removed all the left side engine/trans cover bolts.
I then carefully removed the transmission cover making sure to keep loose parts and washers.
Clutch cable, mounting and cover bolts removed.
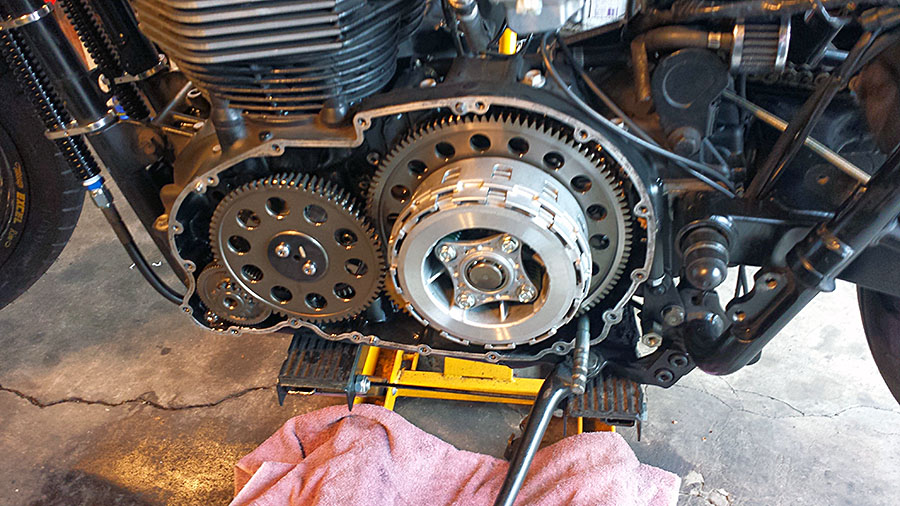
Left Side Engine/Transmission Cover Removed
Thankfully, it was not bent enough to affect shifting, but given time this shaft would wear out the seal and cause the transmission to leak.
So, last Sunday I started the process of replacing this bent shaft with a new one purchased online at BikeBandit. I found this thread on TriumphRat.net that has proved to be very helpful in this process.
With the Bonneville safely up on a jack stand, I removed the clutch cable and lever assembly. I loosened and removed all the left side engine/trans cover bolts.
I then carefully removed the transmission cover making sure to keep loose parts and washers.
Next, on the right side I removed the front sprocket cover, loosened the chain by loosening the back tire axle and moving the adjusters forward, then I removed the front sprocket.
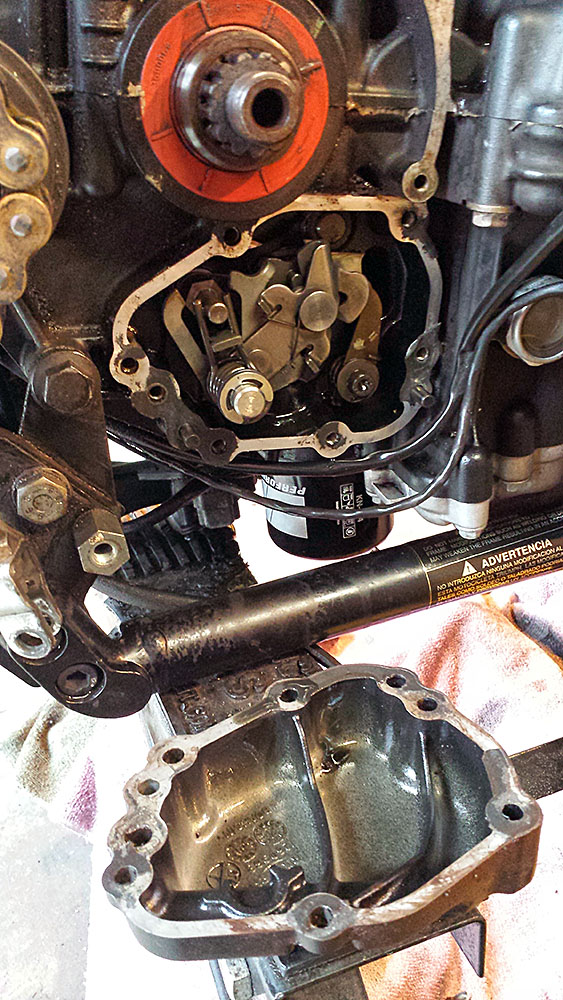
Following the steps in my Haynes manual, I removed the c-clip and washer from the left side of the gearchange shaft using a screwdriver and needle nose pliers. This is a little difficult to get at!
After noting how everything aligned, I carefully pulled the full gearchange shaft assembly out of the transmission from the right side.
Chain loosened, front sprocket removed, allowing access to removing the right side gearchange mechanism cover.
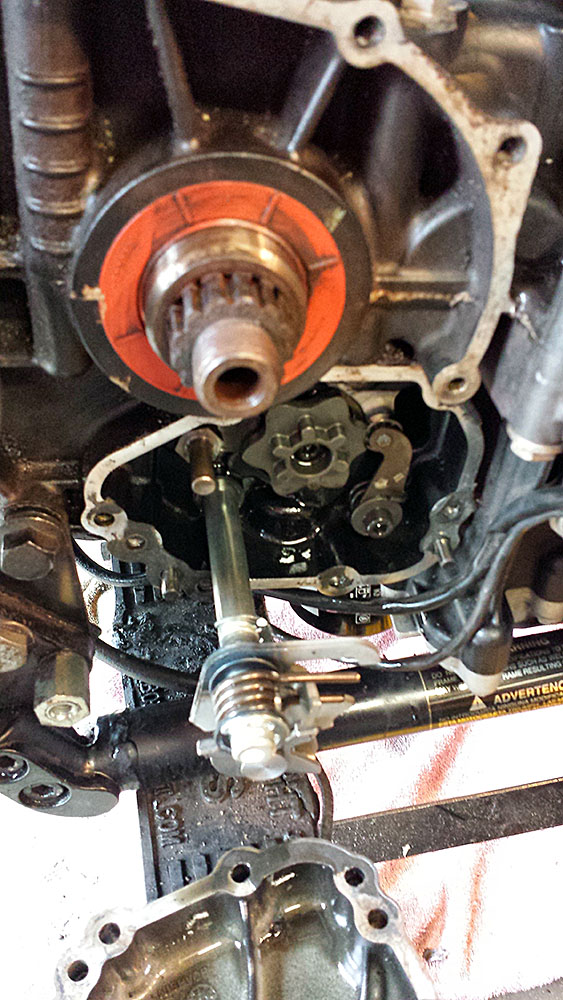
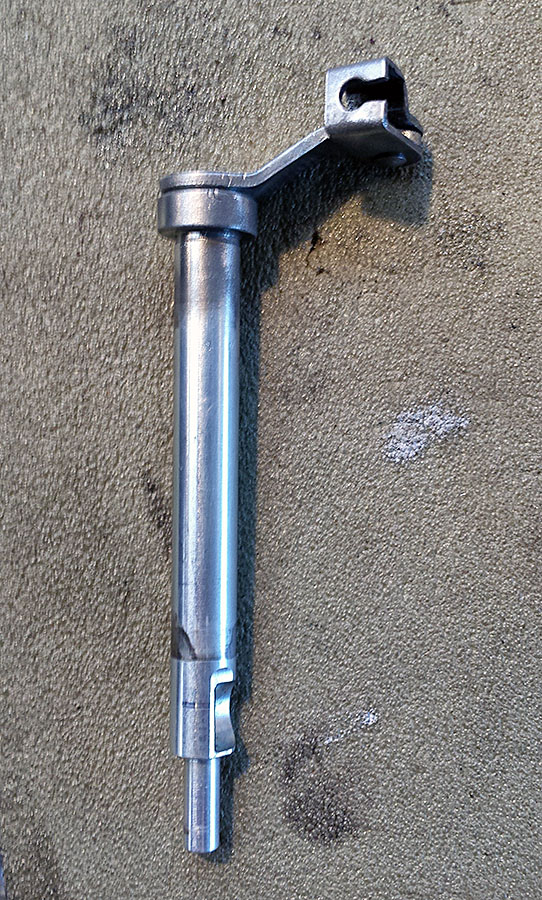
Shaft assembly coming out right side.
New shaft assembly in place, pushed in from right side.
I inspected the dust seal in the transmission cover housing that the clutch lifter arm goes through and determined it should be replaced.
The engine/trans cover had some scratches on it from the accident where the gearchange lever had hit it. I cleaned up this cover, degreased it, and prepped if for re-coating with black Plasti-Dip.
The cover showing scratched areas to be sanded out before re-coating.
Also to be replaced is the seal around the gearchange shift shaft. This is the seal that was showing signs of wear due to the off centered bent shaft. This was the most likely place for a leak to happen!
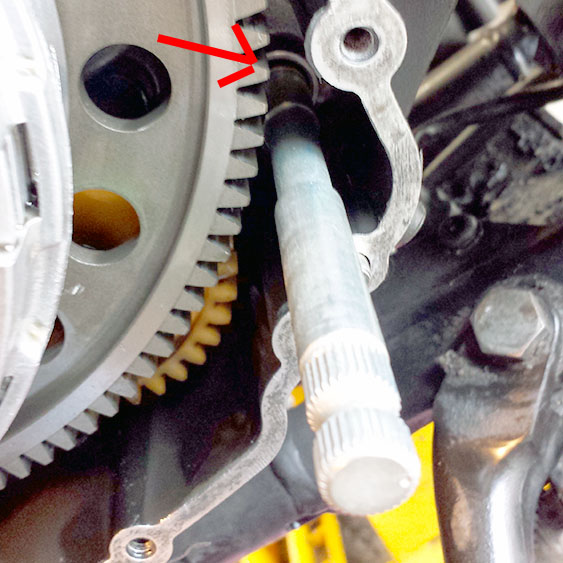
Position of C-clip and washer, on left side, behind large gear. Like I said, hard to get at!
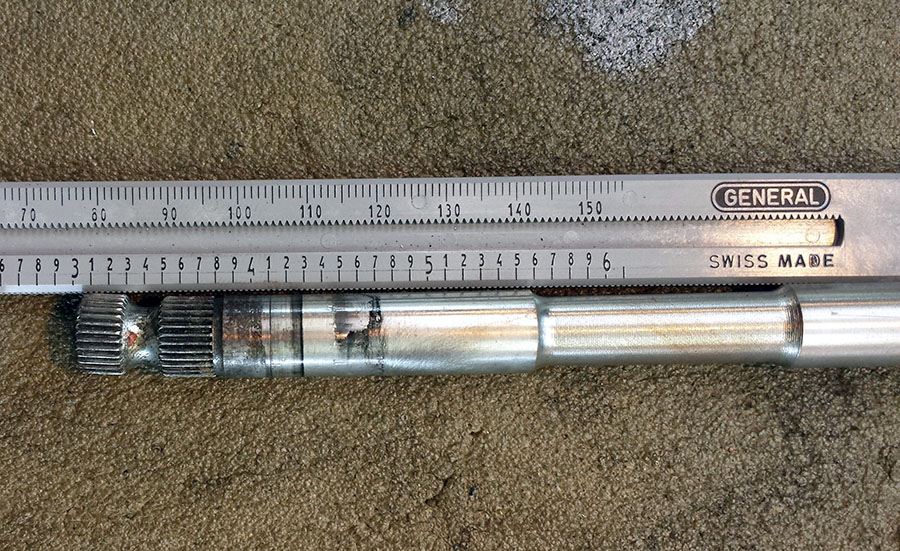
After removal, side-by-side comparison with a straightedge.
Clutch lifter arm cleaned up with wire wheel on bench grinder.
I inspected the dust seal in the transmission cover housing that the clutch lifter arm goes through and determined it should be replaced.
The engine/trans cover had some scratches on it from the accident where the gearchange lever had hit it. I cleaned up this cover, degreased it, and prepped if for re-coating with black Plasti-Dip.
The cover showing scratched areas to be sanded out before re-coating.
Also to be replaced is the seal around the gearchange shift shaft. This is the seal that was showing signs of wear due to the off centered bent shaft. This was the most likely place for a leak to happen!
Clutch shaft dust seal needs replacement.
Engine-Trans cover inside – cleaned up.
Engine-trans cover outside – cleaned up and getting ready to refinish.
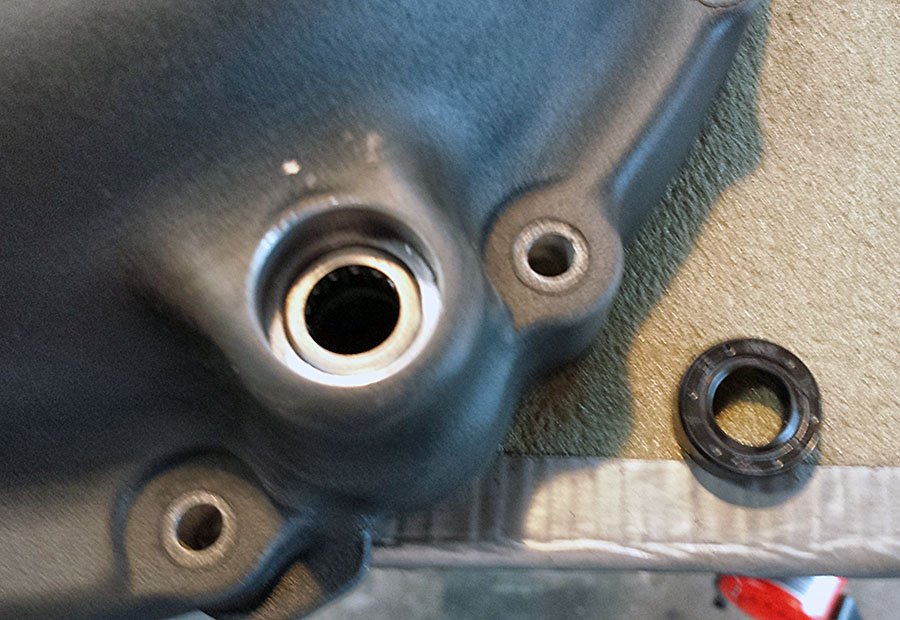
Removal of shift shaft seal. A new one is required.
April 19, 2014 Update
Today I finished this project. First I completed Plasti Dipping the engine-transmission cover and the gearchange mechanism cover.
I made sure that the two opening for the seals were masked. Once coated and dry, I inserted new seals, installed the clutch lifter arm and spring, a new gasket, the alignment pins, shaft and wavy washer, then aligned the cover and bolted it back on the Bonnie.
I also installed a new gasket on the gearchange cover and bolted it back on the right side of the bike.
I also painted the headers that had been wrapped already, with the black high temp spray paint. I coated the clamps as well.
Once these covers were in place, I installed the left and right footpeg assemblies, reattached the right rear brake pedal, and installed the shifter lever on the new gearchange shaft.
I had to find a good path for the clutch cable and found that with the old oil cooler gone, there was a good path for the cable right through where that used to be.
Next, I installed the entire exhaust system from exhaust manifold seals all the way back to the new black Dominator mufflers. The black clamps and black paint on the headers really makes the entire exhaust system look uniform and great!
After everything was installed, I filled the crankcase with Castrol Power RS Racing 4T synthetic oil. Almost 4.5 quarts were required since the engine, filter and oil cooler system had been completely drained.
After taking the bike on a shakedown ride and letting it sit for awhile to cool, I checked for leaks. I found a small one along the bottom of the trans cover, so I torqued the bolts a bit tighter… which fixed the problem. I am happy to report there were no leaks in the new Bonneville Performance oil cooling system.
This completes all the modifications and repairs to the Bonneville that I had planned after the accident. Any changes from this point forward will be unrelated to the accident.
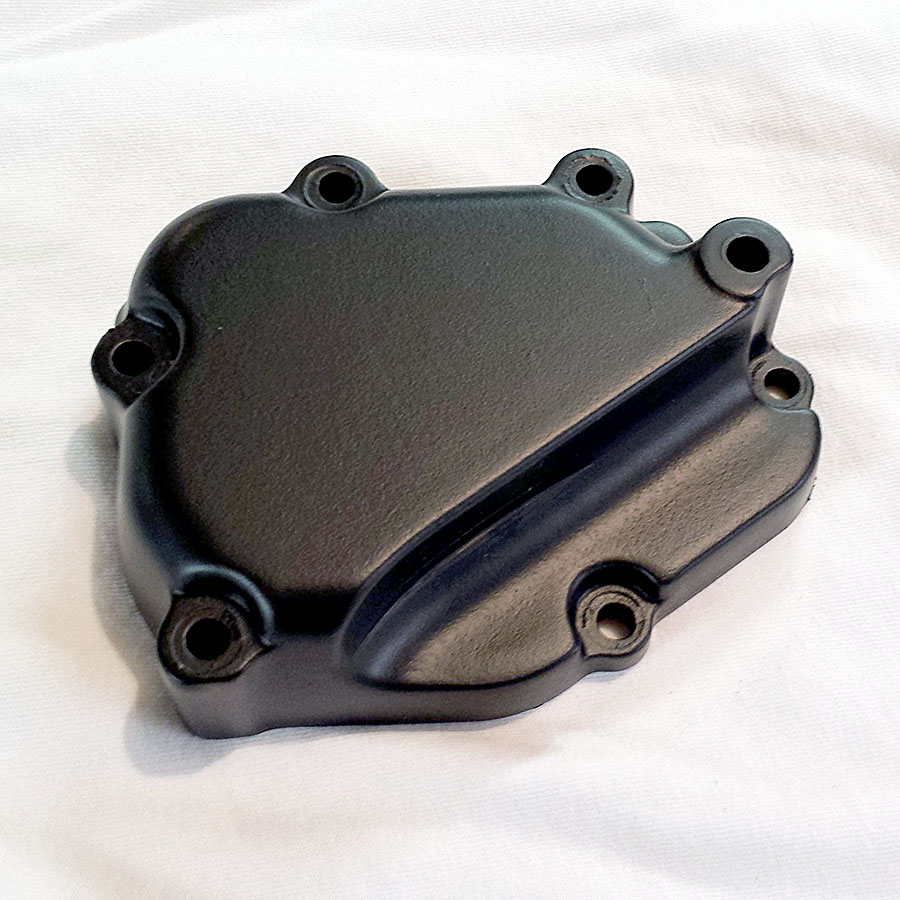
Right side gearchange cover refinished.
Left side engine/transmission cover refinished.
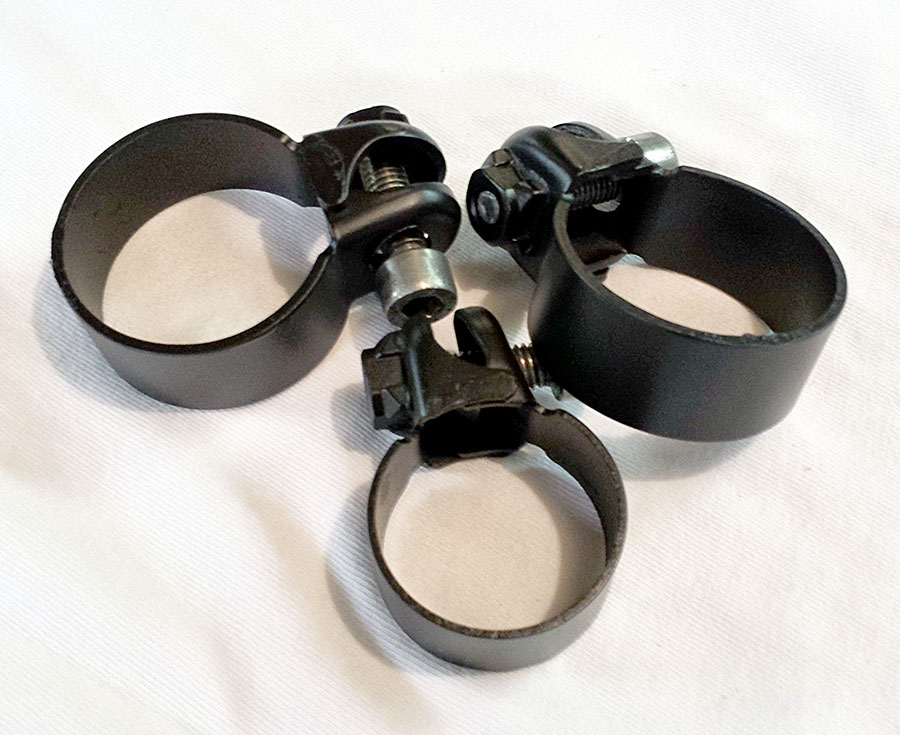
Exhaust header clamps painted with the same high temp black paint used on the header wrap.
Could you possibly tell me what was the diameter size of the shaft & Triumph Part No. if possible
Kind Regards
Wasi
Wasi,
The Triumph part number for the “Gearchange Shaft Assembly” for my 2008 Bonneville Black is T1190082. You need to use a Triumph Parts finder site to find the part number for your year/model. Here are a couple that I use: http://www.madss.com/ and http://www.worldoftriumph.com/triumph_motorcycle_parts_locator.php
Good luck!
Randy
Hi i had the exact same thing happen to my bonnie a few months ago. I have all the parts needed to repair and have started working however i cannot for the life of me get the e clip back on the gear change shaft. how did u manage to put it back on??
Nelson,
It has been a couple years since I did this, but I think I used a long needle nose pliers to grip the e clip and position it next to the slot on the shaft, then I used a long flat head screwdriver to lever the clip into the slot. As I remember it took me a few tries to get the right angle.
I hope that helps.
Randy
Dear Sir, please do You can explain me the correct position-slope of the gear change lever, in the Bonneville T100 EFI 2011?
I removed it and now I dont remember the correct position-slope.
Much regards Yours truly fan
mariano sciacca
my mail is
[email protected]
Mariano,
Here is a photo of the left side of a T-100 that shows the shift lever position. Basically it goes straight forward (level) from the gearchange shaft. Hope that helps.
http://triumphbonneville.org/uploads/Triumph-Bonneville-T100-2008-left-side-lighter.jpg
Hi! Did you use the spray version of plasti dip on your covers? They look really good!
Hi Randy, just come across your post and thought I would ask if you have any tips you can give me. I am trying to replace the transmission shaft oil seal and the distance sleeve that sit behind the front drive sprocket as I have an oil leak from that seal. I have the old seal out but cant get the distance sleeve off, should it just pull off, do you have any idea? I would leave it on but the one on my bike has scratches on it and I think thats why I have the oil leak. Any advise ? regards Peter
Please I have a question, is necessary to take out de clutch to put the a new one Gearchange Shaft Assembly Replacement ? because I dont have tool extractor clutch and I only want to changue de gear shaft,
Alfredo, I do not believe you need to remove the clutch to replace the Gearchange Shaft Assembly. The hardest part of this task is getting the circlip on and off. I used needlenose pliers and a long screwdriver to get that part of the job done. – Randy
thank you Mr.Randal so I understand that I dont need a special tool at all only get a new one bar http://www.worldoftriumph.com/triumph_motorcycle_parts_locator?block_01=&block_02=100064709-0-2&block_03=3130 and changue de two seals, shift shaft seal and Clutch shaft dust.
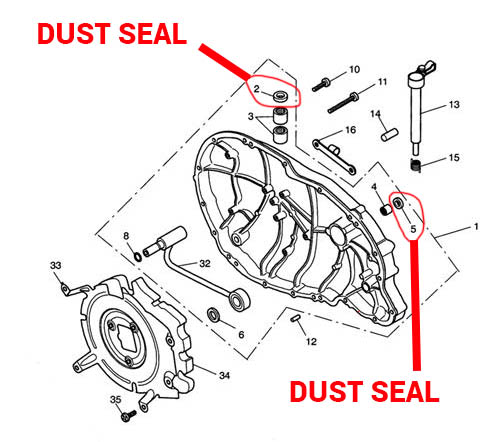
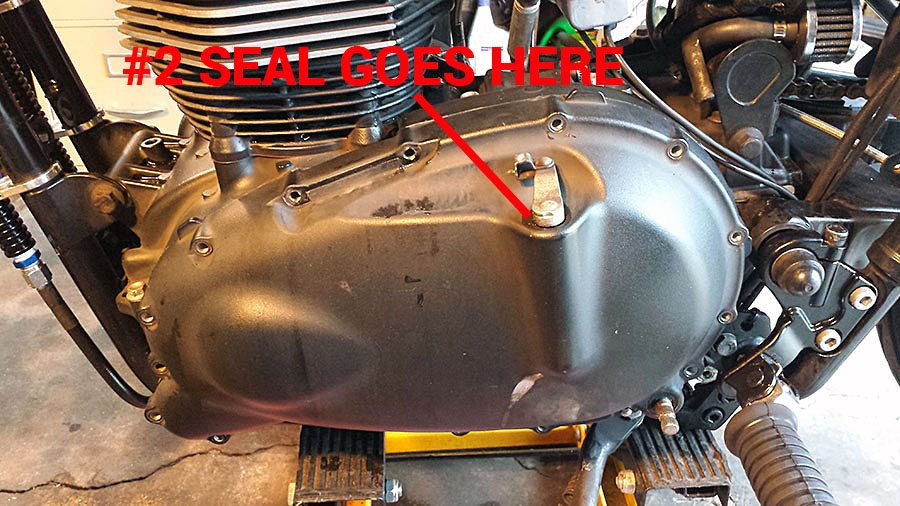
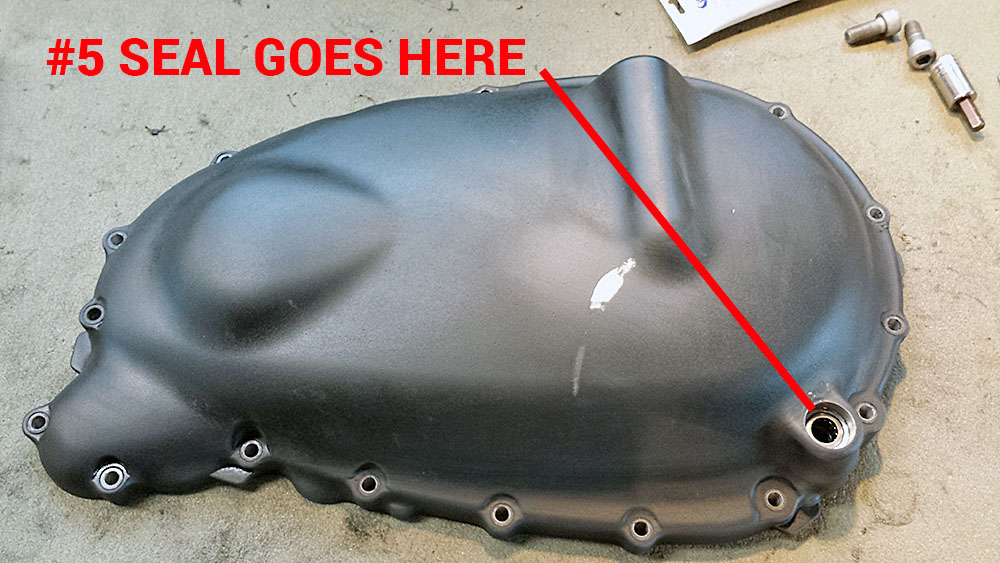
Alfredo, if this is the correct diagram for your bike, I have outlined the 2 dust seals… #2 and #5. I would replace both of them. I did not need any special tools for this job.
http://www.worldoftriumph.com/triumph_motorcycle_parts_locator?block_01=&block_02=100064717-0-2&block_03=3130 in this other link coul you identify the two seal I have to changue ? Clutch shaft dust sea and shift shaft seal because a have a doubt of the two seals identifications.
Mr.Randal thanks a thousand again for your kindness
sorry but I dont find shift shaft seal. A new one is required but this is not the 2 or 5 number seal ! have other one but I dont find it in the diagram.
Alfredo, OK, I need more info. What year and model is your Bonneville? These photos show where the #2 and #5 seals are on my 2008 Bonneville.
Hallo Mr. Randal, mi triumph is a bonneville in black of 790c.c. and it was the last one of carburation 2005/2006 I had got the one in Spain I bought my motorbike of second hand 9000 kilometres I think that after the year 2006 only electronic injection triumphs were built so I have a whole classic bike but am sorry because the last December 27 I had a bad exit curve and I went against the curb of the opposite lane and the shaft gear was bent and I have to replacehange Shaft Assembly Replace
Alfredo… well then those 2 seal parts in the diagram should be what you need for your year/model. – Randy
hank you for all ! last weekend just I have finished repairing my Bonneville and every thinks all right without oil leak at all and that is my cost and material used as follow Grand Total £176.56 GEARCHANGE SHAFT ASSY LO £79.96 DUST SEAL. 12X18X4.5 £2.30 SEAL, OIL £6.92 GASKET.CLUTCH COVER £8.16 GASKET.COVER.G/CHANGE MECH £6.50 BEARING. NEEDLE £7.84 CLUTCH HOLDING PLATE TOOL £34.48 SPRING. CLUTCH 4 £15.40
Great to hear of your success! I’m happy it worked out for you! Safe riding!
information for users with the same: I used a bicycle radio fixing the clip with glue on the end, when the clip was in position I pushed it with a screwdriver downwards, it was very easy.
Really glad to find your post – needed to replace my slightly bent gearshift shaft (enough to stop it from shifting) on my 2006 America. Pictures with instructions were just the ticket and I’m back on the road! Thanks Randal!
Ed.
Ed, Thanks for the comment! I’m really happy that you found this post helpful, and you were able to fix the issue yourself! – Randy
Started this process yesterday. Had to hacksaw the shaft as it wouldnt go through the clutch cover. Still a little bend on it and its not going through the engine case. Yours went through no trouble?
Hi Randal,
I just wanted to say THANK YOU for this write up as it’s served me well the last few days! I’ve never in my life worked on a bike, although I’ve done a bit of shade tree mechanics in my day.
Long story short, I couldn’t have done this without this write up and it’s still helping people all these years later.
Thank you again,
Joe
Joe,
I am very pleased that you found the post and that it was still helpful! Thankfully I have not dropped my Bonneville since the time I had to write the post! So, my gearchange shaft assembly is still straight and working great! I hope yours stays that way also!
All the best to you…
Randy
Joe, you are very welcome. Glad I could be a help!
Is there a replacement shift pedal that would make further damage less likely if the Bonneville is laid down on its left side? I’m wondering about the Scrambler 1200 shift pedal. I laid my T120 down (gently) on it’s left side and it is now stuck in 1st gear. The engine bars and side case didn’t help protect the shifter from damage. Sigh.
Dave, If only there was… but alas, I am not aware of any other options. Certainly, there are other shift lever designs, but the nature of where it needs to be, and how it needs to be accessed make it pretty hard to come up with something different that doesn’t put the shaft in jeopardy when the bike is dropped on that side. It’s just a lot of weight for the lever and shaft to bear. Have you explored why the T120 is stuck in first? Did you remove the shift lever and see if you can turn the shifter shaft with some other tool like a pliers or clamp? Seems that you want to find out if it is an internal thing, or just the external lever. – Randy
Hi Randall,
I’ve got a 2016 T120 that I foolishly took off road and had it go down gently on the left side, bending the shift lever. It moves up and down freely and has spring tension on it but, alas, she’s stuck in third. The shaft doesn’t seem bent but clearly something is detached or broken inside.
I’m going to order gaskets for left and right, dust seals, etc. before I tear it down to determine the failure. Any ‘gut’ feel on what likely part(s) would need replacement so I can order have some chance of having the required parts on hand? Not looking for a ‘crystal ball diagnosis’ but I’d trade off having extra parts to sell for a good chance of having what’s needed when I open her up.
Regards,
Bill
Bill, I have not yet torn into the transmission of my 2016 Bonneville T120, so I do not have any firsthand knowledge of what you might run into. Do you have a shop manual that takes you step-by-step through the process? I would highly recommend getting that if you don’t. I know from experience on the air-colled versions (my 2008) that there is a small “wavy washer” that can easily fall out and be overlooked in the rebuild process, and which will cause things to not work right if you lose it or don’t put it back correctly. It’s small things like that you need to be aware of, and avoid. Also, you may discover the parts that are damaged after you open things up, and will need to order replacements. That is usually how it goes. Best of luck to you! – Randy