
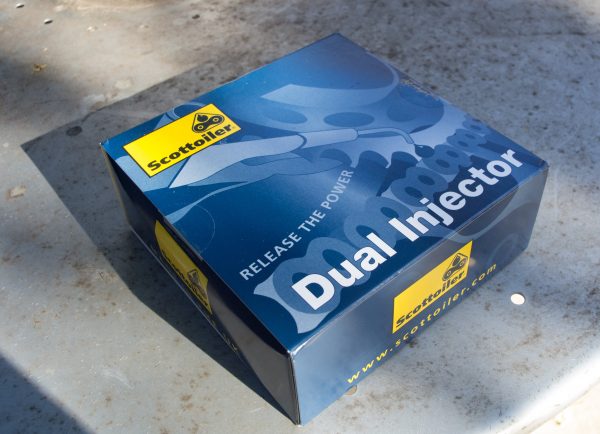
The Scottoiler Dual Injector: a device that gives more coverage, while being positioned less obstrusively.
When I originally installed the Scottoiler, one thing that I wasn’t too thrilled about was the way the oil injector mounted onto the bike.
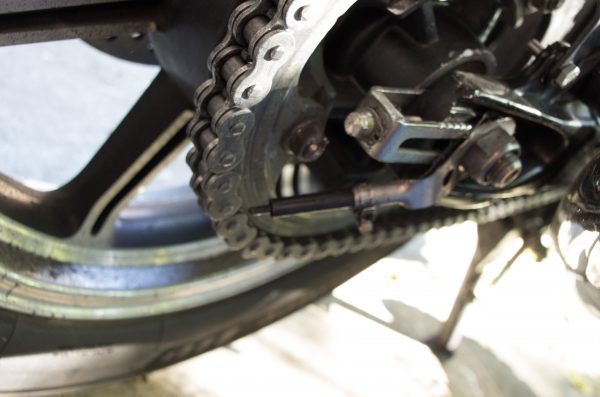
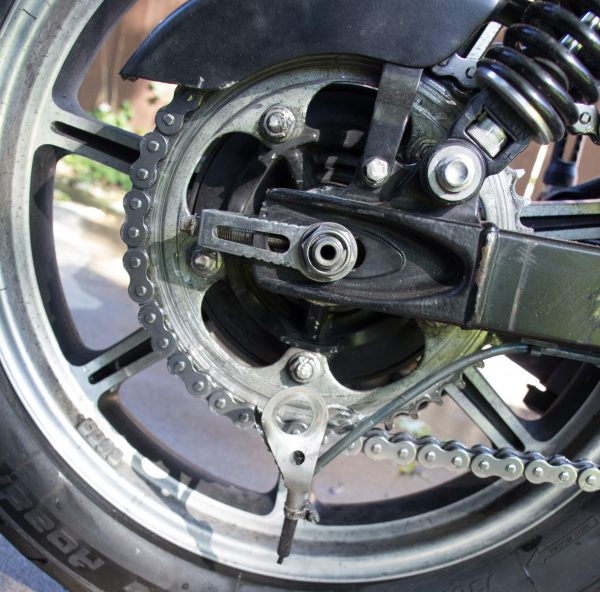
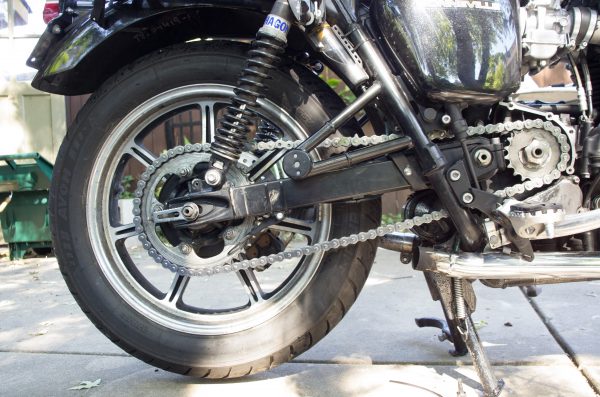
Stock Scottoiler injector: mounts on rear axle.
The stock injector mounted to the Bonneville, via the rear axle nut. This caused me some concern on a particular point: adjusting chain tension requires loosening this nut. Loosening this nut rotates the injector out of ideal position for lubricating the chain. Tightening this nut rotates the injector clip upward, into the chain tensioner. This deforms the injector clip, which bends the injector away from the bike, causing the chain oil to miss the chain as it drips. (You’re basically oiling the road, then. I’m sure the guy behind you has a word of thanks for you — or two.)
Essentially, it is a design that interferes with normal maintenance tasks and which is interfered with by those same tasks. But, since this was all I had, I decided to live with it. On the whole, it didn’t inconvenience me too much. (Although, I might have felt the inconvenience more keenly if I had been doing my regular chain maintenance…)
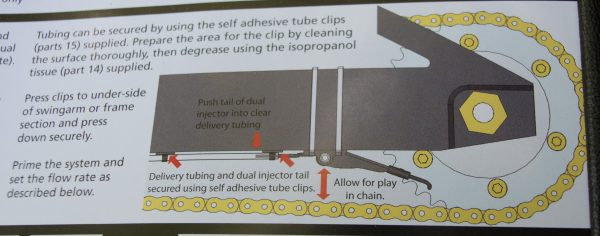
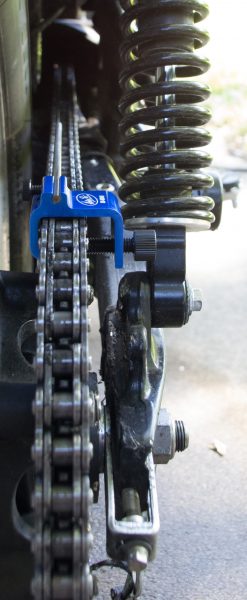
Dual Injector diagram
Then, I came across this, on the Scottoiler site. “Whoa!”, I thought. I really liked how this design
- mounted to the swingarm, instead of the axle
- lubes the chain from two sides, instead of just one.
Top view dual injector (diagram from included instructions)
So, I ordered one! And today I installed it. It felt pretty good removing the old stock injector.
Very happy to see this going away. (And here, you can see lug nuts that were mangled by a departing chain, earlier this month. Not looking forward to getting those off…)
Removing the old injector and installing the new one was a perfect opportunity to do some chain maintenance.
Aligning the chain, during a tension adjustment.
Mounting the Dual Injector required a minimal tool set. Pictured: #5 allen head, 10mm wrench. Not pictured: clippers for zip ties.
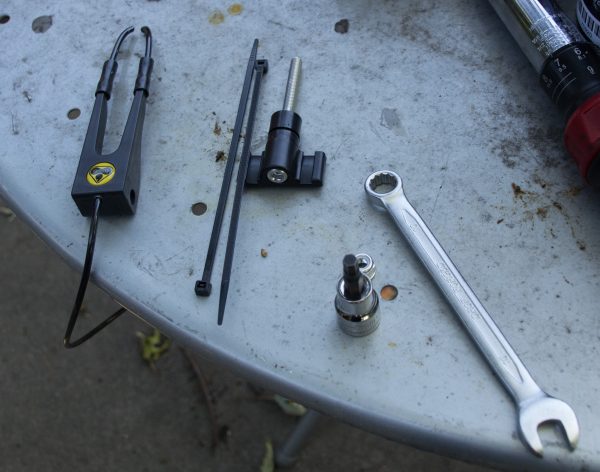
Dual injector mount and required tools.
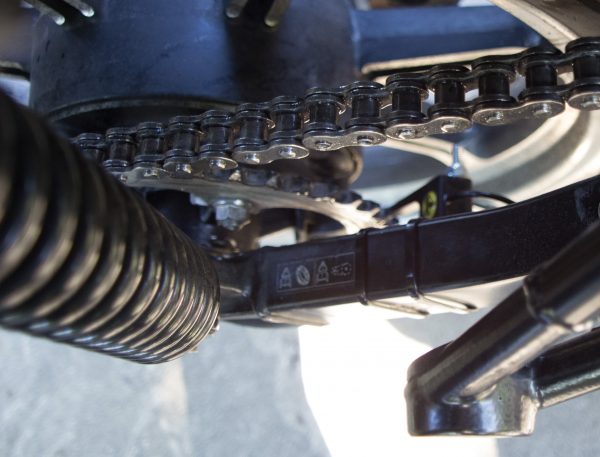
Dual injector installation location.
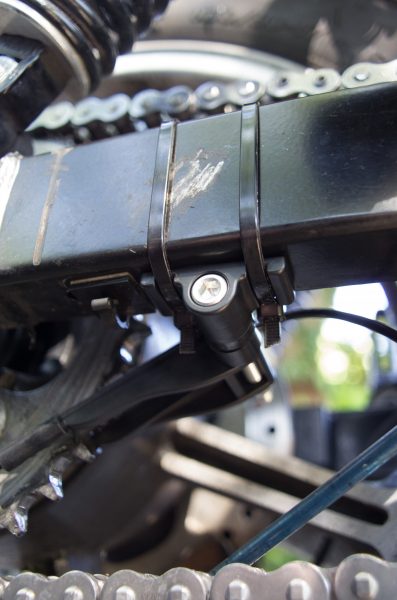
Dual injector installation location detail
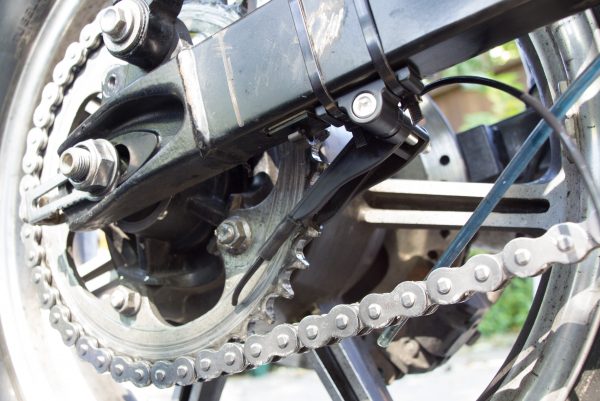
Dual injector installation: final positioning
Final positioning of the dual injectors was simple enough. The instructions mention that you might need to trim the tips to appropriate length — I found the stock length to be just fine and did no trimming. The tips just skim the surface of the rear sprocket.
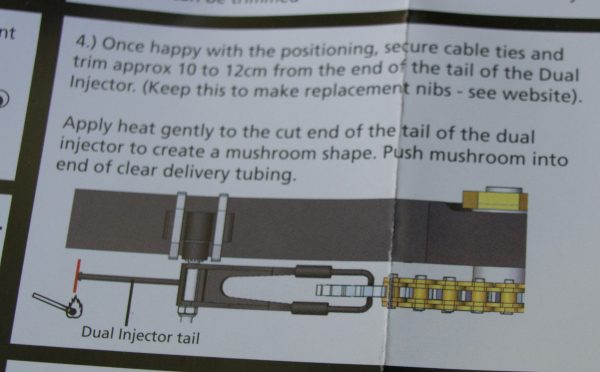
With the injectors in place, the last task is to trim the original feeder tube from the reservoir and the new dual injector feeder tube, and then to mate them.

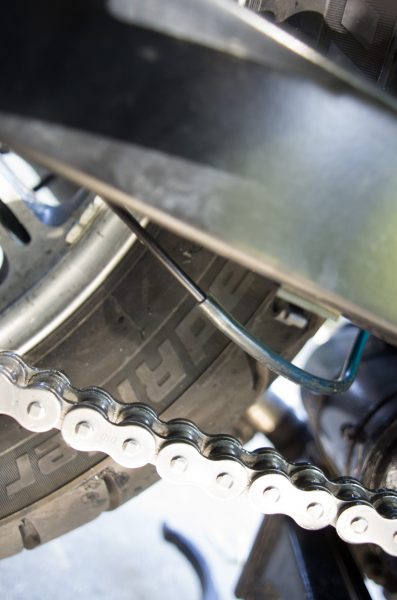
Untrimmed oil delivery tubing.
Oil delivery tubing, trimmed and joined.
With the tubing joined together and tucked up neatly, the last thing to do is test the flow rate.
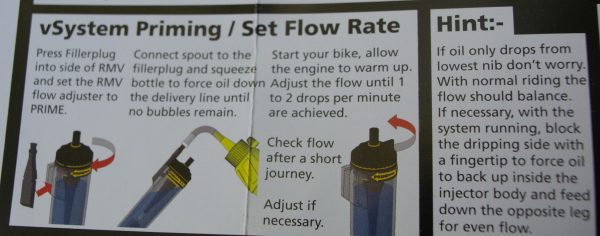
Flow rate instructions.
Honestly, I have found this is an exercise in trial and error. It takes a few rides to get it dialed in just right. But, it doesn’t take too long (if you’re paying attention and not distracted by gorgeous scenery) and, in the end, you have a nice, generally maintenance-free continuous lubrication mechanism for your drive chain.
The final installation.
Job done!
Total time to install: 1 hour (including chain cleaning and adjustment).
Gains: chain oiled on both sides, while riding; rear axle now free of interference during regular drive maintenance tasks.
Cost: $35.00USD.
Verdict: recommended. If you have a Scottoiler, do yourself a favor a free your rear axle of an unwanted encumbrance, while improving your drive maintenance.
Cheers!
–LH