I recently discovered that one of the 2 pistons in the rear brake caliper (made by Nissin) of my 2008 Bonneville was not working. After doing some research I also learned that to replace the entire caliper (Part #T2020239) would be over $500… not an option! While researching the possibility of buying a used one online I ran across a UK company that sells caliper rebuild kits through eBay. That company is Powerhouse Automotive UK and the kit to rebuild the 2001-2010 rear brake caliper is located here.
Good Price, Easy Ordering & Shipping
The kit cost me $36.31 including shipping.
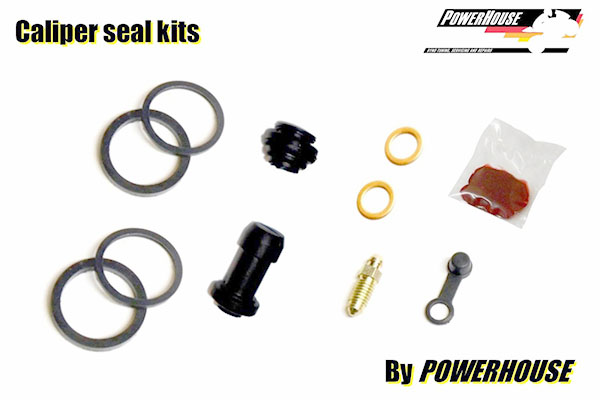
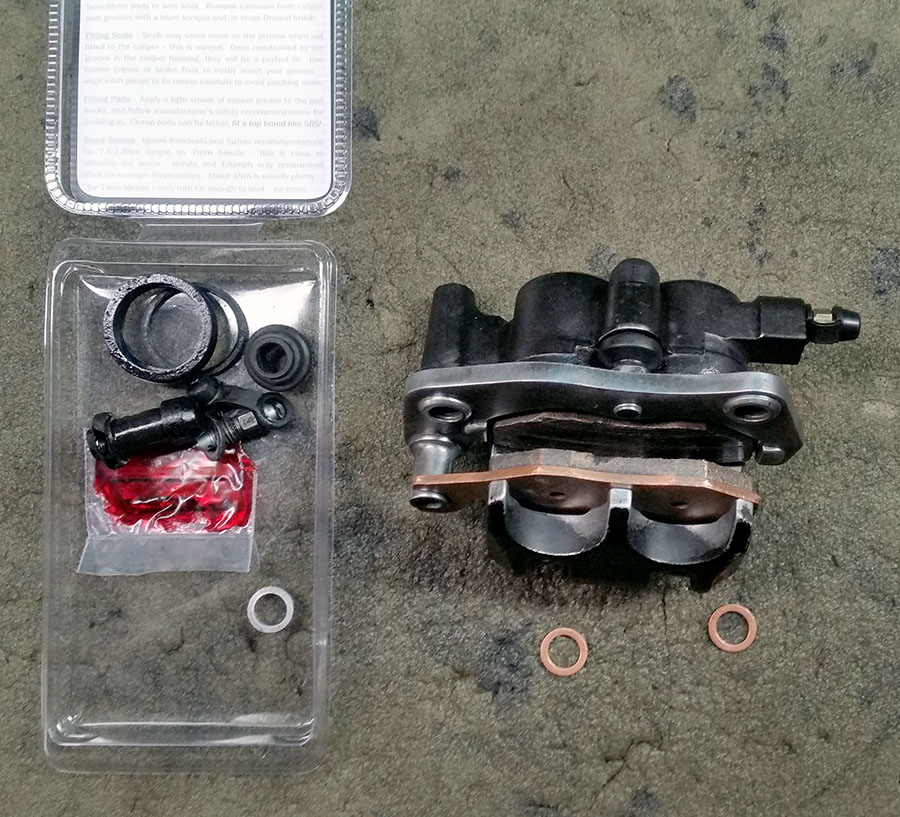
Included in this kit are:
- 2 dust seals
- 2 pressure seals
- 1 slide rod gaiter
- 1 slide rod boot
- 1 bleed nipple
- 1 dust cap
- 2 Hel copper banjo washers
- 1 red rubber grease

The Powerhouse Automotive Rear Brake Rebuild Kit #N23 for 2001-2010 Triumph Bonneville Models.
My kit arrived just a few days after I ordered it, all the way from the UK. Ain’t modern global economies great!?
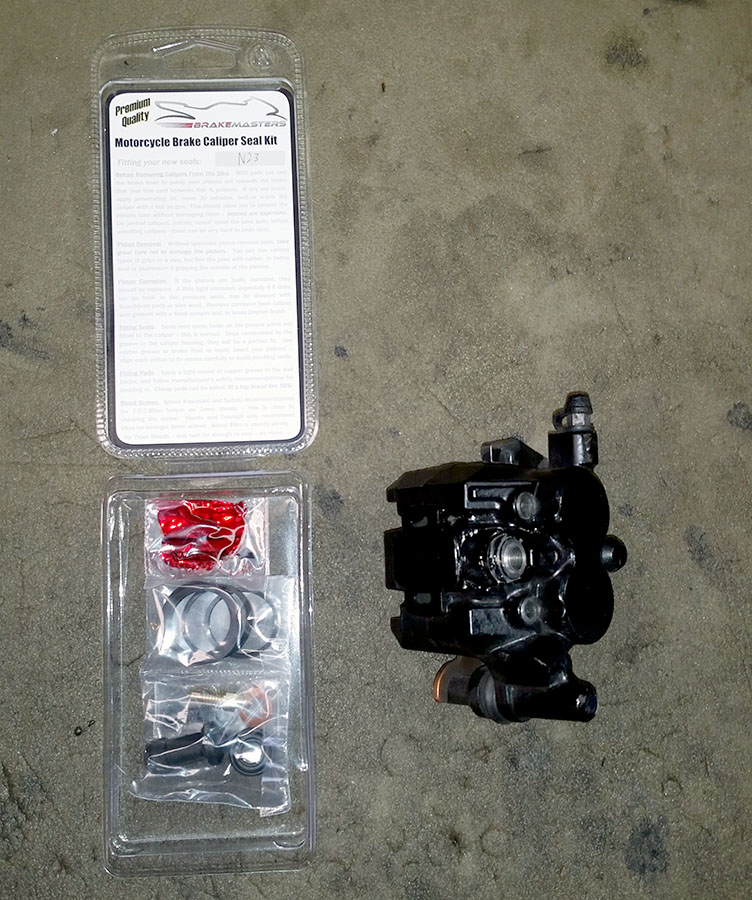
Kit with my Rear Caliper
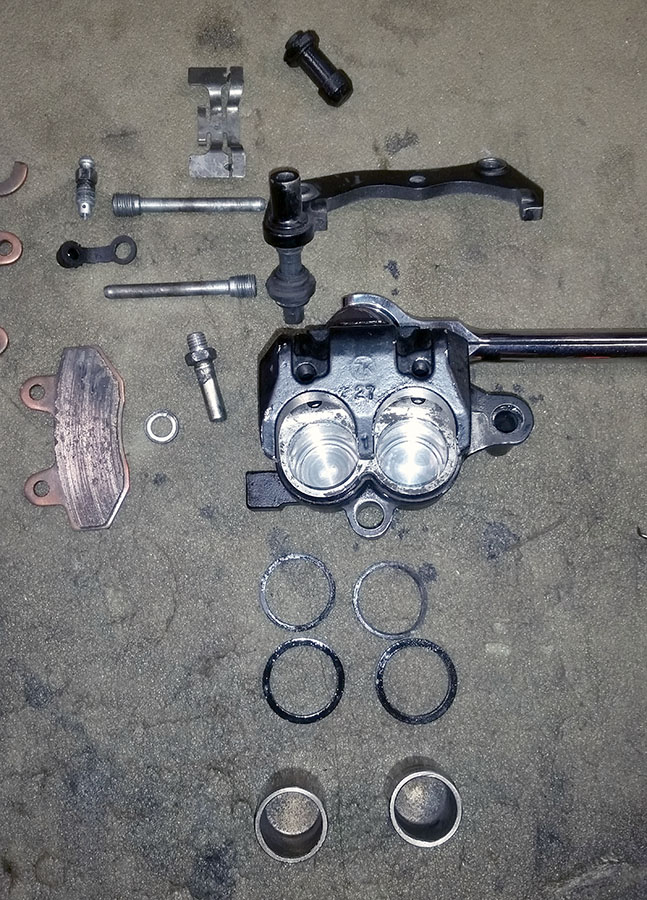
My rear caliper fully disassembled.
Great Customer Service & No Special Tools Required
Before I had placed my order, I emailed the seller about how hard it would be to rebuild the caliper… Did it require any special tools, etc? I received a very complete answer from Paul (Thanks!), which made the process a breeze!
- First of all you do not need any special tools, especially if you are already handy and do most of your own Bonneville maintenance.
- You should be able to pump out the pistons evenly while the caliper is on the bike and then either wiggle them out by hand through the last part of the fluid seal or if they are a bit more stiff finish popping them out with compressed air with the caliper removed, at no point grabbing hold of the pistons externally with pliers/grips etc. (This proved to be true for me!)
- With the seals removed use any type of small pick tools (or small electrical type screwdriver which you can bend the end over to create a pick tool) to scrape all oxidization/corrosion out of the seal grooves so they are perfectly clean. (Mine were pretty clean, but i cleaned out a few groves with one of these tools).
- A can of brake cleaner and an old toothbrush is good enough to clean up the caliper body. Pistons should be cleaned with brake cleaner and scotchbrite, checking for any pitting or scratches on the pistons (replace if necessary – we can provide stainless steel replacements) ensuring they are clean and smooth. (Mine were very clean, needed a little scotch pad cleaning).
- Using the rubber grease provided, lightly smear the seals and pistons to aid installment, and automotive white grease for the slide boots. (Worked great!)
I needed to lightly scotch brite the pistons (more the one that was stuck), and just clean out the inside of the caliper cylinders with brake fluid and compressed air.
After cleaning, putting in the new seals and rubber parts was very easy, and reassembling the rest of the brake a snap.
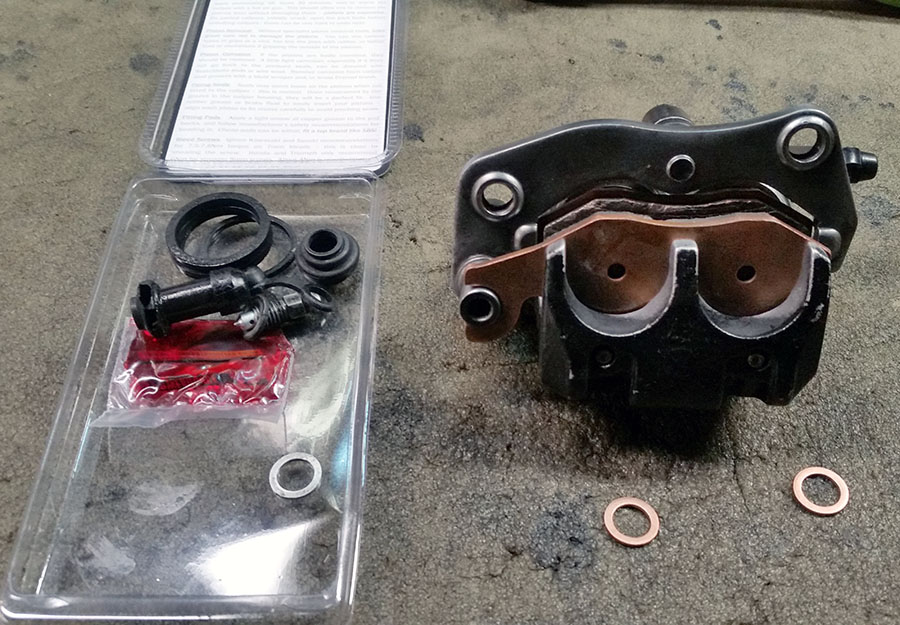
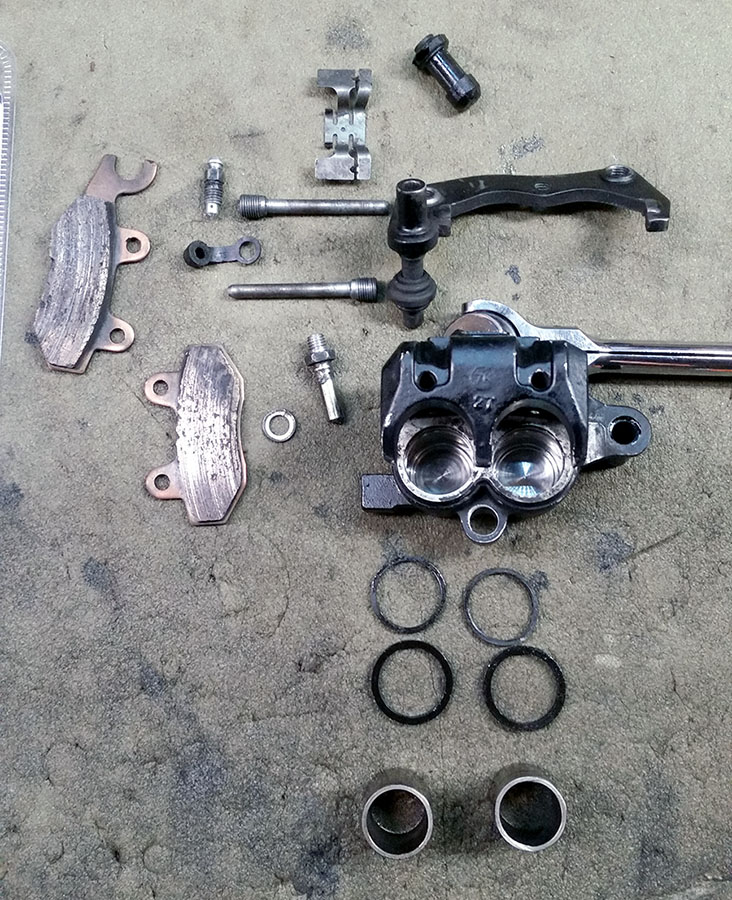
The leftover old parts are piled on the package on the left, and the fully rebuilt caliper on the right ready to reinstall on my Bonneville.
The installation back on the Bonneville went perfect, and the brake bleeding as well. I now have a just-as-good-as-new rear brake that is noticeably better now that both pistons are working again! I can highly recommend this kit to any Triumph Bonneville owner who wants to save some bucks and add years of life to your OEM rear brake (T2020239).