Airbox Removal Kit – Day One
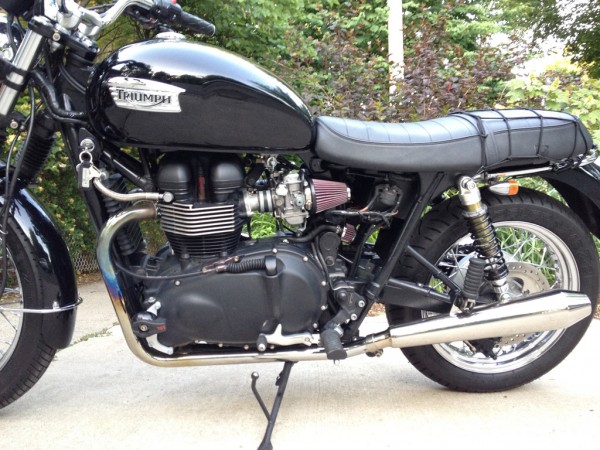
Today I installed the British Customs Airbox Removal Kit (A.R.K.) on my 2008 Triumph Bonneville. It basically required a full day. You should plan ahead and allow plenty of time to do this modification.
British Customs Airbox Removal Kit (A.R.K.) Instructions – PDF
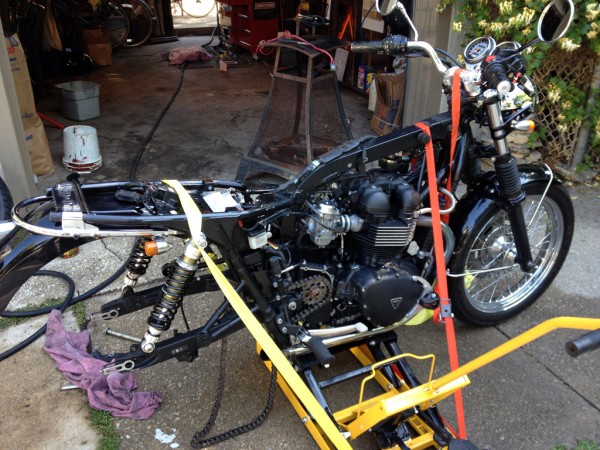
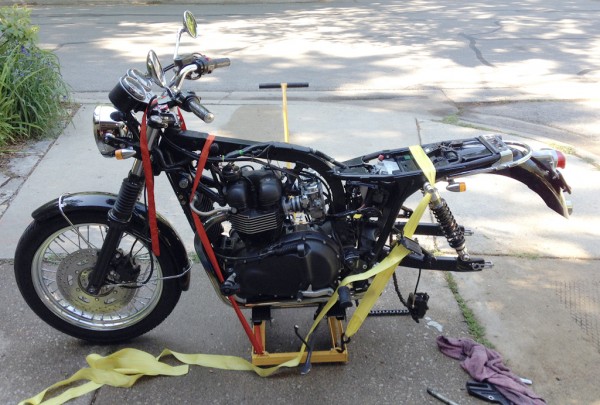
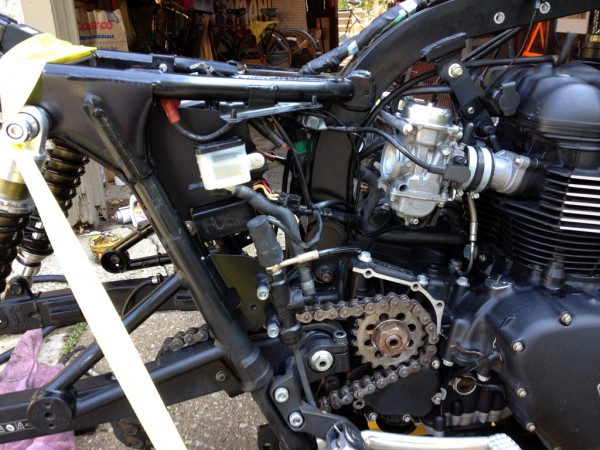
First I jacked up my Bonneville on a motorcycle jack and secured it with straps. I stripped it down by removing the seat, gas tank, exhaust pipes, rear brake and tire, side covers, and front chain cover.
I followed the Instruction PDF file that I downloaded from the British Customs website.
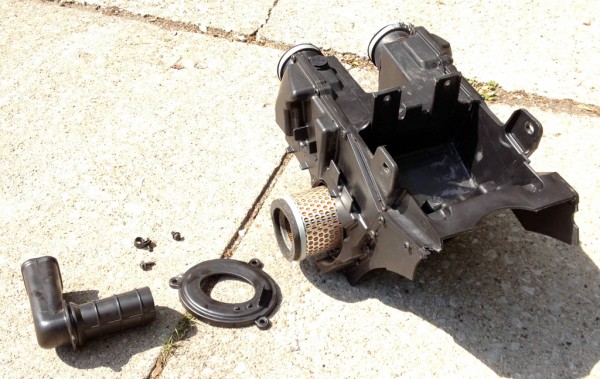
After removing all the items attached to the OEM Airbox, I pulled it out (through where the back tire was). It’s basically a plastic box with two holes for the carbs, a hole for the air cleaner, and a place for the battery.
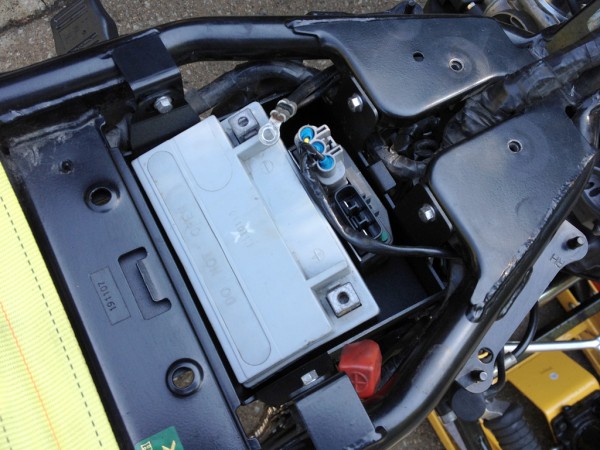
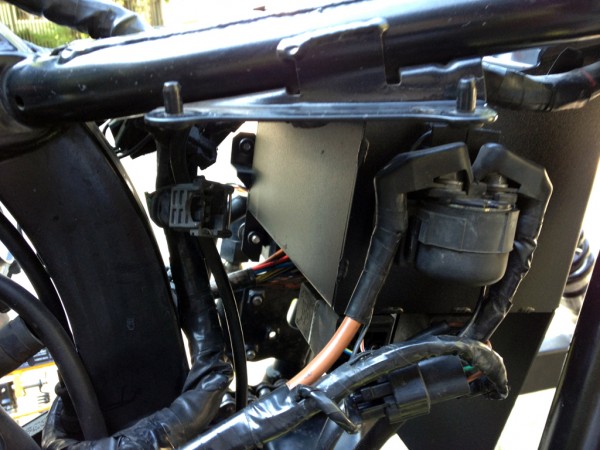
I inserted the British Customs aluminum battery case in its place and remounted all the items that attach to it. I discovered that BC did not include the “hardware” for mounting the brake reservoir or fuse box to the new battery box, contrary to their instructions. Fortunately I had some bolts that fit.
My battery left a space about and inch and a half in front of the battery, which turned out to be a perfect place to store my Mosfet Rectifier/Regulator that I had purchased previously from RoadsterCycle.com. The OEM battery strap held everything snuggly in place.
Once I had the new box and all attachments mounted, I replaced the rear wheel, brake, and other items.
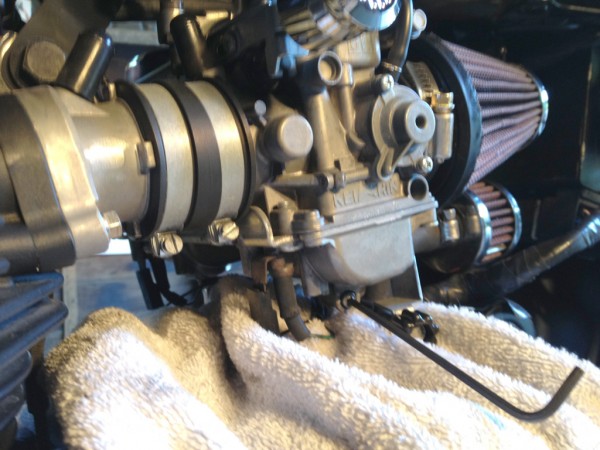
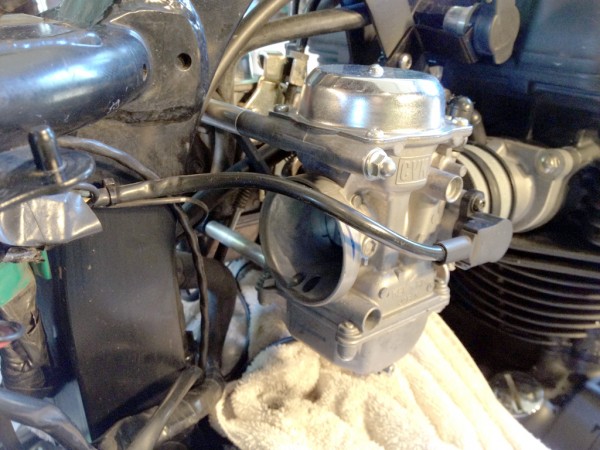
Next, I tackled the carburetor re-jetting process having never done it before. Here I am draining the carb bowls with a 3mm hex wrench.
The instructions said they were using 140 main, and 42 pilots. They shipped me 135 Mains, and 40 and 42 pilots. I didn’t know what to do and couldn’t get in touch with BC on the weekend, so I installed the 135/42 combination.
A word to the wise that is not in the instructions. When you loosen the main jet (8mm) and let it fall from the bottom of the carb, watch out for a small brass fitting (jet) that will fall out with it. It would be very easy to miss this and lose it if you aren’t careful! Not having the best tools for this section really slowed me down. I had purchased a T3880107 Carb Adjuster Tool per the instructions, but it did not fit anything that I could find on the carb. You really need a short philips and flat blade screwdriver in an “L” angled shape for this. I ended up using an adapter on my 1/4″ ratchet to do this.
I also could not identify the idle mixture screws in Step 28. The BC photo is too dark, and the instructions were not clear, and neither was the Haynes manual. So, I had to skip this step.
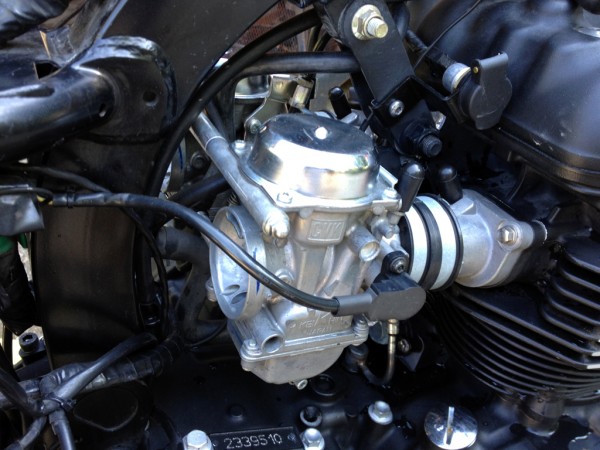
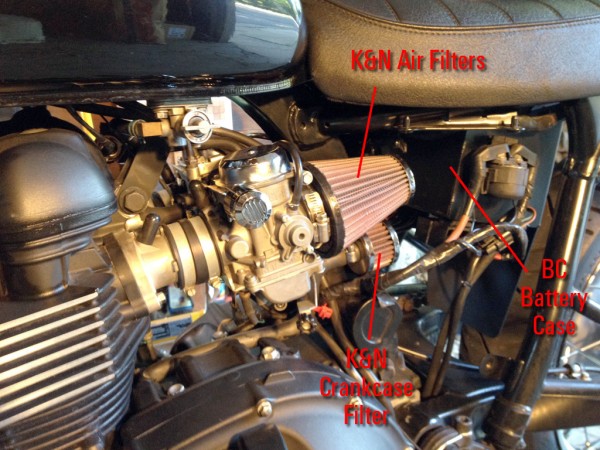
Finally I had the carbs back together, and mounted the brace that comes with the kit. After replacing everything else that was still not attached, and the K&N filters and crankcase filter (which was missing the hose clamp described in the instructions) I started it up (and it did fire up!).
It was running rougher that normal, so I decided to get out the BC 2 Carb Synchronization kit I had also purchased. Following instructions I warmed up the engine and then attached the synchro gauges and hoses. They fluctuated so wildly while the engine was idling I could not use them for any kind of adjustments. So, after sending an email about this to BC, I was forced to abandon this final step as well.
I then took the bike for a test spin. I was underwhelmed with the initial experience. It did not feel any different than the way the bike was before. I will wait to see what can be done about the idle mixture screws and the carb synchronizer before I make a final judgement.
So, my initial installation and conversion experience was half satisfying and half frustrating. I like how the bike looks and sounds, but I was frustrated that I didn’t get all the parts that were described, and I couldn’t figure out their instructions at several points. Not being able to get in touch with anyone at BC on a weekend is annoying. Most people like me do these installs and mods on the weekends.
Stay tuned.

Hey there,
I was thinking of doing the same to mine, but if your saying there is no real noticeable difference, i guess i’m asking, was it worth the money?
cheers,
jesse
Jesse,
Thanks for the comment and question. Since writing this post I’ve learned more details about the conversion. I can say that in the long run, this was worth it, but it is only part of the series of things you need to address to make it such.
Read my latest post.
Randy
Hi there, I have also removed my stock airbox, added the K& N filters, open pipes, I left the stock 40 pilot jets in as info on the net says they work ok. Recently I added a single shim under the needles. I am yet to order a ‘D’ tool and adjust the mixture screw. I had 135 maiin jets sent out from BC although I read with interest 140’s make all the difference?
My bike runs better through the gears and adding the shim made a difference but it’s flat in the top end power. The 140 main jet should cure this.
Along with ordering/installing 140 main jets, I’m going to install the 42 pilot jets that BC sent out. I’ll also order a ‘D’ tool and adjust the mixture screw as mentioned here it’s said this can make a difference right through the rev range?
Hope this sharpens up the performance.
Cheers, Pat Reardon,
Auckland, New Zealand
Pat,
Thanks for your post. Based on my experience, I do think you are on the right track with your plans.
In addition to the 140’s you might want to also drill the slides to 3mm… per the Jenks Bolts PDF document I have posted on the site here: http://triumphbonneville.org/modification-installation/airbox-removal-in-retrospect/.
Also, as a more practical option to using the “D tool”, you can get replacement idle mixture screws (see http://triumphbonneville.org/after-market-suppliers/british-customs/carburetor-rejetting-and-synchronization/) that allow you to adjust them by hand… very handy (with a glove on!)!
Randy
Thanks for the reply Randy, yep, I too found the Jenks Bolts PDF on the net and have indeed drilled out the vacuum holes in my slides to 3mm. Looking forward to getting the 140 main jets. From what you say this may fix my flat top end power problem as I only have 135’s at present. I’ll also install the 42 pilot jets. Great website, good to be able to correspond with other Bonneville owners. I used to have Brit Bikes for years before Harley Davidson bought out the Evo bikes in the mid eighties, My love of riding out weighed the choir of maintenance so I went to HD’s for a couple of decades. Love these new Bonnevilles though! Light, good power, handle well, look cool [if you do a few things] and a little exclusive compared to HD’s. Thanks, Pat.
I am still experimenting with my setup. On a recent 4-day ride around Lake Michigan I got 48-50 MPG with my current setup (see: http://triumphbonneville.org/modification-installation/airbox-removal-in-retrospect/). I am planning to try this setup next and compare performance: Switch to Thruxton needles (NBTZ), 1 shim, 140 main jets, 40 pilot jets, 3 turns out on the idle mix. I’ll post my results on the blog.
Hello, do you know where I can find a diagram of the stock carb breakdown so I can check the assembly?
Thank you Gil
Hi Gil,
First, did you see the diagram on this post: http://triumphbonneville.org/modification-installation/airbox-removal-in-retrospect/
I found two more diagrams online that might help and posted them here:
Other than that, perhaps the manufacturer can help: http://www.keihincarbs.com/
Randy
Thanks for posting! I’m going to start with the rectifier kit and take it from there. One thing that keeps nagging me is that obnoxious oil cooler. I guess I’ll start saving for that $850 oil-in-frame conversion from Streetmaster.
Hi, sorry to bother you, but I am in the process of doing the airbox removal kit at this very moment. However it also came with the two bolts to plug the air injection. (Furthermore it came with no directions so I am a little lost about the whole air injection removal process? Do I remove the whole factory apparatus? Your posts were awesome, and I am sure that you did this process, so any words of wisdom would be greatly appreciated.
Cheers,
Chris
Chris,
Thanks for your post and sorry I couldn’t respond sooner. I was on a friend’s Triumph America riding and delivering it to his new home in Memphis, TN. Mission accomplished!
It always amazes me when vendors who sell kits don’t ship them with instructions or some communication about how to access that kind of info online. Do you mind sharing who that vendor was?
I have just created a new post on the Triumph Bonneville site that includes a copy of the British Customs installations instructions in PDF format. They should be good and useable for most any kit.
Regards,
Randy
Hi Randy,
Thank you so much for the reply. I just wanted to say that I have been reading your website for a few weeks now, and have greatly appreciated all of your hard work and advice which you have shared. It had made the task of getting a little more performance out of my bonnie realistic, and something I can do on my own.
Glad to hear that you had a safe and successful voyage to TN. A long way from me, as I am in Vancouver BC.
Anyway, I purchased the Performance kit from TPUSA. I have to admit, I was also a little disappointed as when the kit (Air Box removal, Dominator Torque pipes, AI Removal, Jet Kit) arrived, it was missing the 42 Pilot jets. It took a phone call to inquire to find out that they were on back order. No note inside saying as much or anything!
As such I ordered a set from a different vender (New Bonneville) yesterday so I will have to change out the Pilot jets next week, (I have a 18 tooth front sprocket coming to as my original is 17).
However I did change the main jets last night. And hope to finish the rest of the install today.
The Air Injection Removal I received only came with 2-Bolts and 2 crush washers. so I was kinda like??? I will go ahead and remove the whole apparatus today, and insert the bolds into the head, and call it a day I guess.
Thanks again for the reply!
Cheers,
Chris
Do you have to do the Jenks Bolt air injection system removal when you remove the stock airbox? The British Customs A.R.K. mod doesn’t say anything about removing the air injection system. I know you have to re-jet the carbs, but the kit comes with needles, and shims, etc.
Scot,
To the best of my knowledge they are 2 separate mods. You can do either one independent of the other at any time. I do recommend doing both though.
Randy
Does any one have instructions for a thruxton 9 EFI ? I can’t seem to find one anywhere. I’m pretty sure I can figure it out but would love to have a step by step . Any info is appreciated.thanks
Ruas, Usually the airbox removal kit manufacturer supplies instructions with the kit. I’ve added a link above to download the instructions that came with my BC Kit. Hope this helps.
Hello again Randal,
07 Bonneville, 9,100 miles. So I just finished all three mods, AIS delete, air box delete, k&n filters and bc predators.
Pilot jets 42, mains 138, 2.5 turns on mixture screw, two shims.
She’s running rich. Lose a shim?
This is my first Bonne and my first big mod.
Thanks in advance!
Jesse, I’ll send you an email! Thanks.
Hello again Randal,
07 Bonneville, 9,100 miles. So I just finished all three mods, AIS delete, air box delete, k&n filters and bc predators.
Pilot jets 42, mains 138, 2.5 turns on mixture screw, two shims.
She’s running rich. Lose a shim?
This is my first Bonne and my first big mod.
Thanks in advance!