I can honestly say now that the reason the original airbox removal wasn’t that impressive is because there is a lot more to this story than I initially understood. Let me explain.
Yesterday, on the 4th of July, I did some additional work on my 2008 Bonnie. I removed the seat, gas tank and side covers, then removed the carbs.

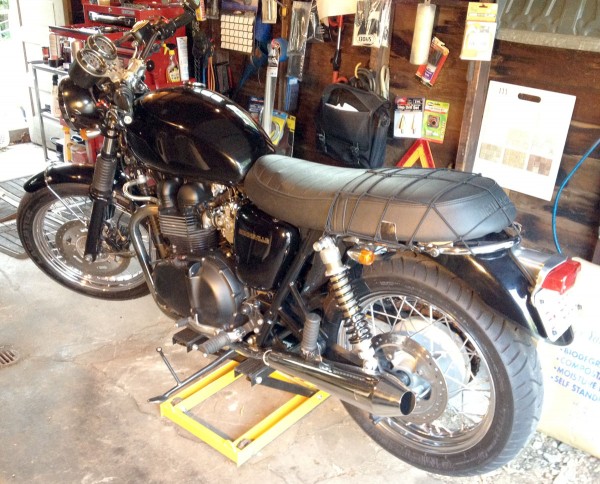
2008 Bonneville on jack ready to be stripped down
I did this partly to install TPUSA Billet Manifolds (black) purchased from New Bonneville (see next photo).

TPUSA Billet Manifolds
So I removed the carbs and the original OEM manifolds, and installed the billets.

TPUSA Billet Manifolds – black – installed on Bonneville
But alsoI also wanted to dive deeper into the carb adjustment details that I had been reading and studying in a PDF file I found on the web. The PDF is published by Jenks Bolts (JB) out of the UK, and is the most complete document I have yet found on carb tuning of Hinckley Bonneville’s: Tuning jets, idle mixture, needles, shims, slides and other information for Hinckley Triumph Bonneville Keihin CVK Carburetors (updated 2007 version).
In this document I learned that with my particular setup with: airbox removed, air injection removed and free flow exhausts, they recommend: adding 1 shim to the needle valves, and using a 140 or larger main jet and a 40 to 42 pilot jet, with 3 turns out on the idle mixture screw. They also mentioned that using main jets this size one should consider drilling out the slides to 3 mm up from the stock 2.5 mm. This permits more air to flow into the combustion chamber with the gas.

2008 Triumph Bonneville crabs viewed from underside
So I was prepared to do these things on the 4th of July when I removed the carbs. However, I discovered that there was already 1 shim on the needles. Then I realized that when I had my previous exhausts installed by the dealer (Triumph Off Road or “TOR” pipes) the dealer had already made some carb adjustments – which is where the 1 shim came from. So, I decided to try 145 Main Jets, 42 Pilots, drill the slides to 2.95mm, add one more shim (2 shims on each needle) and see how it ran.

Carburetor slides, springs, needles and existing shims (1 on each needle) laid out for cleaning.
All I can say is WOW! What a difference this made! The bike starts up and idles very nicely, had plenty of torque on the low end to get going, even with a 19 tooth front sprocket, and feels like it is just settling in at 80 MPH. The extra shim improved power response in the lower RPM range from 2500 to 3500. The drilled slides made throttle response much quicker, almost instantaneous at all RPM’s most noticeable from 3500 up.
I now feel like all the modifications are coming together and working in sync with each other. The current settings are close enough, but I want to put the bike on a dyno within the next month to fine tune it.
So, that’s what I’ve earned so far about the “airbox removal” modification.
Let me know if I can answer any additional questions about my experience.
Added July 16, 2012
An exploded view diagram of the Keihin carburetor parts used on my Bonneville, with notes about my modifications.

My Keihin CVK Carb Settings
Added July 19, 2012
Last night I removed 1 of the 2 shims that were on each stock carb needle, and changed the idle mixture screws to exactly 2.5 turns out. This has actually improved the overall performance of the Bonneville. My current carb settings as shown above: 145 main jets, 42 pilot jets, slides drilled to 2.95 mm, stock Bonneville needles with one shim each. Idle mixture screw is 2.5 turns out from closed. My next modification will be to try Thruxton needles instead of stock Bonnie needles.Added July 20, 2012
I had just decided to get these same add-ons. I’m glad I found your site and followed your progress before I started buying the parts. Sharing your pitfalls and frustrations are very helpful to people like me out there in the world.
Do you think your new adjustments have altered your Bonnies MPG? Would enriching the fuel/air mixture cause your engine to run hotter now?
Kerry,
I do think my MPG has dropped slightly and is in the high 30’s instead of around 40 in everyday Chicago urban city riding. However, I do not think I have my Idle mixture screws optimized and I am going to take off one shim and see how that feels. So, my current setup is stock airbox and air injection removed, low/no restriction exhausts added, 145 main jets, 42 pilot jets, idle mix screws out about 2.75 turns, slides drilled to 2.95mm, and 2 shims on each stock Bonneville needle. I will remove one shim each side, and play with the idle mixture to see if I can keep performance high and get better MPG. I’ll keep you posted.
The “Jenks Bolts Carb Tuning Notes article” was a real eye opener. After reading it I thought I might set up my Thruxton with 125 Main Jet, 1 Shim, Pilot jets at 40 and pilot screw set to 2.5 turns. However seeing the results you have with your setup I have rethought the Jenks setup and considered using yours. I’ll experiment between 1 and 2 shims.
I drive long distances on the interstate so I want to go to a 19 tooth front end sprocket from the stock one I’m using now. I also want to replace my stock air intake with a spun shaped velocity stack for improved airflow. Having all the components adjusted just right is a complicated balancing act to say the least. Keep posting your results as you make changes. I’m interested to see how things are shaping up with your Bonnie.
Kerry,
Just remember that my setup is based upon my airbox being removed with lo/no resistance exhausts. You wouldn’t what to use my jet setup unless your Thruxton also had this setup.
Refer to the chart on page 10 of the Jenks Bolts PDF and start with the recommendations for your bike and exhaust system.
Randy
Randy,
My Thrux has the Triumph Off Road pipes. My hardware is the same as yours. I’ll start slow and low then work my way up to a more performance based layout. I may find my own setup different from yours. I’ll keep tinkering until I’m happy with the way my Thruxton runs. It would be interesting to know how your Bonnie performs on the Dyno.
Just updated my notes on my carb settings and performance
All 865cc bonnevilles have thruxton needles as standard..